1. UNIT 3: Energy in Motion
Overview
The topics covered in Grade 7 deal with the relationship between motion and
energy. At the end of the quarter, students should be able to realize that energy
exists in different forms, energy transfers from one body to another, and that motion
is the concrete manifestation that a body possesses energy.
Among the many forms of energy, motion, heat, light, sound, and electrical
energy are the most common and most familiar among students. All these forms
belong to kinetic energy; they are all associated with some kind of motion - the
motion of waves, electrons, atoms, molecules, and objects.
In this grade level, the focus is on the sources of the different forms of energy
and the different ways by which they are transferred from one place to another.
Sound and light are introduced as forms of energy that are transferred by waves
while heat is introduced as an energy that is transferred either by randomly moving
particles, or by electromagnetic waves (radiation). Electrical energy is described as
an energy that is transferred by moving electrical charges through a complete circuit.
Motion is considered to be the first topic because it is the most concrete
manifestation of the abstract concept of energy. Besides, some of the concepts to be
developed in this module will be useful in understanding the succeeding topics, like
when students learn about the common characteristics of waves and when they
relate these to the characteristics of sound and light waves.
The table below shows the general and specific topics covered in Grade 7:
Module
Specific Topics Focus Questions
Title
Uniform Motion
Motion - How do objects move?
Accelerated Motion
Types/Kinds of waves - How are waves classified?
Wave Common characteristics of - What characteristics do waves
waves have in common?
- How is sound produced?
Sources of sound - How does sound propagate?
Sound
Characteristics of sound - How do sounds differ from
each other?
Sources of light - How is light produced?
Light
Characteristics of light - How does light intensity vary
1
2. Module
Specific Topics Focus Questions
Title
How the eye sees color with distance from the source?
- How is color related to
frequency and wavelength?
- When does heat transfer take
Heat transfer
place?
Heat Modes of heat transfer
- How does heat transfer take
Conductors/insulators of heat
place?
- How do charges behave?
Electrical charges
Electricity - How do charges carry
Simple circuit
energy?
Each topic or module contains three to five activities, mostly practical work
activities, that provide students with opportunities to develop their thinking and
manipulative skills. Teachers need to make sure that students are on the right
track while performing the activities and are able to grasp the particular concepts
involved.
2
3. TEACHING GUIDE
Unit 3
MODULE
1 DESCRIBING MOTION
This module covers basic aspects of motion. Its aim is to enable the students
to describe examples of motion along a straight line. Motion is defined as the change
in position over an interval of time. Students will therefore describe motion in terms of
the positions of the moving object at different points in time, or its distance travelled
over a period, or its speed of travel. Furthermore, they will construct or analyze
diagrams, graphs, or charts to describe whether an object is in motion or not, or
moving with constant speed, or whether it is changing in speed or not.
In this module, the relevant concepts are introduced only at a basic, more
conceptual and less mathematical level. But the students’ understanding of these
concepts will be enhanced when they continue to study about motion in the next
grade levels or when they study other relevant topics in physics and in other areas.
Key questions for this module
When can we say that an object is in motion?
How do we describe the motion of an object?
This module contains four sections:
I-Where
o In this section, students will describe the position of an object with respect to
a point of reference (or reference point).
Activity
1 Where is it?
Prepare beforehand the instructions to be given to the students. The instructions
should be vague to make it less helpful to the students. Examples are given
below:
a. It is right there.
3
4. b. Turn and it is there.
c. Walk slowly and you will get there.
d. It is from here to there.
In this activity, students should be able to realize the importance of the point of
reference (or reference point) and direction in describing the position of an
object.
Students may use the terms such as beside, above, below, left, right, in front of,
or behind when describing the direction of an object from the reference point.
During the processing, it should be emphasized that once the students have
selected their point of reference, they can easily describe any change in the
position of an object. In other words, they can easily tell whether an object is
moving or not. At this point, the definition of motion, which is the change in
position over time, can be introduced.
Sample answers to the questions
Q1. (Students are supposed to have a hard time in finding the object)
Q2. The instruction is not clear. There should be another object where we can
refer to or compare the position of the object.
Q3. (This time, students should be able to find the object)
Q4. The distance of the object and its direction from the point of reference are
included in the instruction.
Q5. A point of reference is something that seems steady that is used to
compare the position of an object.
Q6. -10 m.
Q7. 5 m.
Q8. The dog is 25 meters to the left of the house
Q9. The tree is 15 meters to the right of the dog.
Q10. The initial position of the ball is at 0 m. Its final position is at 15 m.
Q11. 10 m.
Q12. 15 seconds
Q13. 7.5 meters
Q14. 12.5 seconds
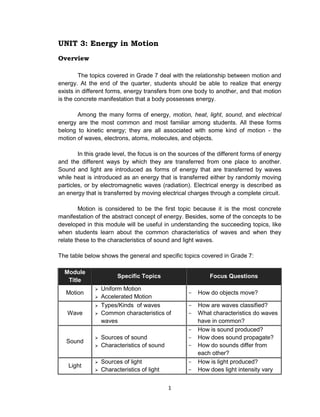
Table 1
Position of the
Time (sec)
ball
0 0
5 5
10 10
15 15
4
5. 20
15
Position (m) 10
5 (20 s, 5 m)
0 5 10 15 20
Time (s)
Figure 3
II-How far
o In this section, students will describe the motion of an object in terms of the
distance it travelled. They will also differentiate distance from displacement.
o Since vector and scalar quantities are not yet introduced in the module,
displacement will be defined as measurement of length plus direction while
distance is defined as measurement of length only.
o The following questions are asked to test students’ understanding of the
difference between distance and displacement. Encourage the students to
answer these questions or use them as points for discussion.
- What have you noticed about the distance and the displacement in the
given examples above?
Displacement always follows a straight line. Distance does not always
follow a straight line.
Displacement measures the length of the straight line that connects the
object’s point of origin and its point of destination. Distance measures the
length of the path travelled by the object.
- When can displacement be equal to distance?
When the path travelled is a straight line
- Can displacement be greater than distance? Why?
No, it can be shorter but it cannot be greater than the distance.
Displacement is the shortest length between the object’s point of origin
and its point of destination.
- What if the ball, the car, and the dog in the illustration go back to their
starting positions, what will be their total distances? What will be their
displacements?
5
6. Their total distances will increase two times (will double) but their
displacements will become zero.
Activity
2 Home to school roadmap
Allow students to work either in pairs or in small groups.
In the absence of ruler, or meter stick, or any standard distance measuring
instrument, ask students to design an alternative way to measure the distance.
Check their design or device for precision.
If the students live far from school, they can choose a nearer place as their
starting point. Remind them to include in their maps the street names, reference
points and precise measurements. Remind them also to stay safe while doing
the activity outside the school.
All answers to the questions depend on the students’ data.
III-How fast?
o In this section, students will describe the motion of an object in terms of its
speed. They will also differentiate speed from velocity (which is defined as
speed plus direction) and average speed from instantaneous speed.
Activity
3 Fun Walk
In this activity, students should be able to design ways to obtain the speed of
each member of the group and decide how to use these values to determine who
among them walks fastest.
In the absence again of a standard instrument for measuring distance, students
can use their previous design/device.
Check their units of distance, time, and speed. If for example, they use meter for
distance and minute for time, then their unit for speed must be meter/minute.
Sample answers to the questions
Q1. We measured the total distance travelled and time taken to travel the
distance
Q2. We divided the distance travelled by the time of travel
Q3. The fastest participant was the one with the highest computed value of
distance over time
Q4. The lesser the time of travel, the greater the speed of travel
Q5. The greater the distance travelled, the greater the speed of travel
6
7. Q6. They travelled with the same speed of 2m/s.
IV-How fast is the velocity changing?
o In this section, students will be introduced to the concept of acceleration.
o Since the students are dealing only with motion along a straight line, the
concept of acceleration is introduced as due to the change in the speed of the
moving object. During the discussion, it should be emphasized that
acceleration may also be due to the change in the direction of the object.
Acceleration, by definition, is the change in velocity over a time interval, and
velocity as mentioned earlier is speed plus direction. So even if there is no
change in speed but there is a change in direction, acceleration is achieved.
Activity
4 Doing detective work
In this activity, students will analyze an example of motion wherein speed (or
velocity) is changing by examining the record of the dots on a strip of paper.
Prepare beforehand the paper strips containing dots. The dots should be
arranged such that the distance between two successive dots increases
uniformly, like the one shown in the module.
However, each group can be also asked to work on a strip having different
arrangement of dots. Some can be decreasing uniformly; others can be
increasing or decreasing but not uniformly.
During the discussion, emphasize that any change in the velocity of an object
results in an acceleration. This includes change in speed (increasing speed or
decreasing speed which is also called deceleration) or change in direction
(although this is not discussed in the module). This is to correct the common
conception among people that acceleration only refers to objects with increasing
speed.
Sample answers to the questions
Q1. The distance between two successive dots increases uniformly.
Q2. The length of the strips of tape in the chart increases uniformly.
Q3. Each strip of tape provides the speed (or velocity) of the object every 1
second.
Q4. Because the length of the tape increases uniformly, it means that the
speed (or velocity) of the object increases uniformly.
Q5. The change in length of the tape is constant. The change in speed is
constant.
or
The length of the tape increases by the same amount in each time
interval. The speed increases by the same amount in each time interval.
Q6. The object is moving with constant acceleration.
Q7. The graph is curved or parabolic.
7
8. Q8. The shape of the speed-time graph is different from the. It is a straight-
line graph.
Q9. Similar to the answers in Q5 and Q6
Q10.If the arrangement of oil drops left by the car is similar to what we used in
this activity, then the suspect was not telling the truth.
PRE/POST TEST
1. When is an object considered to be in motion?
I. When its position changes with respect to a point of reference.
II. When its distance changes with respect to a point of reference.
III. When its direction changes with respect to a point of reference.
A. I and II only C. II and III only
B. I and III only D. I, II, and III
For questions 2 and 3, refer to the table below. Data were obtained from a 200-meter
dash competition.
Female Recorded Male Recorded
Athlete Time Athlete Time
1 26.5 1 22.4
2 26.1 2 21.9
3 25.3 3 23.0
4 26.7 4 22.6
2. Which of the following statements is/are true?
I. The male athletes are faster than the female athletes.
II. Compared to the speed of the fastest male athlete, the average speed of the
fastest female athlete is slightly less.
A. I only C. Both I and II
B. II only D. Neither I nor II
3. How do you compute for the average speed of each athlete?
A. Multiply 200 meters by the recorded time of travel.
B. Divide 200 meters by the recorded time of travel.
C. Divide the recorded time of travel by 200 meters.
D. Divide 200 meters by twice the recorded time of travel.
4. Which of the following is true about an object that travels 5 meters to the left,
then 2 meters up, then another 5 meters to the right?
A. The displacement of the object is equal to 12 meters.
B. The total distance travelled by the object is equal to 12 meters.
8
9. C. The displacement of the object is equal to 12 meters down.
D. The total distance travelled by the object is equal to 12 meters down.
5. Which of the following statements is NOT true about the object moving with
constant speed?
A. The object is not accelerating
B. The speed of the object is equal to zero.
C. The distance travelled by the object increases uniformly
D. The speed of the object remains the same all throughout the travel
6. Which of the following graphs shows that the object’s motion is accelerating?
distance distance distance
distance
time time time
time
A B C D
Answer Key
1. D
2. C
3. B
4. B
5. B
6. C
Links and References
Chapter 2: Representing Motion. Retrieved March 14, 2012 from http://igcse-physics-
-41-p2-yrh.brentsvillehs.schools.pwcs.edu/modules
Chapter 3: Accelerated Motion. Retrieved March 14, 2012 from http://igcse-physics--
41-p2-yrh.brentsvillehs.schools.pwcs.edu/modules
HS Science IV: Physics in your environment. Teacher’s Edition. 1981. Science
Education Center. Quezon City
9
10. TEACHING GUIDE
Unit 3
MODULE
2 WAVES AROUND YOU
This module introduces the student to the study of waves and its properties.
There is one warm-up activity and three principal activities designed to target key
concepts about wave motion. While the lesson is generally activity-centered, the
teacher must set off the lesson by facilitating the class to give examples of waves in
the environment and to think about what these waves can do.
Importance of the Topics to Real Life
Sound waves, earthquake waves, waves on stretched strings, and water
waves are all produced by some source of vibration. To explain many other
phenomena in nature, it should be emphasized that it is important to understand
concepts of wave motion.
For instance, since the Philippines is one of the countries which is a part of
the Pacific Ring of Fire, it experiences frequent earthquakes due to the movements
of tectonic plates or segments of the earth’s crust. It is therefore important to
understand how earthquake waves propagate and to know what actions are taken by
scientists, particularly the geologists, to address the challenges brought by the
geographical location of the Philippines.
Architects and engineers also consider concepts in wave motion in designing
skyscrapers and bridges. Although these structures appear to be rigid, they actually
vibrate and this fact must be taken into account in their construction.
Finally, to understand how radio and television work, concepts about the
origin, nature and propagation of electromagnetic waves have to be examined.
Hints for the Teacher
1. Prepare the students for this lesson by giving a demonstration to serve as
motivation.
Demonstration Activity. Introduction to Vibrations
1) Prepare a metal can with both lids removed.
10
11. 2) Cut a rubber balloon cut and stretched it over one end of the can. Use a
rubber band to hold the stretched balloon in place.
3) Put the can and its balloon end up on a table.
4) Put a small amount of salt on top of the balloon.
5) Ask a student volunteer to shout (not blow) at the can.
6) Tell the class to observe what happens to the salt. Also, invite them to
place their fingers lightly on their throat while creating a sound.
Guide Questions
1. What two things are vibrating?
(1) The rubber balloon on the can and (2) the students’ vocal cords in
their throats
2. What caused the salt to move?
The salt is moved by the balloon’s vibrations, which are ultimately caused
by sound waves traveling through the air. These sound waves are
generated by the vibration of the vocal chords in the throat. Tell the
students they will study the details in the next activities and in a separate
module on sound.
2. Do the warm up activity with the class and relate it with the demonstration
activity. The demonstration and the warm-up activity aim to bring out the
following pre-requisite concepts:
(1) Waves are caused by a source of a vibration and
(2) Waves can set objects into motion.
Guide Questions
1. What do you do when you wave your hand?
Tell the students that they are essentially “vibrating” their hands by doing
a repetitive back-and-forth or side-to-side movement with your fingers or
your palm. (Encourage the students to demonstrate their personal hand
waves.)
2. Think of a still lake. How would you generate water waves on the lake?
Water waves can be generated by vibrating the surface of the water.
Students can have various answers from their experiences. Tell them that
the activities that they would perform will allow them to generate waves
and to understand wave motion.
3. You may have to demonstrate to students how they can make periodic
waves using the materials in the activities.
11
12. Objectives
After taking up this module, the students should be able to:
1. Infer that energy, like light and sound travel in the form of waves.
2. Explain how waves carry energy from one place to another.
3. Distinguish between transverse and longitudinal waves and mechanical
and electromagnetic waves.
4. Create a model to demonstrate the relationship among frequency,
wavelength, and wave speed.
Guide to Conducting the Principal Activities in the Module
The activities in the module are designed to be performed within the
classroom. Each activity will take up one class period.
The following schedule of activities is suggested:
Session 1 Demonstration Activity
Warm Up. What are waves?
Activity 1. Let’s Make Waves!
Presentation of Group Output
Discussion of the Answers to Activity 1
Session 2 Review of Key Concepts from Activity 1
Activity 2. Anatomy of a Wave
Presentation of Group Output
Discussion of the Answers to Activity 2
Session 3 Review of the Key Concepts from Activities 1 and 2
Activity 3. Mechanical vs. Electromagnetic Waves
Discussion of the Answers to Activity 3
Summary of the Module
Test Your Knowledge
Activity
1 Let’s Make Waves!
What happens when waves pass by?
The students are given 30 minutes to perform the activity and to answer the
questions in the activity sheet. After completing the activity, the teacher will facilitate
a brief discussion of the findings.
12
13. It is best to choose three groups to present their findings on the different parts
of the activity (i.e. one representative will show the work of their group on Part A
only; representatives from other groups will talk about Part B and Part C
respectively.)
The teacher will conclude the meeting by answering the summary part of the
activity sheet with the class.
Answers to the Activity Sheet
What are transverse waves?
1. Sketches showing the motion of a wave pulse at three subsequent instances
(snapshots at three different times).
Time 1
Time 2
Time 3
a. What is the source of the wave pulse?
A vibration due to a quick shake at one end of the rope
b. Describe the motion of your hand as you create the pulse.
A quick up and down movement
c. Describe the motion of the pulse with respect to the source. The pulse
moved away from the source.
2. [Sketch of the waveform or the shape of the wave created by the students.]
13
14. a. Does the wave transport the colored ribbon from its original position to the
end of the rope?
No, it doesn’t.
b. Describe the vibration of the colored ribbon. How does it move as waves
pass by? Does it move in the same direction as the wave?
As the waves pass by, the colored ribbon moves up and down
repetitively. It does not move in the same direction as the passing waves.
Instead, it vibrates along the axis perpendicular to the direction of travel of
the passing waves.
What are longitudinal waves?
1. Sketch of longitudinal waves in a coil spring.
2. [Observations on the colored ribbon tied to the coil spring.]
a. Does the wave transport the colored ribbon from its original position to the
end of the rope?
No, it doesn’t.
b. Describe the vibration of the colored ribbon. How does it move as waves
pass by?
As the waves pass by, the colored ribbon moves back and forth
repetitively. It vibrates along the axis parallel to the direction of travel of
the passing waves.
What are surface waves?
1. [Sketch of the waves as seen from above the water basin.] The source of the
disturbance should be marked.
2. [Observation on the paper boat.]
a. Do the waves set the paper boat into motion? What is required to set an
object into motion?
Yes, the waves moved the paper boat. Energy is required to set and
object into motion.
b. If you exert more energy in creating periodic waves by tapping the
surface with greater strength, how does this affect the movement of the
paper boat?
The wave carried more energy causing the paper boat to vibrate strongly.
14
15. 3. [Observations on the figure showing water waves.]
a. As shown in the figure, the passage of a wave across a surface of a body
of water involves the motion of particles following a circular pattern about
their original positions.
b. Does the wave transport water molecules from the source of the
vibration? Support your answer using the shown figure.
No, the water molecules are not transported from the source of the
vibration. The figure shows that the water particles merely move in
circular orbits about their original positions as waves pass by.
Summary
1. Waves can be typified according to the direction of motion of the vibrating
particles with respect to the direction in which the waves travel.
a. Waves in a rope are called transverse waves because the individual
segments of the rope vibrate perpendicular to the direction in which the
waves travel.
b. When each portion of a coil spring is alternatively compressed and
extended, longitudinal waves are produced.
c. Waves on the surface of a body of water are a combination of transverse
and longitudinal waves. Each water molecule moves in a circular pattern
as the waves pass by.
2. How do we know that waves carry energy?
Waves can set other objects into motion.
3. What happens when waves pass by?
Particles vibrate alternately to transport the energy of the wave.
Activity
2 Anatomy of a Wave
How can you describe waves?
The students are given 40 minutes to perform the activity and to answer the
questions in the activity sheet. After completing the activity, the teacher will facilitate
a brief discussion of the findings.
Before discussing the results of the activity to the class, it is useful to show a
large image of a sinusoidal wave and ask the class to name the parts of the wave.
The activity has three parts so the groups may be asked to assign a different
representative to discuss the result of their work to the class (i.e. those who have
been chosen as presenters in Activity 1 should not be assigned again).
15
16. The teacher will conclude the meeting by answering the summary part of the
activity sheet with the class.
Answers to the Activity Sheet
How can you measure the wavelength of a wave?
1. The wavelength of a wave refers to the distance between any
successive identical parts of the wave. For instance, the distance from
one crest to the next is equal to one full wavelength. In the following
illustration, this is given by the interval B to F. Identify the other intervals
that represent one full wavelength.
Intervals 1) A to E and 2) C to G
2. Sketch of the water waves as seen them from the above of the basin.
One wavelength should be labeled in the drawing.
3. Increase the rate of the vibrations you create by tapping the surface of
the water rapidly. What happens to the wavelength of the waves?
The wavelength becomes shorter.
16
17. [Sketch of the water waves as seen them from the top of the basin.
Compared to the drawing in number 2, this one has shorter
wavelengths.]
How can you measure the frequency of a wave?
1-3. Results are recorded in Table 1. Each group may have different
answers.
Table 1. Frequency and period of the wave
Number of waves Frequency
Period
(N cycles) that passed by of the waves
of the waves (seconds)
the ribbon in 10 seconds (N cycles/10 seconds)
Example
15 cycles 15 cycles/10s = 1.5 Hz 1/1.5 Hz = 0.67 s
4. If you increase the frequency of vibration by jerking the end of the rope
at a faster rate, what happens to the wavelength?
The wavelength becomes shorter.
How can you measure the speed of a wave?
1-2a. Results are recorded in Table 2. Each group may have different
answers.
Table 2. The speed of a wave
Number of waves
Frequency
Estimated (N cycles) that
of the waves Wave speed
wavelength passed by the
(N cycles/10 (meter/second)
(meters) ribbon in 10
seconds)
seconds
Example 15 cycles 15 cycles/10s (0.5m)*(1.5Hz)
0.5 m = 1.5 Hz = 0.8 m/s
17
18. Summary
1. What is the relationship between wave speed, wavelength and
frequency? They are related by the equation: wave speed = frequency x
wavelength. The frequency of a wave is inversely proportional to the
wavelength.
2. Suppose you observed an anchored boat to rise and fall once every 4.0
seconds as waves whose crests are 25 meters apart pass by it.
a. What is the frequency of the observed waves?
The frequency of the waves is 0.25 Hz.
Frequency = 1/period = 1/4.0 seconds = 0.25 Hz
b. What is the speed of the waves?
The speed of the waves is 6.3 m/s.
Wave speed = (frequency)*(wavelength) = (0.25 Hz)*(25 m) = 6.3
m/s
Activity
3 Mechanical vs. Electrical Waves
How do waves propagate?
The students are given 30 minutes to perform the activity and to answer the
questions in the activity sheet. After completing the activity, the teacher will facilitate
a brief discussion of the findings.
Before discussing the results of the activity to the class, it is useful to show a
set of large images of the mechanical waves, which the students were able to
generate in Activity 1, and a chart of the electromagnetic spectrum which can be
used by the students in answering the questions in the activity sheet. The class must
be divided into small discussion groups until all of each group’s members are able to
complete the activity sheets. Proceed with the discussion of the answers to the class
while keeping the small discussion groups intact. Before giving the correct answers,
have each group announce their answers to the class.
The teacher will conclude the meeting by answering the summary part of the
activity sheet with the class.
18
19. Answers to the Activity Sheet
What are mechanical waves?
1. [Identifying the medium of wave propagation for mechanical waves]
a. In Activity 1 Part B, what is the medium of wave propagation?
Coil spring
b. In Activity 1 Part C, what is the medium of wave propagation?
Water
2. [Characteristics of mechanical waves]
a. How can you generate mechanical waves? They can be generated
by vibrating a medium. A medium is required because vibrating
particles are needed for the wave to travel.
3. [Application of the concept of mechanical waves to earthquakes]
a. What do you think is the source of earthquake waves? Earthquake
waves are caused by a vibration due to colliding tectonic plates.
b. What is the medium of propagation of earthquake waves?
The Earth
What are electromagnetic waves?
1. [Knowing the electromagnetic waves]
1) Radio waves 5) Ultraviolet waves
2) Microwaves 6) X-rays
3) Infrared waves 7) Gamma Rays
4) Visible light
2. [Some characteristics of electromagnetic waves]
a. Describe the relationship between frequency and wavelength of each
electromagnetic wave.
Among electromagnetic waves, the higher the frequency, the shorter
the wavelength.
b. Draw waves to represent each electromagnetic wave. Your
illustrations must represent the wavelength of a wave relative to the
others. For instance, gamma rays have a very small wavelength
compared to the other waves in the spectrum.
High energy electromagnetic waves have (high, low) frequency and
(long, short) wavelengths.
19
20. 1. Gamma Rays
2. X-rays
3. Ultraviolet Waves
4. Visible Light
5. Infrared Waves
6. Microwaves
7. Radio Waves
The following image can also be used.
20
21. c. The Sun is an important source of ultraviolet (UV) waves, which is the
main cause of sunburn. Sunscreen lotions are transparent to visible
light but absorb most UV light. The higher a sunscreen’s solar
protection factor (SPF), the greater the percentage of UV light
absorbed. Why are UV rays harmful to the skin compared to visible
light?
Compare the frequency and energy carried by UV waves to that of
visible light.
UV waves have higher energy and frequency compared to visible
light.
Summary
1. Mechanical waves like sound, water waves, earthquake waves, and
waves in a stretched string propagate through a medium while
electromagnetic waves such as radio waves, visible light, and gamma
rays, do not require a material medium for their passage.
Review. Waves Around You
The activities in the module are all about wave motion or the propagation of a
pattern caused by a vibration. Waves transport energy from one place to another
thus they can set objects into motion.
What happens when waves pass by?
Activity 1 introduced transverse waves, longitudinal waves, and surface
waves. The students were able to observe the motion of a segment of the material
through which the wave travels.
1. Transverse waves occur when the individual particles or segments of a
medium vibrate from side to side perpendicular to the direction in which
the waves travel.
2. Longitudinal waves occur when the individual particles of a medium
vibrate back and forth in the direction in which the waves travel.
3. The motion of water molecules on the surface of deep water in which a
wave is propagating is a combination of transverse and longitudinal
displacements, with the result that molecules at the surface move in
nearly circular paths. Each molecule is displaced both horizontally and
vertically from its normal position.
4. While energy is transported by virtue of the moving pattern, it is important
to remember that there is not net transport of matter in wave motion. The
particles vibrate about a normal position and do not undergo a net motion.
How can you describe waves?
In Activity 2, the students encountered the important terms and quantities
used to describe periodic waves.
21
22. 1. The crest and trough refer to the highest point and lowest point of a wave
pattern, respectively.
2. The amplitude of a wave is the maximum displacement of a particle of the
medium on either side of its normal position when the wave passes.
3. The frequency of periodic waves is the number of waves that pass a
particular point for every one second while the wavelength is the distance
between adjacent crests or troughs.
4. The period is the time required for one complete wave to pass a particular
point.
5. The speed of the wave refers to the distance the wave travels per unit
time. It is related to the frequency of the wave and wavelength through
the following equation:
How do waves propagate?
Finally, Activity 3 prompted the students to distinguish between mechanical
and electromagnetic waves.
1. In mechanical waves, some physical medium is being disturbed for the
wave to propagate. A wave traveling on a string would not exist without
the string. Sound waves could not travel through air if there were no air
molecules. With mechanical waves, what we interpret as a wave
corresponds to the propagation of a disturbance through a medium.
2. On the other hand, electromagnetic waves do not require a medium to
propagate; some examples of electromagnetic waves are visible light,
radio waves, television signals, and x-rays.
PRE/POST TEST
(For Modules 2 to 4)
Part A: WAVES
Consider the diagram below to question 1 below
1. The amplitude of the wave in the diagram above is given by letter __.
2. Indicate the interval that represents a half wavelength.
22
23. a. A to E
b. B to F
c. A to B
d. C to E
3. Mechanical waves transport energy from one place to another through
a. Alternately vibrating particles of the medium
b. Particles traveling with the wave
c. Vibrating particles and traveling particles
d. None of the above
4. In a transverse wave, the individual particles of the medium
a. move in circles
b. move in ellipses
c. move parallel to the direction of travel
d. move perpendicular to the direction of travel
5. The higher the frequency of a wave,
a. the lower its speed
b. the shorter its wavelength
c. the greater its amplitude
d. the longer its period
6. Waves in a lake are 5.00 m in length and pass an anchored boat 1.25 s apart.
The speed of the waves is
a. 0.25 m/s
b. 4.00 m/s
c. 6.25 m/s
d. impossible to find from the information given
7. Energy from the sun reaches the earth through
a. ultraviolet waves
b. infrared waves
c. mechanical waves
d. electromagnetic waves
Part B: SOUND
8. Which of the following objects will produce sound?
a. soft objects
b. radio stations
c. vibrating objects
d. objects under pressure
23
24. 9. Which of the following best describes a high frequency sound? It has
_____________.
a. low pitch
b. high pitch
c. low energy
d. A and C
10. Compared to a thin string of the same length and tightness a thick string
produces sounds of ____________.
a. the same pitch
b. lower pitch
c. higher pitch
d. lower then higher pitch
11. A sound wave is a _____________.
a. longitudinal wave
b. transverse wave
c. standing wave
d. shock wave
12. Which of the following is not capable of transmitting sound?
a. air
b. water
c. steel
d. a vacuum
13. Which of the following would most likely transmit sound best?
a. Steel in cabinet
b. Water in the ocean
c. Air in your classroom
d. Water in a swimming pool
Part C: LIGHT
1. Which of the following is NOT an electromagnetic wave?
a. Infrared
b. Radio
c. Sound
d. X ray
2. How does the wavelength of infrared (IR) compare with the wavelength of
ultraviolet (UV) waves?
a. Infrared waves have longer wavelength.
b. Infrared waves have shorter wavelength.
c. IR waves have the same wavelength as the UV waves.
d. IR is not comparable in wavelength with the UV waves
24
25. 3. Among all the electromagnetic waves (EM), which has the highest
frequency?
a. Infrared radiation
b. Radio wave
c. Ultraviolet
d. Gamma rays
4. ROYGBIV is the basic component of white light. Which color of light carries
the most energy?
a. Blue
b. Green
c. Orange
d. Red
5. Light is an electromagnetic wave. Which characteristic is common in all
electromagnetic waves?
a. amplitude
b. frequency
c. speed
d. wavelength
Answer Key
Part A Part B Part C
1. D 1.C 1.C
2. D 2.B 2.A
3. A 3.B 3.D
4. D 4.A 4.A
5. B 5.D 5.C
6. B 6.A
7.D
References and Web Links
[1] Anatomy of an electromagnetic wave. Available at:
http://missionscience.nasa.gov/ems/02_anatomy.html
[2] Electromagnetic waves. Available at:
http://www.colorado.edu/physics/2000/waves_particles/
[3] Hewitt, P. (2006). Conceptual Physics 10th Ed. USA: Pearson Addison-Wesley.
[4] The anatomy of a wave. Available at:
http://www.physicsclassroom.com/class/waves/u10l2a.cfm
[5] The nature of a wave. Available at:
http://www.physicsclassroom.com/class/waves/u10l1c.cfm
25
26. TEACHING GUIDE
Unit 3
MODULE
3 SOUND
In this module the student will be able to explore the concept of sound.
Specifically, students will be acquainted with (1) sound propagation, (2)
characteristics of sound – pitch, loudness, and quality, and (3) types of sound
according to quality – infrasonic, audible, & ultrasonic.
The developmental task for the students include being able to (1)
demonstrate how sound is produced; (2) use the concepts of wavelength, velocity,
and amplitude to describe characteristics of sound such as pitch, loudness and
quality; (3) demonstrate changes in pitch and loudness using real or improvised
musical instrument through fair testing; (4) explain sound production in the human
voice box and how pitch, loudness and quality of sound vary from one person to
another; (5) describe how organisms produce, transmit and receive sound of various
frequencies (infrasonic, audible and ultrasonic sound); and (6) create harmonious
music using indigenous products.
Probable Misconceptions
Sound waves move with the medium.
Sound can travel in vacuum.
Sound travels fastest in gas.
Pitch is dependent on period.
Teaching and Learning Strategies
Motivation
The facilitator may start with elicitation of the different indigenous instruments
in the locality used as musical apparatus. Ask them what particular local
occasions are these used. Ask them how these instruments are played to
derive from the students the concept of how sound waves are propagated.
Facilitating Learning
Introduce activity 1 to arrive at the objectives: design a sounding box to
explain and explore how sound is produced.
26
27. Since activity 1 features not only concept attainment but also provides
opportunities for learners who are artistically inclined to express their talents
as well then this may be able to keep all students on task.
Data processing may be done by group presentation and class discussion of
the guide questions to probe the concept of sound propagation.
Discussion should also be extended to cover media on which sound travel
and speed of sound.
Then introduce Activity 2: Characteristics and Properties of Sound. In this
activity, the students will be able to use their sounding box to describe the
characteristics of sound and compare their experimental results with that of
the standard instrument (guitar).
Data processing may be done by group presentation and class discussion of
the guide questions to probe the how pitch is related to frequency.
Extend the discussion to include types of sound (infrasonic, audible, and
ultrasonic), the human ear, loudness and intensity.
As a performance task, introduce Activity 3: Big Time Gig!. In this activity the
students will be able to: (1) create musical instruments using indigenous
products and (2) use these instruments to compose tunes and present in a
Gig. Students may also utilize other indigenous musical instruments.
In the quest to come up with a Gig students will be able to discover and apply
the different characteristics and properties of sound. Further, they will also be
able to utilize and showcase their talents through a presentation or rendition.
Summary of the whole module may be probed by asking for insights and
experiences they had during the preparation, presentation and post-
presentation discussion of the rendition.
Description of Activities
Activity 1: My Own Sounding Box
(Students will design a sounding box to explain and explore how sound is
produced)
Activity 2: Properties and Characteristics of Sound
(Using the Sound Box, students will describe the characteristics of sound
through the concept of wavelength, velocity and amplitude)
Activity 3: Big Time Gig!!!
(Students will create musical instruments using indigenous products and use
these instruments to compose tunes and present in a Gig. Students may also
utilize other indigenous musical instruments)
27
28. Answers to Questions:
Activity
1 My Own Sounding Box
Q1. The elastic bands vibrate when plucked. Sound is produced by vibration of the
elastic band.
Q2. The sound produced by each elastic band is different from the others. The
thinker the band the louder the sound produced. The thicker the band, the
lower the tone.
Q3. When the elastic bands are stretched then plucked, sound increases in pitch.
Q4. Highest note – thinnest, Lowest note - thickest
Activity
2 Properties and Characteristics of
Sound
Q1. The rubber bands were vibrating when plucked. This resulted to produced
sound. This means that sound is produced by vibration of the medium or
material.
Q2. Yes. The sound produced by each elastic band is different from the others.
Q3. The thinker the band the louder the sound produced. The thicker the band the
lower the tone.
Q4. To make a softer sound apply small force in plucking the rubber bands. To
make a louder sound, apply greater force in plucking the rubber bands
Q5. Pitch is dependent on the thickness or thinness of the string and on the
stretching of the elastics. Loudness and softness of sound, on the other hand,
affected by the force exerted in plucking the elastics.
Q6. Yes.
Q7. Yes, the pitch is higher.
Q8. Shorter side – higher pitch; Longer side – lower pitch
Q9. Pitch of sound is affected by the thickness of the rubber band and the amount
of stretch.
Q10. String No. 0
Q11. String No. 6
Q12. String No. 0
Q13. String No. 0
Q14. String No. 6
Q15. String No. 6
Q16. The higher the frequency, the higher the pitch.
28
29. Activity
3 Big Time Gig!!!
Big Time Gig!
Rubric Scoring
Task/
4 3 2 1 Score
Criteria
Makes use of Makes use of Makes use of Makes use of
local and local local local
indigenous materials materials materials
materials only. only. only.
The The The The sound
Improvised/ improvised improvised improvised produced by
Localized instruments instruments instruments the
musical are produce produce good produce fair improvised
instruments good quality quality sound. quality sound. instruments is
sound not clear and
comparable distinct.
to standard
musical
instruments.
The group’s The group’s The group’s The group’s
original original original original
composition composition composition composition
has good has fair melody has fair melody has fair melody
Composition melody and the and the lyrics and the lyrics and the lyrics
lyrics provided provided are provided are provided are
are thematic thematic and NOT thematic NEITHER
and meaningful meaningful but meaningful thematic nor
meaningful
The group The group The group The group
was able to was able to was able to was able to
successfully successfully use the use the
use the use the improvised improvised
improvised improvised musical musical
musical musical instruments instruments
instruments in instruments in but some but MOST
Performance
their GIG. their GIG. were out of were out of
The group The group tune tune
was able to was able to The group The group
provide good provide fair was able to was able to
quality rendition. provide fair provide fair
rendition or rendition. rendition
performance.
Each one of 3 out of 4 2 out of 4 Only 1 out of
them completed members completed their the 4 members
Cooperation their task so as completed their task so as to did his/her job
and Team to come up with task so as to come up with
Work the expected come up with the expected
output - GIG the expected output - GIG
output - GIG
TOTAL
29
30. TEACHING GUIDE
Unit 3
MODULE
4 LIGHT
In this module the student will be able to explore the concept of light.
Specifically, students will be acquainted with (1) light production and propagation,
and (2) characteristics of light – intensity, brightness and color.
The developmental task for the students include being able to (1)
Demonstrate how light produced by common sources differ in brightness; (2) Relate
characteristics of light such as color and intensity to frequency and wavelength; (3)
Design and implement an experiment that shows that light travels in a straight line;
and (4) Investigate the relationship between light intensity and the distance from a
light source through fair testing.
Probable Misconceptions
Brightness is measurable.
Brightness of light is only dependent on the distance from the light source.
Parts of the electromagnetic spectrum have different speed as that of the
visible light because these have different wavelength and frequency.
Light bends even when travelling in a uniform medium.
Teaching and Learning Strategies
Motivation
The facilitator may start with elicitation of the unique and indigenous light
sources or lighting material in the locality aside from bubs and fluorescent
lamps. Ask them to differentiate the different light sources from their place to
arrive at the concept that there is variety of light sources.
Facilitating Learning
Introduce Activity No. 1 to arrive at the objectives: (1) design a simple
photometer (2) determine which chemical substances produce the brightest
light; and (3) infer that brightness of light is dependent on the distance of the
source.
Since activity 1 features not only concept attainment but also provides
opportunities for learners who are artistically inclined to express their talents
as well then this may be able to keep all students on task.
30
31. Data processing may be done by group presentation and class discussion of
the guide questions to probe the concept of common light sources and how
light is produced and propagated.
Discussion should also be extended to cover differences and similarities of
brightness and intensity.
Introduce light as a wave, specifically as a major component of the
Electromagnetic Theory of Light by James Clark Maxwell.
Then introduce Activity No. 2: My Spectrum Wheel. In this activity the
students will (1) design a spectrum wheel and (2) explore the characteristics
of light such energy, frequency and wavelength.
Data processing may be done by group presentation and class discussion of
the data and results in tabular form and guide questions to the characteristics
of electromagnetic spectrum.
Extend the discussion to include dispersion as a special kind of refraction.
Then introduce Activity No. 3: Colors of Light - Colors of Life!. In this activity
the students should be able to (1) make a color spectrum wheel; (2) explore
the characteristics of color lights; and (3) observe how primary colors
combine to form other colors.
Data processing may be done by group presentation and class discussion of
the data and results in tabular form and guide questions to the characteristics
of color spectrum.
Extend the discussion to include dispersion as a special kind of refraction.
As a performance task, introduce Activity No. 4: Lighting Up Straight!. In this
activity the students will be able to: design an experiment given several
materials to show that light travels in a straight line.
In the quest to come up with a design, students will be able to discover and
apply the different characteristics and properties of light.
Summary of the whole module may be probed by asking for insights and
experiences they had during the preparation, presentation and post-
presentation discussion of their outputs.
Description of Activities
Activity 1: Light Sources: Langis Kandila or Diwali Lights
(Students will explore the concept of common light sources and how light is
produced by chemical substances)
Activity 2: My Spectrum Wheel
(Students will design a spectrum wheel to explore the characteristics of
electromagnetic spectrum such as intensity and relate these to frequency and
wavelength)
Activity 3: Colors of light – color of life!
(Students will design a spectrum wheel to explore the characteristics of light
such as color and intensity and relate these to frequency and wavelength)
Activity 4: Lighting Up Straight!
(Students will design n experiment given several materials to show that light
travels in a straight line)
31
32. Answers to Questions:
Activity
1 Light Sources:
Langis Kandila or Diwali Lights
Q1. Sample Computation: If both side of the wedge showed equal illumination
when it is about 200 cm from 1, and 50 cm from 2, the distances are as 4 to
1. But as light falls off according to the square of the distance: (200) 2= 40000
and (50)2 = 2500 or 16 to 1.). Thus the candle-power of the lamp is 16.
Q2. DL-LK1 (Canola Oil)
Q3. The farther the light source, the dimmer is the light and the lower the intensity
Activity
2 My Spectrum Wheel
Q1. While the frequency increases, the wavelength decreases.
Q2. The product of frequency and wavelength for all spectrum regions is
constant. This is equal to the speed of light in vacuum.
Q3. As the frequency is increased, the energy is also increased.
Activity
3 Colors of Light – Colors of Life!
Q1. Violet – highest frequency, Violet – shortest wavelength
Q2. Red – lowest frequency, Red –longest wavelength
Q3. The wavelength decreases as the frequency is increased.
Q4. The product of frequency and wavelength in all color lights is constant and
equal to the speed of light in vacuum.
Q5. The speed of all color light in air is constant and is equal to the speed of
visible light.
Q6. White light separates in color light due to the process known as dispersion.
As white light enters the air glass interface, different color light exhibit
different refractive indices thus separates into the visible color lights.
32
33. Activity
4 Lighting Up Straight!
Lighting Up Straight!
Rubric Scoring
Task/
4 3 2 1 Score
Criteria
Steps are Steps are Steps are Steps are
logically logically logically logically
presented. presented. presented. presented.
The The The The
procedure procedure procedure procedure
included included included included
about 5-6 about 3-4 about 3-4 about 2-3
Experiment
steps. steps. steps. steps.
Procedure
All materials 75% of the 50% of the 25% of the
given to the materials materials materials
group are given to the given to the given to the
utilized in group are group are group are
the utilized in utilized in utilized in
procedure the the the
procedure procedure procedure
The group has The group has The group has The group
successfully attained the partially had some
attained the object to attained the effort but was
object to prove that object to not able to
prove that light travels in prove that attained the
Result of
light travels in a straight line light travels in object to
Experiment
a straight line using their a straight line prove that
Try-out/
using their designed using their light travels in
Feasibility
designed procedure but designed a straight line
procedure. there are procedure. using their
some steps designed.
that are not
very clear.
Each one of About 75% of About 50% of About 25% of
them the members the members the members
completed completed completed did his/her job
Cooperation
their task so their task so their task so
and Team
as to come up as to come up as to come up
Work
with the with the with the
expected expected expected
output. output. output.
TOTAL
33
34. TEACHING GUIDE
Unit 3
MODULE
5 HEAT
In the previous modules, students learned about sound and light as forms of
energy that travel in waves. This time, they will study about heat which is another
form of energy that travels through moving particles or through radiation. In the first
activity, they will determine the condition needed for heat to transfer from one place
to another and the direction by which it transfers. Then they will observe and
compare the different modes of heat transfer and identify some factors that affect the
transfer of heat. They will specifically investigate how the color of the surface of the
material affects it ability to absorb or emit heat. Lastly, they will apply what they
learned in the module to describe how each part of the thermos bottle helps in
keeping its content hot or cold for a longer period of time.
The lessons covered in Module 5 are relevant to life because they help
explain some of our everyday experiences with heat. Also, some of the lessons
covered in this module will be picked up in the next quarter when students learn
about “weather and climate”.
Key questions for this module
How is heat transferred between objects or places?
Do all objects equally conduct, absorb, or emit heat?
Heat and Thermal Energy
At the start, students may be asked to give their own ideas about heat, based on
what they learned in the lower grades or based on their everyday experiences
with heat. Be aware of their misconceptions and take note of those which can be
addressed by the module, like cold is associated with lack of heat or heat is a
substance that is in the object that makes the object warm. Make sure to go back
to them during the processing, wherever applicable.
The difference between heat and thermal energy should be made clear to the
students.
34
35. Heat is a form of energy that refers to the thermal energy that is in the
process of being transferred, say between objects due to the difference in their
temperature. In other words, heat is energy “in transit”. It transfers from an
object of higher temperature to an object of lower temperature.
Activity
1 Warm me up, cool me down
In this activity, students will analyze changes in the temperature of the water
inside the containers to answer the following questions:
a) What is the condition needed for heat transfer to occur between the
containers?
b) In which direction does heat transfer between them?
c) Until when will heat transfer continue to occur?
Since students will gather data using the thermometers, make sure that they
know how to use the device properly and measure temperature accurately. If
needed, give them a detailed review of how to use the thermometer and take
data from it. Aside from the tips on how to measure temperature accurately, the
following points may also be emphasized:
a) Handle the thermometer with care to prevent breaking.
b) Do not hold the thermometer by its bulb (the lower end of the tube)
c) Do not ‘shake down’ the thermometer to reset it.
d) Do not use the thermometer to stir the water inside the containers.
e) Do not allow the thermometer to touch the bottom of the container.
Each group should be provided with 4 thermometers – one for each container. If
ever they have only one or two thermometers, they should be advised to
consider one setup at a time.
In the absence of a laboratory thermometer, students may use their ‘sense of
touch’ to determine the relative hotness or coldness of the water inside the
containers. Just make sure that if they do, they dip their fingers with care and
use a different finger for each container. Students may be allowed to perform the
activity provided in the module to show them how sense of touch may give
different result in their activity.
Sample data:
Table 1
Temperature (°C) of Water After
Container 0 min 2 4 6 8 10
(initial) mins mins mins mins mins
1-Tap water
Setup 1
A-Tap water
35
36. Temperature (°C) of Water After
Container 0 min 2 4 6 8 10
(initial) mins mins mins mins mins
2-Tap water
Setup 2
B-Hot water
* This slight increase in temperature could be due to the warmer surrounding
Answers to the questions:
Q1. Setup 2. Setup 1
Q2. Setup 2.
Q3. For heat transfer to take place, the objects must be of different
temperature.
Q4. Container B. Its temperature decreases after 2 minutes.
Q5. Container 2. Its temperature increases after 2 minutes.
Q6. - Heat is transferred from Container B to container 2.
- Heat is transferred from object of higher temperature to an object of
lower temperature.
- Heat is transferred from a warmer object to a cooler object.
Q7. In container 2, the temperature of water continuously increases while the
temperature of water in container B continuously decreases. Heat transfer
is continuously taking place between the containers.
Q8. Heat transfer will continue to take place until both objects reach the same
temperature (just like in Setup1)
Q9. The blue line shows that the temperature decreases as time increases.
This represents Container B (with higher initial temperature).
Q10. The red line shows that the temperature increases as time increases.
This represents Container 2 (with lower initial temperature)
Q11. The broken line shows that container 2 and container B have already the
same temperature and their temperature is still decreasing as time
continues. This time, heat transfer is taking place between the container
and the surrounding.
At this point, it is important to emphasize that heat transfer will continue to occur
as long as there is a temperature difference.
Methods of Heat Transfer
Heat transfer by Conduction
Conduction takes place when the particles between objects or places that are
in contact vibrate and collide at different speeds due to the difference in their
temperature. The particles at a higher temperature are more energetic and thus
vibrate faster than the particles at the lower temperature. When these particles
collide, some of the energy from the more energetic particles is transferred to the
less energetic particles, in the form of heat.
36
37. Heat transfer occurs not only in solids but also in fluids, but not all conduct
heat equally. Some materials conduct heat easily; other materials conduct heat
poorly. Objects that conduct heat poorly, like wood are particularly called insulators.
There is no particular name for those materials which conduct heat easily.
One basis for determining the use of materials is by their ability to conduct
heat, known as their conductivity. Higher conductivity means that the material is a
good conductor of heat. As shown in the table below, most metals have higher
conductivities; they are good conductors of heat. That’s why they are generally used
for products that require better heat conductivity like cooking utensils.
Table 2: List of thermal conductivities of common materials
Conductivity Conductivity
Material Material
W/(m·K) W/(m·K)
Silver 429 Concrete 1.1
Copper 401 Water at 20°C 0.6
Gold 318 Rubber 0.16
Polypropylene
Aluminum 237 0.25
plastic
Ice 2 Wood 0.04 - 0.4
Glass, ordinary 1.7 Air at 0°C 0.025
* Watt (W) is the unit of power where 1 watt is equal to 1 joule per second. 1 joule is
equal to 0.24 calories.
Activity
2 Which feels colder?
* This activity is adapted from the book of Harry Sootin, entitled “Experiments with
Heat”
Motivate the students by asking them to touch or feel some objects found inside
the classroom, like the metal bars or grills, the curtains, glass windows, the floor,
the wooden chairs. Then ask some volunteers to share their observations to the
class. Let them also try to explain their observations. Be aware of the
misconceptions that students may give, such as the following:
a) The objects have different temperatures.
b) Some objects contain greater amount of heat than others.
c) Some objects are naturally cooler than others.
If ever, make sure to go back to these during the post activity discussion for
clarifications.
The first part of the activity must be done at home or in school one day ahead. In
case there is no available refrigerator, students may just bring cooler with ice
37
38. cubes inside the classroom where they can place their thermometer and
samples before the day ends.
For the second part of the activity, make sure that the students read the
temperature from the thermometer or touch their sample objects while these are
still inside the freezer (cooler). Bringing them out may affect the result of their
experiment, especially if the materials are already out for long. Also, make sure
that the students feel each sample with a different finger. Lastly, make sure that
each student will touch all the samples to determine their relative coldness. (Do
not compare the coldness of an object with another object that is examined by
another student) They can just compare their conclusions and answers to the
questions with the other members of the group once they are done examining all
their samples.
During the discussion, emphasize that different objects or materials conduct
heat differently. And this explains why even if they are of the same temperature,
they do not feel (cold) equally. Materials with higher conductivities feel cooler
than those with lower conductivities because they allow more energy to be
transferred from the (warmer) finger than those with lower conductivities.
Answers to the questions:
Q1. Answer will depend on their reading from the thermometer.
Q2. The temperature of the objects inside the freezer must all be the same
because they are just exposed to the same condition. Their temperature
must also be equal to the temperature that was read from the thermometer.
Q3. Yes. When my finger got in contact with the object, heat was trasferred
from my finger to it.
Q4. Yes. Because my finger loses some amount of thermal energy (heat), so
that makes me feel the object cold.
Q5. No, the objects did not feel equally cold. This means that the objects
conduct heat differently. Some objects conduct heat more easily than the
others.
Q6. Answers depend on the objects or materials used.
Q7. Answers depend on the objects or materials used. The coolest should be
the best conductor.
Heat Transfer by Convection
Heat transfer by conduction can take place in solids and in fluids.
Convection, on the other hand, takes place only in fluids because it involves the
movement of particles themselves from one place to another.
In the module, heat from the bottom part of the water is transferred to the
upper part through convection. As the water gets warmer, it expands and become
lighter and so it rises at the top of the cooler water. This will then be replaced by the
cooler water that goes down from above, which will in turn become warmer and also
will rise to the top.
38
39. Activity
3 Move me up
Refer the students back to the conductivity table. Then ask them this question: Is
water a good conductor of heat? When they say no, ask them again: Then why
is it that when we heat the bottom of the pan containing water, the entire water
evenly gets hot so quickly? Allow students to give their answers/opinions. Be
aware of their misconceptions and make sure to go back to these during the
post activity discussion. These may include be the following:
a) The particles of the water travel faster than the particles of the solids.
b) Heat is distributed so fast throughout the water (without mentioning how).
Prepare the hot water prior to the activity. If available, better use an electric
thermal pot for convenience. Remind the students to take extra care when
pouring hot water into their containers.
In the absence of liquid food coloring, students can use the ‘water color’ that
they use for their arts activities. Make sure that the colored water is much cooler
than the tap water.
Remind the students not to bump the table nor shake the containers while doing
the activity.
The third and fourth steps are very crucial. Make sure that students follow them
accordingly and very carefully.
During the discussion, emphasize that following
- This module considers convection in water only. Convection does not only
take place in liquids. It also takes place in gases, like air. This will be
discussed when they study about weather and climate in Earth Science.
Sample answers to the questions:
Q1. Most of the colored liquid stayed at the bottom (a small amount mixed
immediately with the water).
Q2. When the container was placed on top of the other container with hot
water, the liquid (water and food coloring) at the bottom rises slowly to the
top.
Q3. Yes. Heat is transferred by the heated liquid that moved from the bottom
to the top.
39
40. You can extend the discussion by asking the students to describe what happens
to the cooler liquid on top.
You can use the illustration below to discuss about convection current.
warmer liquid cooler liquid
(goes up) (goes down)
Q4. Yes. The food coloring itself goes up.
Q5. Convection is a method by which heat is transferred through the liquid (or
gas) by the movement of its particles.
Q6. (Students can be asked to try out this part).
Heat Transfer by Radiation
Radiation refers to the emission of electromagnetic waves which carry
energy away from the surface of the emitting body or object. In this process, no
particles are involved, unlike in the processes of conduction and convection. This is
why radiation can take place even in vacuum.
All objects emit and absorb radiation, known as thermal or infrared radiation.
The amount of radiation emitted depends on the temperature of the emitting object.
The hotter an object is, the more infrared radiation it emits.
Heat transfer by radiation takes place between objects of different
temperatures, when the hotter object emits more energy than it absorbs from the
cooler object and the cooler object receives more energy than it emits.
Activity
4 Keep it cold
This is an unstructured type of activity wherein will be the one to design their own
experiment based on the given situation. They will construct their own problem,
write their own procedure, and gather and analyze their data to arrive at an
answer to the problem.
Not all surfaces absorb or reflect radiation equally. Some surfaces reflect or
absorb radiation better than others. The aim of this activity is to enable the
40
41. students to compare the abilities of the two different surfaces to absorb or reflect
radiation from the Sun or from a lighted electric bulb.
To motivate the students, ask them of their favourite cold drinks. Then ask them
how they usually make their drinks inside the container stay cold longer.
Prediction
At this point, there is no need yet to check whether their predictions are right or
wrong. They should find out themselves later when they do their investigation.
Sample Design
Testable Question: Which container will keep the temperature of the cold milk tea
longer?
Independent variable: The surface of the container (dull and black surface or
bright and shiny surface).
Controlled Variables: The amount of the liquid, the amount of light entering the
container (degree of exposure)
Dependent variables: The temperature of the liquid inside the container at equal
intervals of time
Sample Answers to the Questions
Q1. Dull black container
Q2. Dull black container
Q3. Bright shiny container
Q4. No.
41
42. Activity
5 All at once
These last two tasks are applications of what the students learned so far from
this module.
Task 1: What’s For Dinner?
3
1
2
Figure 6
Sample answers
What is the
Which object Which object
Description method of heat
gives off heat? receives heat?
transfer?
conduction/
1 broiling fish flame fish
convection
melting ice
2 sun Ice cream radiation
cream
42
43. What is the
Which object Which object
Description method of heat
gives off heat? receives heat?
transfer?
steam coming
out of the kettle
3 boiling water Air above convection
(with boiling
water)
Task 2
(Adapted from:
http://1e1science.files.wordpress.com/2009/08/13.pdf)
Below is a diagram showing the basic parts of the thermos bottle. Examine
the parts and the different materials used. Explain how these help to keep the liquid
inside either hot or cold for a longer period of time. Explain also how the methods of
heat transfer are affected by each material.
Stopper made of plastic or cork
(good insulator of heat/prevents
heat lost by conduction)
Silvered inner and outer glass wall (retains
heat inside the bottle/reflects heat that
escapes/prevents heat lost by radiation)
Vacuum between inner and outer wall
Hot (prevents heat to transfer to the other
liquid wall/prevents heat lost by conduction and
convection)
Outer casing made of plastic or
metal (retains heat inside)
Ceramic base (conducts heat poorly/
prevents heat lost by conduction)
Figure 7: Parts of a thermos bottle
43
44. Summary
Below is a list of concepts or ideas developed in this module.
Heat is a thermal energy that is in transit.
Heat transfer takes place between objects of different temperature.
When the object becomes warmer, it means that it gained energy. When it
becomes cooler, it means that it lost energy.
Heat energy always transfers from object of higher temperature to object of lower
temperature.
Heat can be transferred in three ways: conduction, convection, and radiation.
Conduction takes place due to the vibrating and colliding particles of objects that
are in contact. It can take place in solids, liquids, and gases but it takes place
best in solids.
Conductivity refers to the ability of the material to conduct heat. The higher the
conductivity of the object, the better it conducts heat.
Metals are mostly good conductors of heat.
Convection takes place in fluids because their particles can move around. In
convection, the heat is transferred by the particles themselves.
During convection, warmer liquid or gas expands and goes up while cooler liquid
or gas moves down.
Heat transfer by radiation does not need particles or a medium to take place.
Different surfaces emit or absorb heat differently. Dull and black surfaces absorb
heat better than bright and shiny surfaces.
PRE/POST TEST
The illustration on the right shows a lady making a
noodle soup using a pan made of metal. Use this
illustration to answer the questions below:
1. How does heat travel through the pan?
A. by radiation C. by dispersion
B. by convection D. by conduction
2. How does heat travel through the soup?
A. by radiation C. by dispersion
B. by convection D. by conduction
3. In what direction does heat travel through the
soup?
A. from top to bottom C. both A and B
B. from bottom to top D. neither A nor B
4. Which of the following explains why the lady is able to hold the handle of the pan
with her bare hands?
I. The handle is made of good insulator of heat.
II. The handle has low thermal conductivity.
III. The handle has high thermal expansion.
44
45. A. I and II only C. II and III only
B. I and III only D. I, II, and III
5. Which of the following methods of heat transfer is NOT taking place in the given
situation?
A. Conduction C. Radiation
B. Convection D. None of them
Answer Key
1. D
2. B
3. B
4. A
5. D
Links and References
Classroom Clipart. "Marine Life." [Online image] 23 October 2003.
http://classroomclipart.com/cgi-
bin/kids/imageFolio.cgi?direct=Animals/Marine_Life
http://coolcosmos.ipac.caltech.edu/cosmic_classroom/light_lessons/ther
mal/transfer.html
45
46. TEACHING GUIDE
Unit 3
MODULE
6 ELECTRICITY
In Module 5, students learned about heat as a form of energy that can be
transferred through conduction, convection and radiation. They identified the
conditions that are necessary for these processes to occur and performed activities
that allowed them to investigate the different modes of heat transfer.
Here, students will learn about another form of energy which is encountered
in everyday life, electricity. This is a familiar form of energy since it is the energy
required to operate appliances, gadgets, and machines, to name a few. Aside from
these manmade devices, the ever-present nature of electricity is demonstrated by
lightning and the motion of living organisms which is made possible by electrical
signals sent between cells. However, in spite of the familiar existence of electricity,
many people do not know that it actually originates from the motion of charges.
In this module, students will learn about the different types of charges and
perform activities that will demonstrate how objects can be charged in different ways.
They will also learn the importance of grounding and the use of lightning rods. At the
end of the module students will do an activity that will introduce them to simple
electric circuits.
Key questions for this module
What are the different types of charges?
How can objects be charged?
What is the purpose of grounding?
How do lighting rods work?
What constitutes a complete electrical circuit?
46
47. Activity
1 Charged interactions
Tell the students to follow the procedure described below. Take note that
discharging will occur once the sticky side of the tape comes into contact with
other objects. This will make it difficult for the students to perform the succeeding
parts of this activity.
Sample answers
1. Is there any sign of interaction between the tape and the finger?
The students will observe that the tape will be attracted to the finger.
2. Is there any sign of interaction between the tape and this object?
Once again, students will observe an attraction between the tape and the
object.
3. Do you observe any interaction?
The charged tapes will tend to push each other away, i.e. they are repelling
each other.
4. Drag a moistened sponge across the nonsticky side of the tapes and repeat
steps 5, 6 and 8. Do you still observe any interaction?
Interactions observed earlier will be greatly reduced or will be non-existent.
Discussion for Activity 1
Ask students to recall what they learned from previous modules about the
composition of matter. Emphasize that different materials have varying atomic
composition and lead them to the idea that this gives the materials different electrical
properties. One of which is the ability of a material to lose or gain electrons when
they come into contact with a different material through friction.
Discuss how the tape acquired a net charge when the tape was pulled
vigorously from the table in activity 1. Explain that the electrons from the table’s
surface were transferred to the tape and lead them to the difference between the two
types of charges, positive and negative. Then proceed to the description of charging
by friction.
Through the activity you can also introduce the law of conservation of charge
to the students by explaining that the negative charge acquired by the tape is equal
to the positive charge left on the table.
47
48. The Law of Conservation of Charge
Charges cannot be created nor destroyed, but can be
transferred from one material to another.
The total charge in a system must remain constant.
Ask students to describe the interactions they observed in the activity. You
may then introduce the concept of electric force which acts on charges. Explain that
an uncharged or neutral object cannot experience this force.
Let students differentiate between the interactions they observed in the
activity. This will lead them to identify the two kinds of electric forces, repulsive and
attractive. Then you may discuss the electrostatic law:
Electrostatic Law
Like charges repel and unlike charges attract.
Restate that electrical forces do not act on neutral objects. Then ask students
to explain how the neutral objects and the finger which did not acquire an extra
charge during the activity was able to interact with the charged tape. This will lead to
the concept of polarization which can be explained by the electrostatic law. When a
neutral object is placed near a charged object, the charges within the neutral object
are rearranged such that the charged object attracts the opposite charges within the
neutral object. The phenomenon is illustrated in Figure 3.
Figure 3. Polarization of a neutral object.
Let students recall what happened to the interactions after dragging a
moistened sponge on the surface of the tape. They will have noticed that the
interactions were gone or were greatly reduced. Ask them for possible explanations
then lead them to the concept of discharging which is the process of removing
excess charges on an object. You may then discuss grounding which occurs when
discharging is done by means of providing a path between the charged object and a
ground. Define the term ground as any object that can serve as an “unlimited”
source of electrons so that it will be capable of removing or transferring electrons
from or to a charged object in order to neutralize that object.
48
49. Conclude the discussion for the activity by asking students to explain how
grounding is important for electrical devices and equipment.
Activity
2 To charge or not to charge
Tell the students to follow the procedure accordingly. Take note that charging the
balloon by rubbing it against the hair will only work when the hair is completely
dry. If the hair is slightly wet, the water will prevent the transfer of electrons
between the balloon and the hair.
Sample answers
Q1. The hair will give up electrons thus the balloon will acquire a negative
charge.
Q2. Polarization occurred in step 3. When the charged balloon was placed near
the neutral soft drink can, the charges in the can were rearranged in such a
way that the negative charges migrated towards the edge of the can that
was farther from the balloon.
Q3. By touching the can, a path was provided for the charges to be transferred.
This is an example of grounding.
Q4. Ideally, the soft drink can will be charged. The hand provided a path for
negative charges to move away from the can thus when the hand was
removed the can was left with a net charge.
Q5. The soft drink can has acquired a net positive charge.
Discussion for Activity 2
Discuss the difference between conductors and insulators and let students
enumerate different examples of each. Ask them to identify which materials in activity
2 are conductors and which are insulators.
Let students describe how the can was charged and introduce the process of
charging by induction, where an object can be charged without actual contact to
any other charged object.
In the next activity the students will investigate another method of charging
which depends on the conductivity of the materials.
49
50. Activity
3 Pass the charge
Sample answers
Q1. Ideally, the can in the second set up will be charged since excess charges
has been transferred to it from the can in the first set up.
Q2. The contact between the cans is necessary since it is this contact that has
provided a path for the charges to be transferred. This is possible because
both cans are good electrical conductors.
Q3. The can in the second set up has acquired a net positive charge.
Discussion for Activity 3
The charging process performed by students in Activity 3 is called charging by
conduction which involves the contact of a charged object to a neutral object. By
this time, students have already learned the three types of charging processes. In
the next activity they will investigate how lightning occurs, a natural phenomenon
which is essentially a result of electrical charging.
Activity
4 When lighting strikes
Ask students to use reference books or the internet to answer the following
questions. Remind students to check the reliability of internet sources before using
its content.
What is a lightning?
Where does a lightning originate?
How ‘powerful’ is a lightning bolt?
Can lightning’s energy be caught stored, and used?
How many people are killed by lightning per year?
What can you do to prevent yourself from being struck by lightning?
Some people have been hit by lightning many times. Why have they
survived?
How many bushfires are started by lightning strikes?
‘Lightning never strikes twice in the same place.’ Is this a myth or a fact?
What are lightning rods? How do they function?
Discussion for Activity 4
After performing activity 5, students will be aware how much energy is
involved when lightnings strike. Lead them to the idea that no matter how much
50