
Recommended
More Related Content
What's hot
What's hot (19)
Viewers also liked
Viewers also liked (17)
Similar to How new media technologies were used in research, planning and evaluation
Similar to How new media technologies were used in research, planning and evaluation (20)
More from 08tparnell
More from 08tparnell (20)
Recently uploaded
Recently uploaded (20)
How new media technologies were used in research, planning and evaluation
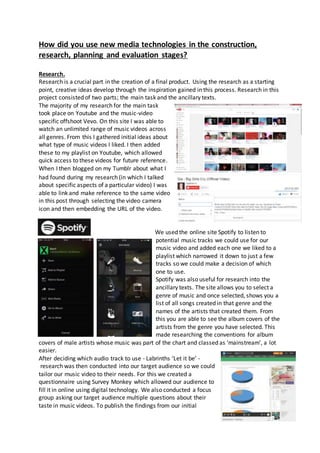
- 1. How did you use new media technologies in the construction, research, planning and evaluation stages? Research. Research is a crucial part in the creation of a final product. Using the research as a starting point, creative ideas develop through the inspiration gained in this process. Research in this project consisted of two parts; the main task and the ancillary texts. The majority of my research for the main task took place on Youtube and the music-video specific offshoot Vevo. On this site I was able to watch an unlimited range of music videos across all genres. From this I gathered initial ideas about what type of music videos I liked. I then added these to my playlist on Youtube, which allowed quick access to these videos for future reference. When I then blogged on my Tumblr about what I had found during my research (in which I talked about specific aspects of a particular video) I was able to link and make reference to the same video in this post through selecting the video camera icon and then embedding the URL of the video. We used the online site Spotify to listen to potential music tracks we could use for our music video and added each one we liked to a playlist which narrowed it down to just a few tracks so we could make a decision of which one to use. Spotify was also useful for research into the ancillary texts. The site allows you to select a genre of music and once selected, shows you a list of all songs created in that genre and the names of the artists that created them. From this you are able to see the album covers of the artists from the genre you have selected. This made researching the conventions for album covers of male artists whose music was part of the chart and classed as ‘mainstream’, a lot easier. After deciding which audio track to use - Labrinths ‘Let it be’ - research was then conducted into our target audience so we could tailor our music video to their needs. For this we created a questionnaire using Survey Monkey which allowed our audience to fill it in online using digital technology. We also conducted a focus group asking our target audience multiple questions about their taste in music videos. To publish the findings from our initial
- 2. questionnaire onto our blogs on Tumblr (which was displayed in the form of a pie chart in Microsoft Office) I used the publishing site called Slideshare. This site allows you to publish documents such as Word and PowerPoint through an embed code which can then be pasted into other sites such as Tumblr. We then used a DSLR camera to film our focus group. This allowed us to gather a lot of information and quickly ensuring everything that was said was recorded. I feel the use if the DSLR camera was hugely successful as a pose to just asking the questions in the focus group and noting what each individual said. We briefly used Adobe Premier Pro to edit this footage together and Youtube was then used again to post this video to our blogs on Tumblr. Planning. After choosing a sound track to use for our music video we then had to send an email to the record label requesting the rights to use the song for educational purposes only and explain that our video would not be released to a large audience. As expected we did not receive a reply from the record label Sony. We then created a storyboard by drawing each scene, which was later scanned into the computer to make our animatic. Microsoft paint was initially used to crop each scene, as there were multiple ones on each page. These were then imported into Adobe Premier Pro and laid over the sound track. Each scene was edited in time to the beat of the sound track and although this was a very basic mock-up of our music video, using sketched drawings, our animatic had been extremely useful as a visual guide to follow throughout the production of our music video from filming to editing. Construction. Throughout the construction of both the main task and the ancillary texts I was constantly emailing drafts of my work, asking people for their opinion on what I had created. I asked whether they agreed or not with specific decisions I had made and often gave them two drafts of the same products, which were slightly different and asked which one they preferred. From their response I then either changed and improved my product or kept it the same according to their feedback. When shooting our music video for the main task, we ensured we shot appropriately for the edit. This included thinking carefully about the composition of the shot, the framing of the
- 3. shot and using the appropriate camera and lens for each shot. For the close up shots of our actors, we used a lens that had a short focal length of f1.8. We did this to achieve a shallow depth of field, which enhanced the quality of our shot, as the main focal point was our actor whilst the background was out of focus. For our wider shots, we used a Nikon DSLR camera on the manual setting, which had a normal focal length, to focus on the subject within the shot whilst the background was still in focus allowing for the setting to be established whilst the main focus was still on the subject. Choosing between each camera lens to use depended entirely on the composition of the shot and knowing which shots were going to be overlaid and cropped. We would then use each lens and frame each shot accordingly. For example in the scene in which our actors meet, we used the camera with a normal focal length and wide angle whilst placing the camera in the centre where they cross over. Furthermore in the split screens we tried to get our actors as central as possible to ensure both frames would fit on screen. Evaluation. Evaluating my main task involved using several social media sites such as Facebook, Youtube and Twitter. By sharing the URL code (that by clicking took you straight to our music video) on these social media sites we were able to ask for and gain audience feedback. By using social media as a means of gathering feedback, we were able to have access to a wide audience who gave their honest opinion without feeling pressured to say ‘the right thing’ because we were not physically present. By screen shotting each comment we were then able to evaluate these and explain what we have learnt from this in Microsoft PowerPoint and present these in the form of an animation. To answer another evaluation question we decided to do this as a director’s commentary which involved using another new and developing media technology that is the apple IPhone. On this device there is software installed known as ‘voice memos’. This allows you to record audio and by using Apples ‘air drop’ we were able to transfer this to my Apple Mac for editing. The audio recorded was then laid over our music video and certain scenes that the audio was describing were paused to illustrate what was being said. Again this was exported as an MP4 file and uploaded to Youtube. To evaluate my ancillary texts I have used the online site ‘Prezi’. Prezi is presentation software that allows you to create a visual presentation that links such as Youtube videos and posts in Tumblr can be embedded into to illustrate your text. By using this software I have shown I have good creative skill using new media technologies as this is a more complex and interesting presentation in comparison to software such as Microsoft PowerPoint, which is relatively basic.