SlideShare a Scribd company logo
1 of 78
Download to read offline
LogixPro Relay Logic Lab                                                                               Page 1 of 7


                                                                   LogixPro
                                                                   Relay Logic
                                                                   Introductory Lab


        RSLogix Relay Logic Instructions

        This exercise is designed to familiarize you with the operation of LogixPro and to step you
        through the process of creating, editing and testing simple PLC programs utilizing the Relay
        Logic Instructions supported by RSLogix.


        From the Simulations Menu at the top of the screen, Select the I/O Simulation and ensure that
        the User Instruction Bar shown above is visible.


        The program editing window should contain a single rung. This is the End of Program rung and
        is always the last rung in any program. If this is the only rung visible then your program is
        currently empty.

        If your program is not empty, then click on the File menu entry at the top of the screen and select
        "New" from the drop-down list. A dialog box will appear asking for you to select a Processor
        Type. Just click on "OK" to accept the default TLP LogixPro selection.


        Now maximize the ProSim-II Simulation Window


file://C:Program%20FilesTheLearningPitLogixProdocnrlintro-rl.html                                 1/20/2003
LogixPro Relay Logic Lab                                                                              Page 2 of 7


        The I/O Simulator

        The simulator screen shown above, should now be in view. For this exercise we will be using the
        I/O simulator section, which consists of 32 switches and lights. Two groups of 16 toggle switches
        are shown connected to 2 Input cards of our simulated PLC. Likewise two groups of 16 Lights
        are connected to two output cards of our PLC. The two input cards are addressed as "I:1" and
        "I:3" while the output cards are addressed "O:2" and "O:4".

        Use your mouse to click on the various switches and note the change in the status color of the
        terminal that the switch is connected to. Move your mouse slowly over a switch, and the mouse
        cursor should change to a hand symbol, indicating that the state of switch can be altered by
        clicking at this location. When you pass the mouse over a switch, a "tool-tip" text box also
        appears and informs you to "Right Click to Toggle Switch Type". Click your right mouse button
        on a switch, and note how the switch type may be readily changed.

        RSLogix Program Creation

        Collapse the I/O simulation screen back to it's normal size by clicking on the same (center)
        button you used to maximize the simulation's window. You should now be able to see both the
        simulation and program windows again. If you wish, you can adjust the relative size of these
        windows by dragging the bar that divides them with your mouse.

        I want you to now enter the following single run program which consists of a single Input
        instruction (XIC - Examine If Closed) and a single Output instruction (OTE - Output Energize).
        There's more than one way to accomplish this task, but for now I will outline what I consider to
        be the most commonly used approach.


file://C:Program%20FilesTheLearningPitLogixProdocnrlintro-rl.html                                1/20/2003
LogixPro Relay Logic Lab                                                                                   Page 3 of 7


              First click on the "New Rung" button in the User Instruction Bar. It's the first button on the
        very left end of the Bar. If you hold the mousepointer over any of these buttons for a second or
        two, you should see a short "ToolTip" which describes the function or name of the instruction
        that the button represents.


        You should now see a new Rung added to your program as shown above, and the Rung number
        at the left side of the new rung should be highlighted. Note that the new Rung was inserted
        above the existing (END) End Of Program Rung. Alternatively you could have dragged (left
        mouse button held down) the Rung button into the program window and dropped it onto one of
        the locating boxes that would have appeared.


              Now click on the XIC instruction with your left mouse button (Left Click) and it will be added
        to the right of your highlighted selection. Note that the new XIC instruction is now selected
        (highlighted). Once again, you could have alternatively dragged and dropped the instruction into
        the program window.

        If you accidentally add an instruction which you wish to remove, just Left Click on the
        instruction to select it, and then press the "Del" key on your keyboard. Alternatively, you
        may right click on the instruction and then select "Cut" from the drop-down menu that
        appears.


             Left Click on the OTE output instruction and it will be. added to the right of your current
        selection.


        Double Click (2 quick left mousebutton clicks) on the XIC instruction and a textbox should
        appear which will allow you to enter the address (I:1/0) of the switch we wish to monitor. Use the
        Backspace key to get rid of the "?" currently in the textbox. Once you type in the address, click
        anywhere else on the instruction (other than the textbox) and the box should close.

        Right Click on the XIC instruction and select "Edit Symbol" from the drop-down menu that
        appears. Another textbox will appear where you can type in a name (Switch-0) to associate with
        this address. As before, a click anywhere else will close the box.


file://C:Program%20FilesTheLearningPitLogixProdocnrlintro-rl.html                                     1/20/2003
LogixPro Relay Logic Lab                                                                                Page 4 of 7


        Enter the address and symbol for the OTE instruction and your first RSLogix program will now
        be complete. Before continuing however, Double check that the addresses of your instructions
        are correct.


        Testing your Program

        It's now time to "Download" your program to the PLC. First click on the "Toggle" button at the top
        right corner of the Edit Panel which will bring the PLC Panel into view.


        Click on the "DownLoad" button to initiate the downloading of your program to the PLC. Once
        complete, click inside the "RUN" option selection circle to start the PLC scanning.

        Enlarge the Simulation window so that you can see both the Switches and Lamps, by dragging
        the bar that separates the Simulation and Program windows to the right with your mouse. Now
        click on Switch I:1/00 in the simulator and if all is well, Lamp O:2/00 should illuminate.

        Toggle the Switch On and Off a number of times and note the change in value indicated in the
        PLC Panel's status boxes which are being updated constantly as the PLC Scans. Try placing the
        PLC back into the "PGM" mode and then toggle the simulator's Switch a few times and note the
        result. Place the PLC back into the "Run" mode and the Scan should resume.

        We are usually told to think of the XIC instruction as an electrical contact that allows electrical
        flow to pass when an external switch is closed. We are then told that the OTE will energize if the
        flow is allowed to get through to it. In actual fact the XIC is a conditional instruction which tests
        any bit that we address for Truth or a 1.


        Editing your Program

        Click on the "Toggle" button of the PLC Panel which will put the PLC into the PGM mode and
        bring the Edit Panel back into view.

        Now add a second rung to your program as shown below. This time instead of entering the
        addresses as you did before, try dragging the appropriate address which is displayed in the I/O
        simulation and dropping it onto the instruction.

        Note that the XIO instruction which Tests for Zero or False has it's address highlighted in yellow.
        This indicates that the instruction is True, which in the case of an XIO, means that the bit
        addressed is currently a Zero or False.


file://C:Program%20FilesTheLearningPitLogixProdocnrlintro-rl.html                                  1/20/2003
LogixPro Relay Logic Lab                                                                             Page 5 of 7


        This is probably a good time to practice your dragNdrop skills. Try moving instructions from rung
        to rung by holding the left mouse button down while over an instruction, and then while keeping
        the mouse button down, move the mouse (and instruction) to a new location. Try doing the same
        with complete rungs by dragging the box at the left end of the rung and dropping it in a new
        location.

        Once you feel comfortable with dragNdrop, ensure that your program once again looks like the
        one pictured above, Now download your program to the PLC and place the PLC into the Run
        Mode. Toggle both Switch-0 and Switch-1 on and off a number of times and observe the effects
        this has on the lamps. Ensure that you are satisfied with the operation of your program before
        proceeding further.


        Stop/Start utilizing OTL and OTU

        For this exercise we need two Normally Open momentary switches. Using your right mouse
        button, click on switch "I:1/2" and "I:1/3", changing them to N.O. pushbuttons. Now add the
        following two rungs to your program. Once you have the rungs entered correctly, download and
        run your modified program.


        Activate the Start and Stop switches and ensure that the OTL and OTU output instructions are
        responding as outlined in your text. Once you have the lamp ON, could you turn it off if power
        was lost in the Stop Switch circuit?

        Now modify your program so that it operates correctly when you substitute the N.O. Stop switch
        (I:1/03) with a Normally Closed Switch. If we now lost power on the N.C. Stop switch circuit, what
        would happen to the state of Lamp (O:2/02)?


        Emulating Standard Stop/Start Control


file://C:Program%20FilesTheLearningPitLogixProdocnrlintro-rl.html                               1/20/2003
LogixPro Relay Logic Lab                                                                               Page 6 of 7


        Erase your program by selecting "New" from the "File" menu selection at the top of the screen.
        When the dialog box appears just click on "OK" to select the default PLC type. Now enter the
        following program. To enter a branch, just drag the branch (button) onto the rung and then insert
        or drag instructions into the branch.


        Before you download and run this program, take a careful look at our use of a XIC instruction to
        test the state of the N.C. Stop Switch. When someone presses the Stop Switch, will bit I:1/04 go
        True or False? Will the XIC instruction go True or False when the Switch is pressed? Is this the
        logic we are seeking in this case? .... Run the program and see if you're right! .... If we loose
        power in the Stop Switch circuit, what state will the lamp go to? .... Why do you think that most
        prefer this method rather than the OTL/OTU method of implementing Stop/Start Control?


        Output Branching with RSLogix

        Modify your program so that it matches the following.


        Download and Run the program. Operate the Stop and Start switches several times with Switch-
        0 open, and again with Switch-0 closed. Remove the XIC instruction from the Output branch and
        note what happens to Lamp-3 when you Start and Stop the circuit. Try moving the Lamp-3 OTE
        instruction so that it is in series with the Lamp-2 OTE instruction. Download, Run and observe
        how both lamps still light even with the empty branch (short?) in place. It may look like an
        electrical circuit but in fact we know that it isn't and therefore obeys a somewhat different set of
        rules. Remove the empty branch, Download, Run and see if this has any effect on the logic or
        operation of the rung.


        Controlling One Light from two Locations

        Create, enter and test a program which will perform the common electrical function of controlling
        a light from two different locations. Clear your program and utilize toggle switch (I:1/00) and


file://C:Program%20FilesTheLearningPitLogixProdocnrlintro-rl.html                                 1/20/2003
LogixPro Relay Logic Lab                                                                                Page 7 of 7


        switch (I:1/01) to control Lamp (O:2/00)... (Hint: If both switches are On or if both switches are
        Off, then the Lamp should be On! This of course is just one approach to solving this problem)


        ......


file://C:Program%20FilesTheLearningPitLogixProdocnrlintro-rl.html                                  1/20/2003
LogixPro Door Simulation Lab                                                                            Page 1 of 5


                                                               LogixPro
                                                               Door Simulation
                                                               Lab
                                                               Utilizing Relay
                                                               Logic


            The ProSim-II Door Simulation

            From the Simulations Menu at the top of the screen, Select the Door Simulation.

            Take the time to familiarize yourself with the components used in the Door system, and
            take particular note of the current state of the limit switches. When the door is in the
            closed position, both limit switches are in their activated state (Not Normal). Run your
            mouse over each switch, and you should see a tool-tip text box appear, which denotes
            that the selected switch is wired using a set of Normally Open contacts. With the door
            fully closed, what signal level would you expect to see at the limit switch inputs I:1/03
            and I:1/04?

            To confirm your assessment of the current limit switch states, place the PLC into the
            RUN mode which will initiate scanning. Now open the Data Table display by clicking on
            the Data Table icon located on the toolbar (3rd from right) at the top of the screen.

            When you have the Data Table showing, select the "Input Table" from the drop down
            Table list box. You should now be able to see the current state of each bit associated
            with input card I:1. You should also note that bit I:1/02 is also in a High or True state.
            Use your mouse to press the Stop switch on the Control Panel a few times, and note the
            results. Don't continue on with the exercise until you are confident that you understand
            the rational of the observed results.


file://C:Program%20FilesTheLearningPitLogixProdocdldl-rl.html                                      1/22/2003
LogixPro Door Simulation Lab                                                                         Page 2 of 5


            Student Programming Exercise #1:

            In this exercise we want you to apply your knowledge of Relay Logic Instructions to
            design a program which will control the ProSim-II Door. The Door System includes a
            Reversible Motor, a pair of Limit Switches and a Control Panel, all connected to your
            PLC. The program you create will monitor and control this equipment while adhering to
            the following criteria:

                  In this exercise the Open and Close pushbuttons will be used to control the
                  movement of the door. Movement will not be maintained when either switch is
                  released, and therefore the Stop switch is neither required nor used in this
                  exercise. However, all other available Inputs and Outputs are employed in this
                  exercise.

                  Pressing the Open Switch will cause the door to move upwards (open) if not
                  already fully open. The opening operation will continue as long as the switch is
                  held down. If the switch is released, or if limit switch LS1 opens, the door
                  movement will halt immediately.

                  Pressing the Close Switch will cause the door to move down (close) if not already
                  fully closed. The closing operation will continue as long as the switch is held
                  down. If the switch is released, or if limit switch LS2 closes, the door movement
                  will halt immediately.

                  If the Door is already fully opened, Pressing the Open Switch will Not energize the
                  motor.

                  If the Door is already fully closed, Pressing the Close Switch will Not energize the
                  motor.

                  Under no circumstance will both motor windings be energized at the same time.

                  The Open Lamp will be illuminated if the door is in the Fully Open position.

                  The Shut Lamp will be illuminated if the door is in the Fully Closed position.


            It is your responsibility to fully design, document, debug, and test your Program. Avoid
            the use of OTL or OTU latching instructions, and make a concerted effort to minimize the
            number of rungs employed.

            Ensure that you have made effective use of both instruction and rung comments to
            clearly document your program. All I/O components referenced within your program
            should be clearly labeled, and rung comments should be employed to add additional
            clarity as required.


            Student Programming Exercise #2:


file://C:Program%20FilesTheLearningPitLogixProdocdldl-rl.html                                      1/22/2003
LogixPro Door Simulation Lab                                                                           Page 3 of 5


            In this exercise we want you to apply your knowledge of Relay Logic Instructions to
            design a program which will maintain the appropriate door movement once initiated by
            the operator. The Opening or Closing operation of the door will continue to completion
            even if the operator releases the pushbutton which initiated the movement. The program
            will adhere to the following criteria:

                  Door movement will halt immediately when the Stop Switch is initially pressed,
                  and will remain halted if the switch is released.

                  Pressing the Open Switch will cause the door to Open if not already fully open.
                  The opening operation will continue to completion even if the switch is released.

                  Pressing the Close Switch will cause the door to Close if not already fully shut.
                  The closing operation will continue to completion even if the Switch is released.

                  If the Door is already fully opened, Pressing the Open Switch will Not energize the
                  motor.

                  If the Door is already fully closed, Pressing the Close Switch will Not energize the
                  motor.

                  Under no circumstance will both motor windings be energized at the same time.

                  The Ajar Lamp will be illuminated if the door is NOT in either the fully closed or
                  fully opened position.

                  The Open Lamp will be illuminated if the door is in the Fully Open position.

                  The Shut Lamp will be illuminated if the door is in the Fully Closed position.


            It is your responsibility to fully design, document, debug, and test your Program. Avoid
            the use of OTL or OTU latching instructions, and make a concerted effort to minimize the
            number of rungs employed.

            As before, ensure that you have made effective use of both instruction and rung
            comments to clearly document your program.


            Student Programming Exercise #3:

            In this exercise we want to introduce you to a simple programming technique for adding
            a bit of "Flash" to your program. We want you to make use of the PLC's Free Running
            Timer which can be viewed in the Data Table Display at location S2:4. This integer word
            contains a count which is incremented continuously by the PLC when it is in the Run
            mode, and it can come in quite handy at times for variety of purposes. In this exercise
            we want you to utilize this word as follows:

            With the PLC in the Run mode, Display word S2:4 utilizing the Data Table display.
            Ensure that the Radix is set to Binary so that you can view the individual bits within the
            word. You should see a binary count in progress where the rate of change of each bit is


file://C:Program%20FilesTheLearningPitLogixProdocdldl-rl.html                                      1/22/2003
LogixPro Door Simulation Lab                                                                               Page 4 of 5


            directly related to it's position within the word. Bit 0 will have the highest rate, while Bit 1
            will be 1/2 as fast as Bit 0, and Bit 2 half as fast as 1 etc. etc.

            We want you to add a Lamp Flasher to your program by monitoring the state of one of
            these bits with an XIC instruction. I'm going to suggest using Bit 4 for this purpose, but
            depending upon the speed of your computer you may elect to substitute another Bit.
            With an actual AB PLC, the rate is consistent, but with LogixPro it varies from computer
            to computer.

            Place an XIC instruction addressed to S:4/4 on the rung which controls either the Open
            or Shut Lamp in your previous program. Now download and Run this modified program
            to see the flashing effect achieved. The Lamp should flash at a reasonable rate
            whenever your program energizes the selected Lamp.

            Now modify your program so that the following criteria is met:

                   If the Door is fully open, the Open lamp will be energized but not flashing as was
                   the case before.

                   If the Door is opening, the Open lamp will flash while the door is in motion.

                   If the Door is fully closed, the Shut lamp will be energized but not flashing as was
                   the case before.

                   If the Door is closing, the Shut lamp will flash while the door is in motion.

                   The Ajar Lamp will flash if the door is stationary, and is not in the fully open or
                   fully closed position. The Ajar Lamp will flash at a slower rate (1/4) then the other
                   lamps.

                   The Ajar Lamp will be illuminated in a steady state if the door is in motion.


            As before, ensure that you have made effective use of both instruction and rung
            comments to clearly document your program.


            Supplemental Programming Exercise #4:

            We do not recommend proceeding with this exercise if you do not have an instructor or
            experienced PLC programmer to call upon for assistance.

            In this exercise we want you to modify your program so that it adheres to this additional
            criteria:

                   If the door is currently opening, pressing the Close Switch will immediately halt
                   movement. Door movement will remain halted when the switch is released.

                   If the door is currently closing, pressing the Open Switch will immediately halt
                   movement. Door movement will remain halted when the switch is released.


file://C:Program%20FilesTheLearningPitLogixProdocdldl-rl.html                                            1/22/2003
LogixPro Door Simulation Lab                                                                         Page 5 of 5


                     Once movement is halted by the either of the foregoing actions, the operating
                     criteria associated with the previous exercise will again take effect.

                     The utilization of Binary or Integer Table bits to Flag specific conditions within
                     your program would be appropriate. Also, the retentive OTL and OTU instructions
                     may be utilized freely at your discretion.


            ......


file://C:Program%20FilesTheLearningPitLogixProdocdldl-rl.html                                       1/22/2003
LogixPro - Silo Simulation Lab                                                                   Page 1 of 3


                                                                  LogixPro
                                                                  The Silo Lab
                                                                  Utilizing Relay
                                                                  Logic


            The ProSim-II Silo Simulation

            From the Simulations Menu at the top of the screen, Select the Silo Simulation


            Exercise #1 -- Continuous Operation

            Completely design and de-bug a ladder control circuit which will automatically position
            and fill the boxes which are continuously sequenced along the conveyor. Ensure that the
            following details are also met:

                   The sequence can be stopped and re-started at any time using the panel
                   mounted Stop and Start switches.

                   The RUN light will remain energized as long as the system is operating
                   automatically.

                   The RUN light, Conveyor Motor and Solenoid will de-energize whenever the
                   system is halted via the STOP switch.

                   The FILL light will be energized while the box is filling.


file://C:Program%20FilesTheLearningPitLogixProdocslsl-rl.html                               1/22/2003
LogixPro - Silo Simulation Lab                                                                            Page 2 of 3


                     The FULL light will energize when the box is full and will remain that way until the
                     box has moved clear of the prox-sensor.


            Exercise #2 -- Container Filling with Manual Restart

            Alter or re-write your program so that it incorporates the following changes:

                     Stop the conveyor when the right edge of the box is first sensed by the prox-
                     sensor.

                     With the box in position and the conveyor stopped, open the solenoid valve and
                     allow the box to fill. Filling should stop when the Level sensor goes true.

                     The FILL light will be energized while the box is filling.

                     The FULL light will energize when the box is full and will remain that way until the
                     box has moved clear of the prox-sensor.

                     Once the box is full, momentarily pressing the Start Switch will move the box off
                     the conveyor and bring a new box into position. Forcing the operator to hold the
                     Start button down until the box clears the prox-sensor is not acceptable.


            Exercise #3 -- Selectable Mode of Operation

            Alter or re-write your program so that the panel mounted Selector switch can be utilized
            to select one of 3 different modes of operation. The 3 modes shall operate as follows:

                     When the selector switch is in position "A", the system shall operate in the
                     "Continuous" mode of operation. This is the mode of operation which was used in
                     Exercise #1.

                     When the selector switch is in position "B", the system shall operate in the
                     "Manual Restart" mode of operation. This is the mode of operation which was
                     used in Exercise #2.

                     When the selector switch is in position "C", the system shall operate in the "Fill
                     Bypass" mode of operation. In this mode, the boxes will simply move down the
                     conveyor continuously and bypass the fill operation. As in the other modes, the
                     Start and Stop pushbuttons will control the conveyor motion and the Run Lamp
                     will operate as expected.


            ......


file://C:Program%20FilesTheLearningPitLogixProdocslsl-rl.html                                         1/22/2003
LogixPro - Silo Simulation Lab                                        Page 3 of 3


file://C:Program%20FilesTheLearningPitLogixProdocslsl-rl.html    1/22/2003
LogixPro - Introductory Timer Lab                                                                    Page 1 of 7


                                                                 LogixPro
                                                                 Introduction To
                                                                 RSLogix Timers


            The TON Timer .... (Timer ON Delay)

                  From the LogixPro Simulations Menu, select the I/O Simulation.
                  Clear out any existing program by selecting the "New" entry in the File menu, and
                  then select the "Clear Data Table" entry in the Simulations menu.
                  Now enter the following program being careful to enter the addresses exactly as
                  shown.
                  Confirm that you have entered the number 100 as the timer's preset value. This
                  value represents a 10 second timing interval (10x0.1) as the timebase is fixed at
                  0.1 seconds:


                  Once you have your program entered, and have ensured that it is correct,
                  download it to the PLC.
                  Ensure that Switch I:1/0 is Open, and then place the PLC into the Run mode.
                  Right click on the Timer instruction, and select "GoTo DataTable" from the drop-


file://C:Program%20FilesTheLearningPitLogixProdocntmrintro-tmr.html                             1/22/2003
LogixPro - Introductory Timer Lab                                                                      Page 2 of 7


                  down menu.
                  Note the initial value of timer T4:1's accumulator and preset in the spaces below.
                  Also indicate the state of each of the timer's control bits in the spaces provided:

                  Initial State (Switch I:1/0=Open):
                  T4:1.ACC = _____ T4:1.PRE = ______ T4:1/EN = ____ T4:1/TT = ____ T4:1/DN
                  = ____

                  Close switch I:1/0, and carefully observe the incrementing of the timer's
                  accumulator, and the state of each of it's control bits.
                  Once the Timer stops incrementing, note the final value of timer T4:1's
                  accumulator, preset, and the state of it's control bits below:

                  Final State (Switch I:1/0=Closed):
                  T4:1.ACC = _____ T4:1.PRE = ______ T4:1/EN = ____ T4:1/TT = ____ T4:1/DN
                  = ____

                  Toggle the state of switch I:1/0 a number of times, and observe the operation of
                  the Timer in both the DataTable display and in the Ladder Rung program display.
                  Confirm that when the rung is taken false, the accumulator and all 3 control bits
                  are reset to zero. This type of timer is a non-retentive instruction, in that the truth
                  of the rung can cause the accumulator and control bits to be reset (=0).

                  Conclusions:
                  Use the TON instruction to turn an output on or off after the timer has been on for
                  a preset time interval. This output instruction begins timing when its rung goes
                  "true". It waits the specified amount of time (as set in the PREset), keeps track of
                  the accumulated intervals which have occurred (ACCumulator), and sets the DN
                  (done) bit when the ACC (accumulated) time equals the PRESET time.

                  As long as rung conditions remain true, the timer adjusts its accumulated value
                  (ACC) each evaluation until it reaches the preset value (PRE). The accumulated
                  value is reset when rung conditions go false, regardless of whether the timer has
                  timed out.


            Cascaded TON Timers

                  Insert a new rung containing a second timer just below the first rung as shown
                  below. This second timer T4:2 will be enabled when the first timer's Done bit
                  T4:1/DN goes true or high (1).


file://C:Program%20FilesTheLearningPitLogixProdocntmrintro-tmr.html                                   1/22/2003
LogixPro - Introductory Timer Lab                                                                       Page 3 of 7


                  Once you have completed this addition to your program, download your program
                  to the PLC and select RUN.
                  Toggle the state of switch I:1/0 to ON and observe the operation of the timers in
                  your program.
                  Bring the DataTable display into view, and pay particular attention to the way in
                  which the timers are cascaded (one timer starts the next).
                  Try changing the value of one of the timer presets by double clicking on the
                  preset value in the DataTable display, and then entering a new value.
                  Run the timers through their timing sequence a number of times. Don't move on
                  until you are satisfied that the timers are working as you would expect

                  In this exercise we have utilized just two timers, but there is nothing stopping us
                  from sequencing as many timers as we wish. The only thing to remember is; to
                  use the DN (done) bit of the previous timer to enable the next timer in the
                  sequence. Obviously locating the timers on consecutive rungs, and employing
                  consecutive numbering will make such a program much easier to read and
                  trouble-shoot.


            Self Resetting Timers

                  Place the PLC into the PGM mode, and modify the first rung of your program as
                  depicted below.


                  Once you have modified your program, download it to the PLC and place the PLC
                  into the RUN mode.
                  Close switch I:1/0 and observe the operation of the timers. The timers should now
                  be operating in a continuous loop with Timer1 starting Timer2, and then when
                  Timer2 is done, Timer1 is reset by Timer2's done bit. As before, when Timer1 is
                  reset, it in turn resets Timer2 which causes Timer2's done to go low (T4:2/DN=0).


file://C:Program%20FilesTheLearningPitLogixProdocntmrintro-tmr.html                                1/22/2003
LogixPro - Introductory Timer Lab                                                                     Page 4 of 7


                  Once Timer2's done bit is low, the sequence is back to where it originally began,
                  and the timing sequence will start over once again on the very next scan.
                  Remove the first instruction (switch XIC I:1/0) from rung zero of your program.
                  Download and RUN this modified version of your program
                  Does the timing operation continuously sequence as before? It should!
                  Can you stop the timing sequence? Not without taking the PLC out of the RUN
                  mode! In many applications there may never be a need to stop such a timing
                  sequence, so a switch might not be used or needed.

                  In this exercise we cascaded two timers, but as before there is nothing to stop us
                  from cascading as many timers as we wish. The thing to remember here is; utilize
                  the DN (XIC or "NOT"done) bit of the last timer in the sequence to reset the first
                  timer in the sequence. Once again, consecutive rungs, and numbering will make
                  a program much easier to read and trouble-shoot.


            The TOF Timer .... (Timer OFF Delay)

                  In Allen Bradley PLC programming, the TON timer is by far the most commonly
                  used type of timer. Most people consider TON timers to be simple to use and
                  understand. In comparison, many people find the operation of the Allen Bradley
                  TOF (Timer OFF delay) timer to be less intuitive, but I'm going to let you decide
                  for yourself.

                  Make sure that switch I:1/0 is Closed, and then enter or modify your existing
                  program to match the one shown below.


                  Once you have your program entered, and have ensured that it is correct,
                  download it to the PLC.
                  Ensure that Switch I:1/0 is Closed, and then place the PLC into the Run mode.
                  Right click on the Timer instruction, and select "GoTo DataTable" from the drop-
                  down menu.


file://C:Program%20FilesTheLearningPitLogixProdocntmrintro-tmr.html                              1/22/2003
LogixPro - Introductory Timer Lab                                                                    Page 5 of 7


                  Note the initial value of timer T4:1's accumulator and preset in the spaces below.
                  Also indicate the state of each of the timer's control bits in the spaces provided:

                  Initial State (Switch I:1/0=Closed):
                  T4:1.ACC = _____ T4:1.PRE = ______ T4:1/EN = ____ T4:1/TT = ____ T4:1/DN
                  = ____

                  Open switch I:1/0, and carefully observe the incrementing of the timer's
                  accumulator, and the state of each of it's control bits.
                  Once the Timer stops incrementing, note the final value of timer T4:1's
                  accumulator, preset, and the state of it's control bits below:

                  Final State (Switch I:1/0=Open):
                  T4:1.ACC = _____ T4:1.PRE = ______ T4:1/EN = ____ T4:1/TT = ____ T4:1/DN
                  = ____

                  Toggle the state of switch I:1/0 a number of times, and observe the operation of
                  the Timer in both the DataTable display and in the Ladder Rung program display.
                  Confirm that when the rung is taken true, the accumulator and all 3 control bits
                  are reset to zero. The TOF timer like the TON timer is also a non-retentive
                  instruction and can be reset by changing the truth of the rung.

                  Conclusions:
                  Use the TOF instruction to turn an output on or off after its rung has been off for a
                  preset time interval. This output instruction begins timing when its rung goes
                  "false." It waits the specified amount of time (as set in the PRESET), keeps track
                  of the accumulated intervals which have occurred (ACCUM), and resets the DN
                  (done) bit when the ACCUM (accumulated) time equals the PRESET time.

                  The Accumulated value is reset when rung conditions go true regardless of
                  whether the timer has timed out.


            The RTO Timer .... (Retentive Timer ON)

                  Make sure that switch I:1/0 is Open, and then replace the TOF timer in your
                  program with a RTO retentive timer.
                  Now insert a new rung below the timer, and add the XIC,I:1/1 and RES,T4:1
                  instructions.
                  Your program should now match the one shown below:


file://C:Program%20FilesTheLearningPitLogixProdocntmrintro-tmr.html                               1/22/2003
LogixPro - Introductory Timer Lab                                                                    Page 6 of 7


                  Once you have your program entered, and have ensured that it is correct,
                  download it to the PLC.
                  Ensure that both Switches are Open, and then place the PLC into the Run mode.
                  Right click on the Timer instruction, and select "GoTo DataTable" from the drop-
                  down menu.
                  Note the initial value of timer T4:1's accumulator, preset and control bits. Are we
                  starting off with the same values we had in the TON exercise? You should be
                  answering Yes.!

                  Close switch I:1/0 for 2 or 3 seconds and then Open it again.
                  Note that the timer stopped timing when the rung went false, but the accumulator
                  was not reset to zero.
                  Close the switch again and leave it closed which will allow the timer to time-out
                  (ACC=PRE).
                  Once timed out, note the state of the control bits
                  Open the switch, and once again note the state of the control bits.

                  Now close Switch I:1/1 and leave it closed. This will cause the Reset instruction to
                  go true.
                  Close switch I:1/0 momentarily to see if the timer will start timing again. It should
                  not!
                  Open Switch I:1/1 which will cause the Reset instruction return to false.
                  Now toggle switch I:1/0 several times and note that the timer should again start
                  timing as expected.

                  Repeat the foregoing steps, until you are satisfied that you clearly understand the
                  operation of both the RTO timer, and the Reset instruction.

                  Conclusions:


file://C:Program%20FilesTheLearningPitLogixProdocntmrintro-tmr.html                               1/22/2003
LogixPro - Introductory Timer Lab                                                                       Page 7 of 7


                     An RTO timer functions the same as a TON with the exception that once it has
                     begun timing, it holds its count of time even if the rung goes false, a fault occurs,
                     the mode changes from RUN to PGM, or power is lost. When rung continuity
                     returns (rung goes true again), the RTO begins timing from the accumulated time
                     which was held when rung continuity was lost. By retaining its accumulated value,
                     retentive timers measure the cumulative period during which rung conditions are
                     true.


            ......


file://C:Program%20FilesTheLearningPitLogixProdocntmrintro-tmr.html                                1/22/2003
LogixPro - Traffic Control Lab                                                                         Page 1 of 3


                                                                  LogixPro
                                                                  Traffic Control Lab
                                                                  Utilizing TON
                                                                  Timers


             Exercise #1 -- Traffic Control using 3 Lights

             From the Simulations Menu at the top of the screen, Select the Traffic Light Simulation


             Using your knowledge of cascading timers, develop a ladder logic program which will
             sequence a set of green, amber and red lights in the following manner:

             Sequence of Operation:

               1.   Light O:2/00 (Red) = 12 seconds ON
               2.   Light O:2/02 (Green) = 8 seconds ON
               3.   Light O:2/01 (Amber) = 4 seconds ON
               4.   The sequence now repeats with Red = ON.

                                  <----------------- Time in Seconds ------------------>


                                   RED                               GREEN                 AMBER


file://C:Program%20FilesTheLearningPitLogixProdoctltl-ton.html                                    1/22/2003
LogixPro - Traffic Control Lab                                                                          Page 2 of 3


                                     12 Sec.                        8 Sec.                  4 Sec.


             Exercise #2 -- Traffic Control using 6 Lights

             Modify your program so that the 3 lights which represent the other traffic direction are
             also controlled. It is tempting to use six Timers for this task, but the job can be done with
             just four, and you'll end up with a much cleaner program as a bonus.


                                   Red = O:2/00                Green = O:2/02      Amber = O:2/01

                      Green = O:2/06      Amber = O:2/05                    Red = O:2/04

                          8 Sec.                4 Sec.             8 Sec.               4 Sec.


             Still getting the odd Crash? Well it's pretty obvious that these drivers aren't paying much
             attention to Amber Lights! No need for any more wiring however. You can solve this
             problem, but it's going take a little more programming.


             Exercise #3 -- Traffic Light With Delayed Green

             Modify your program so that there is a 1 second period when both directions will have
             their RED lights illuminated. Note that the timing diagram below only shows one of these
             1 second intervals but two are actually required. Work the problem out, and try to keep
             the Timer count down to six.


                                   Red = O:2/00                 Green = O:2/02      Amber = O:2/01

                      Green = O:2/06     Amber = O:2/05                 Red = O:2/04

                          8 Sec.               4 Sec.      1        8 Sec.                 4 Sec.


             If a one second delay is not enough to get these drivers under control then just go ahead
             and jack the delay up to two!


             ......


file://C:Program%20FilesTheLearningPitLogixProdoctltl-ton.html                                       1/22/2003
LogixPro - Traffic Control Lab                                         Page 3 of 3


file://C:Program%20FilesTheLearningPitLogixProdoctltl-ton.html    1/22/2003
LogixPro - Introductory Word Compare Lab                                                         Page 1 of 6


                                                           LogixPro
                                                           Introduction To
                                                           Word Compare
                                                           Instructions


            The RSLogix basic Comparison Instructions

                  From the LogixPro Simulations Menu, select the I/O Simulation.
                  Clear out any existing program by selecting the "New" entry in the File menu, and
                  then select the "Clear Data Table" entry in the Simulations menu.
                  Now enter the following program being careful to enter the addresses and values
                  exactly as shown.


file://C:Program%20FilesTheLearningPitLogixProdocncmpintro-cmp.html                         1/22/2003
LogixPro - Introductory Word Compare Lab                                                         Page 2 of 6


                  Once you have completed entering your program, download your program to the
                  PLC.
                  Ensure that SW0 and SW! are configured as Normally Open pushbuttons then
                  place the PLC into the Run mode.
                  Toggle the state of switch SW0 (I:1/0) continuously while observing the truth of
                  each of rungs as indicated by the lamps.
                  Once the count exceeds nine or ten, reset the counter and repeat the above
                  sequence. Keep doing this until you are convinced that the instructions are
                  operating as described in the RSLogix documentation.
                  Finally, indicate the observed state of the lamps, by circling the appropriate
                  numbers below:


file://C:Program%20FilesTheLearningPitLogixProdocncmpintro-cmp.html                            1/22/2003
LogixPro - Introductory Word Compare Lab                                                           Page 3 of 6


                  Lamp 0 is On during counts: 1...2...3...4...5...6...7...8...9...10

                  Lamp 1 is On during counts: 1...2...3...4...5...6...7...8...9...10

                  Lamp 2 is On during counts: 1...2...3...4...5...6...7...8...9...10

                  Lamp 3 is On during counts: 1...2...3...4...5...6...7...8...9...10


            Conclusions:

            The basic Comparison instructions compare the values stored in two memory locations.
            These two values can be the data stored in two different word locations, or one can be
            the data stored in a word and the other can be a constant value. The basic comparison
            instructions are:

                  EQU .... The Equal instruction goes true if the source A and B values are Equal to
                  each other
                  NEQ .... The Not Equal instruction goes true if the source A and B values are Not
                  Equal to each other
                  LES .... The Less Than instruction goes true if the value in source A is Less Than
                  the value in source B
                  GRT .... The Greater Than instruction goes true if the value in source A is Greater
                  Than the value in source B
                  LEQ .... The Less Than OR Equal instruction goes true if the value in source A is
                  Less Than or Equal to the value in source B
                  GEQ .... The Greater Than OR Equal instruction goes true if the value in source A
                  is Greater Than or Equal to the value in source B

            Since any PLC word including Timer and Counter accumulators and presets can be
            used as the source value in any of the basic comparison instructions, these instructions
            prove extremely versatile and are widely used in RSLogix programs.


            The LIM Instruction .... Limit Comparison

                  Modify or rewrite your existing program so that the first 3 rungs appear as shown
                  below.
                  Ensure that addresses and values are exactly as shown.


file://C:Program%20FilesTheLearningPitLogixProdocncmpintro-cmp.html                              1/22/2003
LogixPro - Introductory Word Compare Lab                                                            Page 4 of 6


                  Once you have completed modifying your program, download your program and
                  place the PLC into the Run mode.
                  Toggle the state of switch SW0 (I:1/0) continuously while observing the truth of
                  Lamp 4.
                  Once the count exceeds ten, reset the counter and repeat the above sequence.
                  Keep doing this until you are convinced that the LIM instruction is operating as
                  described in the RSLogix documentation.
                  Finally, indicate the observed state of Lamp 4, by circling the appropriate
                  numbers below:

                  Lamp 4 is On during counts: 1...2...3...4...5...6...7...8...9...10


            Conclusions:

            The LIM (Limit Comparison) instruction compares the Test value to the value of the Low
            Limit and the value of the High Limit. The instruction goes true if .. Test is Equal to or
            Greater than the Low Limit .. And .. Test is Less Than or Equal to the High Limit. A
            logical equivalent to rung 2 is shown below:


            The LIM instruction provides in a single package the same functionality that would
            normally necessitate the utilization of 2 basic comparison instructions.


file://C:Program%20FilesTheLearningPitLogixProdocncmpintro-cmp.html                                1/22/2003
LogixPro - Introductory Word Compare Lab                                                             Page 5 of 6


            The MEQ Instruction .... Masked, Equal Comparison

            The MEQ instruction is sometimes considered an advanced level instruction which many
            might deem inappropriate for inclusion in a basic level exercise. The MEQ is however
            listed with the other comparison instructions, so a quick peek at it's functionality should
            not cause major harm. The subject of "Masking" relates to the act of controlling which
            bits within a binary value or word are passed through to a destination.

            The following program is a very simple demonstration of how extraneous information can
            be selectively ignored with the judicious use of masking. There are several other
            instructions in the RSLogix instruction set that employ masking and work similarly, but
            only the MEQ instruction will be reviewed here.

                  Clear your existing program by selecting the "New" entry in the File menu.
                  Now enter the following program being careful to enter the addresses and values
                  exactly as shown.
                  Note: address I:5 is the address of the I/O simulator's input card which has the
                  thumbwheel switches connected to it.


            The MEQ and EQU instructions are almost identical in operation. The only difference is
            that with the MEQ instruction, selected bits within the Source value can be "masked out"
            or deleted prior to doing the comparison for Equality. In the above MEQ example we are
            going to mask out all bits other than the 4 which contain the data from the first
            thumbwheel switch.

                  Once you have completed your program, download your program and place the
                  PLC into the Run mode.
                  Starting with the right hand (units) thumbwheel only, increment the displayed
                  value up and down and note how both lamps energize when the value is set to 4.
                  Now set the first thumbwheel to 4 and start incrementing the second (tens)
                  thumbwheel. If your program is operating correctly only lamp 6 should remain
                  lighted.


file://C:Program%20FilesTheLearningPitLogixProdocncmpintro-cmp.html                             1/22/2003
LogixPro - Introductory Word Compare Lab                                                              Page 6 of 6


                     Finally, set the thumbwheel values to match those listed below, and circle the
                     appropriate number if the corresponding lamp is On.

                     Lamp 5 is On when the thumbwheel value is: 1...4...14...34...54...94...104

                     Lamp 6 is On when the thumbwheel value is: 1...4...14...34...54...94...104


            Conclusions:

            The MEQ instruction has the same functionality of an EQU instruction, but it allows you
            to first mask out any extraneous information or bits prior to doing the actual test for
            equality.

            Advanced level? Not really, but it does require a reasonably good understanding of
            numbering systems and in particular binary.


            ......


file://C:Program%20FilesTheLearningPitLogixProdocncmpintro-cmp.html                              1/22/2003
LogixPro - Traffic Control Lab                                                                         Page 1 of 3


                                                                LogixPro
                                                                Traffic Control Lab
                                                                Utilizing Word
                                                                Comparison


             Exercise #1 -- Traffic Control utilizing 1 Timer

             From the Simulations Menu at the top of the LogixPro screen, Select the Traffic Light
             Simulation


             Utilizing a single timer, employ the use of Word Comparison instructions to control our
             simulated traffic light. The sequence of operation and timing durations are set out in
             following timing diagram.

             Your program should incorporate a 1 second period (delayed green) when both
             directions will have only their RED lights illuminated. Note that the timing diagram below
             only shows one of these 1 second intervals, but two are actually required.


                                Red = O:2/00                  Green = O:2/02     Amber = O:2/01

                   Green = O:2/06     Amber = O:2/05                   Red = O:2/04

                       8 Sec.              4 Sec.        1        8 Sec.              4 Sec.


file://C:Program%20FilesTheLearningPitLogixProdoctltl-cmp.html                                      1/22/2003
LogixPro - Traffic Control Lab                                                                          Page 2 of 3


             If a one second delay proves insuficient to get these drivers under control then just go
             ahead and jack the delay up to two!


             Exercise #2 -- Dealing with Pedestrians

             Modify your program so that the crosswalks are also controlled. This is not necessarily a
             word comparison exercise, but it's a task that needs doing, and you should now have
             sufficient expertise to accomplish it. It might not be all that easy however!


             Your program should operate as follows:

                      When depressed, the crosswalk pushbutton will cause the appropriate Walk Sign
                      to be illuminated at the next occurence of a Red to Green transition for the
                      appropriate direction.
                      If the Green light is already illuminated when the button is pressed then the Walk
                      signal sequence will be delayed until the next Red to Green transistion ocurrs.
                      Once the Walk Sign is illuminated, it will remain so for the duration of the Green
                      signal.
                      When the Amber light appears, the Walk Sign will commence to flash On and Off
                      and continue to do so until the Red signal appears.

             You might consider using a bit from the free-running timer located in S2:4 to create the
             cautionary flashing effect.


             ......


file://C:Program%20FilesTheLearningPitLogixProdoctltl-cmp.html                                       1/22/2003
LogixPro - Traffic Control Lab                                         Page 3 of 3


file://C:Program%20FilesTheLearningPitLogixProdoctltl-cmp.html    1/22/2003
LogixPro - Introductory Counter Lab                                                               Page 1 of 7


                                                               LogixPro
                                                               Introduction To
                                                               RSLogix Counters


             The CTU and RES ...... Counter Instructions

                   From the LogixPro Simulations Menu, select the I/O Simulation.
                   Clear out any existing program by selecting the "New" entry in the File menu, and
                   then select the "Clear Data Table" entry in the Simulations menu.
                   Now enter the following program being careful to enter the addresses exactly as
                   shown.
                   Confirm that you have entered the number 10 as the counter's preset value. This
                   value is optionally used to set the point at which the counter's Done Bit will be
                   Set, indicating that the count is complete.


file://C:Program%20FilesTheLearningPitLogixProdocnctrintro-ctr.html                          1/22/2003
LogixPro - Introductory Counter Lab                                                                 Page 2 of 7


                   Once you have your program entered, and have ensured that it is correct,
                   download it to the PLC.
                   Ensure that Switch I:1/0 and I:1/1 are Open, and then place the PLC into the Run
                   mode.
                   Right click on the CTU instruction, and select "GoTo DataTable" from the drop-
                   down menu.
                   Note the initial value of Counter C5:1's accumulator and preset in the spaces
                   below. Also indicate the state of each of the Counter's primary control bits in the
                   spaces provided:

                   Initial State (Switch I:1/0=Open):
                   C5:1.ACC = _______ C5:1.PRE = _______ C5:1/CU = ___ C5:1/CD = ___
                   C5:1/DN = ___

                   Open and Close switch I:1/00 a number of times and carefully observe the
                   incrementing of C5:1's accumulator and the operation of the enable and done
                   bits.
                   Close switch I:1/01 and observe the effect that the "RES" instruction has on the
                   counter.
                   Attempt to increment the counter while switch I:1/01 is closed. You should not be
                   able to increment the counter while the "RES" instruction is held "True".
                   Open switch I:1/01 to allow the "RES" instruction to go false, and then increment
                   the counter until the accumulator matches the preset.
                   Increment the counter 2 or 3 more times and note the final value of C5:1's
                   accumulator, preset and status bits in the spaces below.

                   Final State (Switch I:1/0=Closed):


file://C:Program%20FilesTheLearningPitLogixProdocnctrintro-ctr.html                                1/22/2003
LogixPro - Introductory Counter Lab                                                                    Page 3 of 7


                   C5:1.ACC = _______ C5:1.PRE = _______ C5:1/CU = ___ C5:1/CD = ___
                   C5:1/DN = ___


             Conclusions:
             The CTU output instruction counts up for each false-to-true transition of conditions
             preceding it in the rung and produces an output (DN) when the accumulated value
             reaches the preset value. Rung transitions might be triggered by a limit switch or by
             parts traveling past a detector etc.

             The ability of the counter to detect a false-to-true transitions depends on the speed
             (frequency) of the incoming signal. The on and off duration of an incoming signal must
             not be faster than the scan time.

             Each count (accumulator) is retained when the rung conditions again become false,
             permitting counting to continue beyond the preset value. This way you can base an
             output on the preset but continue counting to keep track of inventory/parts, etc.

             Use a RES (reset) instruction with the same address as the counter, or another
             instruction in your program to overwrite the value of the accumulator and control bits.
             The on or off status of counter done, overflow, and underflow bits is retentive. The
             accumulated value and control bits are reset when a RES is enabled.


             The CTD ...... Count Down Instruction

                   Ensure that switch I:1/00 and I:1/01 are open; then place the PLC into the
                   Program mode, and Insert a new rung containing a CTD instruction just below the
                   first rung in your program.


file://C:Program%20FilesTheLearningPitLogixProdocnctrintro-ctr.html                               1/22/2003
LogixPro - Introductory Counter Lab                                                                   Page 4 of 7


                   Once you have completed this addition to your program, download your program
                   to the PLC and select RUN.
                   Toggle the state of switch I:1/0 continuously until the accumulator of C5:1
                   exceeds the preset.
                   Now toggle switch I:1/02 and decrement counter C5:1 while carefully observing
                   the status bits of the counter. Increment and decrement the counter from below
                   zero to beyond the preset a number of times.


             Conclusions:
             The CTD output instruction counts down for each false-to-true transition of conditions
             preceding it in the rung and produces an output when the accumulated value reaches
             the preset value. Rung transitions might be triggered by a limit switch or by parts
             traveling past a detector.

             Each count is retained when the rung conditions again become false. The count is
             retained until a RES (reset) instruction with the same address as the counter is enabled,
             or if another instruction in your program overwrites the value.

             The accumulated value is retained after the CTU or CTD instruction goes false, and
             when power is removed from and then restored to the processor. Also, the on or off


file://C:Program%20FilesTheLearningPitLogixProdocnctrintro-ctr.html                                1/22/2003
LogixPro - Introductory Counter Lab                                                                    Page 5 of 7


             status of counter done, overflow, and underflow bits is retentive. The accumulated value
             and control bits are reset when a RES is enabled.


             Applying Counter Instructions .... An Up/Down Sequence Example

                   Ensure that the I/O Simulation is still selected.
                   Clear your existing program by selecting the "New" entry in the File menu, and
                   then select the "Clear Data Table" entry in the Simulations menu.
                   Note the use of the "EQU" instruction in rung 2 of the following program. This
                   input instruction will go true if the value referenced by the Source entry is "Equal"
                   to the value contained in the Source B entry. In this example, the instruction will
                   go true if the accumulator of the counter is equal to zero.
                   Now enter the following program being careful to enter the addresses exactly as
                   shown.


                   Once you have your program entered, and have ensured that it is correct,
                   download it to the PLC.
                   Confirm that you have configured switch I:1/0 as a N.O. pushbutton then place
                   the PLC into the "Run" mode.
                   Continuously Open and Close switch I:1/00 while carefully observing the
                   incrementing of C5:1's accumulator.
                   If you have entered your program correctly, the accumulator should increment


file://C:Program%20FilesTheLearningPitLogixProdocnctrintro-ctr.html                                  1/22/2003
LogixPro - Introductory Counter Lab                                                                      Page 6 of 7


                      until the count of 10 is reached, and then start to decrement. When the count
                      reaches zero, the B3:1/0 flag bit should be cleared and the up/down sequence
                      should then repeat.
                      Ensure that your program is operating as described, and carefully note how bit
                      B3:1/0 is being employed to track and control the direction of the counting
                      sequence.

                      Note the conditions that must be present in order for bit B3:1/0 to be latched On.
                      The first XIC instruction ensures that the latching only occurs when the
                      pushbutton switch is released
                      Delete this XIC instruction from rung 1, and then download and run your program
                      again.
                      Without the XIC instruction, the latching will occur as soon as the count of ten is
                      reached and the CTD instruction will immediately decrement the counter back to a
                      count of 9.
                      Set the scan speed to it's lowest value, and you should be able to see that the
                      count does reach 10, but it is then immediately decremented.


             Conclusions:
             The CTU is by far the most commonly used counter instruction. It can, and is utilized in
             almost a limitless number of counting applications, and is typically very easy to
             understand and employ.

             The CTD instruction is less widely employed. It is extremely useful however when paired
             with a CTU, where up/down counting operations are required. Cars entering and leaving
             a parking lot, containers being filled and then emptied are just 2 examples of where
             paired CTU/CTD counters might be employed.

             The elegance of the CTU/CTD pairing can extract a price however in terms of ease of
             use and program clarity. As the last exercise highlighted, one requires a very clear
             understanding of the operation of these instructions and the PLC's scan sequence, in
             order to employ them effectively.

             This last exercise was definitely not the only way to setup an up/down counting
             sequence, but it does highlight the attention to detail that you will need to demonstrate
             when tackling the later sections of the next student exercise.


             ......


file://C:Program%20FilesTheLearningPitLogixProdocnctrintro-ctr.html                                 1/22/2003
LogixPro - Introductory Counter Lab                                         Page 7 of 7


file://C:Program%20FilesTheLearningPitLogixProdocnctrintro-ctr.html    1/22/2003
LogixPro - Batch Mix Counters Lab                                                                      Page 1 of 3


                                                              LogixPro
                                                              The Batch Mix Lab
                                                              Utilizing PLC
                                                              Counters


             Exercise #1 -- Filling the Batch Mixing Tank

                   From the Simulations Menu at the top of the screen, Select the Batch Mixing
                   Simulation.


                   Using your knowledge of PLC counters, design a program to meet the following
                   requirements:

                         When the Start switch (I:1/0) is pressed, pump P1 will be energized and
                         the tank will start to fill. The pulses generated by Flowmeter 1 should be
                         used to increment a counter.

                         When the count reaches a value where the tank is approximately 90% full,
                         the pump is to be shut-off and and the control panels FULL light is to be
                         energized.

                         The filling operation is to halt immediately if the stop switch is pressed.

                         While testing, utilize the "Reset Simulation" and the "Reset Timers and
                         Counters" entries in the Simulations menu to re-start your program.

                   To make it a little easier to see what is happening with the counter, you might


file://C:Program%20FilesTheLearningPitLogixProdocblbl-ctr.html                                    1/22/2003
LogixPro - Batch Mix Counters Lab                                                                          Page 2 of 3


                      want to add the following rung to the end of your program.


                      If correctly entered, the TOD (To BCD) instruction will take the integer value in the
                      counters accumulator, convert it to Binary Coded Decimal, and then move (copy)
                      this BCD value to the control panel LED display (O:4). The TOD instruction can
                      be located in the Compute/Math group of instructions in the Edit Panel. Be sure to
                      alter the Source entry to match the counter number you are using.


             Exercise #2 -- Emptying the Batch Mix Tank

                      Modify your program so that it meets the following additional requirements:

                             The mixer will run for 8 seconds once the tank is full.

                             When the mixing is complete, drain pump P3 is to be started and the tank
                             is to be drained. Flowmeter 3 will be employed to decrement the existing
                             counter, and draining will be allowed to continue till the counters
                             accumulator reaches zero.

                             Once the tank is empty again, pressing the Start switch will cause the
                             sequence to repeat.


             Exercise #3 -- Continuous Operation

                      Modify your program so that the filling and emptying sequence will repeat
                      continuously once it has been started by the initial pressing of the Start switch.

                             Ensure that the RUN light is energized when the mixer or either pump is
                             running.

                             The STANDBY light should light and the process should halt when the
                             Stop button is pressed.

                             The process should restart where it left off if the the Start button is pressed
                             following a Stop.

             ......


file://C:Program%20FilesTheLearningPitLogixProdocblbl-ctr.html                                        1/22/2003
LogixPro - Batch Mix Counters Lab                                      Page 3 of 3


file://C:Program%20FilesTheLearningPitLogixProdocblbl-ctr.html    1/22/2003
PSIM - Advanced Batch Lab                                                                           Page 1 of 2


                                                                LogixPro
                                                                The Advanced
                                                                Batch Mixing Lab


            A Programmable Batch Mixing System

                  Exercise #1 -- Single Batch Mode of Operation
                  Using your knowledge of PLCs, design a program to meet the following criteria:

                        When the 3 position Selector Switch is in position "A". the batch
                        mixing process will run in a single batch mode. The operator may start the
                        batch mix sequence by momentarily pressing the Start Switch.

                        Once a batch sequence has begun, the sequence may be stopped and
                        resumed at any time using the Stop and Start switches.

                        The tank is to be filled with a mixture obtained from the separate fill lines
                        utilizing fill pumps P1 and P2. A counter will track the quantity of product
                        obtained from Line 1 (P1) while the remainder will come from Line 2 (P2).
                        The mixture ratio of the product will be controllable by adjusting the
                        counter's preset. The tank is to be filled to the point where the Hi-Level
                        sensor goes true.

                        When filling is complete, the Full light will turn On. Heater O:2/04 and Mixer
                        O:2/00 will be started allowing the mixture to begin heating. Thermostat
                        I:1/02 will be employed to control the temperature.

                        The mixer will continue to run for 4 seconds after the mixture reaches the
                        desired temperature. When the mixer stops, pump P3 will be used to drain
                        the product from the tank. The tank will be drained to the point where the
                        Lo-Level sensor trips.

                        Once emptied, a new single batch sequence may again be started by
                        pressing the Start Switch while the Selector switch is in position "A".


                  Exercise #2 -- Multiple Batch Mode of Operation
                  Enhance your program to include the following features:


file://C:Program%20FilesTheLearningPitLogixProdocblbl-adv.html                                    1/22/2003
PSIM - Advanced Batch Lab                                                                             Page 2 of 2


                         When the 3 position Selector Switch is in position "B". the process will
                         produce multiple batches, The number of batches produced will be
                         operator selectable, and the current batch count will be displayed on the
                         Control panel's LED display.

                         The operator will be able to enter the desired batch count using the control
                         panel thumbwheel switches.

                         The operator will be able to set the product ratio by entering the desired
                         product one percentage via the control panel thumbwheel switches.

                  It is your responsibility to make the operator interface as simple and fault tolerant
                  as possible.


file://C:Program%20FilesTheLearningPitLogixProdocblbl-adv.html                                      1/22/2003
LogixPro Dual Compressor Exercise                                                                       Page 1 of 5


                                                                     LogixPro
                                                                       Dual
                                                                    Compressor
                                                                      Student
                                                                     Exercises


           Exercise #1 --- Single Compressor Operation

           In this first exercise, the pressure switch PE1 (I:1/02) is to be utilized alone to control the
           operation of motor (O:2/0) and maintain the compressor's storage tank pressure. The
           pressure range will be dictated by the settings shown for PE1. Using your mouse, adjust
           both the limit (make 120PSI), and the adjustable span setting (20PSI) of PE1 to match the
           settings shown below.


           Allow the user to start and stop the air system using the appropriate panel mounted
           switches, and ensure that the "Run" lamp is illuminated whenever the system is enabled.
           Lamp "C1" should be illuminated only when compressor #1 is actually running.

           Prior to testing your program, adjust the system's discharge flow rate to 50% as shown. This
           setting should prove to be low enough that a single compressor will then be able to supply
           the needs of this particular pneumatic system.

           Once you have created your program, download it to the PLC and test out it's operation.
           When the start button is pressed, the Compressor should start and begin to build up


http://www.thelearningpit.com/lp/doc/c2/comp2.html                                                           5/2/2004
LogixPro Dual Compressor Exercise                                                                     Page 2 of 5


           pressure within the storage tank. Once the pressure reaches 120PSI, the compressor
           should stop, and remain idle until the pressure in the storage tank drops below 100PSI.
           ..........


           Exercise #2 --- Alternating Compressors when Loading is Light

           In this exercise, each compressor is to take it's turn bringing the storage tank pressure back
           up to the selected pressure setting. Pneumatic/Electric switch PE1 will continue to be
           utilized for this purpose, and the settings will remain the same as those used in the previous
           exercise.


           The task of alternating back and forth between loads is sometimes referred to as a load
           toggle function, and there are numerous methods to accomplish this in relay logic. In this
           exercise however, you are asked to limit yourself to using only basic relay type instructions
           when creating your solution.

           Prior to testing your program, adjust the system's discharge flow rate again to 50% as
           shown. As we have already determined, this flow rate can be readily maintained by a single
           compressor. Adding a second compressor however, will share the loading and allow for an
           extended cooling period between cycles.

           Once you have created your program, download it to the PLC and thoroughly test out it's
           operation.

           Finally, adjust the flow rate which controls the amount of air leaving the storage tank to 80%
           and then 100% and note the effect. At higher rates of flow, a single compressor will not
           have the capacity to supply this system's peak needs on it's own. Obviously we will need a
           bit of help at times from the second compressor.
           ..........


           Exercise #3 --- Coping with Large Demands for Plant Air

           Your current program should be suitable for maintaining the desired pressure range as long
           as the plant air consumption remains relatively modest. As the plant air consumption
           approaches 100% capacity however, it becomes obvious that we will need to have both
           compressors running in order to satisfy this increased loading.


http://www.thelearningpit.com/lp/doc/c2/comp2.html                                                         5/2/2004
LogixPro Dual Compressor Exercise                                                                      Page 3 of 5


           Modify your program so that the second pressure switch PE2 will detect when the storage
           tank pressure drops below our current minimum setting of 100PSI. This situation will occur if
           a single compressor is unable to keep up to the load and the tank pressure continues to
           drop. If and when the pressure drops to 98PSI, the idle compressor should be started, and
           both compressors will then continue to run until the tank is up to full pressure.

           It is likely that your modifications will also result in both compressors being run when the
           system is first started and the tank pressure is initially being brought to within range of the
           pressure switches. This action will reduce the time it takes to bring the plant air system up to
           pressure, and is therefore considered desirable. Please ensure that your system does
           actually operate in this fashion.

           Once you have created your program, download it to the PLC and thoroughly test out it's
           operation at both 50% and 100% rates of flow. When at 50% loading, the compressors
           should alternate with each taking a turn. At 100% loading, both compressors should engage
           once it is detected that the pressure is continuing to drop.

           Your program should now be able to handle both light and heavy demands for air quite
           effectively. While this current solution likely performs as well as most systems employing
           relay logic, with just a bit more effort you should still be able to even improve upon this.
           Before continuing to the next exercise, run your system with the flow rate adjusted to 78%,
           80%, and then 82%, and carefully note the result. You should now have a good idea of
           where improvements might be made.
           ..........


           Exercise #4 --- Detecting When 1 Compressor is not Enough

           When the plant's requirement for air closely matches the maximum volume that can be
           supplied by a single compressor, our current control solution simply falls apart. It's possible
           that this single compressor could run for hours without ever being noticed, nor obtaining any
           down time in which to cool. How long one of these compressors might be allowed to run
           continuously would normally be specified by the manufacturer, but for our purposes we will
           just ensure that excessive run-on can simply not occur.


http://www.thelearningpit.com/lp/doc/c2/comp2.html                                                        5/2/2004
LogixPro Dual Compressor Exercise                                                                    Page 4 of 5


           When attempting a solution for this run-on problem, a couple of ideas may come to mind. If
           a single compressor runs beyond the time that would normally suffice to attain full pressure
           at 50% or 60% flow, the idle compressor could be started to assist in the effort. A second
           method might be to track the time it takes for the pressure tank to drop from it's maximum to
           minimum settings, and from this determine beforehand whether 1 or 2 compressors need to
           be employed.

           If given some thought, you may detect minor faults with either of the above methods. The
           first method could permit repeated short cycling of the back up compressor when operating
           at certain continuous flow rates. The second method attempts to anticipate load demand,
           but may not accommodate rapid changes in plant air utilization. It may be that your solution
           should combine both methods, or possibly a new one not even discussed. Your goal should
           be to analyse the system and come up with the best solution possible using the available
           equipment.

           Modify your program so that continuous run-on of a single compressor will not occur. Your
           solution should continue to alternate between compressors when plant flow rates are
           typically 50% to 60% or lower. In addition, try to equalize wear on each compressor, and
           avoid short cycling as much as practically possible.

           Continue to utilize PE2 to detect if the system pressure descends below the prescribed
           minimum, but feel free to tune or adjust both this pressure switch and any timing
           mechanisms employed in order to attain the best possible performance.

           In order to monitor how well your system is working, provide a means to display the
           accumulated run-time for each compressor. Utilize both the panel mounted selector switch,
           and LEDs for this purpose.

           Once you have your program tuned to perfection, you should have a good grounding in the
           basics of controlling many types of similar systems. It's fairly common to find fans, or pumps
           etc. being controlled in a similar fashion, and the techniques you've developed here should
           closely apply.
           ..........


                            ..........


http://www.thelearningpit.com/lp/doc/c2/comp2.html                                                      5/2/2004
LogixPro Dual Compressor Exercise                    Page 5 of 5


http://www.thelearningpit.com/lp/doc/c2/comp2.html     5/2/2004
LogixPro Bottle Line Simulation                                                                           Page 1 of 7


                                                                      LogixPro
                                                                   Advanced Bottle
                                                                        Line
                                                                      Exercise


        Getting Started

        There are always numerous ways to accomplish tasks in programming, but a quick review of the Allen
        Bradley bit shift instructions should surely point to them as an ideal tool for use in this particular
        process. In the bottle line simulation, we are faced with detecting and tracking a few Boolean details
        having to do with the bottles entering the line. Sensors are provided to detect the presence of a new
        bottle, the bottle size, and whether the bottle is fully intact. Essentially 3 Boolean states describing the
        properties of each bottle that enters the line. If we analyze the various ways that we might process
        these bottles, it should quickly become apparent that we will have ample information for making such
        decisions, assuming we keep track of it.


        A single BSR or BSL instruction can be used to track a single Boolean state (0 or 1) which in-turn can
        describe a unique property of a product. In the initial exercise you will be asked to track the 3 Boolean
        values describing each bottle entering our process line. The Boolean states will be referred to as
        "Exists", "Large", and "Broken" and these states are to be tracked by you, utilizing 3 separate BSL (bit
        shift left) instructions. It can be argued that "Exists" need not be tracked (=correct), as bottles
        continuously enter the line, and therefore must exist. We will even use this fact to strobe our BSL
        instructions and cause a shifting of our tracked information. Later when you start diverting broken
        bottles to scrap however, they will no-longer Exist. These missing bottles could be detected after they
        are scrapped by using the "Broken" state, but for now I want you to track all 3 states using 3 separate
        bit arrays.
        ..........


http://www.thelearningpit.com/lp/doc/bot/bottle.html                                                        5/2/2004
LogixPro Bottle Line Simulation                                                                            Page 2 of 7


        Exercise #1 -- Tracking the bottles

        Create a program which allows the operator to start and stop the process using the available panel
        mounted switches. When the process is running, the main conveyor should be energized, and bottles
        should continuously enter and exit the line. For these exercises please utilize the bits in word B3:0 if
        and when single bits such as flags etc. are required.

        Utilizing LS1 (Exists), strobe 3 BSL instructions to shift 3 separate bit arrays consisting of two 16 bit
        words each. Please use files #B3:2, #B3:4, and #B3:6 for this purpose. By restricting you to these
        particular files in the binary table, it will be much easier for you, and your instructor to monitor what is
        happening with your program using the data table display.


        Test your program out, and using the Data Table display monitor, take note of how the bits
        representing "Exist", "Large", and "Broken" are being shifted within their appropriate bit arrays. You
        may find that it will be necessary to slow the scan rate using the slider in the PLC panel to see this
        activity clearly. If your program is operating correctly, you should now have a means of determining the
        properties associated with each bottle that passes down the bottling line.
        ..........


        Exercise #2 -- Utilizing the Boolean Data

        If you paid careful attention to the bits being shifted along in each bit array, you would have likely noted
        that there is an offset between each of these 3 arrays. This is due to the fact that the 3 limit switches
        are located exactly 2 bottle widths apart. In order to use LS1 to strobe the data from all 3 switches at
        the same time, this spacing is actually critical, and must be an exact multiple of a bottle width. The
        number of bottle widths in-turn determines the offset we encounter within our arrays.


http://www.thelearningpit.com/lp/doc/bot/bottle.html                                                          5/2/2004
LogixPro Bottle Line Simulation                                                                          Page 3 of 7


        We cannot easily compensate for this offset when using a BSL instruction as the switch data will
        always load into bit 0 of the array. There may be ways to overcome this, but for these exercises it will
        be your responsibility to compensate for these offsets. You will have to adjust for this whenever you
        employ any of these bits to determine a particular bottle's properties.


        Modify your program so that all Large bottles are diverted to the lower conveyor located on the right
        hand side of the simulation. This is to be accomplished by utilizing the appropriate bit in the "Large" bit
        array to invoke the transfer. Also, please ensure that the bottles are not damaged in the process.

        If you are successful in completing the above, you should be well prepared to deal with the task of
        diverting broken bottles to scrap
        ..........


        Exercise #3 -- Boxing the Broken Bottles

        To add a little interest to the simulation, I've decided to have you grind up the broken bottles that
        occasionally come down the line. Of course it is your responsibility to ensure that the ground glass is
        placed into boxes, and to bring new boxes into place as required.


        The cost of providing cardboard boxes can be significant over time. For this reason it is essential that
        you fill each box to it's maximum capacity, and do so without spillage. Since a small bottle only


http://www.thelearningpit.com/lp/doc/bot/bottle.html                                                       5/2/2004
LogixPro Bottle Line Simulation                                                                         Page 4 of 7


        produces 2/3 as much ground glass as a large bottle, you will have to adjust for this difference in your
        program logic.

        In creating the logic for this exercise, you may find that you are faced with initializing variables or
        clearing counters etc. each time you edit and then restart your program. Just to make it a little easier to
        find this logic, I would ask that you add the following rung to the top of your program.


        There is no sense cluttering up your program with logic that only executes once each time it is run, so
        please place this logic into a subroutine where it is out of the way, yet easily located.

        Once you have come up with a solution for the scrap problem, then you are now entering the home
        stretch.
        ..........


        Exercise #4 -- Fill and Cap the Bottles

        There aren't many details that need to be explained about the filling operation. Energizing the fill tube
        solenoid O:2/6 will cause the fill tube to extend and enter the positioned bottle. You then must make a
        choice of discharging a large or small quantity of product into the bottle utilizing the appropriate charge
        solenoid O:2/7 or O:2/8. Once again, the Boolean data contained in the bit arrays will be used in
        determining the correct action to be taken.


        The bottle capping station control should be just a matter of capping each bottle that comes along. The
        capping ram solenoid O:2/9 must be energized to extend the ram, but you need not adjust for bottle
        size with this particular capping equipment. Attempting to cap a bottle that does not exist will cause
        little harm, but is a waste of caps, plus adds to clutter on the plant floor. Due to the foregoing, ensure
        that you only cap bottles that actually exist.

        I will leave issues such as when to stop and start the line to you. Keep in mind however, that we want
        to maintain the highest level of production possible with the equipment at our disposal.

        Once you have the filling and capping operations operating at maximum efficiency, we can then move


http://www.thelearningpit.com/lp/doc/bot/bottle.html                                                       5/2/2004
Manual LogixPro
Manual LogixPro
Manual LogixPro
Manual LogixPro
Manual LogixPro
Manual LogixPro
Manual LogixPro
Manual LogixPro
Manual LogixPro
Manual LogixPro
Manual LogixPro
Manual LogixPro
Manual LogixPro
Manual LogixPro
Manual LogixPro
Manual LogixPro
Manual LogixPro
Manual LogixPro
Manual LogixPro
Manual LogixPro
Manual LogixPro
Manual LogixPro
Manual LogixPro

More Related Content

What's hot

PLC Ladder Programming [Mechatronics]
PLC Ladder Programming [Mechatronics]PLC Ladder Programming [Mechatronics]
PLC Ladder Programming [Mechatronics]Dr. S.N. Teli
 
AUTOMATIC BOTTLE FILLING
AUTOMATIC BOTTLE FILLING AUTOMATIC BOTTLE FILLING
AUTOMATIC BOTTLE FILLING rehaan ukaye
 
PLC BASED AUTOMATED SYSTEM IN PROCESS INDUSTRY (Final Presentation)
PLC BASED AUTOMATED SYSTEM IN PROCESS INDUSTRY (Final Presentation)PLC BASED AUTOMATED SYSTEM IN PROCESS INDUSTRY (Final Presentation)
PLC BASED AUTOMATED SYSTEM IN PROCESS INDUSTRY (Final Presentation)Shahid Faizee
 
Escalado de señal analógica, formula para el calculo del escalado
Escalado de señal analógica, formula para el calculo del escalado  Escalado de señal analógica, formula para el calculo del escalado
Escalado de señal analógica, formula para el calculo del escalado Ramon Fernandez
 
Ladder Intro Tutorial
Ladder Intro TutorialLadder Intro Tutorial
Ladder Intro Tutorialplc_course
 
practicas con el simulador logixpro con PLC
practicas con el simulador logixpro con PLC practicas con el simulador logixpro con PLC
practicas con el simulador logixpro con PLC SANTIAGO PABLO ALBERTO
 
Siemens Step-7 200 برمجة متحكم سيمنز
Siemens Step-7 200  برمجة متحكم سيمنز Siemens Step-7 200  برمجة متحكم سيمنز
Siemens Step-7 200 برمجة متحكم سيمنز EssosElectronic
 
Plc Siemens Training Notes
Plc Siemens Training NotesPlc Siemens Training Notes
Plc Siemens Training Notesplc_course
 
PLC Counters
PLC CountersPLC Counters
PLC CountersAmeen San
 
Guia1 electroneumatica
Guia1 electroneumaticaGuia1 electroneumatica
Guia1 electroneumaticaEmiliano Negro
 

What's hot (20)

PLC Ladder Programming [Mechatronics]
PLC Ladder Programming [Mechatronics]PLC Ladder Programming [Mechatronics]
PLC Ladder Programming [Mechatronics]
 
AUTOMATIC BOTTLE FILLING
AUTOMATIC BOTTLE FILLING AUTOMATIC BOTTLE FILLING
AUTOMATIC BOTTLE FILLING
 
Ejercicios resueltos GRAFCET
Ejercicios resueltos GRAFCET Ejercicios resueltos GRAFCET
Ejercicios resueltos GRAFCET
 
Logix Pro manual.pdf
Logix Pro manual.pdfLogix Pro manual.pdf
Logix Pro manual.pdf
 
Industrial Automation
Industrial AutomationIndustrial Automation
Industrial Automation
 
PLC LADDER DIAGRAM
PLC LADDER DIAGRAMPLC LADDER DIAGRAM
PLC LADDER DIAGRAM
 
Unit 4 - PLC.pptx
Unit 4 - PLC.pptxUnit 4 - PLC.pptx
Unit 4 - PLC.pptx
 
PLC BASED AUTOMATED SYSTEM IN PROCESS INDUSTRY (Final Presentation)
PLC BASED AUTOMATED SYSTEM IN PROCESS INDUSTRY (Final Presentation)PLC BASED AUTOMATED SYSTEM IN PROCESS INDUSTRY (Final Presentation)
PLC BASED AUTOMATED SYSTEM IN PROCESS INDUSTRY (Final Presentation)
 
Parity generator & checker
Parity generator & checkerParity generator & checker
Parity generator & checker
 
Escalado de señal analógica, formula para el calculo del escalado
Escalado de señal analógica, formula para el calculo del escalado  Escalado de señal analógica, formula para el calculo del escalado
Escalado de señal analógica, formula para el calculo del escalado
 
Ladder Intro Tutorial
Ladder Intro TutorialLadder Intro Tutorial
Ladder Intro Tutorial
 
PLC y Electroneumática: Neumática
PLC y Electroneumática: NeumáticaPLC y Electroneumática: Neumática
PLC y Electroneumática: Neumática
 
practicas con el simulador logixpro con PLC
practicas con el simulador logixpro con PLC practicas con el simulador logixpro con PLC
practicas con el simulador logixpro con PLC
 
Siemens Step-7 200 برمجة متحكم سيمنز
Siemens Step-7 200  برمجة متحكم سيمنز Siemens Step-7 200  برمجة متحكم سيمنز
Siemens Step-7 200 برمجة متحكم سيمنز
 
Class 29 pi, pd and pid pneumatic controllers
Class 29   pi, pd and pid pneumatic controllersClass 29   pi, pd and pid pneumatic controllers
Class 29 pi, pd and pid pneumatic controllers
 
Plc (programming)
Plc (programming)Plc (programming)
Plc (programming)
 
Plc Siemens Training Notes
Plc Siemens Training NotesPlc Siemens Training Notes
Plc Siemens Training Notes
 
PLC Counters
PLC CountersPLC Counters
PLC Counters
 
logix pro
logix prologix pro
logix pro
 
Guia1 electroneumatica
Guia1 electroneumaticaGuia1 electroneumatica
Guia1 electroneumatica
 

Viewers also liked

RSLogix 5000 Report(s)
RSLogix 5000 Report(s)RSLogix 5000 Report(s)
RSLogix 5000 Report(s)AYAN MONDAL
 
Practicas de Programable Controller Logic
Practicas de Programable Controller Logic Practicas de Programable Controller Logic
Practicas de Programable Controller Logic Cesar Arrieta
 
Basic PLC Symbols and Addresses in LogixPro
Basic PLC Symbols and Addresses in LogixProBasic PLC Symbols and Addresses in LogixPro
Basic PLC Symbols and Addresses in LogixProbkhairullah
 
PLC Traffic Light Control
PLC Traffic Light ControlPLC Traffic Light Control
PLC Traffic Light ControlAmeen San
 
automatic mixing & filling bottle using PLC
automatic mixing & filling bottle using PLCautomatic mixing & filling bottle using PLC
automatic mixing & filling bottle using PLCLeelu Veerendra Pulagam
 
Manual de plc
Manual de plcManual de plc
Manual de plcpapito15
 
INDUSTRIAL AUTOMATION USING PLC
INDUSTRIAL AUTOMATION USING PLCINDUSTRIAL AUTOMATION USING PLC
INDUSTRIAL AUTOMATION USING PLCMehvish Mushtaq
 
Manual061 controladorlgicoprogramableplc
Manual061 controladorlgicoprogramableplcManual061 controladorlgicoprogramableplc
Manual061 controladorlgicoprogramableplcALEJANDROJSG
 
Termodinámica Y Dinámica de los ecosistemas.
Termodinámica Y Dinámica de los ecosistemas. Termodinámica Y Dinámica de los ecosistemas.
Termodinámica Y Dinámica de los ecosistemas. Migue Lopez
 
Ppt on rs logix 5000
Ppt on rs logix 5000Ppt on rs logix 5000
Ppt on rs logix 5000Anil Maurya
 
PLC data types and addressing
PLC data types and addressingPLC data types and addressing
PLC data types and addressingAmeen San
 
PLC- Instrucciones avanzadas
PLC- Instrucciones avanzadasPLC- Instrucciones avanzadas
PLC- Instrucciones avanzadasDidier Ramirez
 
Punto 01 Arranque%20motor%20asinc%20trifas
Punto 01 Arranque%20motor%20asinc%20trifasPunto 01 Arranque%20motor%20asinc%20trifas
Punto 01 Arranque%20motor%20asinc%20trifasJeffer Garcia
 

Viewers also liked (20)

Tutorial logix pro
Tutorial logix proTutorial logix pro
Tutorial logix pro
 
Practicas logix-pro-rs500
Practicas logix-pro-rs500Practicas logix-pro-rs500
Practicas logix-pro-rs500
 
RSLogix 5000 Report(s)
RSLogix 5000 Report(s)RSLogix 5000 Report(s)
RSLogix 5000 Report(s)
 
Practicas de Programable Controller Logic
Practicas de Programable Controller Logic Practicas de Programable Controller Logic
Practicas de Programable Controller Logic
 
Best Practices in PLC Programming
Best Practices in PLC ProgrammingBest Practices in PLC Programming
Best Practices in PLC Programming
 
Basic PLC Symbols and Addresses in LogixPro
Basic PLC Symbols and Addresses in LogixProBasic PLC Symbols and Addresses in LogixPro
Basic PLC Symbols and Addresses in LogixPro
 
PLC Traffic Light Control
PLC Traffic Light ControlPLC Traffic Light Control
PLC Traffic Light Control
 
automatic mixing & filling bottle using PLC
automatic mixing & filling bottle using PLCautomatic mixing & filling bottle using PLC
automatic mixing & filling bottle using PLC
 
Allen Bradley- Micrologix PLC Instructions
Allen Bradley- Micrologix PLC InstructionsAllen Bradley- Micrologix PLC Instructions
Allen Bradley- Micrologix PLC Instructions
 
Manual de plc
Manual de plcManual de plc
Manual de plc
 
INDUSTRIAL AUTOMATION USING PLC
INDUSTRIAL AUTOMATION USING PLCINDUSTRIAL AUTOMATION USING PLC
INDUSTRIAL AUTOMATION USING PLC
 
Manual061 controladorlgicoprogramableplc
Manual061 controladorlgicoprogramableplcManual061 controladorlgicoprogramableplc
Manual061 controladorlgicoprogramableplc
 
GLX meeting 3-Summary of asset mapping
GLX meeting 3-Summary of asset mapping GLX meeting 3-Summary of asset mapping
GLX meeting 3-Summary of asset mapping
 
Termodinámica Y Dinámica de los ecosistemas.
Termodinámica Y Dinámica de los ecosistemas. Termodinámica Y Dinámica de los ecosistemas.
Termodinámica Y Dinámica de los ecosistemas.
 
PLC
PLCPLC
PLC
 
Ppt on rs logix 5000
Ppt on rs logix 5000Ppt on rs logix 5000
Ppt on rs logix 5000
 
Controllogix 5000 Training
Controllogix 5000 TrainingControllogix 5000 Training
Controllogix 5000 Training
 
PLC data types and addressing
PLC data types and addressingPLC data types and addressing
PLC data types and addressing
 
PLC- Instrucciones avanzadas
PLC- Instrucciones avanzadasPLC- Instrucciones avanzadas
PLC- Instrucciones avanzadas
 
Punto 01 Arranque%20motor%20asinc%20trifas
Punto 01 Arranque%20motor%20asinc%20trifasPunto 01 Arranque%20motor%20asinc%20trifas
Punto 01 Arranque%20motor%20asinc%20trifas
 

Similar to Manual LogixPro

plc slc 500.pptx
plc slc 500.pptxplc slc 500.pptx
plc slc 500.pptxMUST
 
BOTTLE LINE SIMULLATION IN LOGIXPRO
BOTTLE LINE SIMULLATION IN LOGIXPROBOTTLE LINE SIMULLATION IN LOGIXPRO
BOTTLE LINE SIMULLATION IN LOGIXPROMohan Tangudu
 
SATYAM_VERMA_PLC_REPORT.docx.pptx
SATYAM_VERMA_PLC_REPORT.docx.pptxSATYAM_VERMA_PLC_REPORT.docx.pptx
SATYAM_VERMA_PLC_REPORT.docx.pptxsatyamVerma186725
 
05 conexão logo! 0 ba7 com ihm (wincc flexible)
05 conexão logo! 0 ba7 com ihm (wincc flexible)05 conexão logo! 0 ba7 com ihm (wincc flexible)
05 conexão logo! 0 ba7 com ihm (wincc flexible)Marcio Miranda
 
05 conexão logo! 0 ba7 com ihm (wincc flexible)
05 conexão logo! 0 ba7 com ihm (wincc flexible)05 conexão logo! 0 ba7 com ihm (wincc flexible)
05 conexão logo! 0 ba7 com ihm (wincc flexible)confidencial
 
04 conex%c3%a3o%20 logo!%200ba7%20com%20ihm
04 conex%c3%a3o%20 logo!%200ba7%20com%20ihm04 conex%c3%a3o%20 logo!%200ba7%20com%20ihm
04 conex%c3%a3o%20 logo!%200ba7%20com%20ihmMarcio Miranda
 
04 conexão logo! 0 ba7 com ihm
04 conexão logo! 0 ba7 com ihm04 conexão logo! 0 ba7 com ihm
04 conexão logo! 0 ba7 com ihmMarcio Miranda
 
04 conexão logo! 0 ba7 com ihm
04 conexão logo! 0 ba7 com ihm04 conexão logo! 0 ba7 com ihm
04 conexão logo! 0 ba7 com ihmconfidencial
 
Auto CAD - 2D
Auto CAD - 2DAuto CAD - 2D
Auto CAD - 2DVj NiroSh
 
Autocad Training Delhi
Autocad Training DelhiAutocad Training Delhi
Autocad Training Delhilalit_625
 
© Dmitriy ShironosovShutterStock, Inc.LABORATORYLogic C.docx
© Dmitriy ShironosovShutterStock, Inc.LABORATORYLogic C.docx© Dmitriy ShironosovShutterStock, Inc.LABORATORYLogic C.docx
© Dmitriy ShironosovShutterStock, Inc.LABORATORYLogic C.docxgerardkortney
 
Debugger & Profiler in NetBeans
Debugger & Profiler in NetBeansDebugger & Profiler in NetBeans
Debugger & Profiler in NetBeansHuu Bang Le Phan
 
Xcos for very beginners
Xcos for very beginnersXcos for very beginners
Xcos for very beginnersScilab
 

Similar to Manual LogixPro (20)

Plc fatek
Plc fatekPlc fatek
Plc fatek
 
plc slc 500.pptx
plc slc 500.pptxplc slc 500.pptx
plc slc 500.pptx
 
BOTTLE LINE SIMULLATION IN LOGIXPRO
BOTTLE LINE SIMULLATION IN LOGIXPROBOTTLE LINE SIMULLATION IN LOGIXPRO
BOTTLE LINE SIMULLATION IN LOGIXPRO
 
SATYAM_VERMA_PLC_REPORT.docx.pptx
SATYAM_VERMA_PLC_REPORT.docx.pptxSATYAM_VERMA_PLC_REPORT.docx.pptx
SATYAM_VERMA_PLC_REPORT.docx.pptx
 
Zelio soft
Zelio softZelio soft
Zelio soft
 
05 conexão logo! 0 ba7 com ihm (wincc flexible)
05 conexão logo! 0 ba7 com ihm (wincc flexible)05 conexão logo! 0 ba7 com ihm (wincc flexible)
05 conexão logo! 0 ba7 com ihm (wincc flexible)
 
05 conexão logo! 0 ba7 com ihm (wincc flexible)
05 conexão logo! 0 ba7 com ihm (wincc flexible)05 conexão logo! 0 ba7 com ihm (wincc flexible)
05 conexão logo! 0 ba7 com ihm (wincc flexible)
 
04 conex%c3%a3o%20 logo!%200ba7%20com%20ihm
04 conex%c3%a3o%20 logo!%200ba7%20com%20ihm04 conex%c3%a3o%20 logo!%200ba7%20com%20ihm
04 conex%c3%a3o%20 logo!%200ba7%20com%20ihm
 
04 conexão logo! 0 ba7 com ihm
04 conexão logo! 0 ba7 com ihm04 conexão logo! 0 ba7 com ihm
04 conexão logo! 0 ba7 com ihm
 
04 conexão logo! 0 ba7 com ihm
04 conexão logo! 0 ba7 com ihm04 conexão logo! 0 ba7 com ihm
04 conexão logo! 0 ba7 com ihm
 
Visual Logic User Guide
Visual Logic User GuideVisual Logic User Guide
Visual Logic User Guide
 
Eagle tut
Eagle tutEagle tut
Eagle tut
 
Auto CAD - 2D
Auto CAD - 2DAuto CAD - 2D
Auto CAD - 2D
 
Autocad Training Delhi
Autocad Training DelhiAutocad Training Delhi
Autocad Training Delhi
 
Multisim training in mohali
Multisim training in mohaliMultisim training in mohali
Multisim training in mohali
 
Matlab 1 level_1
Matlab 1 level_1Matlab 1 level_1
Matlab 1 level_1
 
Ladder system programming using mobile app
Ladder system programming using mobile appLadder system programming using mobile app
Ladder system programming using mobile app
 
© Dmitriy ShironosovShutterStock, Inc.LABORATORYLogic C.docx
© Dmitriy ShironosovShutterStock, Inc.LABORATORYLogic C.docx© Dmitriy ShironosovShutterStock, Inc.LABORATORYLogic C.docx
© Dmitriy ShironosovShutterStock, Inc.LABORATORYLogic C.docx
 
Debugger & Profiler in NetBeans
Debugger & Profiler in NetBeansDebugger & Profiler in NetBeans
Debugger & Profiler in NetBeans
 
Xcos for very beginners
Xcos for very beginnersXcos for very beginners
Xcos for very beginners
 

Recently uploaded

Food processing presentation for bsc agriculture hons
Food processing presentation for bsc agriculture honsFood processing presentation for bsc agriculture hons
Food processing presentation for bsc agriculture honsManeerUddin
 
Music 9 - 4th quarter - Vocal Music of the Romantic Period.pptx
Music 9 - 4th quarter - Vocal Music of the Romantic Period.pptxMusic 9 - 4th quarter - Vocal Music of the Romantic Period.pptx
Music 9 - 4th quarter - Vocal Music of the Romantic Period.pptxleah joy valeriano
 
ROLES IN A STAGE PRODUCTION in arts.pptx
ROLES IN A STAGE PRODUCTION in arts.pptxROLES IN A STAGE PRODUCTION in arts.pptx
ROLES IN A STAGE PRODUCTION in arts.pptxVanesaIglesias10
 
AUDIENCE THEORY -CULTIVATION THEORY - GERBNER.pptx
AUDIENCE THEORY -CULTIVATION THEORY -  GERBNER.pptxAUDIENCE THEORY -CULTIVATION THEORY -  GERBNER.pptx
AUDIENCE THEORY -CULTIVATION THEORY - GERBNER.pptxiammrhaywood
 
Visit to a blind student's school🧑‍🦯🧑‍🦯(community medicine)
Visit to a blind student's school🧑‍🦯🧑‍🦯(community medicine)Visit to a blind student's school🧑‍🦯🧑‍🦯(community medicine)
Visit to a blind student's school🧑‍🦯🧑‍🦯(community medicine)lakshayb543
 
Field Attribute Index Feature in Odoo 17
Field Attribute Index Feature in Odoo 17Field Attribute Index Feature in Odoo 17
Field Attribute Index Feature in Odoo 17Celine George
 
Influencing policy (training slides from Fast Track Impact)
Influencing policy (training slides from Fast Track Impact)Influencing policy (training slides from Fast Track Impact)
Influencing policy (training slides from Fast Track Impact)Mark Reed
 
ENGLISH 7_Q4_LESSON 2_ Employing a Variety of Strategies for Effective Interp...
ENGLISH 7_Q4_LESSON 2_ Employing a Variety of Strategies for Effective Interp...ENGLISH 7_Q4_LESSON 2_ Employing a Variety of Strategies for Effective Interp...
ENGLISH 7_Q4_LESSON 2_ Employing a Variety of Strategies for Effective Interp...JhezDiaz1
 
Concurrency Control in Database Management system
Concurrency Control in Database Management systemConcurrency Control in Database Management system
Concurrency Control in Database Management systemChristalin Nelson
 
Active Learning Strategies (in short ALS).pdf
Active Learning Strategies (in short ALS).pdfActive Learning Strategies (in short ALS).pdf
Active Learning Strategies (in short ALS).pdfPatidar M
 
Integumentary System SMP B. Pharm Sem I.ppt
Integumentary System SMP B. Pharm Sem I.pptIntegumentary System SMP B. Pharm Sem I.ppt
Integumentary System SMP B. Pharm Sem I.pptshraddhaparab530
 
Difference Between Search & Browse Methods in Odoo 17
Difference Between Search & Browse Methods in Odoo 17Difference Between Search & Browse Methods in Odoo 17
Difference Between Search & Browse Methods in Odoo 17Celine George
 
4.16.24 21st Century Movements for Black Lives.pptx
4.16.24 21st Century Movements for Black Lives.pptx4.16.24 21st Century Movements for Black Lives.pptx
4.16.24 21st Century Movements for Black Lives.pptxmary850239
 
Earth Day Presentation wow hello nice great
Earth Day Presentation wow hello nice greatEarth Day Presentation wow hello nice great
Earth Day Presentation wow hello nice greatYousafMalik24
 
Q4-PPT-Music9_Lesson-1-Romantic-Opera.pptx
Q4-PPT-Music9_Lesson-1-Romantic-Opera.pptxQ4-PPT-Music9_Lesson-1-Romantic-Opera.pptx
Q4-PPT-Music9_Lesson-1-Romantic-Opera.pptxlancelewisportillo
 
How to Add Barcode on PDF Report in Odoo 17
How to Add Barcode on PDF Report in Odoo 17How to Add Barcode on PDF Report in Odoo 17
How to Add Barcode on PDF Report in Odoo 17Celine George
 
THEORIES OF ORGANIZATION-PUBLIC ADMINISTRATION
THEORIES OF ORGANIZATION-PUBLIC ADMINISTRATIONTHEORIES OF ORGANIZATION-PUBLIC ADMINISTRATION
THEORIES OF ORGANIZATION-PUBLIC ADMINISTRATIONHumphrey A Beña
 
Incoming and Outgoing Shipments in 3 STEPS Using Odoo 17
Incoming and Outgoing Shipments in 3 STEPS Using Odoo 17Incoming and Outgoing Shipments in 3 STEPS Using Odoo 17
Incoming and Outgoing Shipments in 3 STEPS Using Odoo 17Celine George
 

Recently uploaded (20)

Food processing presentation for bsc agriculture hons
Food processing presentation for bsc agriculture honsFood processing presentation for bsc agriculture hons
Food processing presentation for bsc agriculture hons
 
Music 9 - 4th quarter - Vocal Music of the Romantic Period.pptx
Music 9 - 4th quarter - Vocal Music of the Romantic Period.pptxMusic 9 - 4th quarter - Vocal Music of the Romantic Period.pptx
Music 9 - 4th quarter - Vocal Music of the Romantic Period.pptx
 
ROLES IN A STAGE PRODUCTION in arts.pptx
ROLES IN A STAGE PRODUCTION in arts.pptxROLES IN A STAGE PRODUCTION in arts.pptx
ROLES IN A STAGE PRODUCTION in arts.pptx
 
AUDIENCE THEORY -CULTIVATION THEORY - GERBNER.pptx
AUDIENCE THEORY -CULTIVATION THEORY -  GERBNER.pptxAUDIENCE THEORY -CULTIVATION THEORY -  GERBNER.pptx
AUDIENCE THEORY -CULTIVATION THEORY - GERBNER.pptx
 
YOUVE_GOT_EMAIL_PRELIMS_EL_DORADO_2024.pptx
YOUVE_GOT_EMAIL_PRELIMS_EL_DORADO_2024.pptxYOUVE_GOT_EMAIL_PRELIMS_EL_DORADO_2024.pptx
YOUVE_GOT_EMAIL_PRELIMS_EL_DORADO_2024.pptx
 
Visit to a blind student's school🧑‍🦯🧑‍🦯(community medicine)
Visit to a blind student's school🧑‍🦯🧑‍🦯(community medicine)Visit to a blind student's school🧑‍🦯🧑‍🦯(community medicine)
Visit to a blind student's school🧑‍🦯🧑‍🦯(community medicine)
 
Field Attribute Index Feature in Odoo 17
Field Attribute Index Feature in Odoo 17Field Attribute Index Feature in Odoo 17
Field Attribute Index Feature in Odoo 17
 
Influencing policy (training slides from Fast Track Impact)
Influencing policy (training slides from Fast Track Impact)Influencing policy (training slides from Fast Track Impact)
Influencing policy (training slides from Fast Track Impact)
 
ENGLISH 7_Q4_LESSON 2_ Employing a Variety of Strategies for Effective Interp...
ENGLISH 7_Q4_LESSON 2_ Employing a Variety of Strategies for Effective Interp...ENGLISH 7_Q4_LESSON 2_ Employing a Variety of Strategies for Effective Interp...
ENGLISH 7_Q4_LESSON 2_ Employing a Variety of Strategies for Effective Interp...
 
Concurrency Control in Database Management system
Concurrency Control in Database Management systemConcurrency Control in Database Management system
Concurrency Control in Database Management system
 
Active Learning Strategies (in short ALS).pdf
Active Learning Strategies (in short ALS).pdfActive Learning Strategies (in short ALS).pdf
Active Learning Strategies (in short ALS).pdf
 
Raw materials used in Herbal Cosmetics.pptx
Raw materials used in Herbal Cosmetics.pptxRaw materials used in Herbal Cosmetics.pptx
Raw materials used in Herbal Cosmetics.pptx
 
Integumentary System SMP B. Pharm Sem I.ppt
Integumentary System SMP B. Pharm Sem I.pptIntegumentary System SMP B. Pharm Sem I.ppt
Integumentary System SMP B. Pharm Sem I.ppt
 
Difference Between Search & Browse Methods in Odoo 17
Difference Between Search & Browse Methods in Odoo 17Difference Between Search & Browse Methods in Odoo 17
Difference Between Search & Browse Methods in Odoo 17
 
4.16.24 21st Century Movements for Black Lives.pptx
4.16.24 21st Century Movements for Black Lives.pptx4.16.24 21st Century Movements for Black Lives.pptx
4.16.24 21st Century Movements for Black Lives.pptx
 
Earth Day Presentation wow hello nice great
Earth Day Presentation wow hello nice greatEarth Day Presentation wow hello nice great
Earth Day Presentation wow hello nice great
 
Q4-PPT-Music9_Lesson-1-Romantic-Opera.pptx
Q4-PPT-Music9_Lesson-1-Romantic-Opera.pptxQ4-PPT-Music9_Lesson-1-Romantic-Opera.pptx
Q4-PPT-Music9_Lesson-1-Romantic-Opera.pptx
 
How to Add Barcode on PDF Report in Odoo 17
How to Add Barcode on PDF Report in Odoo 17How to Add Barcode on PDF Report in Odoo 17
How to Add Barcode on PDF Report in Odoo 17
 
THEORIES OF ORGANIZATION-PUBLIC ADMINISTRATION
THEORIES OF ORGANIZATION-PUBLIC ADMINISTRATIONTHEORIES OF ORGANIZATION-PUBLIC ADMINISTRATION
THEORIES OF ORGANIZATION-PUBLIC ADMINISTRATION
 
Incoming and Outgoing Shipments in 3 STEPS Using Odoo 17
Incoming and Outgoing Shipments in 3 STEPS Using Odoo 17Incoming and Outgoing Shipments in 3 STEPS Using Odoo 17
Incoming and Outgoing Shipments in 3 STEPS Using Odoo 17
 

Manual LogixPro

  • 1. LogixPro Relay Logic Lab Page 1 of 7
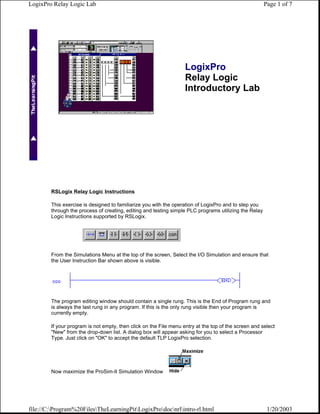
 LogixPro Relay Logic Introductory Lab RSLogix Relay Logic Instructions This exercise is designed to familiarize you with the operation of LogixPro and to step you through the process of creating, editing and testing simple PLC programs utilizing the Relay Logic Instructions supported by RSLogix. From the Simulations Menu at the top of the screen, Select the I/O Simulation and ensure that the User Instruction Bar shown above is visible. The program editing window should contain a single rung. This is the End of Program rung and is always the last rung in any program. If this is the only rung visible then your program is currently empty. If your program is not empty, then click on the File menu entry at the top of the screen and select "New" from the drop-down list. A dialog box will appear asking for you to select a Processor Type. Just click on "OK" to accept the default TLP LogixPro selection. Now maximize the ProSim-II Simulation Window file://C:Program%20FilesTheLearningPitLogixProdocnrlintro-rl.html 1/20/2003
  • 2. LogixPro Relay Logic Lab Page 2 of 7 The I/O Simulator The simulator screen shown above, should now be in view. For this exercise we will be using the I/O simulator section, which consists of 32 switches and lights. Two groups of 16 toggle switches are shown connected to 2 Input cards of our simulated PLC. Likewise two groups of 16 Lights are connected to two output cards of our PLC. The two input cards are addressed as "I:1" and "I:3" while the output cards are addressed "O:2" and "O:4". Use your mouse to click on the various switches and note the change in the status color of the terminal that the switch is connected to. Move your mouse slowly over a switch, and the mouse cursor should change to a hand symbol, indicating that the state of switch can be altered by clicking at this location. When you pass the mouse over a switch, a "tool-tip" text box also appears and informs you to "Right Click to Toggle Switch Type". Click your right mouse button on a switch, and note how the switch type may be readily changed. RSLogix Program Creation Collapse the I/O simulation screen back to it's normal size by clicking on the same (center) button you used to maximize the simulation's window. You should now be able to see both the simulation and program windows again. If you wish, you can adjust the relative size of these windows by dragging the bar that divides them with your mouse. I want you to now enter the following single run program which consists of a single Input instruction (XIC - Examine If Closed) and a single Output instruction (OTE - Output Energize). There's more than one way to accomplish this task, but for now I will outline what I consider to be the most commonly used approach. file://C:Program%20FilesTheLearningPitLogixProdocnrlintro-rl.html 1/20/2003
  • 3. LogixPro Relay Logic Lab Page 3 of 7 First click on the "New Rung" button in the User Instruction Bar. It's the first button on the very left end of the Bar. If you hold the mousepointer over any of these buttons for a second or two, you should see a short "ToolTip" which describes the function or name of the instruction that the button represents. You should now see a new Rung added to your program as shown above, and the Rung number at the left side of the new rung should be highlighted. Note that the new Rung was inserted above the existing (END) End Of Program Rung. Alternatively you could have dragged (left mouse button held down) the Rung button into the program window and dropped it onto one of the locating boxes that would have appeared. Now click on the XIC instruction with your left mouse button (Left Click) and it will be added to the right of your highlighted selection. Note that the new XIC instruction is now selected (highlighted). Once again, you could have alternatively dragged and dropped the instruction into the program window. If you accidentally add an instruction which you wish to remove, just Left Click on the instruction to select it, and then press the "Del" key on your keyboard. Alternatively, you may right click on the instruction and then select "Cut" from the drop-down menu that appears. Left Click on the OTE output instruction and it will be. added to the right of your current selection. Double Click (2 quick left mousebutton clicks) on the XIC instruction and a textbox should appear which will allow you to enter the address (I:1/0) of the switch we wish to monitor. Use the Backspace key to get rid of the "?" currently in the textbox. Once you type in the address, click anywhere else on the instruction (other than the textbox) and the box should close. Right Click on the XIC instruction and select "Edit Symbol" from the drop-down menu that appears. Another textbox will appear where you can type in a name (Switch-0) to associate with this address. As before, a click anywhere else will close the box. file://C:Program%20FilesTheLearningPitLogixProdocnrlintro-rl.html 1/20/2003
  • 4. LogixPro Relay Logic Lab Page 4 of 7 Enter the address and symbol for the OTE instruction and your first RSLogix program will now be complete. Before continuing however, Double check that the addresses of your instructions are correct. Testing your Program It's now time to "Download" your program to the PLC. First click on the "Toggle" button at the top right corner of the Edit Panel which will bring the PLC Panel into view. Click on the "DownLoad" button to initiate the downloading of your program to the PLC. Once complete, click inside the "RUN" option selection circle to start the PLC scanning. Enlarge the Simulation window so that you can see both the Switches and Lamps, by dragging the bar that separates the Simulation and Program windows to the right with your mouse. Now click on Switch I:1/00 in the simulator and if all is well, Lamp O:2/00 should illuminate. Toggle the Switch On and Off a number of times and note the change in value indicated in the PLC Panel's status boxes which are being updated constantly as the PLC Scans. Try placing the PLC back into the "PGM" mode and then toggle the simulator's Switch a few times and note the result. Place the PLC back into the "Run" mode and the Scan should resume. We are usually told to think of the XIC instruction as an electrical contact that allows electrical flow to pass when an external switch is closed. We are then told that the OTE will energize if the flow is allowed to get through to it. In actual fact the XIC is a conditional instruction which tests any bit that we address for Truth or a 1. Editing your Program Click on the "Toggle" button of the PLC Panel which will put the PLC into the PGM mode and bring the Edit Panel back into view. Now add a second rung to your program as shown below. This time instead of entering the addresses as you did before, try dragging the appropriate address which is displayed in the I/O simulation and dropping it onto the instruction. Note that the XIO instruction which Tests for Zero or False has it's address highlighted in yellow. This indicates that the instruction is True, which in the case of an XIO, means that the bit addressed is currently a Zero or False. file://C:Program%20FilesTheLearningPitLogixProdocnrlintro-rl.html 1/20/2003
  • 5. LogixPro Relay Logic Lab Page 5 of 7 This is probably a good time to practice your dragNdrop skills. Try moving instructions from rung to rung by holding the left mouse button down while over an instruction, and then while keeping the mouse button down, move the mouse (and instruction) to a new location. Try doing the same with complete rungs by dragging the box at the left end of the rung and dropping it in a new location. Once you feel comfortable with dragNdrop, ensure that your program once again looks like the one pictured above, Now download your program to the PLC and place the PLC into the Run Mode. Toggle both Switch-0 and Switch-1 on and off a number of times and observe the effects this has on the lamps. Ensure that you are satisfied with the operation of your program before proceeding further. Stop/Start utilizing OTL and OTU For this exercise we need two Normally Open momentary switches. Using your right mouse button, click on switch "I:1/2" and "I:1/3", changing them to N.O. pushbuttons. Now add the following two rungs to your program. Once you have the rungs entered correctly, download and run your modified program. Activate the Start and Stop switches and ensure that the OTL and OTU output instructions are responding as outlined in your text. Once you have the lamp ON, could you turn it off if power was lost in the Stop Switch circuit? Now modify your program so that it operates correctly when you substitute the N.O. Stop switch (I:1/03) with a Normally Closed Switch. If we now lost power on the N.C. Stop switch circuit, what would happen to the state of Lamp (O:2/02)? Emulating Standard Stop/Start Control file://C:Program%20FilesTheLearningPitLogixProdocnrlintro-rl.html 1/20/2003
  • 6. LogixPro Relay Logic Lab Page 6 of 7 Erase your program by selecting "New" from the "File" menu selection at the top of the screen. When the dialog box appears just click on "OK" to select the default PLC type. Now enter the following program. To enter a branch, just drag the branch (button) onto the rung and then insert or drag instructions into the branch. Before you download and run this program, take a careful look at our use of a XIC instruction to test the state of the N.C. Stop Switch. When someone presses the Stop Switch, will bit I:1/04 go True or False? Will the XIC instruction go True or False when the Switch is pressed? Is this the logic we are seeking in this case? .... Run the program and see if you're right! .... If we loose power in the Stop Switch circuit, what state will the lamp go to? .... Why do you think that most prefer this method rather than the OTL/OTU method of implementing Stop/Start Control? Output Branching with RSLogix Modify your program so that it matches the following. Download and Run the program. Operate the Stop and Start switches several times with Switch- 0 open, and again with Switch-0 closed. Remove the XIC instruction from the Output branch and note what happens to Lamp-3 when you Start and Stop the circuit. Try moving the Lamp-3 OTE instruction so that it is in series with the Lamp-2 OTE instruction. Download, Run and observe how both lamps still light even with the empty branch (short?) in place. It may look like an electrical circuit but in fact we know that it isn't and therefore obeys a somewhat different set of rules. Remove the empty branch, Download, Run and see if this has any effect on the logic or operation of the rung. Controlling One Light from two Locations Create, enter and test a program which will perform the common electrical function of controlling a light from two different locations. Clear your program and utilize toggle switch (I:1/00) and file://C:Program%20FilesTheLearningPitLogixProdocnrlintro-rl.html 1/20/2003
  • 7. LogixPro Relay Logic Lab Page 7 of 7 switch (I:1/01) to control Lamp (O:2/00)... (Hint: If both switches are On or if both switches are Off, then the Lamp should be On! This of course is just one approach to solving this problem) ...... file://C:Program%20FilesTheLearningPitLogixProdocnrlintro-rl.html 1/20/2003
  • 8. LogixPro Door Simulation Lab Page 1 of 5 LogixPro Door Simulation Lab Utilizing Relay Logic The ProSim-II Door Simulation From the Simulations Menu at the top of the screen, Select the Door Simulation. Take the time to familiarize yourself with the components used in the Door system, and take particular note of the current state of the limit switches. When the door is in the closed position, both limit switches are in their activated state (Not Normal). Run your mouse over each switch, and you should see a tool-tip text box appear, which denotes that the selected switch is wired using a set of Normally Open contacts. With the door fully closed, what signal level would you expect to see at the limit switch inputs I:1/03 and I:1/04? To confirm your assessment of the current limit switch states, place the PLC into the RUN mode which will initiate scanning. Now open the Data Table display by clicking on the Data Table icon located on the toolbar (3rd from right) at the top of the screen. When you have the Data Table showing, select the "Input Table" from the drop down Table list box. You should now be able to see the current state of each bit associated with input card I:1. You should also note that bit I:1/02 is also in a High or True state. Use your mouse to press the Stop switch on the Control Panel a few times, and note the results. Don't continue on with the exercise until you are confident that you understand the rational of the observed results. file://C:Program%20FilesTheLearningPitLogixProdocdldl-rl.html 1/22/2003
  • 9. LogixPro Door Simulation Lab Page 2 of 5 Student Programming Exercise #1: In this exercise we want you to apply your knowledge of Relay Logic Instructions to design a program which will control the ProSim-II Door. The Door System includes a Reversible Motor, a pair of Limit Switches and a Control Panel, all connected to your PLC. The program you create will monitor and control this equipment while adhering to the following criteria: In this exercise the Open and Close pushbuttons will be used to control the movement of the door. Movement will not be maintained when either switch is released, and therefore the Stop switch is neither required nor used in this exercise. However, all other available Inputs and Outputs are employed in this exercise. Pressing the Open Switch will cause the door to move upwards (open) if not already fully open. The opening operation will continue as long as the switch is held down. If the switch is released, or if limit switch LS1 opens, the door movement will halt immediately. Pressing the Close Switch will cause the door to move down (close) if not already fully closed. The closing operation will continue as long as the switch is held down. If the switch is released, or if limit switch LS2 closes, the door movement will halt immediately. If the Door is already fully opened, Pressing the Open Switch will Not energize the motor. If the Door is already fully closed, Pressing the Close Switch will Not energize the motor. Under no circumstance will both motor windings be energized at the same time. The Open Lamp will be illuminated if the door is in the Fully Open position. The Shut Lamp will be illuminated if the door is in the Fully Closed position. It is your responsibility to fully design, document, debug, and test your Program. Avoid the use of OTL or OTU latching instructions, and make a concerted effort to minimize the number of rungs employed. Ensure that you have made effective use of both instruction and rung comments to clearly document your program. All I/O components referenced within your program should be clearly labeled, and rung comments should be employed to add additional clarity as required. Student Programming Exercise #2: file://C:Program%20FilesTheLearningPitLogixProdocdldl-rl.html 1/22/2003
  • 10. LogixPro Door Simulation Lab Page 3 of 5 In this exercise we want you to apply your knowledge of Relay Logic Instructions to design a program which will maintain the appropriate door movement once initiated by the operator. The Opening or Closing operation of the door will continue to completion even if the operator releases the pushbutton which initiated the movement. The program will adhere to the following criteria: Door movement will halt immediately when the Stop Switch is initially pressed, and will remain halted if the switch is released. Pressing the Open Switch will cause the door to Open if not already fully open. The opening operation will continue to completion even if the switch is released. Pressing the Close Switch will cause the door to Close if not already fully shut. The closing operation will continue to completion even if the Switch is released. If the Door is already fully opened, Pressing the Open Switch will Not energize the motor. If the Door is already fully closed, Pressing the Close Switch will Not energize the motor. Under no circumstance will both motor windings be energized at the same time. The Ajar Lamp will be illuminated if the door is NOT in either the fully closed or fully opened position. The Open Lamp will be illuminated if the door is in the Fully Open position. The Shut Lamp will be illuminated if the door is in the Fully Closed position. It is your responsibility to fully design, document, debug, and test your Program. Avoid the use of OTL or OTU latching instructions, and make a concerted effort to minimize the number of rungs employed. As before, ensure that you have made effective use of both instruction and rung comments to clearly document your program. Student Programming Exercise #3: In this exercise we want to introduce you to a simple programming technique for adding a bit of "Flash" to your program. We want you to make use of the PLC's Free Running Timer which can be viewed in the Data Table Display at location S2:4. This integer word contains a count which is incremented continuously by the PLC when it is in the Run mode, and it can come in quite handy at times for variety of purposes. In this exercise we want you to utilize this word as follows: With the PLC in the Run mode, Display word S2:4 utilizing the Data Table display. Ensure that the Radix is set to Binary so that you can view the individual bits within the word. You should see a binary count in progress where the rate of change of each bit is file://C:Program%20FilesTheLearningPitLogixProdocdldl-rl.html 1/22/2003
  • 11. LogixPro Door Simulation Lab Page 4 of 5 directly related to it's position within the word. Bit 0 will have the highest rate, while Bit 1 will be 1/2 as fast as Bit 0, and Bit 2 half as fast as 1 etc. etc. We want you to add a Lamp Flasher to your program by monitoring the state of one of these bits with an XIC instruction. I'm going to suggest using Bit 4 for this purpose, but depending upon the speed of your computer you may elect to substitute another Bit. With an actual AB PLC, the rate is consistent, but with LogixPro it varies from computer to computer. Place an XIC instruction addressed to S:4/4 on the rung which controls either the Open or Shut Lamp in your previous program. Now download and Run this modified program to see the flashing effect achieved. The Lamp should flash at a reasonable rate whenever your program energizes the selected Lamp. Now modify your program so that the following criteria is met: If the Door is fully open, the Open lamp will be energized but not flashing as was the case before. If the Door is opening, the Open lamp will flash while the door is in motion. If the Door is fully closed, the Shut lamp will be energized but not flashing as was the case before. If the Door is closing, the Shut lamp will flash while the door is in motion. The Ajar Lamp will flash if the door is stationary, and is not in the fully open or fully closed position. The Ajar Lamp will flash at a slower rate (1/4) then the other lamps. The Ajar Lamp will be illuminated in a steady state if the door is in motion. As before, ensure that you have made effective use of both instruction and rung comments to clearly document your program. Supplemental Programming Exercise #4: We do not recommend proceeding with this exercise if you do not have an instructor or experienced PLC programmer to call upon for assistance. In this exercise we want you to modify your program so that it adheres to this additional criteria: If the door is currently opening, pressing the Close Switch will immediately halt movement. Door movement will remain halted when the switch is released. If the door is currently closing, pressing the Open Switch will immediately halt movement. Door movement will remain halted when the switch is released. file://C:Program%20FilesTheLearningPitLogixProdocdldl-rl.html 1/22/2003
  • 12. LogixPro Door Simulation Lab Page 5 of 5 Once movement is halted by the either of the foregoing actions, the operating criteria associated with the previous exercise will again take effect. The utilization of Binary or Integer Table bits to Flag specific conditions within your program would be appropriate. Also, the retentive OTL and OTU instructions may be utilized freely at your discretion. ...... file://C:Program%20FilesTheLearningPitLogixProdocdldl-rl.html 1/22/2003
  • 13. LogixPro - Silo Simulation Lab Page 1 of 3 LogixPro The Silo Lab Utilizing Relay Logic The ProSim-II Silo Simulation From the Simulations Menu at the top of the screen, Select the Silo Simulation Exercise #1 -- Continuous Operation Completely design and de-bug a ladder control circuit which will automatically position and fill the boxes which are continuously sequenced along the conveyor. Ensure that the following details are also met: The sequence can be stopped and re-started at any time using the panel mounted Stop and Start switches. The RUN light will remain energized as long as the system is operating automatically. The RUN light, Conveyor Motor and Solenoid will de-energize whenever the system is halted via the STOP switch. The FILL light will be energized while the box is filling. file://C:Program%20FilesTheLearningPitLogixProdocslsl-rl.html 1/22/2003
  • 14. LogixPro - Silo Simulation Lab Page 2 of 3 The FULL light will energize when the box is full and will remain that way until the box has moved clear of the prox-sensor. Exercise #2 -- Container Filling with Manual Restart Alter or re-write your program so that it incorporates the following changes: Stop the conveyor when the right edge of the box is first sensed by the prox- sensor. With the box in position and the conveyor stopped, open the solenoid valve and allow the box to fill. Filling should stop when the Level sensor goes true. The FILL light will be energized while the box is filling. The FULL light will energize when the box is full and will remain that way until the box has moved clear of the prox-sensor. Once the box is full, momentarily pressing the Start Switch will move the box off the conveyor and bring a new box into position. Forcing the operator to hold the Start button down until the box clears the prox-sensor is not acceptable. Exercise #3 -- Selectable Mode of Operation Alter or re-write your program so that the panel mounted Selector switch can be utilized to select one of 3 different modes of operation. The 3 modes shall operate as follows: When the selector switch is in position "A", the system shall operate in the "Continuous" mode of operation. This is the mode of operation which was used in Exercise #1. When the selector switch is in position "B", the system shall operate in the "Manual Restart" mode of operation. This is the mode of operation which was used in Exercise #2. When the selector switch is in position "C", the system shall operate in the "Fill Bypass" mode of operation. In this mode, the boxes will simply move down the conveyor continuously and bypass the fill operation. As in the other modes, the Start and Stop pushbuttons will control the conveyor motion and the Run Lamp will operate as expected. ...... file://C:Program%20FilesTheLearningPitLogixProdocslsl-rl.html 1/22/2003
  • 15. LogixPro - Silo Simulation Lab Page 3 of 3 file://C:Program%20FilesTheLearningPitLogixProdocslsl-rl.html 1/22/2003
  • 16. LogixPro - Introductory Timer Lab Page 1 of 7 LogixPro Introduction To RSLogix Timers The TON Timer .... (Timer ON Delay) From the LogixPro Simulations Menu, select the I/O Simulation. Clear out any existing program by selecting the "New" entry in the File menu, and then select the "Clear Data Table" entry in the Simulations menu. Now enter the following program being careful to enter the addresses exactly as shown. Confirm that you have entered the number 100 as the timer's preset value. This value represents a 10 second timing interval (10x0.1) as the timebase is fixed at 0.1 seconds: Once you have your program entered, and have ensured that it is correct, download it to the PLC. Ensure that Switch I:1/0 is Open, and then place the PLC into the Run mode. Right click on the Timer instruction, and select "GoTo DataTable" from the drop- file://C:Program%20FilesTheLearningPitLogixProdocntmrintro-tmr.html 1/22/2003
  • 17. LogixPro - Introductory Timer Lab Page 2 of 7 down menu. Note the initial value of timer T4:1's accumulator and preset in the spaces below. Also indicate the state of each of the timer's control bits in the spaces provided: Initial State (Switch I:1/0=Open): T4:1.ACC = _____ T4:1.PRE = ______ T4:1/EN = ____ T4:1/TT = ____ T4:1/DN = ____ Close switch I:1/0, and carefully observe the incrementing of the timer's accumulator, and the state of each of it's control bits. Once the Timer stops incrementing, note the final value of timer T4:1's accumulator, preset, and the state of it's control bits below: Final State (Switch I:1/0=Closed): T4:1.ACC = _____ T4:1.PRE = ______ T4:1/EN = ____ T4:1/TT = ____ T4:1/DN = ____ Toggle the state of switch I:1/0 a number of times, and observe the operation of the Timer in both the DataTable display and in the Ladder Rung program display. Confirm that when the rung is taken false, the accumulator and all 3 control bits are reset to zero. This type of timer is a non-retentive instruction, in that the truth of the rung can cause the accumulator and control bits to be reset (=0). Conclusions: Use the TON instruction to turn an output on or off after the timer has been on for a preset time interval. This output instruction begins timing when its rung goes "true". It waits the specified amount of time (as set in the PREset), keeps track of the accumulated intervals which have occurred (ACCumulator), and sets the DN (done) bit when the ACC (accumulated) time equals the PRESET time. As long as rung conditions remain true, the timer adjusts its accumulated value (ACC) each evaluation until it reaches the preset value (PRE). The accumulated value is reset when rung conditions go false, regardless of whether the timer has timed out. Cascaded TON Timers Insert a new rung containing a second timer just below the first rung as shown below. This second timer T4:2 will be enabled when the first timer's Done bit T4:1/DN goes true or high (1). file://C:Program%20FilesTheLearningPitLogixProdocntmrintro-tmr.html 1/22/2003
  • 18. LogixPro - Introductory Timer Lab Page 3 of 7 Once you have completed this addition to your program, download your program to the PLC and select RUN. Toggle the state of switch I:1/0 to ON and observe the operation of the timers in your program. Bring the DataTable display into view, and pay particular attention to the way in which the timers are cascaded (one timer starts the next). Try changing the value of one of the timer presets by double clicking on the preset value in the DataTable display, and then entering a new value. Run the timers through their timing sequence a number of times. Don't move on until you are satisfied that the timers are working as you would expect In this exercise we have utilized just two timers, but there is nothing stopping us from sequencing as many timers as we wish. The only thing to remember is; to use the DN (done) bit of the previous timer to enable the next timer in the sequence. Obviously locating the timers on consecutive rungs, and employing consecutive numbering will make such a program much easier to read and trouble-shoot. Self Resetting Timers Place the PLC into the PGM mode, and modify the first rung of your program as depicted below. Once you have modified your program, download it to the PLC and place the PLC into the RUN mode. Close switch I:1/0 and observe the operation of the timers. The timers should now be operating in a continuous loop with Timer1 starting Timer2, and then when Timer2 is done, Timer1 is reset by Timer2's done bit. As before, when Timer1 is reset, it in turn resets Timer2 which causes Timer2's done to go low (T4:2/DN=0). file://C:Program%20FilesTheLearningPitLogixProdocntmrintro-tmr.html 1/22/2003
  • 19. LogixPro - Introductory Timer Lab Page 4 of 7 Once Timer2's done bit is low, the sequence is back to where it originally began, and the timing sequence will start over once again on the very next scan. Remove the first instruction (switch XIC I:1/0) from rung zero of your program. Download and RUN this modified version of your program Does the timing operation continuously sequence as before? It should! Can you stop the timing sequence? Not without taking the PLC out of the RUN mode! In many applications there may never be a need to stop such a timing sequence, so a switch might not be used or needed. In this exercise we cascaded two timers, but as before there is nothing to stop us from cascading as many timers as we wish. The thing to remember here is; utilize the DN (XIC or "NOT"done) bit of the last timer in the sequence to reset the first timer in the sequence. Once again, consecutive rungs, and numbering will make a program much easier to read and trouble-shoot. The TOF Timer .... (Timer OFF Delay) In Allen Bradley PLC programming, the TON timer is by far the most commonly used type of timer. Most people consider TON timers to be simple to use and understand. In comparison, many people find the operation of the Allen Bradley TOF (Timer OFF delay) timer to be less intuitive, but I'm going to let you decide for yourself. Make sure that switch I:1/0 is Closed, and then enter or modify your existing program to match the one shown below. Once you have your program entered, and have ensured that it is correct, download it to the PLC. Ensure that Switch I:1/0 is Closed, and then place the PLC into the Run mode. Right click on the Timer instruction, and select "GoTo DataTable" from the drop- down menu. file://C:Program%20FilesTheLearningPitLogixProdocntmrintro-tmr.html 1/22/2003
  • 20. LogixPro - Introductory Timer Lab Page 5 of 7 Note the initial value of timer T4:1's accumulator and preset in the spaces below. Also indicate the state of each of the timer's control bits in the spaces provided: Initial State (Switch I:1/0=Closed): T4:1.ACC = _____ T4:1.PRE = ______ T4:1/EN = ____ T4:1/TT = ____ T4:1/DN = ____ Open switch I:1/0, and carefully observe the incrementing of the timer's accumulator, and the state of each of it's control bits. Once the Timer stops incrementing, note the final value of timer T4:1's accumulator, preset, and the state of it's control bits below: Final State (Switch I:1/0=Open): T4:1.ACC = _____ T4:1.PRE = ______ T4:1/EN = ____ T4:1/TT = ____ T4:1/DN = ____ Toggle the state of switch I:1/0 a number of times, and observe the operation of the Timer in both the DataTable display and in the Ladder Rung program display. Confirm that when the rung is taken true, the accumulator and all 3 control bits are reset to zero. The TOF timer like the TON timer is also a non-retentive instruction and can be reset by changing the truth of the rung. Conclusions: Use the TOF instruction to turn an output on or off after its rung has been off for a preset time interval. This output instruction begins timing when its rung goes "false." It waits the specified amount of time (as set in the PRESET), keeps track of the accumulated intervals which have occurred (ACCUM), and resets the DN (done) bit when the ACCUM (accumulated) time equals the PRESET time. The Accumulated value is reset when rung conditions go true regardless of whether the timer has timed out. The RTO Timer .... (Retentive Timer ON) Make sure that switch I:1/0 is Open, and then replace the TOF timer in your program with a RTO retentive timer. Now insert a new rung below the timer, and add the XIC,I:1/1 and RES,T4:1 instructions. Your program should now match the one shown below: file://C:Program%20FilesTheLearningPitLogixProdocntmrintro-tmr.html 1/22/2003
  • 21. LogixPro - Introductory Timer Lab Page 6 of 7 Once you have your program entered, and have ensured that it is correct, download it to the PLC. Ensure that both Switches are Open, and then place the PLC into the Run mode. Right click on the Timer instruction, and select "GoTo DataTable" from the drop- down menu. Note the initial value of timer T4:1's accumulator, preset and control bits. Are we starting off with the same values we had in the TON exercise? You should be answering Yes.! Close switch I:1/0 for 2 or 3 seconds and then Open it again. Note that the timer stopped timing when the rung went false, but the accumulator was not reset to zero. Close the switch again and leave it closed which will allow the timer to time-out (ACC=PRE). Once timed out, note the state of the control bits Open the switch, and once again note the state of the control bits. Now close Switch I:1/1 and leave it closed. This will cause the Reset instruction to go true. Close switch I:1/0 momentarily to see if the timer will start timing again. It should not! Open Switch I:1/1 which will cause the Reset instruction return to false. Now toggle switch I:1/0 several times and note that the timer should again start timing as expected. Repeat the foregoing steps, until you are satisfied that you clearly understand the operation of both the RTO timer, and the Reset instruction. Conclusions: file://C:Program%20FilesTheLearningPitLogixProdocntmrintro-tmr.html 1/22/2003
  • 22. LogixPro - Introductory Timer Lab Page 7 of 7 An RTO timer functions the same as a TON with the exception that once it has begun timing, it holds its count of time even if the rung goes false, a fault occurs, the mode changes from RUN to PGM, or power is lost. When rung continuity returns (rung goes true again), the RTO begins timing from the accumulated time which was held when rung continuity was lost. By retaining its accumulated value, retentive timers measure the cumulative period during which rung conditions are true. ...... file://C:Program%20FilesTheLearningPitLogixProdocntmrintro-tmr.html 1/22/2003
  • 23. LogixPro - Traffic Control Lab Page 1 of 3 LogixPro Traffic Control Lab Utilizing TON Timers Exercise #1 -- Traffic Control using 3 Lights From the Simulations Menu at the top of the screen, Select the Traffic Light Simulation Using your knowledge of cascading timers, develop a ladder logic program which will sequence a set of green, amber and red lights in the following manner: Sequence of Operation: 1. Light O:2/00 (Red) = 12 seconds ON 2. Light O:2/02 (Green) = 8 seconds ON 3. Light O:2/01 (Amber) = 4 seconds ON 4. The sequence now repeats with Red = ON. <----------------- Time in Seconds ------------------> RED GREEN AMBER file://C:Program%20FilesTheLearningPitLogixProdoctltl-ton.html 1/22/2003
  • 24. LogixPro - Traffic Control Lab Page 2 of 3 12 Sec. 8 Sec. 4 Sec. Exercise #2 -- Traffic Control using 6 Lights Modify your program so that the 3 lights which represent the other traffic direction are also controlled. It is tempting to use six Timers for this task, but the job can be done with just four, and you'll end up with a much cleaner program as a bonus. Red = O:2/00 Green = O:2/02 Amber = O:2/01 Green = O:2/06 Amber = O:2/05 Red = O:2/04 8 Sec. 4 Sec. 8 Sec. 4 Sec. Still getting the odd Crash? Well it's pretty obvious that these drivers aren't paying much attention to Amber Lights! No need for any more wiring however. You can solve this problem, but it's going take a little more programming. Exercise #3 -- Traffic Light With Delayed Green Modify your program so that there is a 1 second period when both directions will have their RED lights illuminated. Note that the timing diagram below only shows one of these 1 second intervals but two are actually required. Work the problem out, and try to keep the Timer count down to six. Red = O:2/00 Green = O:2/02 Amber = O:2/01 Green = O:2/06 Amber = O:2/05 Red = O:2/04 8 Sec. 4 Sec. 1 8 Sec. 4 Sec. If a one second delay is not enough to get these drivers under control then just go ahead and jack the delay up to two! ...... file://C:Program%20FilesTheLearningPitLogixProdoctltl-ton.html 1/22/2003
  • 25. LogixPro - Traffic Control Lab Page 3 of 3 file://C:Program%20FilesTheLearningPitLogixProdoctltl-ton.html 1/22/2003
  • 26. LogixPro - Introductory Word Compare Lab Page 1 of 6 LogixPro Introduction To Word Compare Instructions The RSLogix basic Comparison Instructions From the LogixPro Simulations Menu, select the I/O Simulation. Clear out any existing program by selecting the "New" entry in the File menu, and then select the "Clear Data Table" entry in the Simulations menu. Now enter the following program being careful to enter the addresses and values exactly as shown. file://C:Program%20FilesTheLearningPitLogixProdocncmpintro-cmp.html 1/22/2003
  • 27. LogixPro - Introductory Word Compare Lab Page 2 of 6 Once you have completed entering your program, download your program to the PLC. Ensure that SW0 and SW! are configured as Normally Open pushbuttons then place the PLC into the Run mode. Toggle the state of switch SW0 (I:1/0) continuously while observing the truth of each of rungs as indicated by the lamps. Once the count exceeds nine or ten, reset the counter and repeat the above sequence. Keep doing this until you are convinced that the instructions are operating as described in the RSLogix documentation. Finally, indicate the observed state of the lamps, by circling the appropriate numbers below: file://C:Program%20FilesTheLearningPitLogixProdocncmpintro-cmp.html 1/22/2003
  • 28. LogixPro - Introductory Word Compare Lab Page 3 of 6 Lamp 0 is On during counts: 1...2...3...4...5...6...7...8...9...10 Lamp 1 is On during counts: 1...2...3...4...5...6...7...8...9...10 Lamp 2 is On during counts: 1...2...3...4...5...6...7...8...9...10 Lamp 3 is On during counts: 1...2...3...4...5...6...7...8...9...10 Conclusions: The basic Comparison instructions compare the values stored in two memory locations. These two values can be the data stored in two different word locations, or one can be the data stored in a word and the other can be a constant value. The basic comparison instructions are: EQU .... The Equal instruction goes true if the source A and B values are Equal to each other NEQ .... The Not Equal instruction goes true if the source A and B values are Not Equal to each other LES .... The Less Than instruction goes true if the value in source A is Less Than the value in source B GRT .... The Greater Than instruction goes true if the value in source A is Greater Than the value in source B LEQ .... The Less Than OR Equal instruction goes true if the value in source A is Less Than or Equal to the value in source B GEQ .... The Greater Than OR Equal instruction goes true if the value in source A is Greater Than or Equal to the value in source B Since any PLC word including Timer and Counter accumulators and presets can be used as the source value in any of the basic comparison instructions, these instructions prove extremely versatile and are widely used in RSLogix programs. The LIM Instruction .... Limit Comparison Modify or rewrite your existing program so that the first 3 rungs appear as shown below. Ensure that addresses and values are exactly as shown. file://C:Program%20FilesTheLearningPitLogixProdocncmpintro-cmp.html 1/22/2003
  • 29. LogixPro - Introductory Word Compare Lab Page 4 of 6 Once you have completed modifying your program, download your program and place the PLC into the Run mode. Toggle the state of switch SW0 (I:1/0) continuously while observing the truth of Lamp 4. Once the count exceeds ten, reset the counter and repeat the above sequence. Keep doing this until you are convinced that the LIM instruction is operating as described in the RSLogix documentation. Finally, indicate the observed state of Lamp 4, by circling the appropriate numbers below: Lamp 4 is On during counts: 1...2...3...4...5...6...7...8...9...10 Conclusions: The LIM (Limit Comparison) instruction compares the Test value to the value of the Low Limit and the value of the High Limit. The instruction goes true if .. Test is Equal to or Greater than the Low Limit .. And .. Test is Less Than or Equal to the High Limit. A logical equivalent to rung 2 is shown below: The LIM instruction provides in a single package the same functionality that would normally necessitate the utilization of 2 basic comparison instructions. file://C:Program%20FilesTheLearningPitLogixProdocncmpintro-cmp.html 1/22/2003
  • 30. LogixPro - Introductory Word Compare Lab Page 5 of 6 The MEQ Instruction .... Masked, Equal Comparison The MEQ instruction is sometimes considered an advanced level instruction which many might deem inappropriate for inclusion in a basic level exercise. The MEQ is however listed with the other comparison instructions, so a quick peek at it's functionality should not cause major harm. The subject of "Masking" relates to the act of controlling which bits within a binary value or word are passed through to a destination. The following program is a very simple demonstration of how extraneous information can be selectively ignored with the judicious use of masking. There are several other instructions in the RSLogix instruction set that employ masking and work similarly, but only the MEQ instruction will be reviewed here. Clear your existing program by selecting the "New" entry in the File menu. Now enter the following program being careful to enter the addresses and values exactly as shown. Note: address I:5 is the address of the I/O simulator's input card which has the thumbwheel switches connected to it. The MEQ and EQU instructions are almost identical in operation. The only difference is that with the MEQ instruction, selected bits within the Source value can be "masked out" or deleted prior to doing the comparison for Equality. In the above MEQ example we are going to mask out all bits other than the 4 which contain the data from the first thumbwheel switch. Once you have completed your program, download your program and place the PLC into the Run mode. Starting with the right hand (units) thumbwheel only, increment the displayed value up and down and note how both lamps energize when the value is set to 4. Now set the first thumbwheel to 4 and start incrementing the second (tens) thumbwheel. If your program is operating correctly only lamp 6 should remain lighted. file://C:Program%20FilesTheLearningPitLogixProdocncmpintro-cmp.html 1/22/2003
  • 31. LogixPro - Introductory Word Compare Lab Page 6 of 6 Finally, set the thumbwheel values to match those listed below, and circle the appropriate number if the corresponding lamp is On. Lamp 5 is On when the thumbwheel value is: 1...4...14...34...54...94...104 Lamp 6 is On when the thumbwheel value is: 1...4...14...34...54...94...104 Conclusions: The MEQ instruction has the same functionality of an EQU instruction, but it allows you to first mask out any extraneous information or bits prior to doing the actual test for equality. Advanced level? Not really, but it does require a reasonably good understanding of numbering systems and in particular binary. ...... file://C:Program%20FilesTheLearningPitLogixProdocncmpintro-cmp.html 1/22/2003
  • 32. LogixPro - Traffic Control Lab Page 1 of 3 LogixPro Traffic Control Lab Utilizing Word Comparison Exercise #1 -- Traffic Control utilizing 1 Timer From the Simulations Menu at the top of the LogixPro screen, Select the Traffic Light Simulation Utilizing a single timer, employ the use of Word Comparison instructions to control our simulated traffic light. The sequence of operation and timing durations are set out in following timing diagram. Your program should incorporate a 1 second period (delayed green) when both directions will have only their RED lights illuminated. Note that the timing diagram below only shows one of these 1 second intervals, but two are actually required. Red = O:2/00 Green = O:2/02 Amber = O:2/01 Green = O:2/06 Amber = O:2/05 Red = O:2/04 8 Sec. 4 Sec. 1 8 Sec. 4 Sec. file://C:Program%20FilesTheLearningPitLogixProdoctltl-cmp.html 1/22/2003
  • 33. LogixPro - Traffic Control Lab Page 2 of 3 If a one second delay proves insuficient to get these drivers under control then just go ahead and jack the delay up to two! Exercise #2 -- Dealing with Pedestrians Modify your program so that the crosswalks are also controlled. This is not necessarily a word comparison exercise, but it's a task that needs doing, and you should now have sufficient expertise to accomplish it. It might not be all that easy however! Your program should operate as follows: When depressed, the crosswalk pushbutton will cause the appropriate Walk Sign to be illuminated at the next occurence of a Red to Green transition for the appropriate direction. If the Green light is already illuminated when the button is pressed then the Walk signal sequence will be delayed until the next Red to Green transistion ocurrs. Once the Walk Sign is illuminated, it will remain so for the duration of the Green signal. When the Amber light appears, the Walk Sign will commence to flash On and Off and continue to do so until the Red signal appears. You might consider using a bit from the free-running timer located in S2:4 to create the cautionary flashing effect. ...... file://C:Program%20FilesTheLearningPitLogixProdoctltl-cmp.html 1/22/2003
  • 34. LogixPro - Traffic Control Lab Page 3 of 3 file://C:Program%20FilesTheLearningPitLogixProdoctltl-cmp.html 1/22/2003
  • 35. LogixPro - Introductory Counter Lab Page 1 of 7 LogixPro Introduction To RSLogix Counters The CTU and RES ...... Counter Instructions From the LogixPro Simulations Menu, select the I/O Simulation. Clear out any existing program by selecting the "New" entry in the File menu, and then select the "Clear Data Table" entry in the Simulations menu. Now enter the following program being careful to enter the addresses exactly as shown. Confirm that you have entered the number 10 as the counter's preset value. This value is optionally used to set the point at which the counter's Done Bit will be Set, indicating that the count is complete. file://C:Program%20FilesTheLearningPitLogixProdocnctrintro-ctr.html 1/22/2003
  • 36. LogixPro - Introductory Counter Lab Page 2 of 7 Once you have your program entered, and have ensured that it is correct, download it to the PLC. Ensure that Switch I:1/0 and I:1/1 are Open, and then place the PLC into the Run mode. Right click on the CTU instruction, and select "GoTo DataTable" from the drop- down menu. Note the initial value of Counter C5:1's accumulator and preset in the spaces below. Also indicate the state of each of the Counter's primary control bits in the spaces provided: Initial State (Switch I:1/0=Open): C5:1.ACC = _______ C5:1.PRE = _______ C5:1/CU = ___ C5:1/CD = ___ C5:1/DN = ___ Open and Close switch I:1/00 a number of times and carefully observe the incrementing of C5:1's accumulator and the operation of the enable and done bits. Close switch I:1/01 and observe the effect that the "RES" instruction has on the counter. Attempt to increment the counter while switch I:1/01 is closed. You should not be able to increment the counter while the "RES" instruction is held "True". Open switch I:1/01 to allow the "RES" instruction to go false, and then increment the counter until the accumulator matches the preset. Increment the counter 2 or 3 more times and note the final value of C5:1's accumulator, preset and status bits in the spaces below. Final State (Switch I:1/0=Closed): file://C:Program%20FilesTheLearningPitLogixProdocnctrintro-ctr.html 1/22/2003
  • 37. LogixPro - Introductory Counter Lab Page 3 of 7 C5:1.ACC = _______ C5:1.PRE = _______ C5:1/CU = ___ C5:1/CD = ___ C5:1/DN = ___ Conclusions: The CTU output instruction counts up for each false-to-true transition of conditions preceding it in the rung and produces an output (DN) when the accumulated value reaches the preset value. Rung transitions might be triggered by a limit switch or by parts traveling past a detector etc. The ability of the counter to detect a false-to-true transitions depends on the speed (frequency) of the incoming signal. The on and off duration of an incoming signal must not be faster than the scan time. Each count (accumulator) is retained when the rung conditions again become false, permitting counting to continue beyond the preset value. This way you can base an output on the preset but continue counting to keep track of inventory/parts, etc. Use a RES (reset) instruction with the same address as the counter, or another instruction in your program to overwrite the value of the accumulator and control bits. The on or off status of counter done, overflow, and underflow bits is retentive. The accumulated value and control bits are reset when a RES is enabled. The CTD ...... Count Down Instruction Ensure that switch I:1/00 and I:1/01 are open; then place the PLC into the Program mode, and Insert a new rung containing a CTD instruction just below the first rung in your program. file://C:Program%20FilesTheLearningPitLogixProdocnctrintro-ctr.html 1/22/2003
  • 38. LogixPro - Introductory Counter Lab Page 4 of 7 Once you have completed this addition to your program, download your program to the PLC and select RUN. Toggle the state of switch I:1/0 continuously until the accumulator of C5:1 exceeds the preset. Now toggle switch I:1/02 and decrement counter C5:1 while carefully observing the status bits of the counter. Increment and decrement the counter from below zero to beyond the preset a number of times. Conclusions: The CTD output instruction counts down for each false-to-true transition of conditions preceding it in the rung and produces an output when the accumulated value reaches the preset value. Rung transitions might be triggered by a limit switch or by parts traveling past a detector. Each count is retained when the rung conditions again become false. The count is retained until a RES (reset) instruction with the same address as the counter is enabled, or if another instruction in your program overwrites the value. The accumulated value is retained after the CTU or CTD instruction goes false, and when power is removed from and then restored to the processor. Also, the on or off file://C:Program%20FilesTheLearningPitLogixProdocnctrintro-ctr.html 1/22/2003
  • 39. LogixPro - Introductory Counter Lab Page 5 of 7 status of counter done, overflow, and underflow bits is retentive. The accumulated value and control bits are reset when a RES is enabled. Applying Counter Instructions .... An Up/Down Sequence Example Ensure that the I/O Simulation is still selected. Clear your existing program by selecting the "New" entry in the File menu, and then select the "Clear Data Table" entry in the Simulations menu. Note the use of the "EQU" instruction in rung 2 of the following program. This input instruction will go true if the value referenced by the Source entry is "Equal" to the value contained in the Source B entry. In this example, the instruction will go true if the accumulator of the counter is equal to zero. Now enter the following program being careful to enter the addresses exactly as shown. Once you have your program entered, and have ensured that it is correct, download it to the PLC. Confirm that you have configured switch I:1/0 as a N.O. pushbutton then place the PLC into the "Run" mode. Continuously Open and Close switch I:1/00 while carefully observing the incrementing of C5:1's accumulator. If you have entered your program correctly, the accumulator should increment file://C:Program%20FilesTheLearningPitLogixProdocnctrintro-ctr.html 1/22/2003
  • 40. LogixPro - Introductory Counter Lab Page 6 of 7 until the count of 10 is reached, and then start to decrement. When the count reaches zero, the B3:1/0 flag bit should be cleared and the up/down sequence should then repeat. Ensure that your program is operating as described, and carefully note how bit B3:1/0 is being employed to track and control the direction of the counting sequence. Note the conditions that must be present in order for bit B3:1/0 to be latched On. The first XIC instruction ensures that the latching only occurs when the pushbutton switch is released Delete this XIC instruction from rung 1, and then download and run your program again. Without the XIC instruction, the latching will occur as soon as the count of ten is reached and the CTD instruction will immediately decrement the counter back to a count of 9. Set the scan speed to it's lowest value, and you should be able to see that the count does reach 10, but it is then immediately decremented. Conclusions: The CTU is by far the most commonly used counter instruction. It can, and is utilized in almost a limitless number of counting applications, and is typically very easy to understand and employ. The CTD instruction is less widely employed. It is extremely useful however when paired with a CTU, where up/down counting operations are required. Cars entering and leaving a parking lot, containers being filled and then emptied are just 2 examples of where paired CTU/CTD counters might be employed. The elegance of the CTU/CTD pairing can extract a price however in terms of ease of use and program clarity. As the last exercise highlighted, one requires a very clear understanding of the operation of these instructions and the PLC's scan sequence, in order to employ them effectively. This last exercise was definitely not the only way to setup an up/down counting sequence, but it does highlight the attention to detail that you will need to demonstrate when tackling the later sections of the next student exercise. ...... file://C:Program%20FilesTheLearningPitLogixProdocnctrintro-ctr.html 1/22/2003
  • 41. LogixPro - Introductory Counter Lab Page 7 of 7 file://C:Program%20FilesTheLearningPitLogixProdocnctrintro-ctr.html 1/22/2003
  • 42. LogixPro - Batch Mix Counters Lab Page 1 of 3 LogixPro The Batch Mix Lab Utilizing PLC Counters Exercise #1 -- Filling the Batch Mixing Tank From the Simulations Menu at the top of the screen, Select the Batch Mixing Simulation. Using your knowledge of PLC counters, design a program to meet the following requirements: When the Start switch (I:1/0) is pressed, pump P1 will be energized and the tank will start to fill. The pulses generated by Flowmeter 1 should be used to increment a counter. When the count reaches a value where the tank is approximately 90% full, the pump is to be shut-off and and the control panels FULL light is to be energized. The filling operation is to halt immediately if the stop switch is pressed. While testing, utilize the "Reset Simulation" and the "Reset Timers and Counters" entries in the Simulations menu to re-start your program. To make it a little easier to see what is happening with the counter, you might file://C:Program%20FilesTheLearningPitLogixProdocblbl-ctr.html 1/22/2003
  • 43. LogixPro - Batch Mix Counters Lab Page 2 of 3 want to add the following rung to the end of your program. If correctly entered, the TOD (To BCD) instruction will take the integer value in the counters accumulator, convert it to Binary Coded Decimal, and then move (copy) this BCD value to the control panel LED display (O:4). The TOD instruction can be located in the Compute/Math group of instructions in the Edit Panel. Be sure to alter the Source entry to match the counter number you are using. Exercise #2 -- Emptying the Batch Mix Tank Modify your program so that it meets the following additional requirements: The mixer will run for 8 seconds once the tank is full. When the mixing is complete, drain pump P3 is to be started and the tank is to be drained. Flowmeter 3 will be employed to decrement the existing counter, and draining will be allowed to continue till the counters accumulator reaches zero. Once the tank is empty again, pressing the Start switch will cause the sequence to repeat. Exercise #3 -- Continuous Operation Modify your program so that the filling and emptying sequence will repeat continuously once it has been started by the initial pressing of the Start switch. Ensure that the RUN light is energized when the mixer or either pump is running. The STANDBY light should light and the process should halt when the Stop button is pressed. The process should restart where it left off if the the Start button is pressed following a Stop. ...... file://C:Program%20FilesTheLearningPitLogixProdocblbl-ctr.html 1/22/2003
  • 44. LogixPro - Batch Mix Counters Lab Page 3 of 3 file://C:Program%20FilesTheLearningPitLogixProdocblbl-ctr.html 1/22/2003
  • 45. PSIM - Advanced Batch Lab Page 1 of 2 LogixPro The Advanced Batch Mixing Lab A Programmable Batch Mixing System Exercise #1 -- Single Batch Mode of Operation Using your knowledge of PLCs, design a program to meet the following criteria: When the 3 position Selector Switch is in position "A". the batch mixing process will run in a single batch mode. The operator may start the batch mix sequence by momentarily pressing the Start Switch. Once a batch sequence has begun, the sequence may be stopped and resumed at any time using the Stop and Start switches. The tank is to be filled with a mixture obtained from the separate fill lines utilizing fill pumps P1 and P2. A counter will track the quantity of product obtained from Line 1 (P1) while the remainder will come from Line 2 (P2). The mixture ratio of the product will be controllable by adjusting the counter's preset. The tank is to be filled to the point where the Hi-Level sensor goes true. When filling is complete, the Full light will turn On. Heater O:2/04 and Mixer O:2/00 will be started allowing the mixture to begin heating. Thermostat I:1/02 will be employed to control the temperature. The mixer will continue to run for 4 seconds after the mixture reaches the desired temperature. When the mixer stops, pump P3 will be used to drain the product from the tank. The tank will be drained to the point where the Lo-Level sensor trips. Once emptied, a new single batch sequence may again be started by pressing the Start Switch while the Selector switch is in position "A". Exercise #2 -- Multiple Batch Mode of Operation Enhance your program to include the following features: file://C:Program%20FilesTheLearningPitLogixProdocblbl-adv.html 1/22/2003
  • 46. PSIM - Advanced Batch Lab Page 2 of 2 When the 3 position Selector Switch is in position "B". the process will produce multiple batches, The number of batches produced will be operator selectable, and the current batch count will be displayed on the Control panel's LED display. The operator will be able to enter the desired batch count using the control panel thumbwheel switches. The operator will be able to set the product ratio by entering the desired product one percentage via the control panel thumbwheel switches. It is your responsibility to make the operator interface as simple and fault tolerant as possible. file://C:Program%20FilesTheLearningPitLogixProdocblbl-adv.html 1/22/2003
  • 47. LogixPro Dual Compressor Exercise Page 1 of 5 LogixPro Dual Compressor Student Exercises Exercise #1 --- Single Compressor Operation In this first exercise, the pressure switch PE1 (I:1/02) is to be utilized alone to control the operation of motor (O:2/0) and maintain the compressor's storage tank pressure. The pressure range will be dictated by the settings shown for PE1. Using your mouse, adjust both the limit (make 120PSI), and the adjustable span setting (20PSI) of PE1 to match the settings shown below. Allow the user to start and stop the air system using the appropriate panel mounted switches, and ensure that the "Run" lamp is illuminated whenever the system is enabled. Lamp "C1" should be illuminated only when compressor #1 is actually running. Prior to testing your program, adjust the system's discharge flow rate to 50% as shown. This setting should prove to be low enough that a single compressor will then be able to supply the needs of this particular pneumatic system. Once you have created your program, download it to the PLC and test out it's operation. When the start button is pressed, the Compressor should start and begin to build up http://www.thelearningpit.com/lp/doc/c2/comp2.html 5/2/2004
  • 48. LogixPro Dual Compressor Exercise Page 2 of 5 pressure within the storage tank. Once the pressure reaches 120PSI, the compressor should stop, and remain idle until the pressure in the storage tank drops below 100PSI. .......... Exercise #2 --- Alternating Compressors when Loading is Light In this exercise, each compressor is to take it's turn bringing the storage tank pressure back up to the selected pressure setting. Pneumatic/Electric switch PE1 will continue to be utilized for this purpose, and the settings will remain the same as those used in the previous exercise. The task of alternating back and forth between loads is sometimes referred to as a load toggle function, and there are numerous methods to accomplish this in relay logic. In this exercise however, you are asked to limit yourself to using only basic relay type instructions when creating your solution. Prior to testing your program, adjust the system's discharge flow rate again to 50% as shown. As we have already determined, this flow rate can be readily maintained by a single compressor. Adding a second compressor however, will share the loading and allow for an extended cooling period between cycles. Once you have created your program, download it to the PLC and thoroughly test out it's operation. Finally, adjust the flow rate which controls the amount of air leaving the storage tank to 80% and then 100% and note the effect. At higher rates of flow, a single compressor will not have the capacity to supply this system's peak needs on it's own. Obviously we will need a bit of help at times from the second compressor. .......... Exercise #3 --- Coping with Large Demands for Plant Air Your current program should be suitable for maintaining the desired pressure range as long as the plant air consumption remains relatively modest. As the plant air consumption approaches 100% capacity however, it becomes obvious that we will need to have both compressors running in order to satisfy this increased loading. http://www.thelearningpit.com/lp/doc/c2/comp2.html 5/2/2004
  • 49. LogixPro Dual Compressor Exercise Page 3 of 5 Modify your program so that the second pressure switch PE2 will detect when the storage tank pressure drops below our current minimum setting of 100PSI. This situation will occur if a single compressor is unable to keep up to the load and the tank pressure continues to drop. If and when the pressure drops to 98PSI, the idle compressor should be started, and both compressors will then continue to run until the tank is up to full pressure. It is likely that your modifications will also result in both compressors being run when the system is first started and the tank pressure is initially being brought to within range of the pressure switches. This action will reduce the time it takes to bring the plant air system up to pressure, and is therefore considered desirable. Please ensure that your system does actually operate in this fashion. Once you have created your program, download it to the PLC and thoroughly test out it's operation at both 50% and 100% rates of flow. When at 50% loading, the compressors should alternate with each taking a turn. At 100% loading, both compressors should engage once it is detected that the pressure is continuing to drop. Your program should now be able to handle both light and heavy demands for air quite effectively. While this current solution likely performs as well as most systems employing relay logic, with just a bit more effort you should still be able to even improve upon this. Before continuing to the next exercise, run your system with the flow rate adjusted to 78%, 80%, and then 82%, and carefully note the result. You should now have a good idea of where improvements might be made. .......... Exercise #4 --- Detecting When 1 Compressor is not Enough When the plant's requirement for air closely matches the maximum volume that can be supplied by a single compressor, our current control solution simply falls apart. It's possible that this single compressor could run for hours without ever being noticed, nor obtaining any down time in which to cool. How long one of these compressors might be allowed to run continuously would normally be specified by the manufacturer, but for our purposes we will just ensure that excessive run-on can simply not occur. http://www.thelearningpit.com/lp/doc/c2/comp2.html 5/2/2004
  • 50. LogixPro Dual Compressor Exercise Page 4 of 5 When attempting a solution for this run-on problem, a couple of ideas may come to mind. If a single compressor runs beyond the time that would normally suffice to attain full pressure at 50% or 60% flow, the idle compressor could be started to assist in the effort. A second method might be to track the time it takes for the pressure tank to drop from it's maximum to minimum settings, and from this determine beforehand whether 1 or 2 compressors need to be employed. If given some thought, you may detect minor faults with either of the above methods. The first method could permit repeated short cycling of the back up compressor when operating at certain continuous flow rates. The second method attempts to anticipate load demand, but may not accommodate rapid changes in plant air utilization. It may be that your solution should combine both methods, or possibly a new one not even discussed. Your goal should be to analyse the system and come up with the best solution possible using the available equipment. Modify your program so that continuous run-on of a single compressor will not occur. Your solution should continue to alternate between compressors when plant flow rates are typically 50% to 60% or lower. In addition, try to equalize wear on each compressor, and avoid short cycling as much as practically possible. Continue to utilize PE2 to detect if the system pressure descends below the prescribed minimum, but feel free to tune or adjust both this pressure switch and any timing mechanisms employed in order to attain the best possible performance. In order to monitor how well your system is working, provide a means to display the accumulated run-time for each compressor. Utilize both the panel mounted selector switch, and LEDs for this purpose. Once you have your program tuned to perfection, you should have a good grounding in the basics of controlling many types of similar systems. It's fairly common to find fans, or pumps etc. being controlled in a similar fashion, and the techniques you've developed here should closely apply. .......... .......... http://www.thelearningpit.com/lp/doc/c2/comp2.html 5/2/2004
  • 51. LogixPro Dual Compressor Exercise Page 5 of 5 http://www.thelearningpit.com/lp/doc/c2/comp2.html 5/2/2004
  • 52. LogixPro Bottle Line Simulation Page 1 of 7 LogixPro Advanced Bottle Line Exercise Getting Started There are always numerous ways to accomplish tasks in programming, but a quick review of the Allen Bradley bit shift instructions should surely point to them as an ideal tool for use in this particular process. In the bottle line simulation, we are faced with detecting and tracking a few Boolean details having to do with the bottles entering the line. Sensors are provided to detect the presence of a new bottle, the bottle size, and whether the bottle is fully intact. Essentially 3 Boolean states describing the properties of each bottle that enters the line. If we analyze the various ways that we might process these bottles, it should quickly become apparent that we will have ample information for making such decisions, assuming we keep track of it. A single BSR or BSL instruction can be used to track a single Boolean state (0 or 1) which in-turn can describe a unique property of a product. In the initial exercise you will be asked to track the 3 Boolean values describing each bottle entering our process line. The Boolean states will be referred to as "Exists", "Large", and "Broken" and these states are to be tracked by you, utilizing 3 separate BSL (bit shift left) instructions. It can be argued that "Exists" need not be tracked (=correct), as bottles continuously enter the line, and therefore must exist. We will even use this fact to strobe our BSL instructions and cause a shifting of our tracked information. Later when you start diverting broken bottles to scrap however, they will no-longer Exist. These missing bottles could be detected after they are scrapped by using the "Broken" state, but for now I want you to track all 3 states using 3 separate bit arrays. .......... http://www.thelearningpit.com/lp/doc/bot/bottle.html 5/2/2004
  • 53. LogixPro Bottle Line Simulation Page 2 of 7 Exercise #1 -- Tracking the bottles Create a program which allows the operator to start and stop the process using the available panel mounted switches. When the process is running, the main conveyor should be energized, and bottles should continuously enter and exit the line. For these exercises please utilize the bits in word B3:0 if and when single bits such as flags etc. are required. Utilizing LS1 (Exists), strobe 3 BSL instructions to shift 3 separate bit arrays consisting of two 16 bit words each. Please use files #B3:2, #B3:4, and #B3:6 for this purpose. By restricting you to these particular files in the binary table, it will be much easier for you, and your instructor to monitor what is happening with your program using the data table display. Test your program out, and using the Data Table display monitor, take note of how the bits representing "Exist", "Large", and "Broken" are being shifted within their appropriate bit arrays. You may find that it will be necessary to slow the scan rate using the slider in the PLC panel to see this activity clearly. If your program is operating correctly, you should now have a means of determining the properties associated with each bottle that passes down the bottling line. .......... Exercise #2 -- Utilizing the Boolean Data If you paid careful attention to the bits being shifted along in each bit array, you would have likely noted that there is an offset between each of these 3 arrays. This is due to the fact that the 3 limit switches are located exactly 2 bottle widths apart. In order to use LS1 to strobe the data from all 3 switches at the same time, this spacing is actually critical, and must be an exact multiple of a bottle width. The number of bottle widths in-turn determines the offset we encounter within our arrays. http://www.thelearningpit.com/lp/doc/bot/bottle.html 5/2/2004
  • 54. LogixPro Bottle Line Simulation Page 3 of 7 We cannot easily compensate for this offset when using a BSL instruction as the switch data will always load into bit 0 of the array. There may be ways to overcome this, but for these exercises it will be your responsibility to compensate for these offsets. You will have to adjust for this whenever you employ any of these bits to determine a particular bottle's properties. Modify your program so that all Large bottles are diverted to the lower conveyor located on the right hand side of the simulation. This is to be accomplished by utilizing the appropriate bit in the "Large" bit array to invoke the transfer. Also, please ensure that the bottles are not damaged in the process. If you are successful in completing the above, you should be well prepared to deal with the task of diverting broken bottles to scrap .......... Exercise #3 -- Boxing the Broken Bottles To add a little interest to the simulation, I've decided to have you grind up the broken bottles that occasionally come down the line. Of course it is your responsibility to ensure that the ground glass is placed into boxes, and to bring new boxes into place as required. The cost of providing cardboard boxes can be significant over time. For this reason it is essential that you fill each box to it's maximum capacity, and do so without spillage. Since a small bottle only http://www.thelearningpit.com/lp/doc/bot/bottle.html 5/2/2004
  • 55. LogixPro Bottle Line Simulation Page 4 of 7 produces 2/3 as much ground glass as a large bottle, you will have to adjust for this difference in your program logic. In creating the logic for this exercise, you may find that you are faced with initializing variables or clearing counters etc. each time you edit and then restart your program. Just to make it a little easier to find this logic, I would ask that you add the following rung to the top of your program. There is no sense cluttering up your program with logic that only executes once each time it is run, so please place this logic into a subroutine where it is out of the way, yet easily located. Once you have come up with a solution for the scrap problem, then you are now entering the home stretch. .......... Exercise #4 -- Fill and Cap the Bottles There aren't many details that need to be explained about the filling operation. Energizing the fill tube solenoid O:2/6 will cause the fill tube to extend and enter the positioned bottle. You then must make a choice of discharging a large or small quantity of product into the bottle utilizing the appropriate charge solenoid O:2/7 or O:2/8. Once again, the Boolean data contained in the bit arrays will be used in determining the correct action to be taken. The bottle capping station control should be just a matter of capping each bottle that comes along. The capping ram solenoid O:2/9 must be energized to extend the ram, but you need not adjust for bottle size with this particular capping equipment. Attempting to cap a bottle that does not exist will cause little harm, but is a waste of caps, plus adds to clutter on the plant floor. Due to the foregoing, ensure that you only cap bottles that actually exist. I will leave issues such as when to stop and start the line to you. Keep in mind however, that we want to maintain the highest level of production possible with the equipment at our disposal. Once you have the filling and capping operations operating at maximum efficiency, we can then move http://www.thelearningpit.com/lp/doc/bot/bottle.html 5/2/2004