Drone Building 101
•Download as PPTX, PDF•
16 likes•3,112 views

RC Quadcopters, or multirotors, were on just about everyone's Christmas list. If Santa's present has left you wanting for more (or you just want to tinker!), but you don't know where to start, this course is for you. We'll cover the basics to get you started: tools you'll need, pre-planning, components and how they all go together. I will also show a sample build that features a 3DR Pixhawk flight controller, running open-source firmware ArduPilot (http://dev.ardupilot.com/) and Mission Planner (https://github.com/diydrones/MissionPlanner)

Recommended
More Related Content
What's hot
What's hot (20)
Viewers also liked
Viewers also liked (20)
Similar to Drone Building 101
Similar to Drone Building 101 (20)
More from Aaron Buma
Recently uploaded
Recently uploaded (20)
Drone Building 101
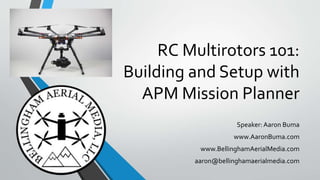
- 1. RC Multirotors 101: Building and Setup with APM Mission Planner Speaker: Aaron Buma www.AaronBuma.com www.BellinghamAerialMedia.com aaron@bellinghamaerialmedia.com
- 2. Aaron Buma Personal: AaronBuma.com Business: BellinghamAerialMedia.com Contact: aaron@BellinghamAerialMedia.com Twitter: @AaronDBuma LinkedIn: LinkedIn.com/pub/AaronBuma
- 3. Agenda • A little history • Overview of parts • How to put together • Resources – Parts and Community • Questions • APM Mission PlannerWalkthrough
- 4. Multirotors – Quick History • First one 1923 …. A little better in 1956 …. • Development on multirotors started early late 90’s and early 2000’s? • Increasing Market growth – DJI (about a billion dollar value), 3D Robotics
- 5. Multirotors - Parts • Frames • Power Distribution Board or Harness • Electronic Speed Controllers • Motors • Propellers • Batteries • BEC andVoltage Regulators • Flight Controller • Transmitter and Receive
- 6. Multirotors – Frame Configurations • X or H format • Has 4 or 8 motors • Redundancy on with 8, but at a loss of efficiency • Simplest to build and manage • Front cameras can have propellers or propeller shadows in-view (DJI Phantom)
- 7. Multirotors – Frame Configurations • Y - format • Has 3 or 6 motors • Redundancy on with 6, but at a loss of efficiency • More complex than X setup, due to rear rotor(s) requirement to rotate to turn • Clearer front-facing view for cameras
- 8. Multirotors – Frame Configurations • Hexa and Octo formats • Flat layout, Hexarotor has 6 or 12 motors, Octorotor has 8 or 16 motors (heavy lifting!) • Redundancy inherent to design, most Flight controllers handle motor loss well. • Complexity not too bad, all motors are stationary and most FC’s have 6 or 8 outputs • Cameras are mounted below main section
- 9. Frames – Planning the build • Purpose of multirotor: Aerial Photography? Park fun? Endurance record flight times? • How redundant should it be? • Size: micro or full-size? • Folding frame or not? • Case available?
- 10. Power Distribution Board or Harness • Transfers power from the battery to the motors, flight controller, camera etc • Basic PDBs – solder wires, or bullet connectors, to them, the have not voltage regulators or Battery EliminationCircuits (BEC) • Fancy PDBs – starting to see them online, they have 12v output and built in BECs • Integrated PDB – Some frames (ex:TBS Discovery) have PDB’s built in
- 11. Electronic Speed Controllers (ESC) • Required for brushless motors • Has 3 wires, two for power (connected to PDB) and a servo wire (3 smaller wires) that connect to flight controller • ESCs control the RPMs for which the motor spins • Amperage ratings - Check propeller and motor setup Amp requirements
- 12. Electronic Speed Controllers (ESC) - Continued • Firmwares – Allow for various tweaks and settings • SimonK – most performant, ESC’s with this pre-flashed on them are available • Mostly flash-able • DJI’s are locked (E300, E600, E800 tuned ESC/Motor sets) • Tuning/Setup – • Programming Cards - ~$20-30 • WithTx/Rx –Tone and beep based menu • Individually vs All-At-Once • Throttle Range setup required
- 13. Motors • Kv rating • Higher Kv - meant for and most efficient with: smaller and higher speed propellers • 2600kv with 5” props • Lower Kv – meant for and most efficient with: larger and slower speed propellers • 300 Kv with 20” props • Propeller diameter, pitch and design play a factor in picking the motor • “Pancake” – Larger diameter, most efficient at a slower more powerful spin
- 14. Motors
- 15. Propellers • ABS • Pros: Inexpensive ($2/$3 each), durable, easy to balance • Cons: Flexible, twice the weight as carbon fiber (in my personal experience) • Carbon Composite • Pros: Cheaper than straight Carbon Fiber (CF), lighter thanABS • Cons:A middle-ground between ABS and CF with middle-ground on cost, performance and durability • Carbon Fiber • Pros: Stiff and light – most efficient • Cons: EXPENSIVE – A set (1 CC and 1 CW)Tmotor ~$40-$$$
- 16. Propellers - Continued • Balancing • Wear and tear, ‘jello’ in pictures/video, efficiency cost • Cheaper Props usually means more balancing required • Balance blades AND shaft hub • My balancer: Du-Bro
- 17. Batteries – Lipo’s DO-NOT’s • Don’t charge over 4.2 (extreme danger) • Don’t discharge (fly) or charge until battery is at room temp after either • Don’t discharge lower than ~3.3v (this damages the battery) • Don’t keep a ‘puffy’ lipo around (extreme danger) DO’s • DO USE A FIREPROOF LIPO BAG, or metal ammo can, fire proof safe etc. • DO charge with a lipo charger, USB ones overcharge and puff your lipos • DO Follow the instructions on how to charge a lipo with said charger • DO Keep sand on hand, water will not put it out.
- 18. Batteries - Continued • “S” rating – Number of cells in the battery • 3.7v per cell (4.2 fully charged): 4s battery outputs 16.8v fully charged • Micro quads (ex. Hubsan X4,Cheerson CX10) have 1s, or 1 cell Lipos • Larger Multirotors have multiple 6s, 8s or even 10s batteries • Mah rating – Milliamp Hours • Ex. 4200 Mah – capacity of battery • “C” rating • Until Lipo technology improves, it is generally unsafe to charge faster than 1C (or at the capacity-per- hour of the battery)
- 19. BEC andVoltage Regulators • BEC – Battery Elimination Circuit aka Power Filter • ESC’s and Motors create electronic ‘noise’ that anything in the power circuit feels • Can cause First PersonView (FPV) feeds to be fuzzy when you start your motors • BEC’s create ‘clean’ power • Basic Setup: Battery->PDB- >BEC->Components
- 20. BEC andVoltage Regulators • Voltage Regulator / Stepper – Outputs a set steady voltage • Components usually don’t have internal voltage limiters • Check the voltage requirements • Avoid releasing the magic blue smoke that makes electronics work • Voltage examples: • Gimbal Controller board: 12v • FPV Cameras: 5v to 12v (camera specific) • VideoTransmitter: 12v
- 21. Flight Controller aka “The Brains” • Combines inputs from pitch, roll, yaw, horizontal and vertical accelerometers, GPS receivers, controller receivers to keep control of the aircraft. • Is connected to the receiver either a per-channel cables or via SBUS (all the channels on one cable) • Is powered by BEC/PF component or powered via one of the power connections from a ESC (if that ESC has a BEC built in) • It’s really FC dependent: DJI has a DJI-specific component (powered off of the PDB), 3DRobotics has one you plug in-line with the battery and PDB
- 22. Flight Controllers Simple Comparison • Locked/Expensive: DJI Naza M Lite, NazaV2,Wookong? • Plug and play, but no tuning, “DJI dance required” • Reliability Question: Flyaway, Grounded until locked firmware updates • EagleTree Systems – has plug and play customizable OSD • ArduoPilot (APM Pilot) • Open-Source • Fully Featured • Fully Configurable • FullCode Accessibility • Many HardwareVendors
- 23. Transmitter and Receiver • Starting out, it’s best to buy aTransmitter/Receiver combo (Tx/Rx).There are a fewTx and Rx types and they only will work with one of similar type. • Follow the binding instructions included with the set, they are really simple to set up. • Frequency • Most common is 2.4GHz and further range and obstacle penetration is required, UHF is used. • Channels – Use at least a 6 channelTx/Rx set • Each of the pitch, roll, yaw, throttle require a channel (that’s 4 so far) • All flight controllers have multiple flight modes (another channel, now up to 5)
- 24. Other Components • On-Screen-Display (OSD) – used to display telemetry (altitude, gps, voltage, heading ETC). • Gimbals and Gimbal Controllers • FPV Systems (Camera,VTX), Goggles and Monitors • Groundstations (VRx,TV’s) • Dipole, Cloverleaf,Yagi other antenna types
- 25. BasicTools Needed to Build • Small set of Phillips and Flathead screw drivers • Metric and Standard Allen • Soldering Iron with solder • “Helping Hands” (Harbor Freight) • Wire cutters/strippers • Heat-shrinkTubing (Harbor Freight) • A lighter or heat gun for the tubing
- 26. So how do all these parts go together? ?
- 27. Step 1: Frame Assembly
- 28. Step 2: Mount Motors
- 29. Step 2: ESC’s to Motors • Don’t worry about direction of rotation • If wrong, swap any two ESC wires to reverse motor direction.
- 30. Step 3: Power Harness ( without a PDB)
- 31. Step 3: Power Harness (with a PDB)
- 32. Step 3: Power Harness ( with frame-based PDB’s)
- 33. Step 4: Connect ESCs to Flight Controller
- 34. Step 5: Controller RX to FC
- 35. Step 6: Connect to FC Software and Calibrate • Visit manufacturer site to get correct drivers • Verify controller connectivity • Update firmware • Calibrate compass (process varies per FC) • Calibrate Accelerometers • Calibrate controller modes/sticks/switches • Set up initial flight modes
- 36. Step 7:Verify Motor Rotation • Take/keep propellers off! • Most Flight Controller software will have ability to test rotation of motors to verify that the ESC’s are wired correctly. • If you can’t verify it via software, you’ll just have to test via throttling up.
- 37. Step 8:Test flight/Tune • In a SAFE area!!! • Let FC set its GPS location, this can take a while if it hasn’t done it recently • Verify that it is ready via LED output or tones based on FC • Do not learn to fly with it in GPS mode! Use it as an aid later, not a crutch from the start! • Or use a test rig:
- 39. Parts and Community Resources Parts – Online Stores • ReadyMadeRC.com • GetFPV.com • GotHeliRC.com • Amazon.com • HobbyKing and Banggood • Non-US based = higher shipping • YMMV – I hear constant complaints about product and service Community • Facebook Group – Quadcopters • RCGroups.com • Reddit Subs: Quadcopters, Multirotors, FPV, Multicopter, RadioControl, DIYDrones, MultiCopterBuildsx
- 40. WATCH OUT It’s addicting ;)
- 41. Any Questions so far? • Next up: APM Mission Softare walkthrough (sorry, no flying)