Lensometer
•
109 likes•59,977 views

Lensometer principle of lensometer Description of the Lensometer Optics of lensometer

Recommended
More Related Content
What's hot
What's hot (20)
Similar to Lensometer
Similar to Lensometer (20)
More from Azizul Islam
More from Azizul Islam (20)
Recently uploaded
Recently uploaded (20)
Lensometer
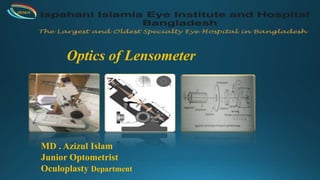
- 1. Optics of Lensometer MD . Azizul Islam Junior Optometrist Oculoplasty Department IIEI&H
- 2. Lensometer is also known as Focimeter or avertometer (The main use of the lensometer is to measure the back or front vertex power of a spectacle lens. It is a device designed to measure the refractive power prescription of a unknown lens. (spherical, cylindrical with axis and also the optical center) Types:- Manual Automated LENSOMETER Manual Automated N.B: The lensometer works on the Badal principle with the addition of an astronomical telescope for precise detection of parallel rays at neutralization. The Badal principle is Knapp’s law applied to lensometers. IIEI&H
- 3. The Badal principle (Ogle, 1968; Southall, 1964) is based on the observation that if the eye is placed at the focal point of a positive lens, the virtual image of an object located between the lens and the anterior focal point will always subtend the same visual angle. Badal optics are disclosed in which an aperture array at an optical system under test is interrogated for the deflection of light between a detector array conjugate with the aperture array of the optical system under test being examined. Excursion is measured in a plane normal to the axis of the Badal optics instead of observing towards and away image focus along the axis of the Badal system. In the case of an objective refractor, the eye is illuminated at the retina with a test spot, preferably light in the infrared. An image of a detector array is relayed by a relay lens through the Badal optics to the cornea of the eye, the lens under test. Light emanating from the test spot on the retina passes through the eye lens at the at the image of the detector array. This light undergoes excursion in accordance with the power of eye lens under test at each aperture of the detector array. The extent of this excursion is determined by a moving boundary locus between the image of the detector array and the detector array itself. This excursion is related directly to the eye prescription. Badal principle IIEI&H
- 5. IIEI&H
- 6. General Description of the Lensometer 1. The eyepiece 2. Chrome Knurled Sleeve 3. Prism Compensating Device Knob 4. Lens Holder Handle 5. Marking Device Control 6. Gimbal 7. Ink Pad 8. Spectacle Table Lever 9. Spectacle Table 10. Power Drum 11. Locking Lever 12. Prism Axis Scale 13. Prism Compensating Device 14. Prism Diopter Power Scale 15. On-off Switch 16. Lens Stop 17. Cylinder Axis Wheel 18. Filter Lever 19. Lamp Access Cover IIEI&H
- 7. 1. The Eyepiece : mounted in a screw-type focusing mechanism, the eyepiece plays an important role in the accuracy of your readings. It is essential that the eyepiece be focused to the individual eye of each user. It may be fitted with a rubber guard to prevent scratching of the user’s own eyewear. 2. Chrome Knurled Sleeve: used to rotate the Reticle to orient prism base. 3. Prism Compensating Device Knob: Used to read prism amounts greater than five prism diopters. 4. Lens Holder Handle :Used to hold a lens in place against the aperture. 5. Marking Device Control: Used to spot the lens at either the Optical Center or Prism Reference Point (PRP). 6. Gimbal: A pivoting holder that holds the lens in place. 7. Ink Pad: Holds the spotting ink. 8. Spectacle Table Lever: Used to raise, or lower the level of the Spectacle Table. IIEI&H
- 8. 9. Spectacle Table: The resting place for the frame when neutralizing finished eyewear. 10. Power Drum :Hand wheel with numbered scale readings between +20 and -20 Diopters. 11. Locking Lever: Used to elevate or depress the position of the instrument for individual’s height or posture. 12. Prism Axis Scale: Used for orientation of prism axis 13. Prism Compensating Device: Used to verify or layout large amounts of prism. 14. Prism Diopter Power Scale: Displays prism amount. 15. On-off Switch : Power switch. 16. Lens Stop : Aperture against which the lens rests. 17. Cylinder Axis Wheel: Used to orient or neutralize cylinder axis. 18. Filter Lever: Used to engage or remove green filter. 19. Lamp Access Cover: Provides access to change the lensmeter bulb. IIEI&H
- 9. Optics of Lensometer (Manual) Lensometer cross sectional view. 1 – Adjustable eyepiece 2 – Reticle 3 – Objective lens 4 – Keplerian telescope 5 – Lens holder 6 – Unknown lens 7 – Standard lens 8 – Illuminated target 9 – Light source 10 – Collimator 11 – Angle adjustment lever 12 – Power drum (+20 and -20 Diopters) 13 – Prism scale knob IIEI&H
- 10. (Manual) IIEI&H
- 11. Optics of Lensometer (Automated) Lensometer cross sectional view. 1 – LCD Monitor 2 – Operated Switch 3 – Marking Level 4 – Lens Plate 5 – Lens Holder 5 – Nose Pad 6 – Memory add Switch 7 – UV –Measurement Switch 8 – Printer IIEI&H
- 12. Optics of Lensometer (Automated) IIEI&H
- 13. Rotate the eyepiece until fully extended from the instrument(usually by rotating the eyepiece as far as possible in an anti clock wise direction). The graticule visible through the eyepiece will now appear blurred. The eyepiece should then be rotated in a clock wise direction until the target cross hairs and the graticule just come into focus. Continued rotation of the eyepiece will force the observer to accommodate in order to keep the graticule in focus. With the power wheel at the zero position, the cross hairs and the target should be in clear focus. Failure to focus the eyepiece will result in incorrect readings of lens power. Procedure Focusing the Eyepiece IIEI&H
- 14. Focus the eyepiece of the lensometer for the examiner’s eye With the power wheel set on zero, turn the eyepiece as far counter-clockwise as possible Then slowly turn it clockwise until the reticule first comes into sharp focus Insert the spectacles If testing a pair of glasses, always check the right lens first Place the pair of glasses in the lensometer with the ocular surface away from you The lens is held in place by the lens holder and is held level on the lens table Center the lens by moving it so that the image of the lensometer target is aligned in the center of the eyepiece reticle Lens Measurement Preparation IIEI&H
- 15. If all the lines or dots of the target are in focus at a given setting of the power wheel, the lens is spherical, Marking the optical centre 1. Check that the centre of the lens coincides with the centre of the target. 2. When this is so, the lens is correctly positioned and the optical centre could be marked. 3. While there is no centre dot, the whole set of dots can be ‘framed’ within the lines of the graticule to locate the centre. 4. Repeat the same procedure for the other lens. Determining the Lens Power (Spherical Lenses) IIEI&H
- 16. Step 1 (finding the sph: power) : Rotate the power wheel until one set of lines (stretched dots) becomes clear. Start with the higher positive power (or lower negative power). The axis drum will need to be rotated to ensure that the lines are unbroken. Note the power on the power wheel. Step 2 (finding the cyl: power): Rotate the power wheel until the second set of lines (stretched dots)becomes clear. The second power reading minus the first reading will give the power of the cyl (and its correct sign). Step 3 (finding the axis) : Note the direction of the lines (stretched dots) at the second reading.This is the axis. The rotatable line in the graticuleis used to line up with the stretched dots to determine the axis. Determining the Lens power (Sphero-Cyllinder) IIEI&H
- 17. Determining the Lens power (Sphero-Cyllinder) IIEI&H
- 18. Take Home Messages IIEI&H Always focus the eyepiece before using the instrument Concentrate on the central circular orientation of dots (especially in case of toric lenses) One meridian of the target should always be parallel to the orientation of central small lines (in toric lens) Each dot at the center will not be round, instead they will be small lines oriented in one particular meridian Except the protractor, everything will be blur when a lens is placed The target moves with the movement of the lens Instrument should not be used more on battery
- 19. References Theory and Practice of Optics & Refraction, A. K. Khurana Lensometry manual by Mr.Sunny Mannava (HCU). Optical-Dispensing, Arvindo eye care (Gide) Picture: Me,Book,Google . IIEI&H