
Recommended
More Related Content
What's hot
What's hot (20)
Similar to Gis application tutorial
Similar to Gis application tutorial (20)
Recently uploaded
Recently uploaded (20)
Gis application tutorial
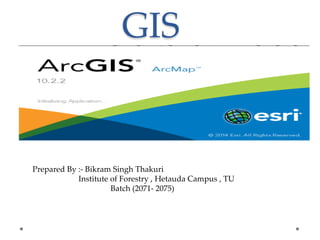
- 1. GIS Prepared By :- Bikram Singh Thakuri Institute of Forestry , Hetauda Campus , TU Batch (2071- 2075)
- 2. Introduction :- GIS is computer software and stand for Geographical Information system. Geographical = Earth features Information = Data capture and interpretation System = Software
- 3. Generally used GIS software are Arc Gis and Qgis Following are major function of GIS • Data capture o geographic data: digitized, converted from existing data, image, GPS o attribute data: loaded from existing data files • Data storage and manipulation o file management and editing • Data analysis o database query, spatial analysis and modeling • Data display o Maps and reports
- 4. Application of GIS In the following General Forestry function , GIS is necessary 1. Boundary survey and area calculation 2. Polygon area division into block and their area calculation 3. Labeling 4. Making a complete map of any area and Export the map in JPEG format 5. For finding Sample point(GPS point) of any area for inventory 6. Slope map and slope area
- 5. Boundary survey and area calculation Followings steps are involved in this :- • Taking GPS point of desired forest area just at boundary of area • Then these GPS points in the form of X and Y co- ordinate save in excel format :- either manual or software(gps utility,DNR gps etc) And save the excel in a folder without Arc gis doesn‘t found
- 7. Data add • Add the excel data into Arc Gis also connect the computer folder in Arc map
- 8. Data display Display the added data by right click in the data as in figure
- 9. Followings points are remind during data display:- • We have to edit coordinate system and click edit then goes into following folder Projected coordinate system UTM WGS 1984 Northern hemisphere 44N/45N zone Then click ok and also set as favorites for that coordinate system Note:- 44N for western to Nawalparasi and 45N for Eastern to Nawalparasi midpoi
- 10. Data export • Data export means data save in the acceptable form of Arc map(making shape file) • After display the data new layer is obtained which is subjected to export and old one can do remove
- 11. Cont…. • Save the shape file into the desired connected folder click in Browse ,look in, also named for easy and click ok
- 12. • Then new exported point layer is obtained and old layers might be removed • We show the boundary point into polygon for area calculation , for this we search at right side for conversion from point to line and line to polygon
- 13. . • And input the exported point data in input features ,click in close line, may save the output feature in desired connected folder and named the file(there is no duplication in naming of file) • Saving process is same as export process
- 14. • Line(feature) to polygon search and same as above
- 15. Polygon area calculation • Right click on polygon layer and click on attribute table
- 16. Cont…. • Click on table options add field write area in Name and in type select Double/Text and ok
- 17. Cont….. • Area column is inserted and then right click on area column calculate geometry and in property there should be area and in units whichever we essence(generally in Hectares) ,ok
- 18. Cont…. • When area determined in form such as 3.3334543,for rounding:- Right click on Area ,properties, Numeric and finally in rounding the area in desired number and click ok and apply
- 19. Polygon area Division into blocks • After making polygon , area can divided into block according to condition of forestry, slope , users group demand , topography , features present inside the forestry • For block division of forest area , At first discuss with CFUGs • By help of Google earth , we can easily demarcate the block area • In case of Scientific forest management , equal 8 blocks are essential • Followings steps involved:-
- 20. 1.Selection of polygon area • In Arc map , there is editor tool:- click start editing ,select the area of polygon
- 21. 2. Cut the polygon • Simply cut the polygon randomly for practices by cut polygon tools into several blocks as necessary • Start cut the polygon at corner of polygon by help of symbol seen.
- 22. After division of polygon in blocks , saves the edits and stop the editing click on Editor tools
- 23. 3.Block area calculation • It is same as the polygon area calculation • Right click on the layer obtained last and click on attribute table and other process is same as click on table options and go on.
- 24. Labeling • Means symbolize the map in many respect , for example block name view in map, area , coloring of the block etc • For naming the block click on attribute table -> Add field -> write Block_name(in type there must be text) ->click ok • Then without cut the attribute table click on editor tools -> start editing -> click on block name column and write the block name -> finally save edits and stop the editing
- 26. • For coloring the block , right click on layer-> properties -> click on symbology -> in field value you can set any but generally block name -> click on Add al values -> you may change the color of block by click on the each color of block
- 27. • For showing the symbols click on labels of properties • Click on label feature in this layer • In label field select the feature whatever you want to label on map suppose block name -> then apply the feature and ok
- 28. • For multiple labels click on define classes of feature and label each class differently of Method click on add value -> name the feature again you want to label
- 29. Making complete map Following things are necessary for completion of map 1. Map 2. Scale bar 3. North arrow 4. Grid(show the map in projection) 5. Legend(meaning of symbol in map) 6. Name of the map
- 30. • At first click on layout view to fix the map as below the arrow
- 31. • For scale bar click on insert -> Scale bar -> select scale as your choice • Then place the scale just below the map left
- 32. • For North arrow click on insert -> North arrow • Grid is most important component of map and for this Right click on Layers -> click on properties
- 33. • Click on Grid property -> New grid -> Next -> in Appearance you have click one option generally Labels only -> Next -> Click on finish -> Apply -> Ok
- 34. • Legend is also important and click on insert -> legend -> select legend items -> Next -> Next -> Next -> Finally finish • Place the legend under the map
- 35. • For Text inside the layout click on Text tool and place box as you comfort to place and write any things • The size , font can be managed
- 36. Map Export • Means save map as image which can easily support in MS word • Click on File -> Export map -> save the map • Also you can increase resolution
- 37. Sample plot determination • For sample plot GPS point , Add polygon(area) • On search type Create fishnet -> click on -> in output features and named and ok • In Template extent(option) put same as layer of polygon added
- 38. There is empty in Cell width , height , Number of row and columns which have to fill up
- 39. Width and height calculation • For cell width and height(both are equal) , we use following formula :- • 𝑑 = 𝐴 𝑛+1 Where , A= total area, n = total no of samples plots • For n, We use following following formula • 𝑛 = 𝐴×𝐼 𝑎×100% where A= total area , I= Intensity, a= sample plot size • For inventory , 𝑎 = 500𝑚2 for tree • For No of rows and columns measure • For no. of rows , measure the height(vertical distance) of map and divide it by Cell width , then more than obtained values is used • Similarly for columns measured horizontal distance and divide by cell width , then more than obtained value is used
- 40. Example • If total area of any polygon be 500000𝑚2 then we have to calculate Cell width • For this at first we determine no. of sample plot (𝑛 ) 𝑛 = 𝐴×𝐼 𝑎×100% , here 𝐴 = 500000𝑚2 𝑎 = 500𝑚2 𝑛 = 500000 × 1% 500 × 100% 𝑛 = 10 Then 𝑑 = 𝐴 𝑛+1 𝑑 = 500000 10 + 1 𝑑 = 213.200 = 213m That is Cell Width= cell height= 213m
- 41. Then Click ok
- 42. Clip the sample point inside polygon • After create fishnet following feature is obtained
- 43. • Then go to Geoprocessing toolbars -> Clip
- 44. • In Input features put last obtained layer • In Clip feature put polygon layer
- 45. • Then Unclip the remaining layer except polygon layer and newly obtained layer
- 46. Conversion of point to XY coordinate in excel • This is most important part for inventory as it gives XY coordinate of sample points by this point we can able to find the obtained sample point in field • For this right click on last obtained layer-> open attribute table -> click on table option -> Add field - > write X in Name and Long integer in Type -> ok • New column is added , right click on the column - >Calculate geometry -> in property there must be X coordinate point as For Calculation of x coordinate • And For Y same as X but instead of X there will be Y
- 48. • After XY coordinate obtained in Attribute table , We convert these point into excel to put the point into GPS for Navigation • For this in search write table to excel -> search -> click on table to excel • In Input Table put the clip layer last obtained and in out excel you can save anywhere as your choice , Click ok , Excel is finally obtained
- 49. Slope map • Slope map is map which gives slope of any forest area from ground level and classify the forest in different classes of slope • It gives variation of elevation in forest and help in demarcation of critical zone in forest area • For slope map , contour map of the district where forest area is located , is essential
- 50. Process • Add the contour map of District
- 51. • Overlay the polygon of the forest area and zoom the layer by right click on polygon , the polygon is seen
- 52. Clip the Polygon • Click on the Geoprocessing -> Clip • In input feature inputs the district contour map and in clip feature put polygon which is overlay • Then, in the polygon there is change in color as compared to outside the polygon
- 53. • The Unclip the district contour map layer
- 54. Step 1 :- Create tin • In search write create tin and clip in Create tin and the create tin is obtained as
- 55. • In output feature save location is located and named • In coordinate system set WGS_1984_UTM_Zone_44/45S and in input feature put Clip feature
- 56. • In the below column we have to change the setting as • In Height field set COV by double click in just below row of it • In SF type we set Soft line by double click in just below row of it and OK , it takes time
- 57. Step 2:- Tin to Raster • Then search Tin to raster and click Tin to raster • In input feature put Tin obtained and output is location of export data and ok -> remove tin
- 58. Step:- 3 Slope • Search slope and click on slope(3D analyst) • In input feature input raster data and output as usual • In output measurement there should be Degree and click Ok and remove raster
- 59. Step:- 4 Reclassify • Search reclassify and click • In input put slope and click on Classify -> in method put defined interval -> put the defined interval as 10 and ok
- 60. • And set the interval in layer reclassify layer just below
- 61. Step:5 Raster to polygon • Search raster to polygon and click • In input feature click on reclassify data and ok Feature obtained
- 62. Step:- 6 Clip feature • Then go to clip and in input feature put obtained polygon from raster • In clip feature put Forest area polygon and Unclick slope and reclass
- 63. Step:- 7 Calculation of area and perimeter • Calculate the Area and perimeter by attribute table same as previous • In attribute table also make ascending od Gridcode(class)
- 64. Step 8 :- Symbology on polygons • Go to properties of Clip feature last obtained -> symbology ->In value field put gridcode-> click on Categories and unclick mark -> change color and apply and ok