SlideShare a Scribd company logo
1 of 33
INDUSTRIAL TRAINING REPORT
ON
CARL ZEISS
CMM
O-INSPECT 543
SUBMITTED BY:
MITESH JARIWALA
CONTENT
๏‚ท Basics of CMM
๏‚ท How do coordinate measuring machines work?
๏‚ท How to Turn On Machine
๏‚ท Calibration
๏‚ท Alignment of Axis Directions
๏‚ท Modes of operation in CMM
๏‚ท How to define clearance plane
๏‚ท Steps to start optical measurement
๏‚ท Method for executing measurement using optics
๏‚ท How to execute program in CMM
๏‚ท Execution of program stepwise with example
Coordinate Measuring Machine
Definition:
A coordinate measuring machine is 3D device for measuring the
physical geometrical characterises of an object.
Description:
The typical CMM is composed of three axes an X, Y, and Z.
These axes are orthogonal to each other in a typical three dimension
coordinate system.
Each axis has a scale system that indicates the location of that axis.
The machine will read input from the touch probe as directed by
operator or programmer.
The machine then uses X, Y, Z coordinate for each of these points to
determine size and position with micrometre precision typically.
Parts:
Coordinate measuring machine include three main components:
1. The main structure which includes three axis of motion
2. Probing system
3. Data collection and reduction system โ€“ typically includes machine
controllers, desktop computer and application software.
Definition of probe:
It is the sensory part of CMM responsible for sensing different
parameters required for measurement.
Fig1. Shows sensory part called tactile or probe for sensing different parameters
How do coordinate measuring machines work?
After placing a work-piece on the machine table, a probe is used to
measure different points on it by mapping the X, Y, Z coordinates.
The probe operates either manually via an operator or automatically
via a control system.
These points then uploaded to computer interface where they can be
analysed using modelling software (e.g. CALYPSO)
Fig2. Shows Carl Zeiss CMM O-inspect 543
HOW TO TURN ON MACHINE
Starting procedure
1. Turn ON Raw Power (UPS ON)
2. Turn ON CPU
3. Turn ON Controller
4. Open Calypso Software
Closing procedure
1. Close Calypso Software
2. Turn OFF Controller
3. Turn OFF CPU
4. Turn OFF Raw Power (UPS OFF)
Fig Shows Zeiss Joystick with ON/OFF Push Button Switch
Zeiss Controller
SWITCH
Calibration
What is calibration?
It is the process of verifying and adjusting the accuracy of monitoring
equipment and machine by comparing them with standards of known
accuracy.
The adjustment of instruments is performed by compensating the error
into the instruments
It is performed in regular intervals so as to ensure that instrument is
reliable.
Steps to perform calibration for (O-INSPECT543)
1. Click on CMM
Fig3. Shows windows for calibration methods
2. Now click on Stylus system, after clicking on stylus system,
following window will appear & click on manual stylus system
change
Fig4. Defines Hand symbol for manual stylus system change
3. By clicking on manual stylus system change, it will show window
as seen below
Fig5. Shows window for selecting Master Probe for calibration
4. From sensor types select XXT & from styli system select master
probe
5. Now click on Ref. sphere position
Fig6. Shows ref. sphere for Tilt & Rotation Angle of sphere
6. After selecting Ref. sphere following window will appear
Fig7. Shows window in which tilt and rotation should adjust according to
sphere position
[Note: Depending on sphere angle, tilt angle & rotation should be
entered else accident can occur while calibration]
7. After clicking ok, place probe in the direction of stylus shaft,
window is shown below
Fig8. Shows window to touch probe on sphere, to start calibration
8. After the competition of calibration, again from window select
qualify stylus and calibration will start again.
Fig9. Shows window to change probe after the calibration of Master Probe
Alignment of Axis Directions
What is alignment?
Before starting any measurement on work-piece we have to define axis
directions such as X, Y, Z. After proper alignment, all the direction of
axis will be display in calypso CAD window.
Steps to perform Alignment process
1. Place the work-piece properly on surface table where
measurement is to be done.
2. Using probe define plane in all directions according to axis (X, Y, Z)
3. Click on Measurement, then start alignment, in that enter the
entire plane respectively in Spatial & Planar Rotation.
4. After that also define X, Y, Z origin respectively and finally after
alignment CAD window will open represent axis of the direction.
Step 1
Fig10. Shows to start alignment process
Step 2
Fig11. Shows base alignment settings
Step 3
Fig12.shows to define plane in spatial & planar rotation
Step 4
Fig13. Shows window to define plane in x, y, z origin
Modes of operations in CMM
There are various mode of operation in CMM, depend upon operator
requirements.
Some of them are as shown below.
1. Roundness
2. Roundness angle
3. Waviness
4. Flatness
5. Flatness ref
6. Straightness
7. Cylindricity
8. Profile
9. Line profile
10. Form
11. Curve form
12. True position
13. Concentricity
14. Coaxiality
15. Perpendicularity
16. Parallelism
17. Angularity
18. Distance
19. Angle between features
20. Runout
After selecting specific operations on a work-piece, at the end we
can run program in which we have to specify clearance data and
everything needed.
Define Roundness
Roundness is the measure of how closely the shape of an object
approaches that of a circle. Roundness is dominated by the
shape's gross features rather than the definition of its edges and
corners, or the surface roughness of a manufactured object. A
smooth ellipse can have low roundness, if its eccentricity is large.
Define Waviness
Waviness is the measurement of the more widely spaced
component of surface texture. It is a broader view of roughness
because it is more strictly defined as "the irregularities whose
spacing is greater than the roughness sampling length".
Define Flatness
Flatness is a form control. The flatness control (c) defines how
much a surface on a real part may vary from the ideal flat plane.
Tolerance Zone: The flatness tolerance zone is the volume
between two parallel planes. The distance between the parallel
planes is the stated flatness control tolerance value.
Define Straightness
Straightness is the shortest distance between two points. When
using a compass or a laser one thinks of straightness as 180
degree line. When talking TGP a straight bar can be defined as
one without a bend or curve.
Define Concentricity
Concentricity is a complex tolerance used to establish a tolerance
zone for the median points of a cylindrical or spherical part
feature.
Define Perpendicularity
In elementary geometry, the property of being perpendicular
(perpendicularity) is the relationship between two lines which
meet at a right angle (90 degrees). A line is said to be
perpendicular to another line if the two lines intersect at a right
angle.
Define Angularity
Angularity is the symbol that describes the specific orientation of
one feature to another at a referenced angle. It can reference a
2D line referenced to another 2D element, but more commonly it
relates the orientation of one surface plane relative to another
datum plane in a 3-Dimensional tolerance zone.
Define True position
True position is the deviation from the theoretical location of the
hole or feature as shown on the drawing. A True Position of 0.000
would mean the hole is exactly where it is supposed to be. A True
Position of 0.010 means the hole is 0.010 off from where it is
supposed to be.
How to Define Clearance Plane
What is clearance plane?
We can define CP as a zone in which CMM move its axis to take
measurement. We have to define plane in every direction i.e. is
โ€“X, +X, -Y, +Y, -Z, +Z. After defining CP, CAD model is as shown in
figure.
Fig14. Shows clearance plane
Steps to define clearance plane
1. Click on clearance plane from the window
2. Now from clearance window define axis in all direction i.e. โ€“X,
+X, -Y, +Y, -Z, +Z
3. Before assigning CP, check all the parameters of measurement
plan editor in which clearance & retract should be checked else
collision of probe can occur.
4. Without assigning CP, CMM program would not run, so it is
necessary to give proper CP.
Step 1
Fig15. Shows clearance plane icon
Step 2
Fig16. Shows window to enter values in CP
Step 3
Fig17. Shows icon for measurement plan editor
Step 4
Fig18. Shows window to edit clearance and retract distance
Steps to start optical measurement
What is optical measurement in CMM?
Optical measurement is a measurement technique that relies on
the use of optical sensor to collect measurement. The advantage
of optical measurement is that it is non-invasive. No contact is
required, beyond contact with the stage of an optical measuring
device. Probes do not touch the object being measured and the
device does not rely on destructive measurement techniques and
most important point is that it can measure the work-piece where
probe cannot measure.
Steps to perform optical measurement completely in detail
1. Again drag your cursor towards CMM and click on it.
2. Click on stylus system icon where you will get manual stylus
system change.
3. From manual stylus system change, probe & camera can be
selected.
4. After selecting camera, go to illumination settings where you
adjust light settings according to clear visibility of work-piece.
5. With the help of z-axis Joy-stick, clear the visibility of an object
to maximum possibility then using Auto-focus, image will be
perfectly clear to start measurements.
Step 1
Fig20. Shows window to open stylus system
Step 2
Fig21.shows icon to select camera for measurement
Step 3
Fig22. Shows manual stylus system change
Step 4
Fig23. Shows window to select camera for optical measurement
Step 5
Fig24. Show illumination settings to change light settings
Step 6
Fig25. Shows window to adjust lights for better visibility
Method for executing measurement using optics
1.Place the work-piece properly w.r.t camera and start laser pointer
to determine the vision of camera.
2.After the proper adjustment of vision stop laser pointer and click
on illumination settings for light focus settings.
3.Try to focus on work-piece with the help of joy-stick after that
focus with the help of Auto-focus from the menu to get perfectly
clear image for measurement.
4.Start measurement for anything like circle, square, line or any
complex that canโ€™t be measure with the help of tactile.
5.For circle select 3 points on the circle then 1 point inside the circle
to determine circle exactly.
6.After all the measurement, it can be switched to CADVIEW then
create 3D line for planer rotation used in alignment
7.Go to alignment in planner select 3D line, in Y select โ€œCircleโ€, in X
origin select โ€œCircleโ€ and in Z define point defined on work-piece.
8.Define clearance plane from CAD model, set all values and set to
Auto-light to run program.
How to execute Program in CMM
1. Place the work-piece on CMM for measurement, then using
tactile take axis in every direction i.e. is for X, Y, Z.
2. From window click on base alignment and in that specify axis for
spatial and planner rotation also define X, Y, Z origin.
3. After proper alignment, the direction of axis should be noticed in
CAD window.
4. If the direction of axis is proper take all the necessary
measurement from diagram and define tolerance & everything.
5. Go to measurement editor plan and check for clearance and
retract distance, edit it according to requirement.
6. Define clearance plane for work-piece that is already explained
earlier how to define CP and check for all characteristics, Clear
Existing Results and speed in mm/s.
7. After completing all the things, program can be executed.
Execution of program stepwise with example
Before starting measurement it is necessary to calibrate with
sphere for better accuracy. Calibration is also necessary with the
changing of probe.
Step 1
Fig26. Shows loading of work-piece on CMM
Step 2
Fig27. Shows CAD view after alignment
Step 3
Fig28. Shows measurement taken from Drawing
Step 4
Fig29. Shows measurements taken from Drawing
Step 5
Fig30. Shows icon for measurement plan editor
Step 6
Fig31. Shows window to edit clearance and retract distance
Step 7
Fig32. Shows clearance plane to define axis
Step 8
Fig33. Shows window to define clearance in every directions
Step 9
Fig34. Shows clearance of a work-piece for measurement
Step 10
Fig35. Shows window for setting selection, Results, CMM
Step 11
Fig36. Shows icon to start the program
THE END

More Related Content

What's hot

Dial gauge
Dial gaugeDial gauge
Dial gaugeRemsbro
ย 
Metrology of threads
Metrology of threadsMetrology of threads
Metrology of threadsnilesh sadaphal
ย 
Comparators, Surface Flatness, Surface Roughness,
Comparators, Surface Flatness, Surface Roughness, Comparators, Surface Flatness, Surface Roughness,
Comparators, Surface Flatness, Surface Roughness, AFAQAHMED JAMADAR
ย 
Unit II
Unit IIUnit II
Unit IIDEVARAJMECH
ย 
LINEAR and ANGULAR Measurement
LINEAR and ANGULAR MeasurementLINEAR and ANGULAR Measurement
LINEAR and ANGULAR MeasurementDhruv Parekh
ย 
Jigs & Fixtures
Jigs & Fixtures Jigs & Fixtures
Jigs & Fixtures Susheel Dhale
ย 
Surface Roughness: Terminology and types
Surface Roughness: Terminology and typesSurface Roughness: Terminology and types
Surface Roughness: Terminology and typesHarsh Bhandari
ย 
Machine tool metorology
Machine tool metorologyMachine tool metorology
Machine tool metorologysreenath T.V
ย 
Dimensioning Rules in Engineering Drawing
Dimensioning Rules in Engineering DrawingDimensioning Rules in Engineering Drawing
Dimensioning Rules in Engineering DrawingMirza Hyder Baig
ย 
interchangeability
interchangeabilityinterchangeability
interchangeabilityDivyanshu Verma
ย 
Presentation Study on CMM And Application
Presentation Study on CMM And ApplicationPresentation Study on CMM And Application
Presentation Study on CMM And Applicationsandeepbags2004
ย 
Topic 1-Micrometer types and application.pptx
Topic 1-Micrometer types and application.pptxTopic 1-Micrometer types and application.pptx
Topic 1-Micrometer types and application.pptxBenjieDestrajoAngele
ย 
Comparators
ComparatorsComparators
Comparatorstaruian
ย 
Metrology and Measurements unit 2
Metrology and Measurements unit 2Metrology and Measurements unit 2
Metrology and Measurements unit 2Gopinath Guru
ย 
Screw thread measurement
Screw thread measurementScrew thread measurement
Screw thread measurementChintan Mehta
ย 

What's hot (20)

Dial gauge
Dial gaugeDial gauge
Dial gauge
ย 
Metrology of threads
Metrology of threadsMetrology of threads
Metrology of threads
ย 
Standards of Measurement
Standards of MeasurementStandards of Measurement
Standards of Measurement
ย 
Dial indicator
Dial indicatorDial indicator
Dial indicator
ย 
Comparators, Surface Flatness, Surface Roughness,
Comparators, Surface Flatness, Surface Roughness, Comparators, Surface Flatness, Surface Roughness,
Comparators, Surface Flatness, Surface Roughness,
ย 
Unit II
Unit IIUnit II
Unit II
ย 
Cmm
CmmCmm
Cmm
ย 
SLIP GUAGE
SLIP GUAGESLIP GUAGE
SLIP GUAGE
ย 
LINEAR and ANGULAR Measurement
LINEAR and ANGULAR MeasurementLINEAR and ANGULAR Measurement
LINEAR and ANGULAR Measurement
ย 
Jigs & Fixtures
Jigs & Fixtures Jigs & Fixtures
Jigs & Fixtures
ย 
Surface Roughness: Terminology and types
Surface Roughness: Terminology and typesSurface Roughness: Terminology and types
Surface Roughness: Terminology and types
ย 
Machine tool metorology
Machine tool metorologyMachine tool metorology
Machine tool metorology
ย 
Dimensioning Rules in Engineering Drawing
Dimensioning Rules in Engineering DrawingDimensioning Rules in Engineering Drawing
Dimensioning Rules in Engineering Drawing
ย 
interchangeability
interchangeabilityinterchangeability
interchangeability
ย 
Presentation Study on CMM And Application
Presentation Study on CMM And ApplicationPresentation Study on CMM And Application
Presentation Study on CMM And Application
ย 
Topic 1-Micrometer types and application.pptx
Topic 1-Micrometer types and application.pptxTopic 1-Micrometer types and application.pptx
Topic 1-Micrometer types and application.pptx
ย 
Comparators
ComparatorsComparators
Comparators
ย 
UNIT IV
UNIT IVUNIT IV
UNIT IV
ย 
Metrology and Measurements unit 2
Metrology and Measurements unit 2Metrology and Measurements unit 2
Metrology and Measurements unit 2
ย 
Screw thread measurement
Screw thread measurementScrew thread measurement
Screw thread measurement
ย 

Similar to Carl-Zeiss Coordinate measuring machine report (O-INSPECT 543)

Unit 3
Unit 3Unit 3
Unit 3ypnrao
ย 
S12_P1_Aiyer_Arun
S12_P1_Aiyer_ArunS12_P1_Aiyer_Arun
S12_P1_Aiyer_ArunArun Aiyer
ย 
Gd & t datum targets
Gd & t datum targetsGd & t datum targets
Gd & t datum targetsTarunJujare
ย 
AJAY SHARMA autocad-summer-training-report.pdf
AJAY SHARMA autocad-summer-training-report.pdfAJAY SHARMA autocad-summer-training-report.pdf
AJAY SHARMA autocad-summer-training-report.pdfYaarJani
ย 
Cnc Milling
Cnc MillingCnc Milling
Cnc Millingwinkycheezie
ย 
Advanced surveying equipment ppt
Advanced surveying equipment pptAdvanced surveying equipment ppt
Advanced surveying equipment pptNaufil Sayyad
ย 
4. THREE DIMENSIONAL DISPLAY METHODS
4.	THREE DIMENSIONAL DISPLAY METHODS4.	THREE DIMENSIONAL DISPLAY METHODS
4. THREE DIMENSIONAL DISPLAY METHODSSanthiNivas
ย 
coordinate-measuring-machine final.pptx
coordinate-measuring-machine final.pptxcoordinate-measuring-machine final.pptx
coordinate-measuring-machine final.pptxJigar Prajapati
ย 
inspection section.ppt
inspection section.pptinspection section.ppt
inspection section.pptluckyvishnu1
ย 
COMPUTER AIDED QUALITY CONTROL AND HANDLING SYSTEMS.pptx
COMPUTER AIDED QUALITY CONTROL AND HANDLING SYSTEMS.pptxCOMPUTER AIDED QUALITY CONTROL AND HANDLING SYSTEMS.pptx
COMPUTER AIDED QUALITY CONTROL AND HANDLING SYSTEMS.pptxDr.M BALA THEJA
ย 
Coordinate measuring machine
Coordinate measuring machineCoordinate measuring machine
Coordinate measuring machineDharmajeetsinh Jadeja
ย 
AUTOCAD RAHUL
AUTOCAD  RAHULAUTOCAD  RAHUL
AUTOCAD RAHULRahulKumar5178
ย 
APPLICATION OF MECHATRONICS IN CMM
APPLICATION OF MECHATRONICS IN CMMAPPLICATION OF MECHATRONICS IN CMM
APPLICATION OF MECHATRONICS IN CMMSajid Sheikh
ย 
Presentation
PresentationPresentation
PresentationSelf-employed
ย 
CHAPTER 2 - Create 2D Basic Drawing.pptx
CHAPTER 2 - Create 2D Basic Drawing.pptxCHAPTER 2 - Create 2D Basic Drawing.pptx
CHAPTER 2 - Create 2D Basic Drawing.pptxMuhammad Taufik
ย 
Site surveying report 1
Site surveying report 1Site surveying report 1
Site surveying report 1Doreen Yeo
ย 
METROLOGY LAB MANUAL 26 12-16
METROLOGY LAB MANUAL 26 12-16METROLOGY LAB MANUAL 26 12-16
METROLOGY LAB MANUAL 26 12-16Dr B Sudarshan
ย 

Similar to Carl-Zeiss Coordinate measuring machine report (O-INSPECT 543) (20)

Unit 3
Unit 3Unit 3
Unit 3
ย 
S12_P1_Aiyer_Arun
S12_P1_Aiyer_ArunS12_P1_Aiyer_Arun
S12_P1_Aiyer_Arun
ย 
Gd & t datum targets
Gd & t datum targetsGd & t datum targets
Gd & t datum targets
ย 
AJAY SHARMA autocad-summer-training-report.pdf
AJAY SHARMA autocad-summer-training-report.pdfAJAY SHARMA autocad-summer-training-report.pdf
AJAY SHARMA autocad-summer-training-report.pdf
ย 
Cnc Milling
Cnc MillingCnc Milling
Cnc Milling
ย 
Two pegtest
Two pegtestTwo pegtest
Two pegtest
ย 
Advanced surveying equipment ppt
Advanced surveying equipment pptAdvanced surveying equipment ppt
Advanced surveying equipment ppt
ย 
4. THREE DIMENSIONAL DISPLAY METHODS
4.	THREE DIMENSIONAL DISPLAY METHODS4.	THREE DIMENSIONAL DISPLAY METHODS
4. THREE DIMENSIONAL DISPLAY METHODS
ย 
coordinate-measuring-machine final.pptx
coordinate-measuring-machine final.pptxcoordinate-measuring-machine final.pptx
coordinate-measuring-machine final.pptx
ย 
inspection section.ppt
inspection section.pptinspection section.ppt
inspection section.ppt
ย 
COMPUTER AIDED QUALITY CONTROL AND HANDLING SYSTEMS.pptx
COMPUTER AIDED QUALITY CONTROL AND HANDLING SYSTEMS.pptxCOMPUTER AIDED QUALITY CONTROL AND HANDLING SYSTEMS.pptx
COMPUTER AIDED QUALITY CONTROL AND HANDLING SYSTEMS.pptx
ย 
Coordinate measuring machine
Coordinate measuring machineCoordinate measuring machine
Coordinate measuring machine
ย 
AUTOCAD RAHUL
AUTOCAD  RAHULAUTOCAD  RAHUL
AUTOCAD RAHUL
ย 
APPLICATION OF MECHATRONICS IN CMM
APPLICATION OF MECHATRONICS IN CMMAPPLICATION OF MECHATRONICS IN CMM
APPLICATION OF MECHATRONICS IN CMM
ย 
Presentation
PresentationPresentation
Presentation
ย 
Cmm
CmmCmm
Cmm
ย 
CHAPTER 2 - Create 2D Basic Drawing.pptx
CHAPTER 2 - Create 2D Basic Drawing.pptxCHAPTER 2 - Create 2D Basic Drawing.pptx
CHAPTER 2 - Create 2D Basic Drawing.pptx
ย 
New manual
New manualNew manual
New manual
ย 
Site surveying report 1
Site surveying report 1Site surveying report 1
Site surveying report 1
ย 
METROLOGY LAB MANUAL 26 12-16
METROLOGY LAB MANUAL 26 12-16METROLOGY LAB MANUAL 26 12-16
METROLOGY LAB MANUAL 26 12-16
ย 

Recently uploaded

Call Girls in Ramesh Nagar Delhi ๐Ÿ’ฏ Call Us ๐Ÿ”9953056974 ๐Ÿ” Escort Service
Call Girls in Ramesh Nagar Delhi ๐Ÿ’ฏ Call Us ๐Ÿ”9953056974 ๐Ÿ” Escort ServiceCall Girls in Ramesh Nagar Delhi ๐Ÿ’ฏ Call Us ๐Ÿ”9953056974 ๐Ÿ” Escort Service
Call Girls in Ramesh Nagar Delhi ๐Ÿ’ฏ Call Us ๐Ÿ”9953056974 ๐Ÿ” Escort Service9953056974 Low Rate Call Girls In Saket, Delhi NCR
ย 
ONLINE FOOD ORDER SYSTEM PROJECT REPORT.pdf
ONLINE FOOD ORDER SYSTEM PROJECT REPORT.pdfONLINE FOOD ORDER SYSTEM PROJECT REPORT.pdf
ONLINE FOOD ORDER SYSTEM PROJECT REPORT.pdfKamal Acharya
ย 
(INDIRA) Call Girl Aurangabad Call Now 8617697112 Aurangabad Escorts 24x7
(INDIRA) Call Girl Aurangabad Call Now 8617697112 Aurangabad Escorts 24x7(INDIRA) Call Girl Aurangabad Call Now 8617697112 Aurangabad Escorts 24x7
(INDIRA) Call Girl Aurangabad Call Now 8617697112 Aurangabad Escorts 24x7Call Girls in Nagpur High Profile Call Girls
ย 
CCS335 _ Neural Networks and Deep Learning Laboratory_Lab Complete Record
CCS335 _ Neural Networks and Deep Learning Laboratory_Lab Complete RecordCCS335 _ Neural Networks and Deep Learning Laboratory_Lab Complete Record
CCS335 _ Neural Networks and Deep Learning Laboratory_Lab Complete RecordAsst.prof M.Gokilavani
ย 
data_management_and _data_science_cheat_sheet.pdf
data_management_and _data_science_cheat_sheet.pdfdata_management_and _data_science_cheat_sheet.pdf
data_management_and _data_science_cheat_sheet.pdfJiananWang21
ย 
Call for Papers - Educational Administration: Theory and Practice, E-ISSN: 21...
Call for Papers - Educational Administration: Theory and Practice, E-ISSN: 21...Call for Papers - Educational Administration: Theory and Practice, E-ISSN: 21...
Call for Papers - Educational Administration: Theory and Practice, E-ISSN: 21...Christo Ananth
ย 
UNIT-III FMM. DIMENSIONAL ANALYSIS
UNIT-III FMM.        DIMENSIONAL ANALYSISUNIT-III FMM.        DIMENSIONAL ANALYSIS
UNIT-III FMM. DIMENSIONAL ANALYSISrknatarajan
ย 
FULL ENJOY Call Girls In Mahipalpur Delhi Contact Us 8377877756
FULL ENJOY Call Girls In Mahipalpur Delhi Contact Us 8377877756FULL ENJOY Call Girls In Mahipalpur Delhi Contact Us 8377877756
FULL ENJOY Call Girls In Mahipalpur Delhi Contact Us 8377877756dollysharma2066
ย 
UNIT - IV - Air Compressors and its Performance
UNIT - IV - Air Compressors and its PerformanceUNIT - IV - Air Compressors and its Performance
UNIT - IV - Air Compressors and its Performancesivaprakash250
ย 
UNIT-V FMM.HYDRAULIC TURBINE - Construction and working
UNIT-V FMM.HYDRAULIC TURBINE - Construction and workingUNIT-V FMM.HYDRAULIC TURBINE - Construction and working
UNIT-V FMM.HYDRAULIC TURBINE - Construction and workingrknatarajan
ย 
PVC VS. FIBERGLASS (FRP) GRAVITY SEWER - UNI BELL
PVC VS. FIBERGLASS (FRP) GRAVITY SEWER - UNI BELLPVC VS. FIBERGLASS (FRP) GRAVITY SEWER - UNI BELL
PVC VS. FIBERGLASS (FRP) GRAVITY SEWER - UNI BELLManishPatel169454
ย 
Call for Papers - International Journal of Intelligent Systems and Applicatio...
Call for Papers - International Journal of Intelligent Systems and Applicatio...Call for Papers - International Journal of Intelligent Systems and Applicatio...
Call for Papers - International Journal of Intelligent Systems and Applicatio...Christo Ananth
ย 
result management system report for college project
result management system report for college projectresult management system report for college project
result management system report for college projectTonystark477637
ย 
VIP Model Call Girls Kothrud ( Pune ) Call ON 8005736733 Starting From 5K to ...
VIP Model Call Girls Kothrud ( Pune ) Call ON 8005736733 Starting From 5K to ...VIP Model Call Girls Kothrud ( Pune ) Call ON 8005736733 Starting From 5K to ...
VIP Model Call Girls Kothrud ( Pune ) Call ON 8005736733 Starting From 5K to ...SUHANI PANDEY
ย 
VIP Call Girls Ankleshwar 7001035870 Whatsapp Number, 24/07 Booking
VIP Call Girls Ankleshwar 7001035870 Whatsapp Number, 24/07 BookingVIP Call Girls Ankleshwar 7001035870 Whatsapp Number, 24/07 Booking
VIP Call Girls Ankleshwar 7001035870 Whatsapp Number, 24/07 Bookingdharasingh5698
ย 
Online banking management system project.pdf
Online banking management system project.pdfOnline banking management system project.pdf
Online banking management system project.pdfKamal Acharya
ย 
Call Now โ‰ฝ 9953056974 โ‰ผ๐Ÿ” Call Girls In New Ashok Nagar โ‰ผ๐Ÿ” Delhi door step de...
Call Now โ‰ฝ 9953056974 โ‰ผ๐Ÿ” Call Girls In New Ashok Nagar  โ‰ผ๐Ÿ” Delhi door step de...Call Now โ‰ฝ 9953056974 โ‰ผ๐Ÿ” Call Girls In New Ashok Nagar  โ‰ผ๐Ÿ” Delhi door step de...
Call Now โ‰ฝ 9953056974 โ‰ผ๐Ÿ” Call Girls In New Ashok Nagar โ‰ผ๐Ÿ” Delhi door step de...9953056974 Low Rate Call Girls In Saket, Delhi NCR
ย 
Booking open Available Pune Call Girls Koregaon Park 6297143586 Call Hot Ind...
Booking open Available Pune Call Girls Koregaon Park  6297143586 Call Hot Ind...Booking open Available Pune Call Girls Koregaon Park  6297143586 Call Hot Ind...
Booking open Available Pune Call Girls Koregaon Park 6297143586 Call Hot Ind...Call Girls in Nagpur High Profile
ย 
chapter 5.pptx: drainage and irrigation engineering
chapter 5.pptx: drainage and irrigation engineeringchapter 5.pptx: drainage and irrigation engineering
chapter 5.pptx: drainage and irrigation engineeringmulugeta48
ย 

Recently uploaded (20)

Call Girls in Ramesh Nagar Delhi ๐Ÿ’ฏ Call Us ๐Ÿ”9953056974 ๐Ÿ” Escort Service
Call Girls in Ramesh Nagar Delhi ๐Ÿ’ฏ Call Us ๐Ÿ”9953056974 ๐Ÿ” Escort ServiceCall Girls in Ramesh Nagar Delhi ๐Ÿ’ฏ Call Us ๐Ÿ”9953056974 ๐Ÿ” Escort Service
Call Girls in Ramesh Nagar Delhi ๐Ÿ’ฏ Call Us ๐Ÿ”9953056974 ๐Ÿ” Escort Service
ย 
ONLINE FOOD ORDER SYSTEM PROJECT REPORT.pdf
ONLINE FOOD ORDER SYSTEM PROJECT REPORT.pdfONLINE FOOD ORDER SYSTEM PROJECT REPORT.pdf
ONLINE FOOD ORDER SYSTEM PROJECT REPORT.pdf
ย 
(INDIRA) Call Girl Aurangabad Call Now 8617697112 Aurangabad Escorts 24x7
(INDIRA) Call Girl Aurangabad Call Now 8617697112 Aurangabad Escorts 24x7(INDIRA) Call Girl Aurangabad Call Now 8617697112 Aurangabad Escorts 24x7
(INDIRA) Call Girl Aurangabad Call Now 8617697112 Aurangabad Escorts 24x7
ย 
CCS335 _ Neural Networks and Deep Learning Laboratory_Lab Complete Record
CCS335 _ Neural Networks and Deep Learning Laboratory_Lab Complete RecordCCS335 _ Neural Networks and Deep Learning Laboratory_Lab Complete Record
CCS335 _ Neural Networks and Deep Learning Laboratory_Lab Complete Record
ย 
(INDIRA) Call Girl Bhosari Call Now 8617697112 Bhosari Escorts 24x7
(INDIRA) Call Girl Bhosari Call Now 8617697112 Bhosari Escorts 24x7(INDIRA) Call Girl Bhosari Call Now 8617697112 Bhosari Escorts 24x7
(INDIRA) Call Girl Bhosari Call Now 8617697112 Bhosari Escorts 24x7
ย 
data_management_and _data_science_cheat_sheet.pdf
data_management_and _data_science_cheat_sheet.pdfdata_management_and _data_science_cheat_sheet.pdf
data_management_and _data_science_cheat_sheet.pdf
ย 
Call for Papers - Educational Administration: Theory and Practice, E-ISSN: 21...
Call for Papers - Educational Administration: Theory and Practice, E-ISSN: 21...Call for Papers - Educational Administration: Theory and Practice, E-ISSN: 21...
Call for Papers - Educational Administration: Theory and Practice, E-ISSN: 21...
ย 
UNIT-III FMM. DIMENSIONAL ANALYSIS
UNIT-III FMM.        DIMENSIONAL ANALYSISUNIT-III FMM.        DIMENSIONAL ANALYSIS
UNIT-III FMM. DIMENSIONAL ANALYSIS
ย 
FULL ENJOY Call Girls In Mahipalpur Delhi Contact Us 8377877756
FULL ENJOY Call Girls In Mahipalpur Delhi Contact Us 8377877756FULL ENJOY Call Girls In Mahipalpur Delhi Contact Us 8377877756
FULL ENJOY Call Girls In Mahipalpur Delhi Contact Us 8377877756
ย 
UNIT - IV - Air Compressors and its Performance
UNIT - IV - Air Compressors and its PerformanceUNIT - IV - Air Compressors and its Performance
UNIT - IV - Air Compressors and its Performance
ย 
UNIT-V FMM.HYDRAULIC TURBINE - Construction and working
UNIT-V FMM.HYDRAULIC TURBINE - Construction and workingUNIT-V FMM.HYDRAULIC TURBINE - Construction and working
UNIT-V FMM.HYDRAULIC TURBINE - Construction and working
ย 
PVC VS. FIBERGLASS (FRP) GRAVITY SEWER - UNI BELL
PVC VS. FIBERGLASS (FRP) GRAVITY SEWER - UNI BELLPVC VS. FIBERGLASS (FRP) GRAVITY SEWER - UNI BELL
PVC VS. FIBERGLASS (FRP) GRAVITY SEWER - UNI BELL
ย 
Call for Papers - International Journal of Intelligent Systems and Applicatio...
Call for Papers - International Journal of Intelligent Systems and Applicatio...Call for Papers - International Journal of Intelligent Systems and Applicatio...
Call for Papers - International Journal of Intelligent Systems and Applicatio...
ย 
result management system report for college project
result management system report for college projectresult management system report for college project
result management system report for college project
ย 
VIP Model Call Girls Kothrud ( Pune ) Call ON 8005736733 Starting From 5K to ...
VIP Model Call Girls Kothrud ( Pune ) Call ON 8005736733 Starting From 5K to ...VIP Model Call Girls Kothrud ( Pune ) Call ON 8005736733 Starting From 5K to ...
VIP Model Call Girls Kothrud ( Pune ) Call ON 8005736733 Starting From 5K to ...
ย 
VIP Call Girls Ankleshwar 7001035870 Whatsapp Number, 24/07 Booking
VIP Call Girls Ankleshwar 7001035870 Whatsapp Number, 24/07 BookingVIP Call Girls Ankleshwar 7001035870 Whatsapp Number, 24/07 Booking
VIP Call Girls Ankleshwar 7001035870 Whatsapp Number, 24/07 Booking
ย 
Online banking management system project.pdf
Online banking management system project.pdfOnline banking management system project.pdf
Online banking management system project.pdf
ย 
Call Now โ‰ฝ 9953056974 โ‰ผ๐Ÿ” Call Girls In New Ashok Nagar โ‰ผ๐Ÿ” Delhi door step de...
Call Now โ‰ฝ 9953056974 โ‰ผ๐Ÿ” Call Girls In New Ashok Nagar  โ‰ผ๐Ÿ” Delhi door step de...Call Now โ‰ฝ 9953056974 โ‰ผ๐Ÿ” Call Girls In New Ashok Nagar  โ‰ผ๐Ÿ” Delhi door step de...
Call Now โ‰ฝ 9953056974 โ‰ผ๐Ÿ” Call Girls In New Ashok Nagar โ‰ผ๐Ÿ” Delhi door step de...
ย 
Booking open Available Pune Call Girls Koregaon Park 6297143586 Call Hot Ind...
Booking open Available Pune Call Girls Koregaon Park  6297143586 Call Hot Ind...Booking open Available Pune Call Girls Koregaon Park  6297143586 Call Hot Ind...
Booking open Available Pune Call Girls Koregaon Park 6297143586 Call Hot Ind...
ย 
chapter 5.pptx: drainage and irrigation engineering
chapter 5.pptx: drainage and irrigation engineeringchapter 5.pptx: drainage and irrigation engineering
chapter 5.pptx: drainage and irrigation engineering
ย 

Carl-Zeiss Coordinate measuring machine report (O-INSPECT 543)

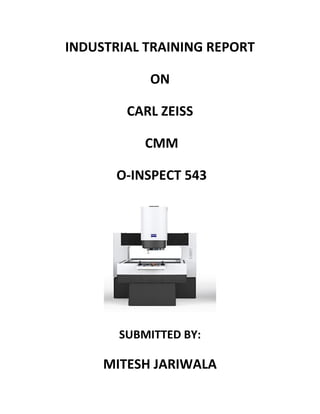
  • 1. INDUSTRIAL TRAINING REPORT ON CARL ZEISS CMM O-INSPECT 543 SUBMITTED BY: MITESH JARIWALA
  • 2. CONTENT ๏‚ท Basics of CMM ๏‚ท How do coordinate measuring machines work? ๏‚ท How to Turn On Machine ๏‚ท Calibration ๏‚ท Alignment of Axis Directions ๏‚ท Modes of operation in CMM ๏‚ท How to define clearance plane ๏‚ท Steps to start optical measurement ๏‚ท Method for executing measurement using optics ๏‚ท How to execute program in CMM ๏‚ท Execution of program stepwise with example
  • 3. Coordinate Measuring Machine Definition: A coordinate measuring machine is 3D device for measuring the physical geometrical characterises of an object. Description: The typical CMM is composed of three axes an X, Y, and Z. These axes are orthogonal to each other in a typical three dimension coordinate system. Each axis has a scale system that indicates the location of that axis. The machine will read input from the touch probe as directed by operator or programmer. The machine then uses X, Y, Z coordinate for each of these points to determine size and position with micrometre precision typically.
  • 4. Parts: Coordinate measuring machine include three main components: 1. The main structure which includes three axis of motion 2. Probing system 3. Data collection and reduction system โ€“ typically includes machine controllers, desktop computer and application software. Definition of probe: It is the sensory part of CMM responsible for sensing different parameters required for measurement. Fig1. Shows sensory part called tactile or probe for sensing different parameters
  • 5. How do coordinate measuring machines work? After placing a work-piece on the machine table, a probe is used to measure different points on it by mapping the X, Y, Z coordinates. The probe operates either manually via an operator or automatically via a control system. These points then uploaded to computer interface where they can be analysed using modelling software (e.g. CALYPSO) Fig2. Shows Carl Zeiss CMM O-inspect 543
  • 6. HOW TO TURN ON MACHINE Starting procedure 1. Turn ON Raw Power (UPS ON) 2. Turn ON CPU 3. Turn ON Controller 4. Open Calypso Software Closing procedure 1. Close Calypso Software 2. Turn OFF Controller 3. Turn OFF CPU 4. Turn OFF Raw Power (UPS OFF) Fig Shows Zeiss Joystick with ON/OFF Push Button Switch Zeiss Controller SWITCH
  • 7. Calibration What is calibration? It is the process of verifying and adjusting the accuracy of monitoring equipment and machine by comparing them with standards of known accuracy. The adjustment of instruments is performed by compensating the error into the instruments It is performed in regular intervals so as to ensure that instrument is reliable. Steps to perform calibration for (O-INSPECT543) 1. Click on CMM Fig3. Shows windows for calibration methods
  • 8. 2. Now click on Stylus system, after clicking on stylus system, following window will appear & click on manual stylus system change Fig4. Defines Hand symbol for manual stylus system change
  • 9. 3. By clicking on manual stylus system change, it will show window as seen below Fig5. Shows window for selecting Master Probe for calibration 4. From sensor types select XXT & from styli system select master probe 5. Now click on Ref. sphere position Fig6. Shows ref. sphere for Tilt & Rotation Angle of sphere
  • 10. 6. After selecting Ref. sphere following window will appear Fig7. Shows window in which tilt and rotation should adjust according to sphere position [Note: Depending on sphere angle, tilt angle & rotation should be entered else accident can occur while calibration] 7. After clicking ok, place probe in the direction of stylus shaft, window is shown below Fig8. Shows window to touch probe on sphere, to start calibration
  • 11. 8. After the competition of calibration, again from window select qualify stylus and calibration will start again. Fig9. Shows window to change probe after the calibration of Master Probe
  • 12. Alignment of Axis Directions What is alignment? Before starting any measurement on work-piece we have to define axis directions such as X, Y, Z. After proper alignment, all the direction of axis will be display in calypso CAD window. Steps to perform Alignment process 1. Place the work-piece properly on surface table where measurement is to be done. 2. Using probe define plane in all directions according to axis (X, Y, Z) 3. Click on Measurement, then start alignment, in that enter the entire plane respectively in Spatial & Planar Rotation. 4. After that also define X, Y, Z origin respectively and finally after alignment CAD window will open represent axis of the direction.
  • 13. Step 1 Fig10. Shows to start alignment process Step 2 Fig11. Shows base alignment settings
  • 14. Step 3 Fig12.shows to define plane in spatial & planar rotation Step 4 Fig13. Shows window to define plane in x, y, z origin
  • 15. Modes of operations in CMM There are various mode of operation in CMM, depend upon operator requirements. Some of them are as shown below. 1. Roundness 2. Roundness angle 3. Waviness 4. Flatness 5. Flatness ref 6. Straightness 7. Cylindricity 8. Profile 9. Line profile 10. Form 11. Curve form 12. True position 13. Concentricity 14. Coaxiality 15. Perpendicularity
  • 16. 16. Parallelism 17. Angularity 18. Distance 19. Angle between features 20. Runout After selecting specific operations on a work-piece, at the end we can run program in which we have to specify clearance data and everything needed. Define Roundness Roundness is the measure of how closely the shape of an object approaches that of a circle. Roundness is dominated by the shape's gross features rather than the definition of its edges and corners, or the surface roughness of a manufactured object. A smooth ellipse can have low roundness, if its eccentricity is large. Define Waviness Waviness is the measurement of the more widely spaced component of surface texture. It is a broader view of roughness because it is more strictly defined as "the irregularities whose spacing is greater than the roughness sampling length".
  • 17. Define Flatness Flatness is a form control. The flatness control (c) defines how much a surface on a real part may vary from the ideal flat plane. Tolerance Zone: The flatness tolerance zone is the volume between two parallel planes. The distance between the parallel planes is the stated flatness control tolerance value. Define Straightness Straightness is the shortest distance between two points. When using a compass or a laser one thinks of straightness as 180 degree line. When talking TGP a straight bar can be defined as one without a bend or curve. Define Concentricity Concentricity is a complex tolerance used to establish a tolerance zone for the median points of a cylindrical or spherical part feature. Define Perpendicularity In elementary geometry, the property of being perpendicular (perpendicularity) is the relationship between two lines which meet at a right angle (90 degrees). A line is said to be
  • 18. perpendicular to another line if the two lines intersect at a right angle. Define Angularity Angularity is the symbol that describes the specific orientation of one feature to another at a referenced angle. It can reference a 2D line referenced to another 2D element, but more commonly it relates the orientation of one surface plane relative to another datum plane in a 3-Dimensional tolerance zone. Define True position True position is the deviation from the theoretical location of the hole or feature as shown on the drawing. A True Position of 0.000 would mean the hole is exactly where it is supposed to be. A True Position of 0.010 means the hole is 0.010 off from where it is supposed to be.
  • 19. How to Define Clearance Plane What is clearance plane? We can define CP as a zone in which CMM move its axis to take measurement. We have to define plane in every direction i.e. is โ€“X, +X, -Y, +Y, -Z, +Z. After defining CP, CAD model is as shown in figure. Fig14. Shows clearance plane Steps to define clearance plane 1. Click on clearance plane from the window 2. Now from clearance window define axis in all direction i.e. โ€“X, +X, -Y, +Y, -Z, +Z
  • 20. 3. Before assigning CP, check all the parameters of measurement plan editor in which clearance & retract should be checked else collision of probe can occur. 4. Without assigning CP, CMM program would not run, so it is necessary to give proper CP. Step 1 Fig15. Shows clearance plane icon
  • 21. Step 2 Fig16. Shows window to enter values in CP Step 3 Fig17. Shows icon for measurement plan editor Step 4 Fig18. Shows window to edit clearance and retract distance
  • 22. Steps to start optical measurement What is optical measurement in CMM? Optical measurement is a measurement technique that relies on the use of optical sensor to collect measurement. The advantage of optical measurement is that it is non-invasive. No contact is required, beyond contact with the stage of an optical measuring device. Probes do not touch the object being measured and the device does not rely on destructive measurement techniques and most important point is that it can measure the work-piece where probe cannot measure. Steps to perform optical measurement completely in detail 1. Again drag your cursor towards CMM and click on it. 2. Click on stylus system icon where you will get manual stylus system change. 3. From manual stylus system change, probe & camera can be selected. 4. After selecting camera, go to illumination settings where you adjust light settings according to clear visibility of work-piece.
  • 23. 5. With the help of z-axis Joy-stick, clear the visibility of an object to maximum possibility then using Auto-focus, image will be perfectly clear to start measurements. Step 1 Fig20. Shows window to open stylus system Step 2 Fig21.shows icon to select camera for measurement
  • 24. Step 3 Fig22. Shows manual stylus system change Step 4 Fig23. Shows window to select camera for optical measurement
  • 25. Step 5 Fig24. Show illumination settings to change light settings Step 6 Fig25. Shows window to adjust lights for better visibility
  • 26. Method for executing measurement using optics 1.Place the work-piece properly w.r.t camera and start laser pointer to determine the vision of camera. 2.After the proper adjustment of vision stop laser pointer and click on illumination settings for light focus settings. 3.Try to focus on work-piece with the help of joy-stick after that focus with the help of Auto-focus from the menu to get perfectly clear image for measurement. 4.Start measurement for anything like circle, square, line or any complex that canโ€™t be measure with the help of tactile. 5.For circle select 3 points on the circle then 1 point inside the circle to determine circle exactly. 6.After all the measurement, it can be switched to CADVIEW then create 3D line for planer rotation used in alignment 7.Go to alignment in planner select 3D line, in Y select โ€œCircleโ€, in X origin select โ€œCircleโ€ and in Z define point defined on work-piece. 8.Define clearance plane from CAD model, set all values and set to Auto-light to run program.
  • 27. How to execute Program in CMM 1. Place the work-piece on CMM for measurement, then using tactile take axis in every direction i.e. is for X, Y, Z. 2. From window click on base alignment and in that specify axis for spatial and planner rotation also define X, Y, Z origin. 3. After proper alignment, the direction of axis should be noticed in CAD window. 4. If the direction of axis is proper take all the necessary measurement from diagram and define tolerance & everything. 5. Go to measurement editor plan and check for clearance and retract distance, edit it according to requirement. 6. Define clearance plane for work-piece that is already explained earlier how to define CP and check for all characteristics, Clear Existing Results and speed in mm/s. 7. After completing all the things, program can be executed.
  • 28. Execution of program stepwise with example Before starting measurement it is necessary to calibrate with sphere for better accuracy. Calibration is also necessary with the changing of probe. Step 1 Fig26. Shows loading of work-piece on CMM
  • 29. Step 2 Fig27. Shows CAD view after alignment Step 3 Fig28. Shows measurement taken from Drawing
  • 30. Step 4 Fig29. Shows measurements taken from Drawing Step 5 Fig30. Shows icon for measurement plan editor
  • 31. Step 6 Fig31. Shows window to edit clearance and retract distance Step 7 Fig32. Shows clearance plane to define axis
  • 32. Step 8 Fig33. Shows window to define clearance in every directions Step 9 Fig34. Shows clearance of a work-piece for measurement
  • 33. Step 10 Fig35. Shows window for setting selection, Results, CMM Step 11 Fig36. Shows icon to start the program THE END