
Recommended
More Related Content
What's hot
What's hot (20)
Viewers also liked
Viewers also liked (14)
Similar to Learn HTML in 40 Characters
Similar to Learn HTML in 40 Characters (20)
Recently uploaded
Recently uploaded (9)
Learn HTML in 40 Characters
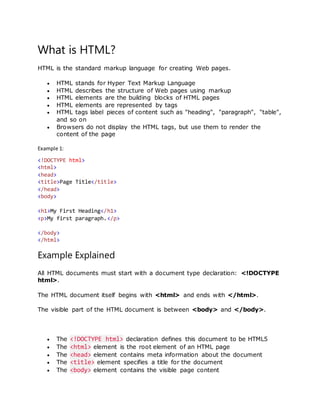
- 1. What is HTML? HTML is the standard markup language for creating Web pages. HTML stands for Hyper Text Markup Language HTML describes the structure of Web pages using markup HTML elements are the building blocks of HTML pages HTML elements are represented by tags HTML tags label pieces of content such as "heading", "paragraph", "table", and so on Browsers do not display the HTML tags, but use them to render the content of the page Example 1: <!DOCTYPE html> <html> <head> <title>Page Title</title> </head> <body> <h1>My First Heading</h1> <p>My first paragraph.</p> </body> </html> Example Explained All HTML documents must start with a document type declaration: <!DOCTYPE html>. The HTML document itself begins with <html> and ends with </html>. The visible part of the HTML document is between <body> and </body>. The <!DOCTYPE html> declaration defines this document to be HTML5 The <html> element is the root element of an HTML page The <head> element contains meta information about the document The <title> element specifies a title for the document The <body> element contains the visible page content
- 2. The <h1> element defines a large heading The <p> element defines a paragraph Example 2: HTML Headings HTML headings are defined with the <h1> to <h6> tags. <h1> defines the most important heading. <h6> defines the least important heading: Example <h1>This is heading 1</h1> <h2>This is heading 2</h2> <h3>This is heading 3</h3> Try it Yourself » HTML Paragraphs HTML paragraphs are defined with the <p> tag: Example <p>This is a paragraph.</p> <p>This is another paragraph.</p> Try it Yourself » HTML Links HTML links are defined with the <a> tag: Example <a href="http://www.w3schools.com">This is a link</a>
- 3. Try it Yourself » The link's destination is specified in the href attribute. Attributes are used to provide additional information about HTML elements. HTML Images HTML images are defined with the <img> tag. The source file (src), alternative text (alt), width, and height are provided as attributes: Example <img src="w3schools.jpg" alt="W3Schools.com" width="104" height="142"> Use Lowercase Tags HTML tags are not case sensitive: <P> means the same as <p>. The HTML5 standard does not require lowercase tags, but W3C recommends lowercase in HTML, and demandslowercase for stricter document types like XHTML. HTML Attributes All HTML elements can have attributes Attributes provide additional information about an element Attributes are always specified in the start tag Attributes usually come in name/value pairs like: name="value" The lang Attribute The language of the document can be declared in the <html> tag. The language is declared with the lang attribute.
- 4. Declaring a language is important for accessibility applications (screen readers) and search engines: <!DOCTYPE html> <html lang="en-US"> <body> ... </body> </html> The first two letters specify the language (en). If there is a dialect, use two more letters (US). The title Attribute Here, a title attribute is added to the <p> element. The value of the title attribute will be displayed as a tooltip when you mouse over the paragraph: Example <p title="I'm a tooltip"> This is a paragraph. </p> Try it Yourself » The href Attribute HTML links are defined with the <a> tag. The link address is specified in the href attribute: Example <a href="http://www.w3schools.com">This is a link</a> Try it Yourself »
- 5. You will learn more about links and the <a> tag later in this tutorial. Size Attributes HTML images are defined with the <img> tag. The filename of the source (src), and the size of the image (width and height) are all provided as attributes: Example <img src="w3schools.jpg" width="104" height="142"> Try it Yourself » The image size is specified in pixels: width="104" means 104 screen pixels wide. You will learn more about images and the <img> tag later in this tutorial. The alt Attribute The alt attribute specifies an alternative text to be used, when an image cannot be displayed. The value of the attribute can be read by screen readers. This way, someone "listening" to the webpage, e.g. a blind person, can "hear" the element. Example <img src="w3schools.jpg" alt="W3Schools.com" width="104" height="142"> Try it Yourself » HTML Headings Headings are defined with the <h1> to <h6> tags.
- 6. <h1> defines the most important heading. <h6> defines the least important heading. Example <h1>This is heading1</h1> <h2>This is heading2</h2> <h3>This is heading3</h3> <h4>This is heading4</h4> <h5>This is heading5</h5> <h6>This is heading6</h6> HTML Paragraphs The HTML <p> element defines a paragraph: Example <p>This is a paragraph.</p> <p>This is another paragraph.</p> HTML Styles The HTML Style Attribute Setting the style of an HTML element, can be done with the style attribute. The HTML style attribute has the following syntax: <tagname style="property:value;"> FONT COLOUR: <!DOCTYPE html> <html> <body> <h1 style="font-family:verdana;">Thisisaheading</h1> <p style="font-family:courier;">Thisisaparagraph.</p>
- 7. </body> </html> BACKGROUNDCOLOUR: <!DOCTYPE html> <html> <bodystyle="background-color:powderblue;"> <h1>This isa heading</h1> <p>This isa paragraph.</p> </body> </html> FontColour: <!DOCTYPE html> <html> <body> <h1 style="color:blue;">Thisis aheading</h1> <p style="color:red;">Thisisaparagraph.</p> </body> </html> FontSize: <!DOCTYPE html> <html> <body> <h1 style="font-size:300%;">Thisisaheading</h1>
- 8. <p style="font-size:160%;">Thisisaparagraph.</p> </body> </html> TextAlignment: <!DOCTYPE html> <html> <body> <h1 style="text-align:center;">CenteredHeading</h1> <p style="text-align:center;">Centeredparagraph.</p> </body> </html> HTML Formatting Elements In the previous chapter, you learned about the HTML style attribute. HTML also defines special elements for defining text with a special meaning. HTML uses elements like <b> and <i> for formatting output, like bold or italic text. Formatting elements were designed to display special types of text: <b> - Bold text <strong> - Important text <i> - Italic text <em> - Emphasized text <mark> - Marked text <small> - Small text <del> - Deleted text <ins> - Inserted text <sub> - Subscript text <sup> - Superscript text
- 9. Bold <!DOCTYPE html> <html> <body> <p>This textisnormal.</p> <p><b>This textisbold.</b></p> </body> </html> Strong: <!DOCTYPE html> <html> <body> <p>This textisnormal.</p> <p><strong>Thistextis strong.</strong></p> </body> </html> Italic: <!DOCTYPE html> <html> <body> <p>This textisnormal.</p>
- 10. <p><i>This textisitalic.</i></p> </body> </html> Emphasize: <!DOCTYPE html> <html> <body> <p>This textisnormal.</p> <p><em>Thistextisemphasized.</em></p> </body> </html> Small: <!DOCTYPE html> <html> <body> <h2>HTML <small>Small</small>Formatting</h2> </body> </html> Marked: <!DOCTYPE html> <html> <body>
- 11. <h2>HTML <mark>Marked</mark> Formatting</h2> </body> </html> Deleted: <!DOCTYPE html> <html> <body> <p>The del elementrepresentsdeleted(removed)text.</p> <p>My favorite coloris<del>blue</del>red.</p> </body> </html> Inserted: <!DOCTYPE html> <html> <body> <p>The inselementrepresentinserted(added) text.</p> <p>My favorite <ins>color</ins>isred.</p> </body> </html> Subscript: <!DOCTYPE html> <html>
- 12. <body> <p>This is<sub>subscripted</sub>text.</p> </body> </html> Superscript: <!DOCTYPE html> <html> <body> <p>This is<sup>superscripted</sup>text.</p> </body> </html> Quotation: <!DOCTYPE html> <html> <body> <p>This is<sup>superscripted</sup>text.</p> </body> </html> Comment: <!DOCTYPE html> <html> <body>
- 13. <!-- This isa comment--> <p>This isa paragraph.</p> <!-- Commentsare not displayedinthe browser --> </body> </html> Internal CSS An internal CSS is used to define a style for a single HTML page. An internal CSS is defined in the <head> section of an HTML page, within a <style> element: Example <!DOCTYPE html> <html> <head> <style> body {background-color: powderblue;} h1 {color: blue;} p {color: red;} </style> </head> <body> <h1>This is a heading</h1> <p>This is a paragraph.</p> </body> </html> Try it Yourself » External CSS An external style sheet is used to define the style for many HTML pages.
- 14. With an external style sheet, you can change the look of an entire web site, by changing one file! To use an external style sheet, add a link to it in the <head> section of the HTML page: Example <!DOCTYPE html> <html> <head> <link rel="stylesheet" href="styles.css"> </head> <body> <h1>This is a heading</h1> <p>This is a paragraph.</p> </body> </html> Try it Yourself » An external style sheet can be written in any text editor. The file must not contain any HTML code, and must be saved with a .css extension. Here is how the "styles.css" looks: body { background-color: powderblue; } h1 { color: blue; } p { color: red; } CSS Fonts The CSS color property defines the text color to be used. The CSS font-family property defines the font to be used.
- 15. The CSS font-size property defines the text size to be used. Example <!DOCTYPE html> <html> <head> <style> h1 { color: blue; font-family: verdana; font-size: 300%; } p { color: red; font-family: courier; font-size: 160%; } </style> </head> <body> <h1>This is a heading</h1> <p>This is a paragraph.</p> </body> </html> Try it Yourself » CSS Border The CSS border property defines a border around an HTML element: Example <!DOCTYPE html> <html> <head> <style>
- 16. p { border:1px solidpowderblue; } </style> </head> <body> <h1>This isa heading</h1> <p>This isa paragraph.</p> <p>This isa paragraph.</p> <p>This isa paragraph.</p> </body> </html> Padding: <!DOCTYPE html> <html> <head> <style> p { border:1px solidpowderblue; padding:30px; } </style> </head> <body> <h1>This isa heading</h1>
- 17. <p>This isa paragraph.</p> <p>This isa paragraph.</p> <p>This isa paragraph.</p> </body> </html> Margin: <!DOCTYPE html> <html> <head> <style> p { border:1px solidpowderblue; margin:50px; } </style> </head> <body> <h1>This isa heading</h1> <p>This isa paragraph.</p> <p>This isa paragraph.</p> <p>This isa paragraph.</p> </body> </html> ID:
- 18. <!DOCTYPE html> <html> <head> <style> #p01 { color: blue; } </style> </head> <body> <p>This isa paragraph.</p> <p>This isa paragraph.</p> <p id="p01">I am different.</p> </body> </html> Class: <!DOCTYPE html> <html> <head> <style> p.error{ color: red; } </style> </head> <body>
- 19. <p>This isa paragraph.</p> <p>This isa paragraph.</p> <p class="error">Iam different.</p> <p>This isa paragraph.</p> <p class="error">Iam differenttoo.</p> </body> </html> IMAGE: <!DOCTYPE html> <html> <body> <h2>SpectacularMountain</h2> <img src="pic_mountain.jpg"alt="MountainView"style="width:304px;height:228px;"> </body> </html> SIZE OF IMAGE: <!DOCTYPE html> <html> <body> <img src="html5.gif"alt="HTML5 Icon"style="width:128px;height:128px;"> </body> </html> IMAGES IN ANOTHERFOLDER: <!DOCTYPE html>
- 20. <html> <body> <img src="/images/html5.gif"alt="HTML5Icon" style="width:128px;height:128px;"> </body> </html> USING IMAGE AS LINK: <!DOCTYPE html> <html> <body> <p>The image isa link.Youcan clickonit.</p> <a href="default.asp"> <imgsrc="smiley.gif"alt="HTMLtutorial"style="width:42px;height:42px;border:0;"> </a> <p>Add "border:0;"to preventIE9(andearlier) fromdisplayingaborderaroundthe image.</p> </body> </html> TABEL: <!DOCTYPE html> <html> <head> <style> table { font-family:arial,sans-serif;
- 21. border-collapse:collapse; width:100%; } td, th { border:1px solid#dddddd; text-align:left; padding:8px; } tr:nth-child(even){ background-color:#dddddd; } </style> </head> <body> <table> <tr> <th>Company</th> <th>Contact</th> <th>Country</th> </tr> <tr> <td>AlfredsFutterkiste</td> <td>Maria Anders</td> <td>Germany</td> </tr> <tr>
- 22. <td>Centrocomercial Moctezuma</td> <td>Francisco Chang</td> <td>Mexico</td> </tr> <tr> <td>Ernst Handel</td> <td>RolandMendel</td> <td>Austria</td> </tr> <tr> <td>IslandTrading</td> <td>HelenBennett</td> <td>UK</td> </tr> <tr> <td>LaughingBacchus Winecellars</td> <td>Yoshi Tannamuri</td> <td>Canada</td> </tr> <tr> <td>Magazzini Alimentari Riuniti</td> <td>Giovanni Rovelli</td> <td>Italy</td> </tr> </table> </body> </html> ADDINGBORDER:
- 23. <!DOCTYPE html> <html> <head> <style> table,th,td { border:1px solidblack; } </style> </head> <body> <table style="width:100%"> <tr> <th>Firstname</th> <th>Lastname</th> <th>Age</th> </tr> <tr> <td>Jill</td> <td>Smith</td> <td>50</td> </tr> <tr> <td>Eve</td> <td>Jackson</td> <td>94</td> </tr> <tr> <td>John</td>
- 24. <td>Doe</td> <td>80</td> </tr> </table> </body> </html> ADDINGLIST: <!DOCTYPE html> <html> <body> <h2>An unorderedHTML list</h2> <ul> <li>Coffee</li> <li>Tea</li> <li>Milk</li> </ul> </body> </html> Unordered HTML List - Choose List Item Marker The CSS list-style-type property is used to define the style of the list item marker:
- 25. Value Description Disc Sets the list item marker to a bullet (default) Circle Sets the list item marker to a circle Square Sets the list item marker to a square None The list items will not be marked Ordered HTML List - The Type Attribute The type attribute of the <ol> tag, defines the type of the list item marker: Type Description type="1" The list items will be numbered with numbers (default) type="A" The list items will be numbered with uppercase letters type="a" The list items will be numbered with lowercase letters
- 26. type="I" The list items will be numbered with uppercase roman numbers type="i" The list items will be numbered with lowercase roman numbers ORDERED LIST: <!DOCTYPE html> <html> <body> <h2>An orderedHTML list</h2> <ol> <li>Coffee</li> <li>Tea</li> <li>Milk</li> </ol> </body> </html>