Migrate a virtual machine faster and with no downtime
•
1 like•304 views

Adopting a hybrid cloud can help your infrastructure gain flexibility and scalability while still keeping your critical business data secure and controlled. Those IT and business benefits grow even stronger when your solution lets you avoid downtime while migrating VMs. By adding VMware vCloud Air HCM to our vCloud Air infrastructure, we extended our network to the public cloud, allowing us to perform a VM migration with no downtime at all. When you can migrate VMs more quickly and without interrupting service to users, your whole business can benefit. For a hybrid cloud solution that can keep your customers happy and save your IT staff time and effort, consider adding HCM to your VMware vCloud Air infrastructure.

Recommended
Recommended
More Related Content
More from Principled Technologies
More from Principled Technologies (20)
Recently uploaded
Recently uploaded (20)
Migrate a virtual machine faster and with no downtime
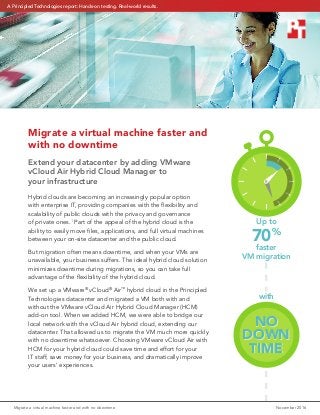
- 1. Migrate a virtual machine faster and with no downtime November 2016 Migrate a virtual machine faster and with no downtime Extend your datacenter by adding VMware vCloud Air Hybrid Cloud Manager to your infrastructure Hybrid clouds are becoming an increasingly popular option with enterprise IT, providing companies with the flexibility and scalability of public clouds with the privacy and governance of private ones.1 Part of the appeal of the hybrid cloud is the ability to easily move files, applications, and full virtual machines between your on-site datacenter and the public cloud. But migration often means downtime, and when your VMs are unavailable, your business suffers. The ideal hybrid cloud solution minimizes downtime during migrations, so you can take full advantage of the flexibility of the hybrid cloud. We set up a VMware® vCloud® Air™ hybrid cloud in the Principled Technologies datacenter and migrated a VM both with and without the VMware vCloud Air Hybrid Cloud Manager (HCM) add-on tool. When we added HCM, we were able to bridge our local network with the vCloud Air hybrid cloud, extending our datacenter. That allowed us to migrate the VM much more quickly with no downtime whatsoever. Choosing VMware vCloud Air with HCM for your hybrid cloud could save time and effort for your IT staff, save money for your business, and dramatically improve your users’ experiences. with Up to 70% faster VM migration NO DOWN TIME NO DOWN TIME A Principled Technologies report: Hands-on testing. Real-world results.
- 2. Migrate a virtual machine faster and with no downtime November 2016 | 2 Save time and improve user experience with VMware vCloud Air with vCloud Air Hybrid Cloud Manager If you’re already working with a VMware vSphere infrastructure, VMware vCloud Air is compatible with the rest of your virtualized infrastructure, making it an appealing choice for your hybrid cloud. Plus, as an add-on, vCloud Air offers enhanced management technologies in VMware vCloud Air Hybrid Cloud Manager. Using HCM with vCloud Air isn’t just a compatible tool that lets you avoid dealing with third-party companies. It’s an addition that can help your company save IT time and effort and improve user experience. Reduce costs with a unified datacenter Typically, a hybrid cloud provides access to public cloud resources while maintaining an on‑premises private cloud. The two clouds remain separate, though, which can cause delays during migrations. HCM connects the two clouds. It enables you to stretch your network across your hybrid cloud, creating a unified datacenter—with a single IP address space—consisting of your facility and the VMware vCloud Air virtual datacenter. In doing so, HCM integrates the virtual datacenter into your own managed network. Unifying your local and cloud-based datacenters can decrease the amount of time and effort needed to manage the otherwise divided infrastructure. It can save on datacenter costs for your company as you can add the processing power of additional servers without requiring more on-site square footage, power, cooling, and other overhead. You also have the opportunity to geographically disperse the servers that are running your applications and storing your data, so your vital resources remain available even if a single site is down.
- 3. Migrate a virtual machine faster and with no downtime November 2016 | 3 Faster VM migration with no downtime When migrating a VM requires you to power it down for long periods of time, your business can suffer. Users attempting to access the data or applications on that VM won’t be able to get what they need, which can translate to a host of problems, from a poor customer experience to an employee missing a crucial deadline. For your most heavily utilized services, even a short outage can spell disaster for your business. To minimize the impact, IT administrators must run migrations at night or on the weekends, which requires them to work long, inconvenient hours. Before adding HCM to our infrastructure, we tried migrating a VM using only VMware vCloud Air on a 1 Gbps connection. It took 27 minutes, during which time the VM had to be powered down. This period of downtime is brief enough that your IT administrators can schedule the migration for a change window, which can minimize the impact on user experience and allow the company to still meet its SLAs. The ideal migration, however, is a live migration: one with no downtime. That’s exactly what we got when we performed a vMotion VM migration using HCM on the same 1 Gbps connection. With HCM extending our datacenter to the cloud, the migration took just under 8 minutes—a 70 percent reduction from the time it took to migrate a VM without HCM. The faster the migration, the more time your IT administrators have to accomplish their goals. More importantly, the VM remained accessible during the entire migration period. Because the VM is never down, users can continue to access the applications or data on the VM even during the migration. In practical terms, this means your customers can use your services without interruption and your staff members can keep working normally. Eliminating downtime also makes life easier for IT staff, who are able to schedule the migration at any time, even during heavy traffic. This saves them time and effort, allowing them to focus their energies on improving efficiency, helping users, and delivering new services. 0 5 10 15 20 25 30 with HCM without HCM 27:00 7:50 minutes 70% less time to migrate
- 4. Migrate a virtual machine faster and with no downtime November 2016 | 4 Conclusion Adopting a hybrid cloud can help your infrastructure gain flexibility and scalability while still keeping your critical business data secure and controlled. Those IT and business benefits grow even stronger when your solution lets you avoid downtime while migrating VMs. By adding VMware vCloud Air HCM to our vCloud Air infrastructure, we extended our network to the public cloud, allowing us to perform a VM migration with no downtime at all. When you can migrate VMs more quickly and without interrupting service to users, your whole business can benefit. For a hybrid cloud solution that can keep your customers happy and save your IT staff time and effort, consider adding HCM to your VMware vCloud Air infrastructure. 1 http://www.rightscale.com/blog/cloud-industry-insights/cloud-computing-trends-2016-state-cloud-survey How hybrid clouds can deliver the cloud capabilities you need Choosing a hybrid cloud can combine useful capabilities of both public and private clouds in a single solution. With a public cloud, users can access their data and applications from anywhere at any time, offering more flexibility for employees who are traveling or working from home. A public cloud also allows you to quickly scale your resources up and down as you need them rather than purchasing and configuring new hardware. This can lower your overhead costs and free funds for new IT projects. A hybrid cloud offers all of these advantages and gives you the security and privacy of a private cloud, keeping your most critical data protected in your datacenter. You have complete control over any data in the private cloud, so it’s easier to set permissions and maintain regulatory compliance. And if that data ever becomes less sensitive, the hybrid cloud allows you to easily transfer it from the private to the public cloud. • Access data anywhere, any time • Scale resources as you need them • Keep data secure and private • Easily transfer data from private to public
- 5. Migrate a virtual machine faster and with no downtime November 2016 | 5 On October 1, 2016, we finalized the hardware and software configurations we tested. Updates for current and recently released hardware and software appear often, so unavoidably these configurations may not represent the latest versions available when this report appears. For older systems, we chose configurations representative of typical purchases of those systems. We concluded hands-on testing on October 18, 2016. Appendix A: System configuration information System Cisco UCS B200 M3 Blade Server Enclosure Blade enclosure Cisco UCS 5108 Power supplies Total number 4 Wattage of each (W) 2,500 Cooling fans Total number 8 General Number of processor packages 2 Number of cores per processor 8 Number of hardware threads per core 2 System power management policy High Performance CPU Vendor Intel® Name Xeon® Model number E5-2650 Stepping 7 Socket type LGA2011 Core frequency (GHz) 2.00 Bus frequency 8.0 GT/s L1 cache 512 KB L2 cache 2 MB L3 cache 20 MB Platform Vendor and model number Cisco UCS B200 M3 Motherboard model number UCSB-B200-M3 BIOS name and version Cisco B200M3.2.2.4a.0.041720151158 BIOS settings Default
- 6. Migrate a virtual machine faster and with no downtime November 2016 | 6 System Cisco UCS B200 M3 Blade Server Memory module(s) Total RAM in system (GB) 384 Vendor and model number Cisco UCS-MR-1X162RZ-A Type DDR3-1866 PC3-14900 Speed (MHz) 1,866 Speed running in the system (MHz) 1,866 Size (GB) 16 Number of RAM module(s) 24 Chip organization Double-sided, dual-rank Operating system Name VMware vSphere 6.0.0 Build number 3562874 Language English RAID controller Vendor and model number LSI Logic® MegaRAID SAS 2004 ROMB Firmware version 20.12.1-0206|4.37.00|NA Hard drives Vendor and model number Seagate® ST9146803SS Number of drives 2 Size (GB) 146 RPM 10,000 Type SAS Network adapter Vendor and model number Cisco UCS VIC 1240 System Firewall/IPSEC gateway pfSense Firewall Software version 2.3.2-RELEASE-p1 (amd64) Figure 1: System configuration information for the test systems. Figure 2: Software version information for the firewall/IPSEC gateway.
- 7. Migrate a virtual machine faster and with no downtime November 2016 | 7 Appendix B: How we tested Configuring the cloud and testing a migration Configuring VMware vCloud Connector Because we pre-configured the vCloud Air environment, we deployed vCloud Connector locally using the guidelines in the Installation and Configuration Guide (http://pubs.vmware.com/hybridcloud-27/topic/com.vmware.ICbase/PDF/vCloudConnector_27_ InstallConfigure.pdf). 1. Deploy the vCloud Connector server appliance VM OVF via vSphere Client, and power it on. 2. Configure the vCloud Connector Server. a. Go to the Admin Web console at https://vCC Server IP address:5480 b. Log in as admin/vmware. c. Configure the time zone. d. Set a static IP address and network information for the server. e. Go to the vSphere Client tab; enter the IP, username, and password for the VMware vCenter Server; and click Register. 3. Deploy the vCloud Connector node appliance VM OVF via vSphere Client, and power it on. 4. Configure and register the vCloud Connector node with vSphere cloud and vCenter Server. a. Go to the Admin Web console at https://vCC Node IP address:5480 b. Log in as admin/vmware. c. Go to the NodeCloud tab. d. Select vSphere as the Cloud type. e. In the Cloud URL field, enter the URL of the vSphere server in IP address form. f. Click Update Configuration. g. If using UDT, click Enable UDT. Migrating a VM using vCloud Connector 1. Increase the staging area for VM migration. a. Select the vCloud Connector Node VM, and click Edit Settings. b. On the Hardware tab, select Hard disk 2, and change the size to 100GB. c. Open a console session to the VM, and login as admin/vmware. d. Run this command to resize the disk: sudo /opt/vmware/hcagent/scripts/resize_disk.sh e. Enter the root password when prompted, and log out of the VM. 2. Add a catalog to the vCloud Air Virtual Data Center (VDC). a. Log into the vCloud Air portal, and select the VDC under test. b. In vCloud Director, click Manage Catalogs. c. Add a catalog, and give it a name. d. Select the storage type, and click Next. e. Share the catalog, and add Read/Write access to the test user. f. Click Next, and then click Finish. 3. Using the vCenter interface for vCloud Connector, browse to the local datacenter and select the VM you will be migrating to vCloud Air. 4. Select ActionsCopy. 5. Proceed through the wizard, and select the vCloud Air destination. 6. Check the box to power on the VM/vApp after deployment. 7. To confirm the options selected, click Validate. 8. To initiate the copy, click Finish. 9. Record the elapsed time to migrate the VM to vCloud Air as the vCloud Connector interface indicates it.
- 8. Migrate a virtual machine faster and with no downtime November 2016 | 8 Deploying VMware vCloud Air Hybrid Cloud Manager Because we pre-configured the vCloud Air environment, we deployed Hybrid Cloud Manager locally using the guidelines in the Installation and Administration Guide (http://pubs.vmware.com/vca/topic/com.vmware.ICbase/PDF/vca-hcm-v1-0u1-install-admin-guide.pdf). Then, we customized the settings for our environment. 1. In vSphere Web Client, deploy the Hybrid Cloud Manager OVF template to the local environment. a. Set the VM to use the local management test network. b. Enter admin and root passwords. c. Enter host name, IP, and gateway information. d. Enter the DNS servers and domain search list. e. Review the settings, and to deploy the VM, click Finish. 2. Register Hybrid Cloud Manager with your local vCenter. a. Log into the Hybrid Cloud Manager Portal. b. Under Configure Systems, select vCenter. c. Add the vCenter URL by IP address. d. Enter the administrator username and password. e. Click OK, and restart the Application Engine. 3. Register the vCloud Air cloud parameters with Hybrid Cloud Manager. a. Copy the vCloud Director API URL from the vCloud Air dashboard. b. In vSphere, select Register new Cloud. c. Paste the API URL into the Cloud URL field. d. Select the vCenter, and enter the username and password. 4. Install HCM services into your datacenter using the HCM wizard. a. In vSphere Web Client, open Hybrid Cloud Manager, and select the Hybrid Services tab. b. Click Install service. c. Select: • Hybrid Cloud Gateway • WAN Optimization Service • Network Extension Service d. Click Next. e. Configure the location and IP Assignment parameters for the Hybrid Cloud Gateway, and click Next. f. Configure the Network Extension Service to use the test network VDS, and place it in the proper containers. g. Through the rest of the wizard, click Next, then click Finish. 5. Extend the Layer 2 test network to the vCloud Air cloud. a. In the vSphere Web Client, select Networking. b. Right-click on the port group to extend to the cloud, and select Hybridity ActionsExtend Network. c. Enter the gateway IP and subnet mask for the network, and click Next. d. Select the parameters for the datacenter under test and matching gateway. e. Click Next. f. Review the settings, and click Finish. Migrating a VM with Hybrid Cloud Manager 1. In the vSphere Web Client, select Hybrid Cloud Manager, and then the VM Migration tab. 2. Click Migrate VM. 3. Select From vSphere to vCloud Air, and click Next. 4. Select vMotion based migration, and click Next. 5. Select the source vCenter and the source resource cluster, and click Next. 6. Select the VM to migrate, and click Next. 7. Select the destination vCD Organization and Virtual Datacenter, and click Next. 8. Select the NSX Edge and destination network, and click Next. 9. Choose to use the same virtual disk format, select a storage tier, and click Next. 10. After validation is complete, click Finish. 11. Record the elapsed time reported in the Hybrid Cloud Manager UI as the final result.
- 9. Migrate a virtual machine faster and with no downtime November 2016 | 9 Principled Technologies is a registered trademark of Principled Technologies, Inc. All other product names are the trademarks of their respective owners. DISCLAIMER OF WARRANTIES; LIMITATION OF LIABILITY: Principled Technologies, Inc. has made reasonable efforts to ensure the accuracy and validity of its testing, however, Principled Technologies, Inc. specifically disclaims any warranty, expressed or implied, relating to the test results and analysis, their accuracy, completeness or quality, including any implied warranty of fitness for any particular purpose. All persons or entities relying on the results of any testing do so at their own risk, and agree that Principled Technologies, Inc., its employees and its subcontractors shall have no liability whatsoever from any claim of loss or damage on account of any alleged error or defect in any testing procedure or result. In no event shall Principled Technologies, Inc. be liable for indirect, special, incidental, or consequential damages in connection with its testing, even if advised of the possibility of such damages. In no event shall Principled Technologies, Inc.’s liability, including for direct damages, exceed the amounts paid in connection with Principled Technologies, Inc.’s testing. Customer’s sole and exclusive remedies are as set forth herein. This project was commissioned by VMware Inc. Principled Technologies® Facts matter.®Principled Technologies® Facts matter.®