
Recommended
More Related Content
What's hot
What's hot (20)
Viewers also liked
Viewers also liked (20)
Similar to Tooth Preparation - Anterior bonded crowns
Similar to Tooth Preparation - Anterior bonded crowns (20)
Recently uploaded
Recently uploaded (20)
Tooth Preparation - Anterior bonded crowns
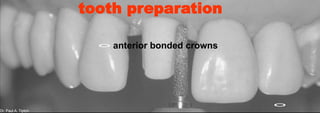
- 1. Dr. Paul A. Tipton anterior bonded crowns Dr. Paul A. Tipton tooth preparation
- 2. Dr. Paul A. Tipton prepare UR1 for P.F.M. crown
- 3. Dr. Paul A. Tipton take 2 thick putty matrices of the upper arch
- 4. Dr. Paul A. Tipton “the facial surface must be reduced in two planes to allow adequate clearance for porcelain” h. shillingburg 1981 some authorities say 3 plane reduction. that is gingival, incisal and mid-facial.
- 5. Dr. Paul A. Tipton use 1 - 1.2mm depth cuts in 3 planes and the putty matrix
- 6. Dr. Paul A. Tipton reduce the incisal edge by 2mm – using depth cuts you may wish to use matrix band separators to avoid preparing the adjacent teeth
- 7. Dr. Paul A. Tipton complete reduction of the labial surface with round ended tapered bur with 1.0 – 1.5 mm cutting tip. do not break through the contacts yet. establish your shoulder labially and into the embrasures. keep the shoulder supra gingival at this stage.
- 8. Dr. Paul A. Tipton break through the contacts with a thin tapered bur. finish off the margin inter-proximally with a long chamfer bur or round ended bur 1mm thick so as to produce a 0.5 mm chamfer margin
- 9. Dr. Paul A. Tipton the shoulder preparation should be a deep chamfer 1.2 – 1.5 mm deep cut with a 2.4 to 3.0 mm chamfer bur . It should stop just past or palatal to the contact points.
- 10. Dr. Paul A. Tipton reduce the palatal surface by 1mm for metal or 1.2 mm reduction for porcelain and metal. use a football-shaped bur for correct depth then a rugby ball-shaped bur for the correct shape
- 11. Dr. Paul A. Tipton prepare a palatal finish line with a supra gingival chamfer and ensure it is not undercut relative to the labial gingival third for more precision use a speed increasing hand piece.
- 12. Dr. Paul A. Tipton finish the margins with speed increasing hand piece and shape the wings finished preparation showing winged appearance with a rounded incisal edge
- 13. Dr. Paul A. Tipton shoulder runs into chamfer interproximally
- 14. Dr. Paul A. Tipton check incisal reduction
- 15. Dr. Paul A. Tipton check marginal reduction
- 16. Dr. Paul A. Tipton check labial and incisal reduction using the putty matrix
- 17. Dr. Paul A. Tipton place 2 Dux Ginginkit soaked in astringent solution– thinnest (00) first and then finish your preparation subgingivally to the cord . Use the correct cord packer .The cord gives you sulcus depth and protects it against violation of the biological width impression techniques
- 18. Dr. Paul A. Tipton this second cord - soaked in astringent solution is half in, half out of the soft tissue. (n.b. for this preparation on the phantom head it needs to be subgingival as the tissue reacts differently).
- 19. Dr. Paul A. TiptonDr. Paul A. Tipton
- 20. Dr. Paul A. Tipton impression techniques dry the preparation and sulcus syringe light body ‘provil’ impression over the dried prep use the 3:1 air syringe to blow (push) the impression material into the sulcus and onto the tooth syringe more impression material onto the prep gently seat the tray and ‘monophase’ tray materialDr. Paul A. Tipton tooth preparation
- 21. Dr. Paul A. TiptonDr. Paul A. Tipton
- 22. Dr. Paul A. TiptonDr. Paul A. Tipton
- 23. Dr. Paul A. Tipton anterior bonded crowns premolar bonded crowns Dr. Paul A. Tipton tooth preparation
- 24. Dr. Paul A. TiptonDr. Paul A. Tipton prepare ul5 for bonded crown. tooth preparation
- 25. Dr. Paul A. Tipton Use the same matrix
- 26. Dr. Paul A. TiptonDr. Paul A. Tipton reduce occlusal surface by 1.5mm use depth cuts of 1.2 mm bur
- 27. Dr. Paul A. TiptonDr. Paul A. Tipton eliminate the grooves to provide even reduction. Make sure occlusal reduction is completed with the bur at the correct angle , taken from the cusp angles of adjacent teeth
- 28. Dr. Paul A. Tipton “the functional cusp bevel is a wide bevel on the palatal inclines of maxillary palatal cusps and the buccal inclines of mandibular buccal cusps that provides space for an adequate bulk of metal in an area of heavy occlusal contact” fundamentals of fixed prosthodontics h. shillingberg quintessence 1981 Dr. Paul A. Tipton tooth preparation
- 29. Dr. Paul A. TiptonDr. Paul A. Tipton place the functional cusp bevel at 45 degrees to the occlusal plane place the functional cusp bevel at 45 degrees to the occlusal plane and supra-gingival palatal chamfer
- 30. Dr. Paul A. Tipton completed functional cusp bevel and palatal surface reduction. chamfer finish line palatally.Dr. Paul A. Tipton
- 31. Dr. Paul A. Tipton use 1 – 1.2mm tapered bur to prepare labial surface using depth grooves or putty matrix Dr. Paul A. Tipton
- 32. Dr. Paul A. Tipton eliminate the grooves to produce even labial reduction and prepare 1.2mm labial shoulderDr. Paul A. Tipton
- 33. Dr. Paul A. Tipton two plane reduction Dr. Paul A. Tipton
- 34. Dr. Paul A. Tipton cut through interdentally using long thin diamond bur Dr. Paul A. Tipton
- 35. Dr. Paul A. Tipton prepare to just labial of contact point distallyDr. Paul A. Tipton
- 36. Dr. Paul A. Tipton prepare half way into the mesial contact areaDr. Paul A. Tipton
- 37. Dr. Paul A. TiptonDr. Paul A. Tipton smooth all sharp edges
- 38. Dr. Paul A. Tipton final preparation (labial view)Dr. Paul A. Tipton
- 39. Dr. Paul A. Tipton final view of preparation from the occlusal surfaceDr. Paul A. Tipton
- 40. Dr. Paul A. Tipton check the marginal preparation using the putty matrixDr. Paul A. Tipton
- 41. Dr. Paul A. Tipton final view from the labial aspect shoulder – 1.2mm preparations wings mesially and distally labially – 2 plane reduction occlusally – 1.5 mm reductions
- 42. Dr. Paul A. TiptonDr. Paul A. Tipton check occlusal reduction
- 43. Dr. Paul A. TiptonDr. Paul A. Tipton Impression techniques place 1st cord place 2nd cord
- 44. Dr. Paul A. TiptonDr. Paul A. Tipton ensure there is a definate visable space around all the preparation edge. If not re pack or place additional cord
- 45. Dr. Paul A. TiptonDr. Paul A. Tipton st ann’s dental clinic dry the prep and sulcus and syringe ‘provil’ impression material blow the impression material into the sulcus and onto the prep then syringe more on top
- 46. Dr. Paul A. TiptonDr. Paul A. Tipton
- 47. Dr. Paul A. Tipton
- 48. Dr. Paul A. Tipton anterior bonded crowns premolar bonded crowns posterior bonded crowns tooth preparation Dr. Paul A. Tipton
- 49. Dr. Paul A. Tipton prepare depth cuts 1.2mm on the occlusal surface all over but keep the bur parallel to the cusp angles or copy the angulation from the adjacent teeth Dr. Paul A. Tipton deeper preparation for thicker posterior restoration to reduce stresses to the cement lute and metal framework
- 50. Dr. Paul A. Tipton functional cusp reduction of a further 0.5mm (lower buccal – upper palatal) Dr. Paul A. Tipton functional cusp bevel. silver dies produce better marginal quality.
- 51. Dr. Paul A. Tipton labial reduction for posterior teeth in 2 planes and 1.2-1.5 mm reduction depending upon aesthetic requirementsDr. Paul A. Tipton
- 52. Dr. Paul A. Tipton make sure there is a mid buccal groove that mimics the shape of the shoulder at the gingival margin Dr. Paul A. Tipton st ann’s dental clinic The occlusal reduction should follow the shape of the original tooth
- 53. Dr. Paul A. TiptonDr. Paul A. Tipton mesio - buccal view disto - buccal view lingual view finished preparation
- 54. Dr. Paul A. TiptonDr. Paul A. Tipton the wings where the shoulder turns into a chamfer or shoulder bevel should be buccal to the disto-buccal contact area and just into the contact area mesio-buccally. distal wing mesial wing
- 55. Dr. Paul A. Tipton distal wing central groove finished preparation mesial wing 1.5mm occlusal reduction functional cusp bevel lingual chamfer or shoulder bevel shoulder bevel
- 56. Dr. Paul A. TiptonDr. Paul A. Tipton
- 57. Dr. Paul A. Tipton