
Recommended
Recommended
More Related Content
What's hot
What's hot (20)
Viewers also liked
Viewers also liked (18)
Similar to Tooth Preparation - Gold preps
Similar to Tooth Preparation - Gold preps (20)
Recently uploaded
Recently uploaded (20)
Tooth Preparation - Gold preps
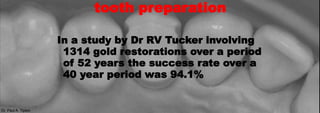
- 1. Dr. Paul A. Tipton In a study by Dr RV Tucker involving 1314 gold restorations over a period of 52 years the success rate over a 40 year period was 94.1% Dr. Paul A. Tipton tooth preparation
- 2. Dr. Paul A. Tipton gold ¾ crowns (upper) Dr. Paul A. Tipton tooth preparation
- 3. Dr. Paul A. Tipton
- 4. Dr. Paul A. Tipton reduce the occlusal surface by approx. 0.5 - 1mm depending on the occlusion and position in the arch , use depth cuts of 0.3 – 0.75mm, slightly less as you approach the buccal cusp tip – depending on whether the tooth is in guidance or not. Keep the correct cuspal inclines
- 5. Dr. Paul A. Tipton prepare functional cusp bevel by extra ½mm angle the bur so that it prepares the functional cusp bevel at approximately 45° to the occlusal plane
- 6. Dr. Paul A. Tipton prepare palatally with ½ mm chamfer bur
- 7. Dr. Paul A. Tipton make sure your margin is just supragingival
- 8. Dr. Paul A. Tipton st ann’s break through distal contact first using long thin diamond
- 9. Dr. Paul A. Tipton place the chamfer finish line supragingivally. finish with fine diamond or carbide bur
- 10. Dr. Paul A. Tipton place distal groove supragingivally using tapered carbide bur with a slight angulation - the same as the palatal wall aim towards opposite corner of the tooth. the bur should engage half its width. use speed increasing handpiece
- 11. Dr. Paul A. Tipton break through mesially with long thin diamond and increase width until thin chamfer bur can produce supra- gingival margin without damaging the adjacent tooth
- 12. Dr. Paul A. Tipton finish the margin with fine diamond or carbide chamfer bur. use speed increasing handpiece
- 13. Dr. Paul A. Tipton place the mesial groove the same way using carbide tapered bur with speed increasing handpiece. angle the bur so that it is upright and you have a “line of drawer” when looking from the buccal. then flare the groove to the cavo surface margin using a flame shaped fine diamond or carbide bur in a speed increasing handpiece. the angle should be the same as the palatal wall
- 14. Dr. Paul A. Tipton the groove should be angled towards the opposite corner of the tooth and half the depth used. the mesial groove should not be seen from the front of the mouth and should be hidden by the distal aspect of the canine tooth
- 15. Dr. Paul A. Tipton cut an occlusal off set between grooves using tungsten carbide flat ended bur by cutting with one corner to produce a 90° v-shaped but shallow ditch.
- 16. Dr. Paul A. Tipton the offset is there to strengthen the thin occlusal cavo-surface margin and give structural rigidity. use speed increasing handpiece
- 17. Dr. Paul A. Tipton the offset is cut so that it follows the buccal cusp outline in a shallow v
- 18. Dr. Paul A. Tipton the final preparation involves a ½ mm bevel on the buccal cusp tip using a fine diamond or carbide bur in a speed increasing handpiece. make sure you have a “line of draw” from the buccal before taking your impressions. this is done by ‘wiping’ the bur over the buccal cup
- 19. Dr. Paul A. Tipton
- 20. Dr. Paul A. Tipton reduce the occlusal surface by approximately 0.5 - 1mm – use depth cuts. slightly less as you approach the buccal cusp tip – maintaining the correct cuspal inclines (unless in guidance)
- 21. Dr. Paul A. Tipton reduce the functional cusp bevel by extra ½ mm at 45° to the occlusal plane
- 22. Dr. Paul A. Tipton use carbide bur with flat cutting edge to place a 1/2mm shoulder
- 23. Dr. Paul A. Tipton the shoulder is placed 1mm apical to the opposing tooth contact
- 24. Dr. Paul A. Tipton cut out a MOD cavity. remove the MOD amalgam and prepare a MOD inlay preparation with a 12° angle of convergence
- 25. Dr. Paul A. Tipton prepare the boxes with sharp line angles and similar angle of convergence the boxes should be apical to the MOD cavity (usually!). use speed increasing handpiece and carbide bur to finish the preparation
- 26. Dr. Paul A. Tipton place a flare (fine bevel) between the boxes and the cavo-surface walls of the preparation using speed increasing handpiece
- 27. Dr. Paul A. Tipton place a flare (fine bevel) or bevel to the bone of the box with fine diamond or carbide bur in a speed increasing handpiece make sure the contact areas are broken
- 28. Dr. Paul A. Tipton complete the preparation by continuing the flare (fine bevel) onto the buccal cusp tip and bevel the palatal shoulder with fine diamond or carbide bur using speed increasing handpiece. make sure you have a “line of draw” from the buccal.
- 29. Dr. Paul A. Tipton make sure that the axial walls are 6° and there is a “line of draw”
- 30. Dr. Paul A. Tipton
- 31. Dr. Paul A. Tipton the boxes should be square internally, with a flare to the contact point with the adjacent teeth. the boxes should break the contact point with the adjacent teeth
- 32. Dr. Paul A. Tipton
- 33. Dr. Paul A. Tipton reduce the occlusal surface by 1mm using depth cuts and maintaining the correct cuspal angles and inclines
- 34. Dr. Paul A. Tipton reduce the buccal cusp (functional cusp bevel) by extra ½ mm
- 35. Dr. Paul A. Tipton place the functional cusp bevel at 45° to the occlusal plane
- 36. Dr. Paul A. Tipton cut a ½ mm shoulder 1mm apical to the opposing tooth contact using flat ended carbide bur in the speed increasing hand piece
- 37. Dr. Paul A. Tipton start the lingual preparation using a chamfer bur, placing a ½ mm margin supragingivally
- 38. Dr. Paul A. Tipton break through the contacts mesially and distally using a thin diamond bur
- 39. Dr. Paul A. Tipton introduce wider burs until the chamfer prep bur can place a ½ mm chamfer confluent with the lingual preparation
- 40. Dr. Paul A. Tipton prepare tapered grooves with supragingival margins mesio-buccally and disto-bucally using speed increasing handpiece and carbide bur
- 41. Dr. Paul A. Tipton place a flare between the groove and the cavo- surface margin with fine diamond or carbide bur using speed increasing handpiece . ensure you have a “line of draw” from the buccal.
- 42. Dr. Paul A. Tipton to finish the preparation place a bevel on the buccal shoulder margin with fine diamond or carbide bur using speed increasing handpiece
- 43. Dr. Paul A. Tipton st ann’s dental clinic
- 44. Dr. Paul A. Tipton
- 45. Dr. Paul A. Tipton cut 0.75mm depth cuts reduce occlusal surface by 1mm
- 46. Dr. Paul A. Tipton maintain cuspal shape during occlusal reduction
- 47. Dr. Paul A. Tipton cut 0.5mm gingival chamfer
- 48. Dr. Paul A. Tipton