SlideShare a Scribd company logo
1 of 33
1
Chapter 1: Introduction of CATIA
1.1 Introduction:
Initially CATIA name is an abbreviation forComputer Aided Three-dimensional
Interactive Application .The French Dassault Systems is the parent company and IBM
participates in the softwares and marketing, and catia is invades broad industrial sectors,
and has been explained in the previous post position of CATIA between 3d modeling
software programs. CATIA was started in 1977 by French Aircraft Manufacturer
Avions Marcel Dassault System.
Fig 1.1 Dasaault system
CATIA is classified under the following software packages:
CAD (Computer Aided Design)
CAM (Computer Aided Manufacturing)
CAE (Computer Aided Engineering)
Version that most of the people works on it now is CATIA V5 or fifth version, which
is a rewriting and revision the code of the fourth edition. For the fifth version, there are
versions from 1 to 20, for example, CATIA V5 R17, it Means CATIA fifth edition
version seventeenth, While years system was adoption in the sixth edition, for example,
CATIA V6 2011 means CATIA sixth edition version of Year 2011.
1.2 CATIA Modules
1.2.1 Sketcher:
This module is responsible for the implementation of two-dimensional shapes, in
preparation for make a three-dimensional commands on it.
1.2.2 Part Design:
This module is responsible for converting two-dimensional graphics to three
2
dimensional objects which is most famous in Catia and is closely linked with sketcher
module. The part design Module it is considered from most important modules, that
used by the designer to get the additional advantage from cad programs, which is
stereotaxic drawing or three-dimensional drawing.
1.2.3 WireFrame and Surface Design:
With this module surfaces can be drawing with zero size and weight and has its uses
in the aerospace, automotive, ships and Mold Design.
1.2.4 Generative Sheet Metal Design:
This module is responsible of converting two-dimensional graphics to thin sheets or
walls having a particular ratio between thickness and its radius.
1.2.5 Assembly:
This module is responsible for assembling the parts previously produced in Part
Design, and it is most important for those who work in the field of machinery design or
design in general, because it is the one who shows the inter-relationships between the
parts of the machine or any mechanical establishment.
1.2.6 Drafting:
This module is responsible, for converting what you see on the screen to standard
engineering drawings can be traded in the workshop for manufacturing or save them
for documentation.
3
Chapter 2: SKETCHER
2.1 INTRODUCTION:
This module is responsible for the implementation of two-dimensional shapes, in
preparation for make a three-dimensional commands on it.
2.2 Toolbars in sketcher:
2.2.1 Profile Toolbar:
The Profile toolbar contains 2D geometry commands. These geometries range from
the very simple (point, rectangle, etc...) to the very complex (splines, conics, etc...).
The Profile toolbar contains many sub-toolbars. Most of these sub-toolbars contain
different options for creating the same geometry. For example, you can create a
simple line, a line defined by two tangent points, or a line that is perpendicular to a
surface.
Profile toolbar Reading from left to right, the Profile toolbar contain the following
commands.
Fig 2.1 Profile toolbar
2.2.1.1 Profile:
This command allows you to create a continuous set of lines and arcs connected
together.
2.2.1.2 Rectangle / Predefined Profile toolbar:
The default top command is rectangle. Stacked underneath are several different
commands used to create predefined geometries.
2.2.1.3 Circle / Circle toolbar:
The default top command is circle. Stacked underneath are several different options
for creating circles and arcs.
2.2.1.4 Spline / Spline toolbar:
The default top command is spline which is a curved line created by connecting a series
of points.
4
2.2.1.5 Ellipse / Conic toolbar:
The default top command is ellipse. Stacked underneath are commands to create
different conic shapes such as a hyperbola.
2.2.1.6 Line / Line toolbar:
The default top command is line. Stacked underneath are several different options for
creating lines.
2.2.1.7 Axis:
An axis is used in conjunction with commands like mirror and shaft (revolve). It
defines symmetry. It is a construction element so it does not become a physical part of
your feature.
2.2.1.8 Point / Point toolbar:
The default top command is point. Stacked underneath are several different options
for creating points.
2.2.1.9 Rectangle:
The rectangle is defined by two corner points. The sides of the rectangle are always
horizontal and vertical.
2.2.1.10 Oriented Rectangle:
The oriented rectangle is defined by three corner points. This allows you to create a
rectangle whose sides are at an angle to the horizontal.
2.2.1.11 Parallelogram:
The parallelogram is defined by three corner points.
2.2.1.12 Elongated Hole:
The elongated hole or slot is defined by two points and a radius.
2.2.1.13 Cylindrical Elongated Hole:
The cylindrical elongated hole is defined by a cylindrical radius, two points and a
radius.
2.2.1.14 Keyhole Profile:
The keyhole profile is defined by two center points and two radii.
2.2.1.15 Hexagon:
The hexagon is defined by a center point and the radius of an inscribed circle.
2.2.1.16 Centered Rectangle:
The centered rectangle is defined by a center point and a corner point.
5
2.2.1.17 Centered Parallelogram:
The centered parallelogram is defined by a center point (defined by two intersecting
lines) and a corner point. Creates text that may be used to create a solid. .
2.2.1.19 Circle:
A circle is defined by a center point and a radius.
2.2.1.20 Three Point Circle:
The three point circle command allows you to create a circle using three
circumferential points.
2.2.1.21 Circle Using Coordinates:
The circle using coordinates command allows you to create a circle by entering the
coordinates for the center point and radius in a Circle Definition window.
2.2.1.22 Tri-Tangent Circle:
The tri-tangent circle command allows you to create a circle whose circumference is
tangent to three chosen lines.
2.2.1.23 Three Point Arc:
The three point arc command allows you to create an arc defined by three
circumferential points.
2.2.1.24 Three Point Arc Starting With Limits:
The three point arc starting with limits allows you to create an arc using a start, end,
and midpoint.
2.2.1.25 Arc:
The arc command allows you to create an arc defined by a center point, and a
circumferential start and end point.
2.2.1.26 Spline:
A spline is a curved profile defined by three or more points. The tangency and
curvature radius at each point may be specified.
2.2.1.27 Connect:
The connect command connects two points or profiles with a spline.
2.2.1.28 Conic toolbar:
Reading from left to right, the Conic toolbar contains the following command.
2.2.1.29 Ellipse:
The ellipse is defined by a center point and major and minor axis points.
2.2.1.30 Parabola by Focus:
The parabola is defined by a focus, apex and start and end points.
6
2.2.1.31 Hyperbola by Focus:
The hyperbola is defined by a focus, center point, apex and start and end points.
2.2.1.32 Conic:
There are several different methods that can be used to create conic curves. These
methods give you a lot of flexibility when creating the above three types of curves.
2.2.1.33 Line:
A line is defined by two points.
2.2.1.34 Infinite Line:
Creates infinite lines that are horizontal, vertical or defined by two points.
2.2.1.35 Bisecting Line:
Creates an infinite line that bisects the angle created by two other lines.
2.2.1.36 Line Normal to Curve:
This command allows you to create a line that starts anywhere and ends normal or
perpendicular to another element.
2.2.1.37 Point by Clicking:
Creates a point by clicking the left mouse button.
2.2.1.38 Point by using coordinates:
Creates a point at a specified coordinate point.
2.2.1.39 Equidistant Points:
Creates equidistant points along a predefined path curve.
2.2.1.40 Intersection Point:
Creates a point at the intersection of two differe
Projects a point of one element onto another.
2.2.2 Constraint toolbar:
Constraints can either be dimensional or geometrical. Dimensional constraints are used
to constrain the length of an element, the radius or diameter of an arc or circle, and the
distance or angle between elements. Geometrical constraints are used to constrain the
orientation of one element relative to another. For example, two elements may be
constrained to be perpendicular to each other. Other common geometrical constraints
include parallel, tangent, coincident, concentric, etc... Reading from left to right:
7
Fig 2.2 Constraint toolbar
2.2.2.1 Constraints Defined in Dialoged Box:
Creates geometrical and dimensional constraints between two elements.
2.2.2.2 Constraint:
Creates dimensional constraints. o Contact Constraint: Creates a contact constraint
between two elements.
2.2.2.3 Fix Together:
The fix together command groups individual entities together. o Auto Constraint:
Automatically creates dimensional constraints.
2.2.2.4 Animate Constraint:
Animates a dimensional constraint between to limits.
2.2.2.5 Edit Multi-Constraint:
This command allows you to edit all your sketch constraints in a single window.
8
Chapter 3: PART DESIGN
3.1 INTRODUCTION:
This module is responsible for converting two-dimensional graphics to three-
dimensional objects which is most famous in Catia and is closely linked with sketcher
module. The part design Module it is considered from most important modules, that
used by the designer to get the additional advantage from cad programs, which is
stereotaxic drawing or three-dimensional drawing.
3.2 Toolbars in Part Design
3.2.1 Sketch-Based Features:
This toolbar is mainly used to create a solid feature from a 2D sketch/profile
Fig3.1 Sketch based features toolbar
3.2.1.1 Pad:
This command is used to add material by extruding a sketch.
3.2.1.2 Pocket:
This command is used to remove material by extruding a sketch.
Fig3.2 Pocket command
9
3.2.1.3 Shaft:
This command is used to add material by rotating a sketch.
3.2.1.4 Groove:
This command is used to remove material by rotating a sketch.
3.2.1.5 Rib:
This command is used to add material by sweeping a profile along a center curve.
3.2.1.6 Slot:
This command is used to remove material by sweeping profile along a center curve.
3.1.1.7 Multi-sections Solid:
This command is used to add material by sweeping one or more planar section curves
along one or more guide curves.
3.1.1.8 Removed Multi-sections Solid:
This command is used to remove material by sweeping one or more planar section
curves along one or more guide curves.
3.1.1.9 Hole:
This command is used for the circular material removal from the existing solid. Several
types of holes are available. Such as:
Simple,
Tapered,
Counter bored,
Countersunk,
Counter drilled
Fig3.3 Hole command
10
3.2.2 Dress-Up Features:
This toolbar is used to add fillets/chamfers on the solid edge, add a draft onto the solid
faces. Hollow the solid, offset faces and many more.
Fig3.4 Dress-up feature toolbar
3.2.2.1 Fillet:
This command is used for creating a curved face of a constant or variable radius that is
tangent to, and that joins, two surfaces.
3.2.2.2 Chamfer:
This command is used for removing & adding a flat section from a selected edge to
create a bevelled surface between the two original faces common to that edge.
Fig 3.5 Chamfer command
3.1.2.3 Draft:
This command is used for adding or removing material depending on the draft angle
.and the pulling direction.
3.1.2.4 Shell:
This command is used to empty a solid while keeping a given thickness on its sides.
11
Fig 3.6 Shell command
3.2.3 Transformation Features:
Fig 3.7 Transformation features toolbar
3.2.3.1 Translation:
This command is used for translating a solid entity along a direction.
3.2.3.2 Rotation:
This command is used for rotating a solid entity about an axis by a certain angle.
3.2.3.3 Symmetry:
This command is used for translating a solid entity to the other side of the mirror plane.
3.2.3.4 Mirror:
This command is used for duplicating a solid entity on the other side of the mirror plane.
3.2.3.5 Patterns:
Generally there are 3 types of patterns, which are:
A. Rectangular Pattern
B. Circular Pattern
C. User defined Pattern
12
Chapter 4: WIREFRAME AND SURFACE DESIGN
4.1 Design:
With this module surfaces can be drawing with zero size and weight and has its uses in
the aerospace, automotive, ships and Mold Design.
Toolbars in Wire-Frame and Surface Design
 Surface Toolbar
 Operation Toolbar
 Wire-Frame Toolbar
4.2 Wireframe and Design Surface Workbench:
The Wireframe and Surface Design workbench provides the tools to create wireframe
construction elements during preliminary design and enrich existing 3D mechanical
part design with wireframe and basic surface features.
Starting Wireframe and Surface Design Workbench Start a new session of CATIA and
close the new product file, which is opened by default. Next, choose Start > Mechanical
Design > Wireframe and Surface Design from the menu bar to start a new file in the
Wireframe and Surface Design Workbench.
4.3 Creating Wireframe Elements:
The wireframe construction elements aid in creating surfaces. The sketches drawn in
sketcher workbench can also be used to create surfaces. The tools available for
constructing the wireframe geometries are discussed in the following section.
4.3.1 Creating Circles:
The Circle tool is used to create circular arcs and circles. Choose the Circle button from
the Wireframe toolbar; the Circle Definition dialog box is displayed. The Center and
radius option is selected by default in the Circle type drop-down list; you are prompted
to select the center point. You can select a predefined point or create a point by choosing
any one of the options from the contextual menu, which is available when you right
click on the Center selection area of the Circle Definition dialog box. Next, you are
prompted to select the support surface. Select a plane as the support surface. Specify
the required radius value in the Radius spinner. You can set the angular limits of the
arc from the Circle Limitation area and finally choose the OK button to complete the
arc.
4.3.2 Creating Splines:
The Spline tool is use to draw a spline in three dimensional space by selecting the
13
connecting points. Choose the down arrow on the right of the Spline button to invoke
the Curves toolbar, and then choose the spline button.
Menu: Insert > Wireframe > Spline Toolbar: Curve > Spline
4.3.3 Creating Helix:
The Helix tool is used to create a helical curve. When you invoke this tool, the Helix
Curve Definition dialog box will be displayed and you are prompted to select the helix
starting point. Select a predefined point, or create a point using the options from the
contextual menu, which will be displayed when you right click on the Starting point
selection area of the Helix Curve Definition dialog box. Next, you are prompted to
select a line as the helix axis. Select a predefined line or draw a line using the options
from the contextual menu, which will be displayed when you right-click in the Axis
selection area. You can set the pitch, height, orientation, and start angle values in the
respective spinners. You can also add a taper angle to the helix by specifying a value in
the Taper Angle spinner available in the Radius variation area of the dialog box.
4.4 Creating Surfaces:
The tools provided in Wireframe and Surface Design workbench to create simple and
complex surfaces are discussed in the following section
Fig 4.1 Surface toolbar
4.4.1 Creating Extruded Surfaces:
The extruded surfaces are created by extruding a profile and specifying the extrusion
depth and direction vector. The basic parameters that are required to
Menu: Insert > Wireframe > Helix Toolbar: Curve > Helix
Menu: Insert > Surfaces > Extrude Toolbar: Surfaces > Extrude
Create an extruded surface are profile, direction for extrusion, and extrusion limits. To
create an extruded surface, you first need to draw the profile to be extruded using the
Sketcher workbench or by using the tools available in the Wireframe toolbar. Once you
have drawn the profile, choose the Extrude button from the Surfaces toolbar.
14
4.4.2 Creating Revolved Surfaces:
Revolved surfaces are created by revolving a profile about a revolution axis. To create
a revolved surface, first profile is to be revolved. Choose the Revolve button from the
Surfaces toolbar; the Revolution Surface Definition dialog box is displayed.
The resulting extruded surface Tip. You can also select an edge of an existing surface
or a solid body as the profile to create an extruded surface.
Menu: Insert > Surface > Revolve Toolbar: Surface > Revolve
Select the profile to be revolved. By default, the axis you sketched, with the profile in
the sketcher workbench, is selected as the axis of revolution. You can also select some
other axis of revolution. Now, set the required angular limits in the Angle.
4.4.3 Creating Spherical Surfaces:
This tool is used to create the spherical surfaces. When you invoke this tool, the Sphere
Surface Definition dialog box is displayed. You need to select the center point and an
axis system as the sphere axis. You can select an existing point as the center point or
create a point by using the options from the contextual menu, which will be displayed
on right-clicking in the Center selection area. The Default (xyz) axis system is
automatically selected. You can also select any previously created axis system. The
preview of the spherical surface is displayed in the geometry area.
Menu: Insert > Surfaces > Sphere Toolbar: Surfaces > Sphere
The angle values using the options available in the Sphere Limitations area or by
directly dragging the limiting arrows in the geometry area the spherical surface created
by defining the origin as the center. Also, this surface has the default axis system and
sphere limitation values.
You can create complete sphere using the Sphere button available in the Sphere
Limitations area of the Sphere Surface Definition dialog box.
4.4.4 Creating Cylindrical Surfaces:
This tool is used to create cylindrical surfaces. Choose the Cylinder button from the
Surfaces toolbar; the Cylinder Surface Definition dialog box is displayed and you are
prompted to select the center of the cylinder. You can select an existing point as the
center point or create a point by using the options from the contextual menu, which
will be displayed on right-clicking in the Center selection area. Next, you are
prompted to specify the direction for the cylinder. Select a plane, normal to which the
cylinder will be extruded. You can also select a direction vector from the contextual
menu, which can be invoked by right-clicking in the direction selection area. Set the
15
parameters using the spinners in the parameters area in the Surface Definition dialog
box. Choose OK to create the cylindrical surface.
4.4.5 Creating Offset Surfaces:
The Offset tool is used to create a surface that is at an offset distance from a reference
surface. To do so, choose the Offset tool from the Surfaces toolbar. The Offset Surface
Definition dialog box is displayed, and you are prompted to select a reference surface.
Select the reference surface from the geometry area and specify the offset value in the
Offset spinner. Choose the Reverse Direction button available in the dialog box to
reverse the offset direction. The Both sides check box is selected to create the offset
surface on both sides of the reference surface. The Repeat object after OK check box is
used to create multiple offset surfaces. Select the Repeat object after OK check box and
exit the Offset Surface Definition dialog box. The Object Repetition dialog box is
displayed.
Menu: Insert > Surfaces > Cylinder Toolbar: Surfaces > Cylinder
Menu: Insert > Surfaces > Offset Toolbar: Surfaces > Offset
In this dialog box specify the required number of instance(s). Choose the OK button to
create the offset surfaces. A reference surface and an offset surface.
Note sometime for complex reference surfaces, the offset surface may not be created.
In such cases, you need to reduce the offset value or modify the initial geometry.
4.4.6 Creating Swept surfaces:
The swap tool is provided to create surfaces by sweeping a profile along a guide curve
in the Wireframe and Surfaces Design workbench of CATIA V5. To create a swept
surface, you first need to draw a profile and a guide curve as two separate sketches.
Next, choose the Sweep button from the Surfaces toolbar. The Swept Surface Definition
dialog box is displayed, and you are prompted to select a profile. Select the profile from
the geometry area; you are prompted to select a guide curve. Select the guide curve
from the geometry area. Now, choose the OK button from the Swept Surface Definition
dialog box. Profile and a guide curve and the resulting swept surface.
Menu: Insert > Surface > Sweep Toolbar: Surface > Sweep
Swept Surface with two Guide Curves You can also create a swept surface using more
than one various other tools to create swept surface are discussed following section.
Guide curve. First draw a profile and two guide curves as separate sketches.
16
Now, select the Sweep button from the Surfaces toolbar, the Swept Surface Definition
dialog box is displayed. Select With two guide curve option from the Subtypes drop-
down list; you are prompted to select a profile. After you select the profile, you are
prompted to select a guide curve. Select the first and second guide curves. Now, select
the anchor point for the respective guide curves. Choose the Preview button from the
Swept Surface Definition dialog box to preview the surface created. Choose the OK
button from the Swept Surface Definition dialog box. Profile and guide curves. The
swept surface created using the two guide curve.
Swept Surface with Two Limits In CATIA V5, you can create a swept surface by
defining the two limit curves. The limit curves can be in the same or different planes.
To create swept surface with two limits, you need to draw two limit curves. Once you
have drawn the curves, choose the Sweep button from the Surfaces toolbar; the Swept
Surface Definition dialog box will be displayed. Select the Line button from the Profile
Type area in the dialog box.
Swept Surface with Three Curve You can also create a circular swept surface using
three guide curves. To create a surface using this tool, you first need to draw three guide
curves, which should lie in different planes. After drawing the curves, invoke the Swept
surface Definition dialog box. Choose the Circle button from the Profile type area in
the dialog box. The parameters in the Swept surface
Definition dialog box will change. You are prompted to select a first guide curve that
define the first extremity of the circular arc. Select the first guide curve. Next you are
prompted to select the second guide curve. After selecting the second guide curve, you
are prompted to select a guide curve that defines the second extremity of the circular
arc. Select the guide curve and choose the OK button from the dialog box to complete
the swept surface.
4.4.7 Creating Fill Surfaces:
The Fill tool allows you to create fill surfaces between a numbers of boundary
segments. These may be planar or non-planar, but there should not be a large gap
between the consecutive boundary segments. Before creating a fill surface, draw the
boundary curves. Next, choose Fill button from the Surface toolbar.
Next, you are required to select the boundary segments. You need to make sure that
while selecting the boundary segments, the sequence of selection should be such that a
17
closed loop is formed. Once you have selected the boundary curves, choose the OK
button. The curves drawn to create the fill surface and the resulting fill surface.
Support surfaces may be selected with the respective curve to ensure the continuity
between the fill surface and the support surface. Similarly, if you select a passing point,
the fill surface will be created, such that it passes through the selected point.
4.4.8 Creating Lofted Multisection Surfaces:
This tool allows you to create lofted multisection surfaces. The surface is created
between the sections along the computed or user-defined spine. To create a multisection
surface, you first need to create sections and guide curves. Next, choose the
Multisections surface button from the Surface toolbar; the Multi-sections Surface
Definition dialog box is displayed.
You are prompted to select a curve. Select the first section curve; you are prompted to
select new curve or select a tangent surface. Select the second section curve from the
geometry area and click on the Guide selection area to activate it. You are prompted to
select a curve. One by one, select the guide curves that were drawn earlier. Choose the
OK button to exit the Multi-sections Surface Definition dialog, box and complete the
multi section surface. Sections and guide curves to create the multisection surface.
Note while selecting the section curve, make sure the arrow associated with each
section curve is pointing in the same direction. Else, the surface will result in a cusp
and will not be created. In some cases, with arrows pointing in opposite direction, a
twisted surface may be formed.
Menu: Insert > Surface > Multisections surface Toolbar: Surface > Multisections
surface
4.4.8 Creating Blended Surfaces:
This tool allows you to create a surface by blending two curves. These curves can be
sketched curves, wireframe geometries, or edge of existing surfaces. If you select
support surfaces with curves, the resulting blend surface will be tangent to the support
surfaces. To create a blend surface, draw some curves and create support surfaces.
Choose the Blend button from the Surfaces toolbar.
You are now prompted to select the first curve and first support. Select the curve and
support. Next, you are prompted to select the second curve and second support. Select
them choose the OK button from the Blend Definition dialog box. The curves and
support surfaces to create the blend surface.
18
4.5 Operation on Shape Geometry:
Generally, the surface models are a combination of various surfaces. You need to join,
trim, split, or translate the surfaces to manage multiple surfaces. CATIA provides a
number of such operation tools that can be used on the surfaces created using the tools
discussed earlier in this chapter. Some of these operations are discussed in the following
section.
Fig 4.2 Operation toolbar
4.5.1 Joining Surfaces:
The Join tool is used to join two adjacent surfaces or two adjacent curves. Choose Join
button from the Operation toolbar; the Join Definition dialog box is displayed. You are
prompted to select the elements (curves or surfaces) to be joined. Select the elements
that you need to join. Remember that there should not be a large gap between the entities
to be joined. Choose the OK button from the Join Definition dialog box to complete the
join operation. The surfaces or curves that are joined together will behave as a single
entity.
4.5.2 Splitting Surfaces:
The Split tool is used to split a surface or a wireframe element using a cutting element.
A wireframe element can be split using a point, another wireframe element, or a surface.
A surface can be split using another surface or a wireframe element. Consider a case in
which two intersecting surfaces are created. Choose the Split button from the
Operations toolbar to invoke the Split Definition dialog box; you are prompted to select
the curve or surface to split. Select the cylindrical surface and then select the other
surface, as the cutting element. The side of the cylindrical surface that is to be removed
will be displayed as transparent. You can choose the other side buttons from the Split
Definition dialog box to reverse the side of the surface to be removed. You can also
retain both sides of the split surface by selecting the Keep both
Sides check box from the split definition dialog box. Choose the OK button to split
19
the cylindrical surface. The transparent side will be removed.
4.5.3 Trimming Surfaces:
The trim tool allows you to trim two intersecting surfaces or curves with respect to
each other. When you invoke this tool, the trim definition dialog box will be displayed,
Choose a surface as the first element and the other surface as the second element. One
side of each surface will be displayed as transparent.You can choose the other side
button to reverse the sides of surfaces to be trimmed.
4.5.4 Extrapolate:
This command is used to increase the surface length in any direction.
20
Chapter 5 : GENERATIVE SHEET-METAL DESIGN
5.1 INTRODUCTION:
This module is responsible of converting two-dimensional graphics to thin sheets or
walls having a particular ratio between thickness and its radius.
There are basic toolbars in this module namely:
 Wall
 Bending
 Rolled
 Transformation
 Stamping
 View
5.2 Accessing the Sheet metal Workbench:
The Sheet Metal Design functions are available when you are in the Part environment.
Several functions are integrated from Part Design workbench.
This task shows how to enter the workbench.
Choose the Sheet Metal Design item from the Start menu.
The Sheet Metal toolbar is displayed and ready to use.
5.3 Defining the Sheet Metal Parameters:
This task shows you how to configure the sheet metal parameters.
1. Click the Parameters icon.
The Sheet Metal Parameters dialog box is displayed.
2. Enter 1mm in the Thickness field.
3. Enter 5mm in the Bend Radius field.
5.4 Wall:
This module responsible to create the wall of sheet metal part. Which have a particular
ratio between thickness and its radius.
With help of this module different type of wall will be created.
Fig 5.1 Wall toolbar
21
5.4.1 Creating the First Wall:
This task shows how to create the first wall of the Sheet Metal Part.
1. Click the Sketcher icon then select the xy plane.
2. Select the Profile icon.
3. Sketch the contour.
4. Click the Exit Sketcher icon to return to the 3D world.
5. Click the Wall icon.
The Wall Definition dialog box open
Fig 5.2
Creating the first wall
5.4.2 Creating the Side Walls:
This task shows you how to add other walls to the Sheet Metal part.
1. Select the Wall on Edge icon.
2. Select the left edge. The Wall Definition dialog box opens.
3. Enter 50mm in the Length field.The application previews the wall.
5.4.3 Creating a Cutout:
In this task, you will learn how to open a sketch on an existing face
Define a contour in order to create a cutout.
1. Select the wall on the right to define the working plane.
2. Click the Sketcher icon
3. Click the Profile icon to create the contour.
22
5.4.4 Unfolding the Sheet Metal Part:
This task shows how to unfold the part.
1. Click the Unfold icon .The part is unfolded according to the reference wall plane, as
shown below.
2. Click this icon again to refold the part for the next task.
3. So in this way, we can easily fold or unfold any entity.
5.4.5 Creating a Flange:
This task explains how to generate a flange from a spine and a profile.
1. Select the Flange icon .The Flange Definition dialog box opens.
2. Select the edge as shown in red.
3. Enter 2 mm in the Radius field, 10 mm in the Length field and 120° for the Angle.
4. Click OK to create the flange.
5.4.6 Patterning:
In this task, you are going to create cutouts according to a pattern. CATIA allows you
to define two types of patterns: rectangular and circular patterns.
5.4.7 Bridge:
This task shows you how to create a bridge by specifying the punch geometrical
parameters. The Stamping.CATPart document is still open from the previous task. If
not, open the Stamping5.CATPart document from the onlinesamplessheet metal
directory.
1. Click the Bridge icon .The Bridge Definition dialog box opens, providing default
values.
2. Change the value in the different fields.
5.4.8 Creating a Hem:
This task explains how to generate a hem from a spine and a profile.
The SweptWall01.CATPart document is still open from the previous task. If not, open
the SweptWall02.CATPart document from the onlinesamplessheet metal directory.
1. Select the Hem icon.
The Hem Definition dialog box opens.
2. Select the edges as shown in red.
3. Enter 2 mm in the Radius field, and 3 mm in the Length field.
4. Click OK to create the hem.
23
5.4.9 Creating a Tear Drop:
This task explains how to generate a tear drop from a spine and a profile.
The SweptWall01.CATPart document is still open from the previous task. If not, open
the SweptWall03.CATPart document from the onlinesamplessheet metal directory.
1. Select the Tear Drop icon.
The Tear Drop Definition dialog box opens.
2. Select the edge as shown in red.
3. Enter 3 mm in the Radius field, and 8 mm in the Length field.
4. Click OK to create the tear drop.
5.4.10 Creating a Swept Flange:
This task explains how to generate a swept from a spine and a user-defined profile.
The SweptWall01.CATPart document is still open from the previous task. If not, open
the SweptWall04.CATPart document from the onlinesamplessheet metal directory.
1. using the Sketcher, define a profile as shown below:
Then quit the Sketcher, using the Exit icon 2. Select the Swept Flange icon.
The User Defined Flange Definition dialog box opens.
3. Select the edge and the profile, as shown in red.
The dialog box looks like this:
4. Click OK to create the swept flange.
5.5 Stamping:
This section explains and illustrates how to create and use various kinds of stamps.
5.5.1 Creating a Point Stamp:
This task shows you how to create a point stamp by specifying the punch geometrical
parameters.
Open the Stamping.CATPart document from the onlinesamplessheetmetal directory.
1. Click the Point Stamp icon. 2. Select a point on the top face. The Point Stamp
Definition dialog box opens, providing default values. 3. Change the value in the
different fields, if need be: Height H, Radius R1, Radius R2, Angle A, Diameter D.
4. Click OK to validate.
5.5.2 Extruded Hole:
This task shows you how to create an extruded hole by specifying the punch
geometrical parameters.
24
The Stamping.CATPart document is still open from the previous task. If not, open the
Stamping2.CATPart document from the onlinesamplessheetmetal directory.
1. Click the Extruded Hole icon . 2. Select a point on the top face where you want to
place the hole. The Extruded Hole Definition dialog box opens, providing default
values. 3. Change the value in the different fields, if need be: Height H, Radius R, Angle
A, Diameter D.
4. Click OK to validate.
5.5.3 Curve Stamp:
This task shows you how to create a curve stamp by specifying the punch geometrical
parameters. The Stamping.CATPart document is still open from the previous task. If
not, open the Stamping3.CATPart document from the onlinesamplessheetmetal
directory. 1. Click the Curve Stamp icon . 2. Select Sketch.4, the curve previously
defined. The Curve Stamp Definition dialog box opens, providing default values.
3. Change the value in the different fields, if need be: Height H, Radius R1, Radius R2,
Angle A, Length L.
4. Click OK to validate.
5.5.4 Surface Stamp:
This task shows you how to create a surface stamp by specifying the punch geometrical
parameters. The Stamping.CATPart document is still open from the previous task. If
not, open the Stamping4.CATPart document from the onlinesamplessheetmetal
directory.
1. Click the Surface Stamp icon. 2. Select Sketch.5, the profile previously defined. The
Surface Stamp Definition dialog box opens, providing default values.
3. Change the value in the different fields, if need be: Height H, Radius R1, Radius R2,
Angle A.
4. Click OK to validate.
5.5.5 Stiffening:
This task shows you how to create a stiffness rib by specifying the punch geometrical
parameters. The Stamping.CATPart document is still open from the previous task. If
not, open the Stamping7.CATPart document from the onlinesamplessheetmetal
directory.
1. Click the Stiffness Rib icon. 2. Select Bend.1, where you want to place a stiffener.
Note that the stiffener will always be centered on the bend radius, wherever the point
may be along the curve. The Stiffening Rib Definition dialog box opens, providing
25
default values. 3. Change the value in the different fields, if need be: Radius R1, Radius
R2, Angle A, Length L.
4. Click OK to validate.
The specification tree indicates the stiffness rib has been created.
26
Chapter 6: ASSEMBLYDESIGN.
6.1 INTRODUCTION:
This module is responsible for assembling the parts previously produced in Part Design,
and it is most important for those who work in the field of machinery design or design
in general, because it is the one who shows the inter-relationships between the parts of
the machine or any mechanical establishment. Assembly modelling is the process of
creating designs that consist of two or more components assembled together at their
respective work positions. The components are brought together and assembled in
Assembly Design workbench by applying suitable parametric assembly
Constraints to them.
6.2 Types of Assembly Design Approach:
In CATIA you can create assembly models by adopting two types of approaches. The
first design approach is the bottom-up approach, and the second one is the top-down
approach. Both these design approaches are discussed below.
6.2.1 Bottom-up Assembly:
The bottom-up assembly is the most preferred approach for creating assembly models.
In this of approach, the components are created in the Part Design workbench file. Then
the product file is started and all the previously created components are inserted and
placed in it using the tools provided in the Assembly Design workbench. After inserting
each component, constraints are applied to position them properly in the 3D space with
respect to other components.
6.2.2 Top-down Assembly:
In the top-down assembly design approach, components are created inside the
Assembly Design workbench. Therefore, there is no need to create separate part files
of the components. This design approach is completely different from the bottom-up
design approach. Here you have to start the product file first and then, one by one, create
all components. Note that even though the components are created inside the product
file, they are saved as individual part files and can be opened separately later.
6.3 Product Structure Tools Toolbar:
This first task shows how to insert new component, new part and existing component.
Fig 6.1 product structure tools toolbar
27
6.3.1 Inserting a New Component:
This task will show you how to insert a component into an existing assembly. This
command lets you: create an instance from the reference chosen component use a
context-specific representation inside it.
6.3.2 Inserting a New Part:
This task will show you how to insert a part in an existing assembly.
1. In the specification tree, select ManagingComponents01 and click the New Part
icon. If geometry exists in the assembly, the New Part: Origin Point dialog box is
displayed, proposing two options to locate the part:
 Click Yes to locate the part origin point on a selected point, on another
component for example.
 Click No to define the origin point of a component according to the origin
point of the parent component
2. For the purposes of this task, click No to locate the part origin according to the
Product1 origin point.
6.3.3 Inserting Existing Components:
This task will show you how to import one or more components into an existing
assembly.You can specify the order in which the files will be imported when you
select the files in the Insert an Existing Component dialog box.
6.3.4 Replacing a Component:
This task consists in replacing a component.
Using the Replacement Component command means replacing one component with
another.
6.4 Constraint toolbar:
Constraints can either be dimensional or geometrical. Dimensional constraints are used
to constrain the length of an element, the radius or diameter of an arc or circle, and the
distance or angle between elements. Geometrical constraints are used to constrain the
orientation of one element relative to another. Other common geometrical constraints
include parallel, tangent, coincident, concentric, etc... Reading from left to right:
Fig 6.2 Constraint toolbar
28
6.4.1 Creating a Coincidence Constraint:
Coincidence type constraints are used to align elements. Depending on the selected
elements, you may obtain concentricity, coaxiality or coplanarity. This task consists in
applying a constraint between two faces.
6.4.2 Creating a Contact Constraint:
Contact type constraints can be created between two planes or faces. The common area
between the two planes can be a plane (plane contact), a line (line contact) or a point
(point contact).
6.4.3 Creating an Angle Constraint:
Angle type constraints fall into three categories:
1. Angle, 2.Parallelism (angle value equals zero),
3. Perpendicularity (angle value equals 90º)
When setting an angle constraint, you will have to define an angle value. Note that this
angle value must not exceed 90o.The tolerance i.e. the smallest angle that can be used
to differentiate two elements is set at 10 -6 radians.
6.4.4 Fixing a Component:
Fixing a component means preventing this component from moving from its parent
component during the update operation. Note that it does not mean fixing its position
according to the geometrical origin of the assembly. To fix the component location
according to the geometrical origin of the assembly, check Fix in space in the constraint
Properties dialog box.
6.4.5 Fixing Components Together:
The Fix Together command attaches selected elements together. You can select as
many components as you wish, but they must belong to the active component. This task
consists in fixing two components together.
Using the Auto constraint Command
The Auto constraint mode allows you to create the first possible constraint as specified
in the priority list. This task consists in using the Auto constraint command to create
two constraints.
29
6.5 Plummer block assembly:
Fig 6.3 Plummer block
Fig 6.4 Body of Plummer block
30
Fig 6.5 Cap of Plummer block
Fig 6.6 Brasses
31
Fig 6.7 Bolt
Fig 6.8 Nut
32
Fig 6.9 lock nut
33
Reference
www.wikipedia.com
www.google.com
Cad/camBook
www.slideshare.com

More Related Content

What's hot

Study project on knuckle joint
Study project on knuckle jointStudy project on knuckle joint
Study project on knuckle jointSRI HARSHA VARDHAN
 
CNC part programming
CNC part programmingCNC part programming
CNC part programmingjntuhcej
 
cad design process VS conventional design process
cad design process VS conventional design processcad design process VS conventional design process
cad design process VS conventional design processJagilam Kumar
 
Design & Analysis of Spur Gears
Design & Analysis of Spur GearsDesign & Analysis of Spur Gears
Design & Analysis of Spur GearsMOHAMMED SHAROOQ
 
COMPUTER AIDED MACHINE DRAWING LAB MANUAL
COMPUTER AIDED MACHINE DRAWING LAB MANUALCOMPUTER AIDED MACHINE DRAWING LAB MANUAL
COMPUTER AIDED MACHINE DRAWING LAB MANUALASHOK KUMAR RAJENDRAN
 
ME6503 - DESIGN OF MACHINE ELEMENTS UNIT - V NOTES
ME6503 - DESIGN OF MACHINE ELEMENTS UNIT - V NOTESME6503 - DESIGN OF MACHINE ELEMENTS UNIT - V NOTES
ME6503 - DESIGN OF MACHINE ELEMENTS UNIT - V NOTESASHOK KUMAR RAJENDRAN
 
Manual part programming
Manual part programmingManual part programming
Manual part programmingjntuhcej
 
SURFACE MODELLING .pptx
SURFACE MODELLING .pptxSURFACE MODELLING .pptx
SURFACE MODELLING .pptxjntuhcej
 
Computer Aided Process Planning (CAPP)
Computer Aided Process Planning (CAPP)Computer Aided Process Planning (CAPP)
Computer Aided Process Planning (CAPP)Pratik Gandhi
 
Design and fabrication of geneva mechanism based punching machine
Design and fabrication of geneva mechanism based punching machineDesign and fabrication of geneva mechanism based punching machine
Design and fabrication of geneva mechanism based punching machinechockalingam athilingam
 

What's hot (20)

Study project on knuckle joint
Study project on knuckle jointStudy project on knuckle joint
Study project on knuckle joint
 
Catia v5 lecture notes
Catia v5 lecture notesCatia v5 lecture notes
Catia v5 lecture notes
 
03 universal coupling
03 universal coupling03 universal coupling
03 universal coupling
 
CNC part programming
CNC part programmingCNC part programming
CNC part programming
 
Solid works ppt
Solid works pptSolid works ppt
Solid works ppt
 
Catia v5 NOTES
Catia v5  NOTESCatia v5  NOTES
Catia v5 NOTES
 
cad design process VS conventional design process
cad design process VS conventional design processcad design process VS conventional design process
cad design process VS conventional design process
 
Design & Analysis of Spur Gears
Design & Analysis of Spur GearsDesign & Analysis of Spur Gears
Design & Analysis of Spur Gears
 
COMPUTER AIDED MACHINE DRAWING LAB MANUAL
COMPUTER AIDED MACHINE DRAWING LAB MANUALCOMPUTER AIDED MACHINE DRAWING LAB MANUAL
COMPUTER AIDED MACHINE DRAWING LAB MANUAL
 
Catia File
Catia FileCatia File
Catia File
 
Catia
Catia Catia
Catia
 
ME6503 - DESIGN OF MACHINE ELEMENTS UNIT - V NOTES
ME6503 - DESIGN OF MACHINE ELEMENTS UNIT - V NOTESME6503 - DESIGN OF MACHINE ELEMENTS UNIT - V NOTES
ME6503 - DESIGN OF MACHINE ELEMENTS UNIT - V NOTES
 
Manual part programming
Manual part programmingManual part programming
Manual part programming
 
Aerodynamics in cars
Aerodynamics in carsAerodynamics in cars
Aerodynamics in cars
 
SURFACE MODELLING .pptx
SURFACE MODELLING .pptxSURFACE MODELLING .pptx
SURFACE MODELLING .pptx
 
Computer Aided Process Planning (CAPP)
Computer Aided Process Planning (CAPP)Computer Aided Process Planning (CAPP)
Computer Aided Process Planning (CAPP)
 
Solidworks ppt
Solidworks pptSolidworks ppt
Solidworks ppt
 
rapid prototyping
rapid prototypingrapid prototyping
rapid prototyping
 
Design and fabrication of geneva mechanism based punching machine
Design and fabrication of geneva mechanism based punching machineDesign and fabrication of geneva mechanism based punching machine
Design and fabrication of geneva mechanism based punching machine
 
Nc part programming
Nc part programmingNc part programming
Nc part programming
 

Viewers also liked

Project 00 Report
Project 00 ReportProject 00 Report
Project 00 Reportspiffyjj115
 
CATIA V5 Interview Questions & Answers
CATIA V5 Interview Questions & AnswersCATIA V5 Interview Questions & Answers
CATIA V5 Interview Questions & AnswersCMS Computer
 
(2) catia v5 assembly design
(2) catia v5 assembly design(2) catia v5 assembly design
(2) catia v5 assembly designmasta2masta
 
Autocad Training Noida
Autocad Training NoidaAutocad Training Noida
Autocad Training NoidaNca Noida
 
Cad cam ii nd mid descriptive & objective [pls visit our blog sres11meches.bl...
Cad cam ii nd mid descriptive & objective [pls visit our blog sres11meches.bl...Cad cam ii nd mid descriptive & objective [pls visit our blog sres11meches.bl...
Cad cam ii nd mid descriptive & objective [pls visit our blog sres11meches.bl...Sres IImeches
 
Circular duct analysis in ansys workbench
Circular duct analysis in ansys workbenchCircular duct analysis in ansys workbench
Circular duct analysis in ansys workbenchSanjeet Kumar Singh
 
Radioss version 11.0
Radioss version 11.0Radioss version 11.0
Radioss version 11.0AltairKorea
 
PPT-1 Starting with Hypermesh
PPT-1 Starting with HypermeshPPT-1 Starting with Hypermesh
PPT-1 Starting with HypermeshAkshay Mistri
 
PPT-2 Starting with hypermesh - Meshing
PPT-2 Starting with hypermesh - MeshingPPT-2 Starting with hypermesh - Meshing
PPT-2 Starting with hypermesh - MeshingAkshay Mistri
 
Catia v5 CAM enhancement
Catia v5 CAM enhancementCatia v5 CAM enhancement
Catia v5 CAM enhancementJimmy Chang
 
Catia V5 Prismatic
Catia V5 PrismaticCatia V5 Prismatic
Catia V5 PrismaticJimmy Chang
 
Cad cam report-final (mechanical workshop)
Cad cam report-final (mechanical workshop)Cad cam report-final (mechanical workshop)
Cad cam report-final (mechanical workshop)Parthibanraj Selvaraj
 
Ds catia v6 r2012x 32 64bit full multilanguage setup & crack (by ssq) cg-pe...
Ds catia v6 r2012x 32 64bit full multilanguage setup & crack (by ssq)   cg-pe...Ds catia v6 r2012x 32 64bit full multilanguage setup & crack (by ssq)   cg-pe...
Ds catia v6 r2012x 32 64bit full multilanguage setup & crack (by ssq) cg-pe...ellongt
 
A seminar report on mechanical designing software/tools
A seminar report on    mechanical designing software/toolsA seminar report on    mechanical designing software/tools
A seminar report on mechanical designing software/toolsmdnawab1995
 

Viewers also liked (20)

Z:\catia v5
Z:\catia v5Z:\catia v5
Z:\catia v5
 
Report hyper mesh
Report hyper meshReport hyper mesh
Report hyper mesh
 
Project 00 Report
Project 00 ReportProject 00 Report
Project 00 Report
 
CATIA V5 Interview Questions & Answers
CATIA V5 Interview Questions & AnswersCATIA V5 Interview Questions & Answers
CATIA V5 Interview Questions & Answers
 
(2) catia v5 assembly design
(2) catia v5 assembly design(2) catia v5 assembly design
(2) catia v5 assembly design
 
Autocad Training Noida
Autocad Training NoidaAutocad Training Noida
Autocad Training Noida
 
Cad cam ii nd mid descriptive & objective [pls visit our blog sres11meches.bl...
Cad cam ii nd mid descriptive & objective [pls visit our blog sres11meches.bl...Cad cam ii nd mid descriptive & objective [pls visit our blog sres11meches.bl...
Cad cam ii nd mid descriptive & objective [pls visit our blog sres11meches.bl...
 
Circular duct analysis in ansys workbench
Circular duct analysis in ansys workbenchCircular duct analysis in ansys workbench
Circular duct analysis in ansys workbench
 
Radioss version 11.0
Radioss version 11.0Radioss version 11.0
Radioss version 11.0
 
Catia photo album
Catia photo albumCatia photo album
Catia photo album
 
PPT-1 Starting with Hypermesh
PPT-1 Starting with HypermeshPPT-1 Starting with Hypermesh
PPT-1 Starting with Hypermesh
 
PPT-2 Starting with hypermesh - Meshing
PPT-2 Starting with hypermesh - MeshingPPT-2 Starting with hypermesh - Meshing
PPT-2 Starting with hypermesh - Meshing
 
Ansys tutorial1
Ansys tutorial1Ansys tutorial1
Ansys tutorial1
 
Catia5v
Catia5vCatia5v
Catia5v
 
Catia v5 CAM enhancement
Catia v5 CAM enhancementCatia v5 CAM enhancement
Catia v5 CAM enhancement
 
Catia V5 Prismatic
Catia V5 PrismaticCatia V5 Prismatic
Catia V5 Prismatic
 
Catia introduccionv5
Catia introduccionv5Catia introduccionv5
Catia introduccionv5
 
Cad cam report-final (mechanical workshop)
Cad cam report-final (mechanical workshop)Cad cam report-final (mechanical workshop)
Cad cam report-final (mechanical workshop)
 
Ds catia v6 r2012x 32 64bit full multilanguage setup & crack (by ssq) cg-pe...
Ds catia v6 r2012x 32 64bit full multilanguage setup & crack (by ssq)   cg-pe...Ds catia v6 r2012x 32 64bit full multilanguage setup & crack (by ssq)   cg-pe...
Ds catia v6 r2012x 32 64bit full multilanguage setup & crack (by ssq) cg-pe...
 
A seminar report on mechanical designing software/tools
A seminar report on    mechanical designing software/toolsA seminar report on    mechanical designing software/tools
A seminar report on mechanical designing software/tools
 

Similar to CATIA Introduction to CATIA Modeling Software

Viva Questions for Engineering Dawing and Graphics
Viva Questions for Engineering Dawing and GraphicsViva Questions for Engineering Dawing and Graphics
Viva Questions for Engineering Dawing and Graphicsshyamranjan2006
 
Computer Aided Solid Modelling
Computer Aided Solid ModellingComputer Aided Solid Modelling
Computer Aided Solid ModellingDibyajyoti Laha
 
AUTOCAD Report
AUTOCAD ReportAUTOCAD Report
AUTOCAD ReportAMIT RAJ
 
Cad notes - ENGINEERING DRAWING - RGPV,BHOPAL
Cad notes - ENGINEERING DRAWING - RGPV,BHOPALCad notes - ENGINEERING DRAWING - RGPV,BHOPAL
Cad notes - ENGINEERING DRAWING - RGPV,BHOPALAbhishek Kandare
 
autocad 2002 tutorial 3d modeling
autocad 2002 tutorial 3d modelingautocad 2002 tutorial 3d modeling
autocad 2002 tutorial 3d modelingAsril Perangin
 
Introduction_to_AUTOCAD
Introduction_to_AUTOCADIntroduction_to_AUTOCAD
Introduction_to_AUTOCADKennRodriguez2
 
1585848522Basic_Introduction_to_AUTOCAD.ppt
1585848522Basic_Introduction_to_AUTOCAD.ppt1585848522Basic_Introduction_to_AUTOCAD.ppt
1585848522Basic_Introduction_to_AUTOCAD.pptssuser0d82cd
 
1585848522Basic_Introduction_to_AUTOCAD.ppt
1585848522Basic_Introduction_to_AUTOCAD.ppt1585848522Basic_Introduction_to_AUTOCAD.ppt
1585848522Basic_Introduction_to_AUTOCAD.pptpradeepdubey73
 
my ppt for autocad &autocad electrical
my ppt for autocad &autocad electricalmy ppt for autocad &autocad electrical
my ppt for autocad &autocad electricalh soundarya
 
CAD CAM Lab MANNUAL Dr.BRAU.pdf
CAD CAM Lab MANNUAL Dr.BRAU.pdfCAD CAM Lab MANNUAL Dr.BRAU.pdf
CAD CAM Lab MANNUAL Dr.BRAU.pdfRameshPinninti2
 
AutoCAD Lab Manual
AutoCAD Lab ManualAutoCAD Lab Manual
AutoCAD Lab ManualCynthia King
 

Similar to CATIA Introduction to CATIA Modeling Software (20)

Viva Questions for Engineering Dawing and Graphics
Viva Questions for Engineering Dawing and GraphicsViva Questions for Engineering Dawing and Graphics
Viva Questions for Engineering Dawing and Graphics
 
Computer Aided Solid Modelling
Computer Aided Solid ModellingComputer Aided Solid Modelling
Computer Aided Solid Modelling
 
AUTOCAD Report
AUTOCAD ReportAUTOCAD Report
AUTOCAD Report
 
Cad notes
Cad notesCad notes
Cad notes
 
Manual autocad 2010 english
Manual autocad 2010 englishManual autocad 2010 english
Manual autocad 2010 english
 
CAD
CADCAD
CAD
 
Cad notes - ENGINEERING DRAWING - RGPV,BHOPAL
Cad notes - ENGINEERING DRAWING - RGPV,BHOPALCad notes - ENGINEERING DRAWING - RGPV,BHOPAL
Cad notes - ENGINEERING DRAWING - RGPV,BHOPAL
 
Cad notes
Cad notesCad notes
Cad notes
 
CAE_s1233587
CAE_s1233587CAE_s1233587
CAE_s1233587
 
Eg5 n
Eg5 nEg5 n
Eg5 n
 
AutoCad 1.pptx
AutoCad 1.pptxAutoCad 1.pptx
AutoCad 1.pptx
 
autocad 2002 tutorial 3d modeling
autocad 2002 tutorial 3d modelingautocad 2002 tutorial 3d modeling
autocad 2002 tutorial 3d modeling
 
Introduction_to_AUTOCAD
Introduction_to_AUTOCADIntroduction_to_AUTOCAD
Introduction_to_AUTOCAD
 
1585848522Basic_Introduction_to_AUTOCAD.ppt
1585848522Basic_Introduction_to_AUTOCAD.ppt1585848522Basic_Introduction_to_AUTOCAD.ppt
1585848522Basic_Introduction_to_AUTOCAD.ppt
 
Introduction_to_AUTOCAD.ppt
Introduction_to_AUTOCAD.pptIntroduction_to_AUTOCAD.ppt
Introduction_to_AUTOCAD.ppt
 
1585848522Basic_Introduction_to_AUTOCAD.ppt
1585848522Basic_Introduction_to_AUTOCAD.ppt1585848522Basic_Introduction_to_AUTOCAD.ppt
1585848522Basic_Introduction_to_AUTOCAD.ppt
 
auto cad ppt.pptx
auto cad ppt.pptxauto cad ppt.pptx
auto cad ppt.pptx
 
my ppt for autocad &autocad electrical
my ppt for autocad &autocad electricalmy ppt for autocad &autocad electrical
my ppt for autocad &autocad electrical
 
CAD CAM Lab MANNUAL Dr.BRAU.pdf
CAD CAM Lab MANNUAL Dr.BRAU.pdfCAD CAM Lab MANNUAL Dr.BRAU.pdf
CAD CAM Lab MANNUAL Dr.BRAU.pdf
 
AutoCAD Lab Manual
AutoCAD Lab ManualAutoCAD Lab Manual
AutoCAD Lab Manual
 

Recently uploaded

Call Girls in Ashok Nagar Delhi ✡️9711147426✡️ Escorts Service
Call Girls in Ashok Nagar Delhi ✡️9711147426✡️ Escorts ServiceCall Girls in Ashok Nagar Delhi ✡️9711147426✡️ Escorts Service
Call Girls in Ashok Nagar Delhi ✡️9711147426✡️ Escorts Servicejennyeacort
 
PORTFOLIO DE ARQUITECTURA CRISTOBAL HERAUD 2024
PORTFOLIO DE ARQUITECTURA CRISTOBAL HERAUD 2024PORTFOLIO DE ARQUITECTURA CRISTOBAL HERAUD 2024
PORTFOLIO DE ARQUITECTURA CRISTOBAL HERAUD 2024CristobalHeraud
 
(办理学位证)埃迪斯科文大学毕业证成绩单原版一比一
(办理学位证)埃迪斯科文大学毕业证成绩单原版一比一(办理学位证)埃迪斯科文大学毕业证成绩单原版一比一
(办理学位证)埃迪斯科文大学毕业证成绩单原版一比一Fi sss
 
Passbook project document_april_21__.pdf
Passbook project document_april_21__.pdfPassbook project document_april_21__.pdf
Passbook project document_april_21__.pdfvaibhavkanaujia
 
Unveiling the Future: Columbus, Ohio Condominiums Through the Lens of 3D Arch...
Unveiling the Future: Columbus, Ohio Condominiums Through the Lens of 3D Arch...Unveiling the Future: Columbus, Ohio Condominiums Through the Lens of 3D Arch...
Unveiling the Future: Columbus, Ohio Condominiums Through the Lens of 3D Arch...Yantram Animation Studio Corporation
 
办理学位证(TheAuckland证书)新西兰奥克兰大学毕业证成绩单原版一比一
办理学位证(TheAuckland证书)新西兰奥克兰大学毕业证成绩单原版一比一办理学位证(TheAuckland证书)新西兰奥克兰大学毕业证成绩单原版一比一
办理学位证(TheAuckland证书)新西兰奥克兰大学毕业证成绩单原版一比一Fi L
 
原版美国亚利桑那州立大学毕业证成绩单pdf电子版制作修改#毕业文凭制作#回国入职#diploma#degree
原版美国亚利桑那州立大学毕业证成绩单pdf电子版制作修改#毕业文凭制作#回国入职#diploma#degree原版美国亚利桑那州立大学毕业证成绩单pdf电子版制作修改#毕业文凭制作#回国入职#diploma#degree
原版美国亚利桑那州立大学毕业证成绩单pdf电子版制作修改#毕业文凭制作#回国入职#diploma#degreeyuu sss
 
ARt app | UX Case Study
ARt app | UX Case StudyARt app | UX Case Study
ARt app | UX Case StudySophia Viganò
 
办理(宾州州立毕业证书)美国宾夕法尼亚州立大学毕业证成绩单原版一比一
办理(宾州州立毕业证书)美国宾夕法尼亚州立大学毕业证成绩单原版一比一办理(宾州州立毕业证书)美国宾夕法尼亚州立大学毕业证成绩单原版一比一
办理(宾州州立毕业证书)美国宾夕法尼亚州立大学毕业证成绩单原版一比一F La
 
Call Girls Aslali 7397865700 Ridhima Hire Me Full Night
Call Girls Aslali 7397865700 Ridhima Hire Me Full NightCall Girls Aslali 7397865700 Ridhima Hire Me Full Night
Call Girls Aslali 7397865700 Ridhima Hire Me Full Nightssuser7cb4ff
 
1比1办理美国北卡罗莱纳州立大学毕业证成绩单pdf电子版制作修改
1比1办理美国北卡罗莱纳州立大学毕业证成绩单pdf电子版制作修改1比1办理美国北卡罗莱纳州立大学毕业证成绩单pdf电子版制作修改
1比1办理美国北卡罗莱纳州立大学毕业证成绩单pdf电子版制作修改yuu sss
 
Design principles on typography in design
Design principles on typography in designDesign principles on typography in design
Design principles on typography in designnooreen17
 
Mookuthi is an artisanal nose ornament brand based in Madras.
Mookuthi is an artisanal nose ornament brand based in Madras.Mookuthi is an artisanal nose ornament brand based in Madras.
Mookuthi is an artisanal nose ornament brand based in Madras.Mookuthi
 
2024新版美国旧金山州立大学毕业证成绩单pdf电子版制作修改#毕业文凭制作#回国入职#diploma#degree
2024新版美国旧金山州立大学毕业证成绩单pdf电子版制作修改#毕业文凭制作#回国入职#diploma#degree2024新版美国旧金山州立大学毕业证成绩单pdf电子版制作修改#毕业文凭制作#回国入职#diploma#degree
2024新版美国旧金山州立大学毕业证成绩单pdf电子版制作修改#毕业文凭制作#回国入职#diploma#degreeyuu sss
 
306MTAMount UCLA University Bachelor's Diploma in Social Media
306MTAMount UCLA University Bachelor's Diploma in Social Media306MTAMount UCLA University Bachelor's Diploma in Social Media
306MTAMount UCLA University Bachelor's Diploma in Social MediaD SSS
 
Architecture case study India Habitat Centre, Delhi.pdf
Architecture case study India Habitat Centre, Delhi.pdfArchitecture case study India Habitat Centre, Delhi.pdf
Architecture case study India Habitat Centre, Delhi.pdfSumit Lathwal
 
MT. Marseille an Archipelago. Strategies for Integrating Residential Communit...
MT. Marseille an Archipelago. Strategies for Integrating Residential Communit...MT. Marseille an Archipelago. Strategies for Integrating Residential Communit...
MT. Marseille an Archipelago. Strategies for Integrating Residential Communit...katerynaivanenko1
 
毕业文凭制作#回国入职#diploma#degree澳洲弗林德斯大学毕业证成绩单pdf电子版制作修改#毕业文凭制作#回国入职#diploma#degree
毕业文凭制作#回国入职#diploma#degree澳洲弗林德斯大学毕业证成绩单pdf电子版制作修改#毕业文凭制作#回国入职#diploma#degree 毕业文凭制作#回国入职#diploma#degree澳洲弗林德斯大学毕业证成绩单pdf电子版制作修改#毕业文凭制作#回国入职#diploma#degree
毕业文凭制作#回国入职#diploma#degree澳洲弗林德斯大学毕业证成绩单pdf电子版制作修改#毕业文凭制作#回国入职#diploma#degree ttt fff
 
专业一比一美国亚利桑那大学毕业证成绩单pdf电子版制作修改#真实工艺展示#真实防伪#diploma#degree
专业一比一美国亚利桑那大学毕业证成绩单pdf电子版制作修改#真实工艺展示#真实防伪#diploma#degree专业一比一美国亚利桑那大学毕业证成绩单pdf电子版制作修改#真实工艺展示#真实防伪#diploma#degree
专业一比一美国亚利桑那大学毕业证成绩单pdf电子版制作修改#真实工艺展示#真实防伪#diploma#degreeyuu sss
 
shot list for my tv series two steps back
shot list for my tv series two steps backshot list for my tv series two steps back
shot list for my tv series two steps back17lcow074
 

Recently uploaded (20)

Call Girls in Ashok Nagar Delhi ✡️9711147426✡️ Escorts Service
Call Girls in Ashok Nagar Delhi ✡️9711147426✡️ Escorts ServiceCall Girls in Ashok Nagar Delhi ✡️9711147426✡️ Escorts Service
Call Girls in Ashok Nagar Delhi ✡️9711147426✡️ Escorts Service
 
PORTFOLIO DE ARQUITECTURA CRISTOBAL HERAUD 2024
PORTFOLIO DE ARQUITECTURA CRISTOBAL HERAUD 2024PORTFOLIO DE ARQUITECTURA CRISTOBAL HERAUD 2024
PORTFOLIO DE ARQUITECTURA CRISTOBAL HERAUD 2024
 
(办理学位证)埃迪斯科文大学毕业证成绩单原版一比一
(办理学位证)埃迪斯科文大学毕业证成绩单原版一比一(办理学位证)埃迪斯科文大学毕业证成绩单原版一比一
(办理学位证)埃迪斯科文大学毕业证成绩单原版一比一
 
Passbook project document_april_21__.pdf
Passbook project document_april_21__.pdfPassbook project document_april_21__.pdf
Passbook project document_april_21__.pdf
 
Unveiling the Future: Columbus, Ohio Condominiums Through the Lens of 3D Arch...
Unveiling the Future: Columbus, Ohio Condominiums Through the Lens of 3D Arch...Unveiling the Future: Columbus, Ohio Condominiums Through the Lens of 3D Arch...
Unveiling the Future: Columbus, Ohio Condominiums Through the Lens of 3D Arch...
 
办理学位证(TheAuckland证书)新西兰奥克兰大学毕业证成绩单原版一比一
办理学位证(TheAuckland证书)新西兰奥克兰大学毕业证成绩单原版一比一办理学位证(TheAuckland证书)新西兰奥克兰大学毕业证成绩单原版一比一
办理学位证(TheAuckland证书)新西兰奥克兰大学毕业证成绩单原版一比一
 
原版美国亚利桑那州立大学毕业证成绩单pdf电子版制作修改#毕业文凭制作#回国入职#diploma#degree
原版美国亚利桑那州立大学毕业证成绩单pdf电子版制作修改#毕业文凭制作#回国入职#diploma#degree原版美国亚利桑那州立大学毕业证成绩单pdf电子版制作修改#毕业文凭制作#回国入职#diploma#degree
原版美国亚利桑那州立大学毕业证成绩单pdf电子版制作修改#毕业文凭制作#回国入职#diploma#degree
 
ARt app | UX Case Study
ARt app | UX Case StudyARt app | UX Case Study
ARt app | UX Case Study
 
办理(宾州州立毕业证书)美国宾夕法尼亚州立大学毕业证成绩单原版一比一
办理(宾州州立毕业证书)美国宾夕法尼亚州立大学毕业证成绩单原版一比一办理(宾州州立毕业证书)美国宾夕法尼亚州立大学毕业证成绩单原版一比一
办理(宾州州立毕业证书)美国宾夕法尼亚州立大学毕业证成绩单原版一比一
 
Call Girls Aslali 7397865700 Ridhima Hire Me Full Night
Call Girls Aslali 7397865700 Ridhima Hire Me Full NightCall Girls Aslali 7397865700 Ridhima Hire Me Full Night
Call Girls Aslali 7397865700 Ridhima Hire Me Full Night
 
1比1办理美国北卡罗莱纳州立大学毕业证成绩单pdf电子版制作修改
1比1办理美国北卡罗莱纳州立大学毕业证成绩单pdf电子版制作修改1比1办理美国北卡罗莱纳州立大学毕业证成绩单pdf电子版制作修改
1比1办理美国北卡罗莱纳州立大学毕业证成绩单pdf电子版制作修改
 
Design principles on typography in design
Design principles on typography in designDesign principles on typography in design
Design principles on typography in design
 
Mookuthi is an artisanal nose ornament brand based in Madras.
Mookuthi is an artisanal nose ornament brand based in Madras.Mookuthi is an artisanal nose ornament brand based in Madras.
Mookuthi is an artisanal nose ornament brand based in Madras.
 
2024新版美国旧金山州立大学毕业证成绩单pdf电子版制作修改#毕业文凭制作#回国入职#diploma#degree
2024新版美国旧金山州立大学毕业证成绩单pdf电子版制作修改#毕业文凭制作#回国入职#diploma#degree2024新版美国旧金山州立大学毕业证成绩单pdf电子版制作修改#毕业文凭制作#回国入职#diploma#degree
2024新版美国旧金山州立大学毕业证成绩单pdf电子版制作修改#毕业文凭制作#回国入职#diploma#degree
 
306MTAMount UCLA University Bachelor's Diploma in Social Media
306MTAMount UCLA University Bachelor's Diploma in Social Media306MTAMount UCLA University Bachelor's Diploma in Social Media
306MTAMount UCLA University Bachelor's Diploma in Social Media
 
Architecture case study India Habitat Centre, Delhi.pdf
Architecture case study India Habitat Centre, Delhi.pdfArchitecture case study India Habitat Centre, Delhi.pdf
Architecture case study India Habitat Centre, Delhi.pdf
 
MT. Marseille an Archipelago. Strategies for Integrating Residential Communit...
MT. Marseille an Archipelago. Strategies for Integrating Residential Communit...MT. Marseille an Archipelago. Strategies for Integrating Residential Communit...
MT. Marseille an Archipelago. Strategies for Integrating Residential Communit...
 
毕业文凭制作#回国入职#diploma#degree澳洲弗林德斯大学毕业证成绩单pdf电子版制作修改#毕业文凭制作#回国入职#diploma#degree
毕业文凭制作#回国入职#diploma#degree澳洲弗林德斯大学毕业证成绩单pdf电子版制作修改#毕业文凭制作#回国入职#diploma#degree 毕业文凭制作#回国入职#diploma#degree澳洲弗林德斯大学毕业证成绩单pdf电子版制作修改#毕业文凭制作#回国入职#diploma#degree
毕业文凭制作#回国入职#diploma#degree澳洲弗林德斯大学毕业证成绩单pdf电子版制作修改#毕业文凭制作#回国入职#diploma#degree
 
专业一比一美国亚利桑那大学毕业证成绩单pdf电子版制作修改#真实工艺展示#真实防伪#diploma#degree
专业一比一美国亚利桑那大学毕业证成绩单pdf电子版制作修改#真实工艺展示#真实防伪#diploma#degree专业一比一美国亚利桑那大学毕业证成绩单pdf电子版制作修改#真实工艺展示#真实防伪#diploma#degree
专业一比一美国亚利桑那大学毕业证成绩单pdf电子版制作修改#真实工艺展示#真实防伪#diploma#degree
 
shot list for my tv series two steps back
shot list for my tv series two steps backshot list for my tv series two steps back
shot list for my tv series two steps back
 

CATIA Introduction to CATIA Modeling Software

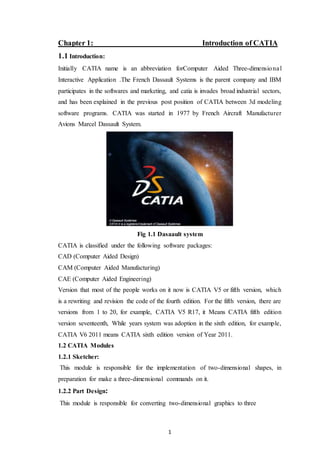
  • 1. 1 Chapter 1: Introduction of CATIA 1.1 Introduction: Initially CATIA name is an abbreviation forComputer Aided Three-dimensional Interactive Application .The French Dassault Systems is the parent company and IBM participates in the softwares and marketing, and catia is invades broad industrial sectors, and has been explained in the previous post position of CATIA between 3d modeling software programs. CATIA was started in 1977 by French Aircraft Manufacturer Avions Marcel Dassault System. Fig 1.1 Dasaault system CATIA is classified under the following software packages: CAD (Computer Aided Design) CAM (Computer Aided Manufacturing) CAE (Computer Aided Engineering) Version that most of the people works on it now is CATIA V5 or fifth version, which is a rewriting and revision the code of the fourth edition. For the fifth version, there are versions from 1 to 20, for example, CATIA V5 R17, it Means CATIA fifth edition version seventeenth, While years system was adoption in the sixth edition, for example, CATIA V6 2011 means CATIA sixth edition version of Year 2011. 1.2 CATIA Modules 1.2.1 Sketcher: This module is responsible for the implementation of two-dimensional shapes, in preparation for make a three-dimensional commands on it. 1.2.2 Part Design: This module is responsible for converting two-dimensional graphics to three
  • 2. 2 dimensional objects which is most famous in Catia and is closely linked with sketcher module. The part design Module it is considered from most important modules, that used by the designer to get the additional advantage from cad programs, which is stereotaxic drawing or three-dimensional drawing. 1.2.3 WireFrame and Surface Design: With this module surfaces can be drawing with zero size and weight and has its uses in the aerospace, automotive, ships and Mold Design. 1.2.4 Generative Sheet Metal Design: This module is responsible of converting two-dimensional graphics to thin sheets or walls having a particular ratio between thickness and its radius. 1.2.5 Assembly: This module is responsible for assembling the parts previously produced in Part Design, and it is most important for those who work in the field of machinery design or design in general, because it is the one who shows the inter-relationships between the parts of the machine or any mechanical establishment. 1.2.6 Drafting: This module is responsible, for converting what you see on the screen to standard engineering drawings can be traded in the workshop for manufacturing or save them for documentation.
  • 3. 3 Chapter 2: SKETCHER 2.1 INTRODUCTION: This module is responsible for the implementation of two-dimensional shapes, in preparation for make a three-dimensional commands on it. 2.2 Toolbars in sketcher: 2.2.1 Profile Toolbar: The Profile toolbar contains 2D geometry commands. These geometries range from the very simple (point, rectangle, etc...) to the very complex (splines, conics, etc...). The Profile toolbar contains many sub-toolbars. Most of these sub-toolbars contain different options for creating the same geometry. For example, you can create a simple line, a line defined by two tangent points, or a line that is perpendicular to a surface. Profile toolbar Reading from left to right, the Profile toolbar contain the following commands. Fig 2.1 Profile toolbar 2.2.1.1 Profile: This command allows you to create a continuous set of lines and arcs connected together. 2.2.1.2 Rectangle / Predefined Profile toolbar: The default top command is rectangle. Stacked underneath are several different commands used to create predefined geometries. 2.2.1.3 Circle / Circle toolbar: The default top command is circle. Stacked underneath are several different options for creating circles and arcs. 2.2.1.4 Spline / Spline toolbar: The default top command is spline which is a curved line created by connecting a series of points.
  • 4. 4 2.2.1.5 Ellipse / Conic toolbar: The default top command is ellipse. Stacked underneath are commands to create different conic shapes such as a hyperbola. 2.2.1.6 Line / Line toolbar: The default top command is line. Stacked underneath are several different options for creating lines. 2.2.1.7 Axis: An axis is used in conjunction with commands like mirror and shaft (revolve). It defines symmetry. It is a construction element so it does not become a physical part of your feature. 2.2.1.8 Point / Point toolbar: The default top command is point. Stacked underneath are several different options for creating points. 2.2.1.9 Rectangle: The rectangle is defined by two corner points. The sides of the rectangle are always horizontal and vertical. 2.2.1.10 Oriented Rectangle: The oriented rectangle is defined by three corner points. This allows you to create a rectangle whose sides are at an angle to the horizontal. 2.2.1.11 Parallelogram: The parallelogram is defined by three corner points. 2.2.1.12 Elongated Hole: The elongated hole or slot is defined by two points and a radius. 2.2.1.13 Cylindrical Elongated Hole: The cylindrical elongated hole is defined by a cylindrical radius, two points and a radius. 2.2.1.14 Keyhole Profile: The keyhole profile is defined by two center points and two radii. 2.2.1.15 Hexagon: The hexagon is defined by a center point and the radius of an inscribed circle. 2.2.1.16 Centered Rectangle: The centered rectangle is defined by a center point and a corner point.
  • 5. 5 2.2.1.17 Centered Parallelogram: The centered parallelogram is defined by a center point (defined by two intersecting lines) and a corner point. Creates text that may be used to create a solid. . 2.2.1.19 Circle: A circle is defined by a center point and a radius. 2.2.1.20 Three Point Circle: The three point circle command allows you to create a circle using three circumferential points. 2.2.1.21 Circle Using Coordinates: The circle using coordinates command allows you to create a circle by entering the coordinates for the center point and radius in a Circle Definition window. 2.2.1.22 Tri-Tangent Circle: The tri-tangent circle command allows you to create a circle whose circumference is tangent to three chosen lines. 2.2.1.23 Three Point Arc: The three point arc command allows you to create an arc defined by three circumferential points. 2.2.1.24 Three Point Arc Starting With Limits: The three point arc starting with limits allows you to create an arc using a start, end, and midpoint. 2.2.1.25 Arc: The arc command allows you to create an arc defined by a center point, and a circumferential start and end point. 2.2.1.26 Spline: A spline is a curved profile defined by three or more points. The tangency and curvature radius at each point may be specified. 2.2.1.27 Connect: The connect command connects two points or profiles with a spline. 2.2.1.28 Conic toolbar: Reading from left to right, the Conic toolbar contains the following command. 2.2.1.29 Ellipse: The ellipse is defined by a center point and major and minor axis points. 2.2.1.30 Parabola by Focus: The parabola is defined by a focus, apex and start and end points.
  • 6. 6 2.2.1.31 Hyperbola by Focus: The hyperbola is defined by a focus, center point, apex and start and end points. 2.2.1.32 Conic: There are several different methods that can be used to create conic curves. These methods give you a lot of flexibility when creating the above three types of curves. 2.2.1.33 Line: A line is defined by two points. 2.2.1.34 Infinite Line: Creates infinite lines that are horizontal, vertical or defined by two points. 2.2.1.35 Bisecting Line: Creates an infinite line that bisects the angle created by two other lines. 2.2.1.36 Line Normal to Curve: This command allows you to create a line that starts anywhere and ends normal or perpendicular to another element. 2.2.1.37 Point by Clicking: Creates a point by clicking the left mouse button. 2.2.1.38 Point by using coordinates: Creates a point at a specified coordinate point. 2.2.1.39 Equidistant Points: Creates equidistant points along a predefined path curve. 2.2.1.40 Intersection Point: Creates a point at the intersection of two differe Projects a point of one element onto another. 2.2.2 Constraint toolbar: Constraints can either be dimensional or geometrical. Dimensional constraints are used to constrain the length of an element, the radius or diameter of an arc or circle, and the distance or angle between elements. Geometrical constraints are used to constrain the orientation of one element relative to another. For example, two elements may be constrained to be perpendicular to each other. Other common geometrical constraints include parallel, tangent, coincident, concentric, etc... Reading from left to right:
  • 7. 7 Fig 2.2 Constraint toolbar 2.2.2.1 Constraints Defined in Dialoged Box: Creates geometrical and dimensional constraints between two elements. 2.2.2.2 Constraint: Creates dimensional constraints. o Contact Constraint: Creates a contact constraint between two elements. 2.2.2.3 Fix Together: The fix together command groups individual entities together. o Auto Constraint: Automatically creates dimensional constraints. 2.2.2.4 Animate Constraint: Animates a dimensional constraint between to limits. 2.2.2.5 Edit Multi-Constraint: This command allows you to edit all your sketch constraints in a single window.
  • 8. 8 Chapter 3: PART DESIGN 3.1 INTRODUCTION: This module is responsible for converting two-dimensional graphics to three- dimensional objects which is most famous in Catia and is closely linked with sketcher module. The part design Module it is considered from most important modules, that used by the designer to get the additional advantage from cad programs, which is stereotaxic drawing or three-dimensional drawing. 3.2 Toolbars in Part Design 3.2.1 Sketch-Based Features: This toolbar is mainly used to create a solid feature from a 2D sketch/profile Fig3.1 Sketch based features toolbar 3.2.1.1 Pad: This command is used to add material by extruding a sketch. 3.2.1.2 Pocket: This command is used to remove material by extruding a sketch. Fig3.2 Pocket command
  • 9. 9 3.2.1.3 Shaft: This command is used to add material by rotating a sketch. 3.2.1.4 Groove: This command is used to remove material by rotating a sketch. 3.2.1.5 Rib: This command is used to add material by sweeping a profile along a center curve. 3.2.1.6 Slot: This command is used to remove material by sweeping profile along a center curve. 3.1.1.7 Multi-sections Solid: This command is used to add material by sweeping one or more planar section curves along one or more guide curves. 3.1.1.8 Removed Multi-sections Solid: This command is used to remove material by sweeping one or more planar section curves along one or more guide curves. 3.1.1.9 Hole: This command is used for the circular material removal from the existing solid. Several types of holes are available. Such as: Simple, Tapered, Counter bored, Countersunk, Counter drilled Fig3.3 Hole command
  • 10. 10 3.2.2 Dress-Up Features: This toolbar is used to add fillets/chamfers on the solid edge, add a draft onto the solid faces. Hollow the solid, offset faces and many more. Fig3.4 Dress-up feature toolbar 3.2.2.1 Fillet: This command is used for creating a curved face of a constant or variable radius that is tangent to, and that joins, two surfaces. 3.2.2.2 Chamfer: This command is used for removing & adding a flat section from a selected edge to create a bevelled surface between the two original faces common to that edge. Fig 3.5 Chamfer command 3.1.2.3 Draft: This command is used for adding or removing material depending on the draft angle .and the pulling direction. 3.1.2.4 Shell: This command is used to empty a solid while keeping a given thickness on its sides.
  • 11. 11 Fig 3.6 Shell command 3.2.3 Transformation Features: Fig 3.7 Transformation features toolbar 3.2.3.1 Translation: This command is used for translating a solid entity along a direction. 3.2.3.2 Rotation: This command is used for rotating a solid entity about an axis by a certain angle. 3.2.3.3 Symmetry: This command is used for translating a solid entity to the other side of the mirror plane. 3.2.3.4 Mirror: This command is used for duplicating a solid entity on the other side of the mirror plane. 3.2.3.5 Patterns: Generally there are 3 types of patterns, which are: A. Rectangular Pattern B. Circular Pattern C. User defined Pattern
  • 12. 12 Chapter 4: WIREFRAME AND SURFACE DESIGN 4.1 Design: With this module surfaces can be drawing with zero size and weight and has its uses in the aerospace, automotive, ships and Mold Design. Toolbars in Wire-Frame and Surface Design  Surface Toolbar  Operation Toolbar  Wire-Frame Toolbar 4.2 Wireframe and Design Surface Workbench: The Wireframe and Surface Design workbench provides the tools to create wireframe construction elements during preliminary design and enrich existing 3D mechanical part design with wireframe and basic surface features. Starting Wireframe and Surface Design Workbench Start a new session of CATIA and close the new product file, which is opened by default. Next, choose Start > Mechanical Design > Wireframe and Surface Design from the menu bar to start a new file in the Wireframe and Surface Design Workbench. 4.3 Creating Wireframe Elements: The wireframe construction elements aid in creating surfaces. The sketches drawn in sketcher workbench can also be used to create surfaces. The tools available for constructing the wireframe geometries are discussed in the following section. 4.3.1 Creating Circles: The Circle tool is used to create circular arcs and circles. Choose the Circle button from the Wireframe toolbar; the Circle Definition dialog box is displayed. The Center and radius option is selected by default in the Circle type drop-down list; you are prompted to select the center point. You can select a predefined point or create a point by choosing any one of the options from the contextual menu, which is available when you right click on the Center selection area of the Circle Definition dialog box. Next, you are prompted to select the support surface. Select a plane as the support surface. Specify the required radius value in the Radius spinner. You can set the angular limits of the arc from the Circle Limitation area and finally choose the OK button to complete the arc. 4.3.2 Creating Splines: The Spline tool is use to draw a spline in three dimensional space by selecting the
  • 13. 13 connecting points. Choose the down arrow on the right of the Spline button to invoke the Curves toolbar, and then choose the spline button. Menu: Insert > Wireframe > Spline Toolbar: Curve > Spline 4.3.3 Creating Helix: The Helix tool is used to create a helical curve. When you invoke this tool, the Helix Curve Definition dialog box will be displayed and you are prompted to select the helix starting point. Select a predefined point, or create a point using the options from the contextual menu, which will be displayed when you right click on the Starting point selection area of the Helix Curve Definition dialog box. Next, you are prompted to select a line as the helix axis. Select a predefined line or draw a line using the options from the contextual menu, which will be displayed when you right-click in the Axis selection area. You can set the pitch, height, orientation, and start angle values in the respective spinners. You can also add a taper angle to the helix by specifying a value in the Taper Angle spinner available in the Radius variation area of the dialog box. 4.4 Creating Surfaces: The tools provided in Wireframe and Surface Design workbench to create simple and complex surfaces are discussed in the following section Fig 4.1 Surface toolbar 4.4.1 Creating Extruded Surfaces: The extruded surfaces are created by extruding a profile and specifying the extrusion depth and direction vector. The basic parameters that are required to Menu: Insert > Wireframe > Helix Toolbar: Curve > Helix Menu: Insert > Surfaces > Extrude Toolbar: Surfaces > Extrude Create an extruded surface are profile, direction for extrusion, and extrusion limits. To create an extruded surface, you first need to draw the profile to be extruded using the Sketcher workbench or by using the tools available in the Wireframe toolbar. Once you have drawn the profile, choose the Extrude button from the Surfaces toolbar.
  • 14. 14 4.4.2 Creating Revolved Surfaces: Revolved surfaces are created by revolving a profile about a revolution axis. To create a revolved surface, first profile is to be revolved. Choose the Revolve button from the Surfaces toolbar; the Revolution Surface Definition dialog box is displayed. The resulting extruded surface Tip. You can also select an edge of an existing surface or a solid body as the profile to create an extruded surface. Menu: Insert > Surface > Revolve Toolbar: Surface > Revolve Select the profile to be revolved. By default, the axis you sketched, with the profile in the sketcher workbench, is selected as the axis of revolution. You can also select some other axis of revolution. Now, set the required angular limits in the Angle. 4.4.3 Creating Spherical Surfaces: This tool is used to create the spherical surfaces. When you invoke this tool, the Sphere Surface Definition dialog box is displayed. You need to select the center point and an axis system as the sphere axis. You can select an existing point as the center point or create a point by using the options from the contextual menu, which will be displayed on right-clicking in the Center selection area. The Default (xyz) axis system is automatically selected. You can also select any previously created axis system. The preview of the spherical surface is displayed in the geometry area. Menu: Insert > Surfaces > Sphere Toolbar: Surfaces > Sphere The angle values using the options available in the Sphere Limitations area or by directly dragging the limiting arrows in the geometry area the spherical surface created by defining the origin as the center. Also, this surface has the default axis system and sphere limitation values. You can create complete sphere using the Sphere button available in the Sphere Limitations area of the Sphere Surface Definition dialog box. 4.4.4 Creating Cylindrical Surfaces: This tool is used to create cylindrical surfaces. Choose the Cylinder button from the Surfaces toolbar; the Cylinder Surface Definition dialog box is displayed and you are prompted to select the center of the cylinder. You can select an existing point as the center point or create a point by using the options from the contextual menu, which will be displayed on right-clicking in the Center selection area. Next, you are prompted to specify the direction for the cylinder. Select a plane, normal to which the cylinder will be extruded. You can also select a direction vector from the contextual menu, which can be invoked by right-clicking in the direction selection area. Set the
  • 15. 15 parameters using the spinners in the parameters area in the Surface Definition dialog box. Choose OK to create the cylindrical surface. 4.4.5 Creating Offset Surfaces: The Offset tool is used to create a surface that is at an offset distance from a reference surface. To do so, choose the Offset tool from the Surfaces toolbar. The Offset Surface Definition dialog box is displayed, and you are prompted to select a reference surface. Select the reference surface from the geometry area and specify the offset value in the Offset spinner. Choose the Reverse Direction button available in the dialog box to reverse the offset direction. The Both sides check box is selected to create the offset surface on both sides of the reference surface. The Repeat object after OK check box is used to create multiple offset surfaces. Select the Repeat object after OK check box and exit the Offset Surface Definition dialog box. The Object Repetition dialog box is displayed. Menu: Insert > Surfaces > Cylinder Toolbar: Surfaces > Cylinder Menu: Insert > Surfaces > Offset Toolbar: Surfaces > Offset In this dialog box specify the required number of instance(s). Choose the OK button to create the offset surfaces. A reference surface and an offset surface. Note sometime for complex reference surfaces, the offset surface may not be created. In such cases, you need to reduce the offset value or modify the initial geometry. 4.4.6 Creating Swept surfaces: The swap tool is provided to create surfaces by sweeping a profile along a guide curve in the Wireframe and Surfaces Design workbench of CATIA V5. To create a swept surface, you first need to draw a profile and a guide curve as two separate sketches. Next, choose the Sweep button from the Surfaces toolbar. The Swept Surface Definition dialog box is displayed, and you are prompted to select a profile. Select the profile from the geometry area; you are prompted to select a guide curve. Select the guide curve from the geometry area. Now, choose the OK button from the Swept Surface Definition dialog box. Profile and a guide curve and the resulting swept surface. Menu: Insert > Surface > Sweep Toolbar: Surface > Sweep Swept Surface with two Guide Curves You can also create a swept surface using more than one various other tools to create swept surface are discussed following section. Guide curve. First draw a profile and two guide curves as separate sketches.
  • 16. 16 Now, select the Sweep button from the Surfaces toolbar, the Swept Surface Definition dialog box is displayed. Select With two guide curve option from the Subtypes drop- down list; you are prompted to select a profile. After you select the profile, you are prompted to select a guide curve. Select the first and second guide curves. Now, select the anchor point for the respective guide curves. Choose the Preview button from the Swept Surface Definition dialog box to preview the surface created. Choose the OK button from the Swept Surface Definition dialog box. Profile and guide curves. The swept surface created using the two guide curve. Swept Surface with Two Limits In CATIA V5, you can create a swept surface by defining the two limit curves. The limit curves can be in the same or different planes. To create swept surface with two limits, you need to draw two limit curves. Once you have drawn the curves, choose the Sweep button from the Surfaces toolbar; the Swept Surface Definition dialog box will be displayed. Select the Line button from the Profile Type area in the dialog box. Swept Surface with Three Curve You can also create a circular swept surface using three guide curves. To create a surface using this tool, you first need to draw three guide curves, which should lie in different planes. After drawing the curves, invoke the Swept surface Definition dialog box. Choose the Circle button from the Profile type area in the dialog box. The parameters in the Swept surface Definition dialog box will change. You are prompted to select a first guide curve that define the first extremity of the circular arc. Select the first guide curve. Next you are prompted to select the second guide curve. After selecting the second guide curve, you are prompted to select a guide curve that defines the second extremity of the circular arc. Select the guide curve and choose the OK button from the dialog box to complete the swept surface. 4.4.7 Creating Fill Surfaces: The Fill tool allows you to create fill surfaces between a numbers of boundary segments. These may be planar or non-planar, but there should not be a large gap between the consecutive boundary segments. Before creating a fill surface, draw the boundary curves. Next, choose Fill button from the Surface toolbar. Next, you are required to select the boundary segments. You need to make sure that while selecting the boundary segments, the sequence of selection should be such that a
  • 17. 17 closed loop is formed. Once you have selected the boundary curves, choose the OK button. The curves drawn to create the fill surface and the resulting fill surface. Support surfaces may be selected with the respective curve to ensure the continuity between the fill surface and the support surface. Similarly, if you select a passing point, the fill surface will be created, such that it passes through the selected point. 4.4.8 Creating Lofted Multisection Surfaces: This tool allows you to create lofted multisection surfaces. The surface is created between the sections along the computed or user-defined spine. To create a multisection surface, you first need to create sections and guide curves. Next, choose the Multisections surface button from the Surface toolbar; the Multi-sections Surface Definition dialog box is displayed. You are prompted to select a curve. Select the first section curve; you are prompted to select new curve or select a tangent surface. Select the second section curve from the geometry area and click on the Guide selection area to activate it. You are prompted to select a curve. One by one, select the guide curves that were drawn earlier. Choose the OK button to exit the Multi-sections Surface Definition dialog, box and complete the multi section surface. Sections and guide curves to create the multisection surface. Note while selecting the section curve, make sure the arrow associated with each section curve is pointing in the same direction. Else, the surface will result in a cusp and will not be created. In some cases, with arrows pointing in opposite direction, a twisted surface may be formed. Menu: Insert > Surface > Multisections surface Toolbar: Surface > Multisections surface 4.4.8 Creating Blended Surfaces: This tool allows you to create a surface by blending two curves. These curves can be sketched curves, wireframe geometries, or edge of existing surfaces. If you select support surfaces with curves, the resulting blend surface will be tangent to the support surfaces. To create a blend surface, draw some curves and create support surfaces. Choose the Blend button from the Surfaces toolbar. You are now prompted to select the first curve and first support. Select the curve and support. Next, you are prompted to select the second curve and second support. Select them choose the OK button from the Blend Definition dialog box. The curves and support surfaces to create the blend surface.
  • 18. 18 4.5 Operation on Shape Geometry: Generally, the surface models are a combination of various surfaces. You need to join, trim, split, or translate the surfaces to manage multiple surfaces. CATIA provides a number of such operation tools that can be used on the surfaces created using the tools discussed earlier in this chapter. Some of these operations are discussed in the following section. Fig 4.2 Operation toolbar 4.5.1 Joining Surfaces: The Join tool is used to join two adjacent surfaces or two adjacent curves. Choose Join button from the Operation toolbar; the Join Definition dialog box is displayed. You are prompted to select the elements (curves or surfaces) to be joined. Select the elements that you need to join. Remember that there should not be a large gap between the entities to be joined. Choose the OK button from the Join Definition dialog box to complete the join operation. The surfaces or curves that are joined together will behave as a single entity. 4.5.2 Splitting Surfaces: The Split tool is used to split a surface or a wireframe element using a cutting element. A wireframe element can be split using a point, another wireframe element, or a surface. A surface can be split using another surface or a wireframe element. Consider a case in which two intersecting surfaces are created. Choose the Split button from the Operations toolbar to invoke the Split Definition dialog box; you are prompted to select the curve or surface to split. Select the cylindrical surface and then select the other surface, as the cutting element. The side of the cylindrical surface that is to be removed will be displayed as transparent. You can choose the other side buttons from the Split Definition dialog box to reverse the side of the surface to be removed. You can also retain both sides of the split surface by selecting the Keep both Sides check box from the split definition dialog box. Choose the OK button to split
  • 19. 19 the cylindrical surface. The transparent side will be removed. 4.5.3 Trimming Surfaces: The trim tool allows you to trim two intersecting surfaces or curves with respect to each other. When you invoke this tool, the trim definition dialog box will be displayed, Choose a surface as the first element and the other surface as the second element. One side of each surface will be displayed as transparent.You can choose the other side button to reverse the sides of surfaces to be trimmed. 4.5.4 Extrapolate: This command is used to increase the surface length in any direction.
  • 20. 20 Chapter 5 : GENERATIVE SHEET-METAL DESIGN 5.1 INTRODUCTION: This module is responsible of converting two-dimensional graphics to thin sheets or walls having a particular ratio between thickness and its radius. There are basic toolbars in this module namely:  Wall  Bending  Rolled  Transformation  Stamping  View 5.2 Accessing the Sheet metal Workbench: The Sheet Metal Design functions are available when you are in the Part environment. Several functions are integrated from Part Design workbench. This task shows how to enter the workbench. Choose the Sheet Metal Design item from the Start menu. The Sheet Metal toolbar is displayed and ready to use. 5.3 Defining the Sheet Metal Parameters: This task shows you how to configure the sheet metal parameters. 1. Click the Parameters icon. The Sheet Metal Parameters dialog box is displayed. 2. Enter 1mm in the Thickness field. 3. Enter 5mm in the Bend Radius field. 5.4 Wall: This module responsible to create the wall of sheet metal part. Which have a particular ratio between thickness and its radius. With help of this module different type of wall will be created. Fig 5.1 Wall toolbar
  • 21. 21 5.4.1 Creating the First Wall: This task shows how to create the first wall of the Sheet Metal Part. 1. Click the Sketcher icon then select the xy plane. 2. Select the Profile icon. 3. Sketch the contour. 4. Click the Exit Sketcher icon to return to the 3D world. 5. Click the Wall icon. The Wall Definition dialog box open Fig 5.2 Creating the first wall 5.4.2 Creating the Side Walls: This task shows you how to add other walls to the Sheet Metal part. 1. Select the Wall on Edge icon. 2. Select the left edge. The Wall Definition dialog box opens. 3. Enter 50mm in the Length field.The application previews the wall. 5.4.3 Creating a Cutout: In this task, you will learn how to open a sketch on an existing face Define a contour in order to create a cutout. 1. Select the wall on the right to define the working plane. 2. Click the Sketcher icon 3. Click the Profile icon to create the contour.
  • 22. 22 5.4.4 Unfolding the Sheet Metal Part: This task shows how to unfold the part. 1. Click the Unfold icon .The part is unfolded according to the reference wall plane, as shown below. 2. Click this icon again to refold the part for the next task. 3. So in this way, we can easily fold or unfold any entity. 5.4.5 Creating a Flange: This task explains how to generate a flange from a spine and a profile. 1. Select the Flange icon .The Flange Definition dialog box opens. 2. Select the edge as shown in red. 3. Enter 2 mm in the Radius field, 10 mm in the Length field and 120° for the Angle. 4. Click OK to create the flange. 5.4.6 Patterning: In this task, you are going to create cutouts according to a pattern. CATIA allows you to define two types of patterns: rectangular and circular patterns. 5.4.7 Bridge: This task shows you how to create a bridge by specifying the punch geometrical parameters. The Stamping.CATPart document is still open from the previous task. If not, open the Stamping5.CATPart document from the onlinesamplessheet metal directory. 1. Click the Bridge icon .The Bridge Definition dialog box opens, providing default values. 2. Change the value in the different fields. 5.4.8 Creating a Hem: This task explains how to generate a hem from a spine and a profile. The SweptWall01.CATPart document is still open from the previous task. If not, open the SweptWall02.CATPart document from the onlinesamplessheet metal directory. 1. Select the Hem icon. The Hem Definition dialog box opens. 2. Select the edges as shown in red. 3. Enter 2 mm in the Radius field, and 3 mm in the Length field. 4. Click OK to create the hem.
  • 23. 23 5.4.9 Creating a Tear Drop: This task explains how to generate a tear drop from a spine and a profile. The SweptWall01.CATPart document is still open from the previous task. If not, open the SweptWall03.CATPart document from the onlinesamplessheet metal directory. 1. Select the Tear Drop icon. The Tear Drop Definition dialog box opens. 2. Select the edge as shown in red. 3. Enter 3 mm in the Radius field, and 8 mm in the Length field. 4. Click OK to create the tear drop. 5.4.10 Creating a Swept Flange: This task explains how to generate a swept from a spine and a user-defined profile. The SweptWall01.CATPart document is still open from the previous task. If not, open the SweptWall04.CATPart document from the onlinesamplessheet metal directory. 1. using the Sketcher, define a profile as shown below: Then quit the Sketcher, using the Exit icon 2. Select the Swept Flange icon. The User Defined Flange Definition dialog box opens. 3. Select the edge and the profile, as shown in red. The dialog box looks like this: 4. Click OK to create the swept flange. 5.5 Stamping: This section explains and illustrates how to create and use various kinds of stamps. 5.5.1 Creating a Point Stamp: This task shows you how to create a point stamp by specifying the punch geometrical parameters. Open the Stamping.CATPart document from the onlinesamplessheetmetal directory. 1. Click the Point Stamp icon. 2. Select a point on the top face. The Point Stamp Definition dialog box opens, providing default values. 3. Change the value in the different fields, if need be: Height H, Radius R1, Radius R2, Angle A, Diameter D. 4. Click OK to validate. 5.5.2 Extruded Hole: This task shows you how to create an extruded hole by specifying the punch geometrical parameters.
  • 24. 24 The Stamping.CATPart document is still open from the previous task. If not, open the Stamping2.CATPart document from the onlinesamplessheetmetal directory. 1. Click the Extruded Hole icon . 2. Select a point on the top face where you want to place the hole. The Extruded Hole Definition dialog box opens, providing default values. 3. Change the value in the different fields, if need be: Height H, Radius R, Angle A, Diameter D. 4. Click OK to validate. 5.5.3 Curve Stamp: This task shows you how to create a curve stamp by specifying the punch geometrical parameters. The Stamping.CATPart document is still open from the previous task. If not, open the Stamping3.CATPart document from the onlinesamplessheetmetal directory. 1. Click the Curve Stamp icon . 2. Select Sketch.4, the curve previously defined. The Curve Stamp Definition dialog box opens, providing default values. 3. Change the value in the different fields, if need be: Height H, Radius R1, Radius R2, Angle A, Length L. 4. Click OK to validate. 5.5.4 Surface Stamp: This task shows you how to create a surface stamp by specifying the punch geometrical parameters. The Stamping.CATPart document is still open from the previous task. If not, open the Stamping4.CATPart document from the onlinesamplessheetmetal directory. 1. Click the Surface Stamp icon. 2. Select Sketch.5, the profile previously defined. The Surface Stamp Definition dialog box opens, providing default values. 3. Change the value in the different fields, if need be: Height H, Radius R1, Radius R2, Angle A. 4. Click OK to validate. 5.5.5 Stiffening: This task shows you how to create a stiffness rib by specifying the punch geometrical parameters. The Stamping.CATPart document is still open from the previous task. If not, open the Stamping7.CATPart document from the onlinesamplessheetmetal directory. 1. Click the Stiffness Rib icon. 2. Select Bend.1, where you want to place a stiffener. Note that the stiffener will always be centered on the bend radius, wherever the point may be along the curve. The Stiffening Rib Definition dialog box opens, providing
  • 25. 25 default values. 3. Change the value in the different fields, if need be: Radius R1, Radius R2, Angle A, Length L. 4. Click OK to validate. The specification tree indicates the stiffness rib has been created.
  • 26. 26 Chapter 6: ASSEMBLYDESIGN. 6.1 INTRODUCTION: This module is responsible for assembling the parts previously produced in Part Design, and it is most important for those who work in the field of machinery design or design in general, because it is the one who shows the inter-relationships between the parts of the machine or any mechanical establishment. Assembly modelling is the process of creating designs that consist of two or more components assembled together at their respective work positions. The components are brought together and assembled in Assembly Design workbench by applying suitable parametric assembly Constraints to them. 6.2 Types of Assembly Design Approach: In CATIA you can create assembly models by adopting two types of approaches. The first design approach is the bottom-up approach, and the second one is the top-down approach. Both these design approaches are discussed below. 6.2.1 Bottom-up Assembly: The bottom-up assembly is the most preferred approach for creating assembly models. In this of approach, the components are created in the Part Design workbench file. Then the product file is started and all the previously created components are inserted and placed in it using the tools provided in the Assembly Design workbench. After inserting each component, constraints are applied to position them properly in the 3D space with respect to other components. 6.2.2 Top-down Assembly: In the top-down assembly design approach, components are created inside the Assembly Design workbench. Therefore, there is no need to create separate part files of the components. This design approach is completely different from the bottom-up design approach. Here you have to start the product file first and then, one by one, create all components. Note that even though the components are created inside the product file, they are saved as individual part files and can be opened separately later. 6.3 Product Structure Tools Toolbar: This first task shows how to insert new component, new part and existing component. Fig 6.1 product structure tools toolbar
  • 27. 27 6.3.1 Inserting a New Component: This task will show you how to insert a component into an existing assembly. This command lets you: create an instance from the reference chosen component use a context-specific representation inside it. 6.3.2 Inserting a New Part: This task will show you how to insert a part in an existing assembly. 1. In the specification tree, select ManagingComponents01 and click the New Part icon. If geometry exists in the assembly, the New Part: Origin Point dialog box is displayed, proposing two options to locate the part:  Click Yes to locate the part origin point on a selected point, on another component for example.  Click No to define the origin point of a component according to the origin point of the parent component 2. For the purposes of this task, click No to locate the part origin according to the Product1 origin point. 6.3.3 Inserting Existing Components: This task will show you how to import one or more components into an existing assembly.You can specify the order in which the files will be imported when you select the files in the Insert an Existing Component dialog box. 6.3.4 Replacing a Component: This task consists in replacing a component. Using the Replacement Component command means replacing one component with another. 6.4 Constraint toolbar: Constraints can either be dimensional or geometrical. Dimensional constraints are used to constrain the length of an element, the radius or diameter of an arc or circle, and the distance or angle between elements. Geometrical constraints are used to constrain the orientation of one element relative to another. Other common geometrical constraints include parallel, tangent, coincident, concentric, etc... Reading from left to right: Fig 6.2 Constraint toolbar
  • 28. 28 6.4.1 Creating a Coincidence Constraint: Coincidence type constraints are used to align elements. Depending on the selected elements, you may obtain concentricity, coaxiality or coplanarity. This task consists in applying a constraint between two faces. 6.4.2 Creating a Contact Constraint: Contact type constraints can be created between two planes or faces. The common area between the two planes can be a plane (plane contact), a line (line contact) or a point (point contact). 6.4.3 Creating an Angle Constraint: Angle type constraints fall into three categories: 1. Angle, 2.Parallelism (angle value equals zero), 3. Perpendicularity (angle value equals 90º) When setting an angle constraint, you will have to define an angle value. Note that this angle value must not exceed 90o.The tolerance i.e. the smallest angle that can be used to differentiate two elements is set at 10 -6 radians. 6.4.4 Fixing a Component: Fixing a component means preventing this component from moving from its parent component during the update operation. Note that it does not mean fixing its position according to the geometrical origin of the assembly. To fix the component location according to the geometrical origin of the assembly, check Fix in space in the constraint Properties dialog box. 6.4.5 Fixing Components Together: The Fix Together command attaches selected elements together. You can select as many components as you wish, but they must belong to the active component. This task consists in fixing two components together. Using the Auto constraint Command The Auto constraint mode allows you to create the first possible constraint as specified in the priority list. This task consists in using the Auto constraint command to create two constraints.
  • 29. 29 6.5 Plummer block assembly: Fig 6.3 Plummer block Fig 6.4 Body of Plummer block
  • 30. 30 Fig 6.5 Cap of Plummer block Fig 6.6 Brasses