2. UI5CN.com
|
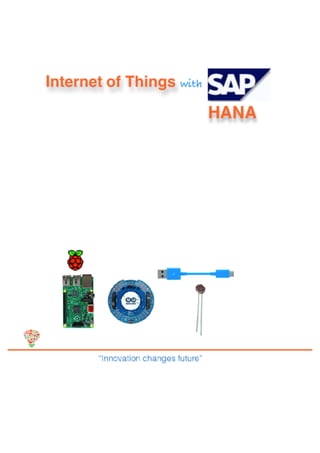
SAP
HANA
(IoT)
Internet
of
Things
Project
|
2 56
3. UI5CN.com
|
SAP
HANA
(IoT)
Internet
of
Things
Project
|
3 56
www.UI5CN.com Facebook
Public
Group Linkedin
Public
Group
TwiLer
Account
To grab your 35%off coupon click here
Or coupon QR code
5. UI5CN.com
|
SAP
HANA
(IoT)
Internet
of
Things
Project
PREFACE
Change
has
always
been
and
will
be
the
key
component
of
progress.
All
change
is
hard
at
first,
messy
in
the
middle
but
gorgeous
in
the
last.
In
this
book,
we
are
going
to
show
the
journey
and
the
steps
we
went
through
to
achieve
something
that
is
changing
the
world.
Internet
of
Things
needs
no
introducTon.
It
is
the
capability
of
connecTng
real
life
objects
to
enable
them
to
achieve
greater
value
and
service
by
exchanging
data
and
informaTon.
As
per
Forbes,
this
is
now
the
most
talked
technology,
beaTng
big
data
(dated
May
2015)
and
this
is
not
a
temporary
hype,
but
the
beginning
of
an
era
which
will
stay
for
the
next
5-‐10
years.
Internet
of
Things
is
not
a
new
radical
concept,
that
just
came
into
existence
now,
but
in
reality
it
is
a
capability
that
is
possible
only
now,
due
to
the
advances
in
database
technology
like
SAP
HANA,
increased
bandwidth,
reduced
size
and
power
consumpTon
of
devices.
Few
years
back,
we
started
tesTng
the
waters
by
looking
into
different
ways
in
which
we
could
connect
different
components,
in
order
to
create
a
basic
use-‐case
applicaTon
of
Internet
of
Things.
It
looked
like
a
quadraTc
equaTon
with
many
soluTons
but
to
reduce
the
complexity
we
sTck
to
KISS
principle
and
kept
it
simple
to
bring
together
all
the
informaTon
required
to
get
started
in
no
Tme.
|
5 56
6. UI5CN.com
|
SAP
HANA
(IoT)
Internet
of
Things
Project
CONTENT
1. IntroducTon
7
1. Real
World
9
2. IoT
Enablement
Factors
10
1. MiniaturizaTon
Of
Devices
10
2. Radio
Frequency
IdenTficaTon
(RFID)
10
3. Internet
Protocol
Version
6
(IPv6)
10
4. CommunicaTon
Throughput
And
Lower
Latency
10
5. Low
Power
ConsumpTon
Devices
10
6. Cloud
CompuTng
10
7. Improved
Security
And
Privacy
11
2. IoT
Architecture
12
2. Geong
Started
With
IoT
Use
Cases
13
1. Open
Hardware
Plaporms
Will
Help
You
Build
Your
Thing
13
2. Learn
About
IoT
Standards
13
3. Get
Out
Of
Comfort
Zone!
14
4. Follow
Your
End
To
End
Tutorial
15
3. Project:
SAP
HANA
Internet
of
Things
(IoT):
Raspberry
PI,
Arduino
Uno,
XSJS
&SAPUI5
16
1. IntroducTon
To
The
Project
16
2. IntroducTon
To
Arduino
Uno
And
Raspeberry
Pi
17
3. Seong
Up
Arduino
Uno
20
4. Seong
Up
Raspberry
Pi
25
5. Seong
Up
Java
Program
To
Read
Serial
Port
32
6. Seong
Up
SAP
Hana
Using
NaTve
Development
37
7. Seong
Up
SAPUI5
44
8. Tying
Loose
Ends
And
Going
Live
53
4. Bonus
54
|
6 56
7. UI5CN.com
|
SAP
HANA
(IoT)
Internet
of
Things
Project
1. INTRODUCTION
The
IOT
concept
was
iniTally
coined
by
a
member
of
the
Radio
Frequency
IdenTficaTon
(RFID)
development
community
in
1999,
and
it
has
recently
become
more
relevant
to
the
pracTcal
world
largely
because
of
the
growth
of
mobile
devices,
embedded
and
ubiquitous
communicaTon,
cloud
compuTng
and
data
analyTcs.
Since
then,
many
have
seized
on
the
phrase
“Internet
of
Things”
to
refer
to
the
general
idea
of
things,
especially
everyday
objects,
that
are
readable,
recognisable,
locatable,
addressable,
and/or
controllable
via
the
Internet,
irrespecTve
of
the
communicaTon
means
(whether
via
RFID,
wireless
LAN,
wide-‐
area
networks,
or
other
means).
Everyday
objects
include
not
only
the
electronic
devices
we
encounter
or
the
products
of
higher
technological
development
such
as
vehicles
and
equipment
but
things
that
we
do
not
ordinarily
think
of
as
electronic
at
all
-‐
such
as
food
and
clothing.
Examples
of
“things”
include:
▪ People
▪ Animals
and
Natural
ecosystem
▪ LocaTon
(of
objects)
▪ Time
InformaTon
(of
objects)
▪ CondiTon
(of
objects)
These
“things”
of
the
real
world
shall
seamlessly
integrate
into
the
virtual
world,
enabling
anyTme,
anywhere
connecTvity.
In
2010,
the
number
of
everyday
physical
objects
and
devices
connected
to
the
Internet
was
around
1
billion.
Cisco
forecasts
that
this
figure
will
reach
to
25
billion
in
2015
as
the
number
of
more
smart
devices
per
person
increases,
and
to
a
further
50
billion
by
2020.
In
addiTon,
the
global
economic
impact,
which
IoT
will
collecTvely
have,
will
be
more
than
$14
Trillion;
if
we
compare
this
to
the
world
populaTon,
then
by
2020
we
will
have
around
more
than
six
connected
devices
per
person.
|
7 56
8. UI5CN.com
|
SAP
HANA
(IoT)
Internet
of
Things
Project
|
8 56
9. UI5CN.com
|
SAP
HANA
(IoT)
Internet
of
Things
Project
1. REAL
WORLD
In
today’s
IT
industry,
companies
are
staying
compeTTve
by
adopTng
new
technologies,
streamlining
business
processes
and
innovaTng
new
services
to
increase
producTvity
and
save
costs.
In
the
logisTcs
and
supply
chain,
the
tradiTonal
supply
of
goods
is
based
on
established
agreements
between
manufacturers
and
suppliers.
Orders
are
made
in
advance
and
various
stakeholders
in
the
supply
chain,
i.e.,
assembly
lines,
manufacturers,
and
logisTcs
managers,
do
the
tracking.
With
the
use
of
smart
technologies
such
as
acTve
RFID
(executable
codes
in
tag),
it
is
possible
to
envision
that
goods
may
be
transported
without
human
intervenTon
from
manufacturers
to
suppliers.
Warehouses
will
become
completely
automaTc
with
goods
moving
in
and
out;
forwarding
of
the
goods
will
be
made,
using
intelligent
decisions
based
on
informaTon
received
via
readers
and
posiToning
systems
to
opTmise
transiTng
routes.
Suppliers
will
have
the
flexibility
to
purchase
parts
from
various
manufacturers
(possibly
from
compeTng
manufacturers)
and
buy
them
in
a
sequence
of
individual
orders.
Such
automaTon
creates
a
dynamic
producTon
and
transportaTon
network
and
provides
beLer
asset
management
to
improve
the
overall
efficiency
in
the
supply
chain.
In
healthcare,
hospitals
are
shifing
from
providing
healthcare
on
premise,
i.e.,
in
hospitals
and
clinics,
to
remote
self-‐monitoring
for
paTents.
Self-‐monitoring
benefits
paTents
by
giving
them
greater
freedom
and
independence
in
monitoring
their
health
and
frees
up
hospital
equipment
for
the
treatment
of
emergencies.
IoT
will
have
a
huge
impact
in
environmental
regulaTon
and
control
as
well
where
we
will
be
able
to
monitor
and
control
the
global
problem
of
clean
air,
global
warming
and
recycling.
It
will
also
provide
a
connected
world
where
private
transportaTon
can
talk
to
each
other
in
order
to
create
an
accident
free
scenario
and
the
best
experience
for
consumers,
taking
care
of
medical
and
emoTonal
need
while
transit.
Manufacturer
will
be
able
to
collect
valuable
informaTon
by
opening
a
two
way
channel
to
customers
which
will
radical
increase
the
chance
of
improvement
and
reduce
the
risk
of
failure
of
consumer
goods.
Factories
will
be
able
to
run
in
more
robust
and
self-‐sustain
way
using
so
called
Industry
4.0.
|
9 56
10. UI5CN.com
|
SAP
HANA
(IoT)
Internet
of
Things
Project
2. IOT
ENABLEMENT
FACTORS
1. MINIATURIZATION
OF
DEVICES
The
size
(and
cost)
of
electronic
components
that
are
needed
to
support
capabiliTes
such
as
sensing,
tracking
and
control
has
been
reducing
and
will
conTnue
to
reduce
as
per
Moore’s
law.
2. RADIO
FREQUENCY
IDENTIFICATION
(RFID)
Moving
into
the
future,
RFID
has
the
potenTal
to
provide
streams
of
data
that
will
provide
informaTon
systems
with
real-‐Tme,
item-‐specific
data
and
be
flexible
enough
to
be
placed
in
extremely
small
spaces
and
locaTons,
i.e.,
coil-‐on-‐chip
technology.
3. INTERNET
PROTOCOL
VERSION
6
(IPV6)
IPv6
is
the
next
Internet
addressing
protocol
that
is
used
to
replace
IPv4.
With
IPv6,
there
are
approximately
3.4×1038
(340
trillion)
unique
IPv6
addresses,
allowing
the
Internet
to
conTnue
to
grow
and
innovate.
4. COMMUNICATION
THROUGHPUT
AND
LOWER
LATENCY
Low
latency
makes
it
possible
for
IOT
applicaTons
to
query
or
receive
quicker
updates
from
sensor
devices.
LTE
networks
have
latencies
about
50-‐75
ms,
which
will
open
up
new
types
of
programming
possibiliTes
for
applicaTon
developers.
5. LOW
POWER
CONSUMPTION
DEVICES
Low
Power
consumpTon
devices
will
allow
the
devices
to
run
for
longer
duraTon.
Some
devices
will
use
solar
capability
to
run,
which
will
be
self-‐sustained.
6. CLOUD
COMPUTING
IOT
connects
billions
of
devices
and
sensors
to
create
new
and
innovaTve
applicaTons.
In
order
to
support
these
applicaTons,
a
reliable,
elasTc,
and
agile
plaporm
is
essenTal.
Cloud
compuTng
is
|
10 56
11. UI5CN.com
|
SAP
HANA
(IoT)
Internet
of
Things
Project
one
of
the
enabling
plaporms
to
support
IOT,
which
provides
required
storage,
processing
power,
and
scaling
capability.
7. IMPROVED
SECURITY
AND
PRIVACY
This
allows
the
communicaTon
channel
to
be
trustworthy.
CriTcal
business
data
can
be
passed
by
encrypTon
or
authenTcaTon
code
(MAC),
protecTng
the
confidenTality
and
authenTcity
of
transacTon
data
as
it
“transits”
between
networks.
There
is
sTll
evolving
standards
in
IoT
security
and
with
IPv6,
IPsec
support
is
integrated
into
the
protocol
design
and
connecTons
can
be
secured
when
communicaTng
with
other
IPv6
devices.
|
11 56
12. UI5CN.com
|
SAP
HANA
(IoT)
Internet
of
Things
Project
2. IOT
ARCHITECTURE
IOT
architecture
consists
of
different
suite
of
technologies
supporTng
IOT.
It
serves
to
illustrate
how
various
technologies
relate
to
each
other
and
to
communicate
the
scalability,
modularity
and
configuraTon
of
IOT
deployments
in
different
scenarios.
The
funcTonality
of
each
layer
is
described
below:
|
12 56
13. UI5CN.com
|
SAP
HANA
(IoT)
Internet
of
Things
Project
2. GETTING
STARTED
WITH
IOT
USE
CASES
Now
coming
to
the
fun
stuff
on
how
you,
as
a
developer
or
technical
consultant,
can
start.
There
are
few
very
basic
advices
that
we
can
follow:
1. OPEN
HARDWARE
PLATFORMS
WILL
HELP
YOU
BUILD
YOUR THING
It's
amazing
to
see
that
only
a
few
years
back,
it
was
virtually
impossible
for
someone
to
have
access
to
actual
hardware
to
run
IoT
soluTons.
That
is,
cheap
and
reasonably
sized
equipment
that
you
could
easily
deploy
in
a
house
or
car.
Nowadays,
plaporms
like
Arduino,
Intel
Edison
board,
BeagleBone
and
Raspberry
Pi
are
providing
IoT
developers
with
a
wide
ecosystem
of
hardware
that
can
be
used
to
easily
prototype
and
even
go
to
producTon
for
small
batches.
2. LEARN
ABOUT
IOT
STANDARDS
source
:
eclipse.org
What
is
really
interesTng
in
the
Internet
of
Things
space
is
that
we're
talking
about
millions
of
devices
that
are
preLy
limited
in
terms
of
processing
power
and
communicaTon
capabiliTes.
Think
of
a
Tny
baLery-‐powered
microcontroller,
monitoring
a
solar
panel
in
the
middle
of
the
Death
Valley!
|
13 56
14. UI5CN.com
|
SAP
HANA
(IoT)
Internet
of
Things
Project
And
yet,
one
needs
reliable
ways
to
access
sensor
data
or
manage
the
sofware
running
in
the
device,
all
of
this,
usually
happening
over
the
air
and
with
limited
human
intervenTon.
While
the
term
IoT
is
new,
the
use
cases
we
see
today
have
been
around
for
several
years,
and
there
are
interesTng
open
standards
that
help
build
interoperable,
efficient
IoT
soluTons.
In
order
to
allow
IoT
data
to
flow
from
producers
(sensors
on
the
field)
to
consumers
(IT
backends,
web
apps,
etc.),
there
is
MQTT,
an
OASIS
standard
that
implements
a
publish-‐subscribe
communicaTon
model.
It
has
several
QoS
levels
making
it
easy
to
find
the
perfect
tradeoff
between
reliability
and
resources/bandwidth
usage.
You
should
definitely
read
the
MQTT
3.1.1
specificaTon
document
to
get
more
familiar
with
the
protocol,
and
see
by
yourself
that
it
is
indeed
a
simple
and
interesTng
protocol
for
IoT.
OMA
Lightweight
M2M
is
another
interesTng
standard
from
the
Open
Mobile
Alliance
that
is
geong
a
lot
of
aLenTon
in
the
domain
of
Device
Management.
LwM2M
is
proposing
a
standard
way
to
do
things
like:
reboot
a
device,
install
a
new
sofware
image
(yes,
similarly
to
what
happens
on
your
smartphone
and
that
is
based
on
an
ancestor
of
LwM2M
called
OMA-‐DM),
etc.
At
the
transport
level,
Lightweight
M2M
is
using
CoAP
(Constrained
ApplicaTon
Protocol),
which
is
an
IETF
standard
targeTng
very
constrained
environments
in
which
it's
sTll
desirable
to
have
the
kind
of
features
you
would
expect
from
HTTP,
in
parTcular
the
manipulaTon
of
resources
that
you
can
"GET",
"PUT",
store
in
a
local
cache,
etc.
3. GET
OUT
OF
COMFORT
ZONE!
IoT
is
an
incredible
opportunity
for
all
developers
to
learn
about
new
technologies.
If
you
are
used
to
developing
backend
applicaTons,
you
will
learn
a
lot
about
embedded
development
if
you
start
playing
with
embedded
runTmes
like
ConTki.
Being
closer
to
the
silicon
means
having
to
think
about
how
to
opTmize
radio
communicaTons,
power
consumpTon,
etc.,
and
this
is
truly
fascinaTng.
If
you
are
more
into
embedded
development,
then
start
experimenTng
with
the
various
cloud
services
(Tme
series
databases,
IoT
brokers)
you
can
connect
your
embedded
system
to,
and
learn
how
to
turn
your
IoT
data
into
something
useful.
|
14 56
15. UI5CN.com
|
SAP
HANA
(IoT)
Internet
of
Things
Project
4. FOLLOW
YOUR
END
TO
END
TUTORIAL
In
addiTon,
one
of
the
important
factors
in
making
an
IoT
demo
is
to
understand
the
basic
skeleton
of
the
project
and
start
with
the
minimal
configuraTon
and
then
you
can
add
on
to
the
setup,
to
make
it
more
producTon
ready.
In
the
next
secTon,
we
will
start
building
a
small
end-‐to-‐end
use
case
on
IoT
using
Raspberry
Pi,
Arduino,
sensor
circuits
and
using
SAP
HANA
XS
as
backend,
which
is
exposed
via
REST
based
services.
|
15 56
16. UI5CN.com
|
SAP
HANA
(IoT)
Internet
of
Things
Project
3. PROJECT:
SAP
HANA
INTERNET
OF
THINGS
(IOT):
RASPBERRY
PI,
ARDUINO
UNO,
XSJS
&SAPUI5
1. INTRODUCTION
TO
THE
PROJECT
Change
has
always
been
and
will
be
the
key
component
of
progress.
All
change
is
hard
at
first,
messy
in
the
middle
but
gorgeous
in
the
end.
In
the
following
secTons,
we
are
going
to
show
the
journey
and
the
steps
we
went
through
to
achieve
out
IoT
end-‐to-‐end
use
case.
Six
months
back,
we
started
tesTng
the
waters
by
looking
into
different
ways
in
which
we
could
connect
different
components,
in
order
to
create
a
basic
use-‐case
applicaTon
of
Internet
of
Things.
Internet
of
Things
is
not
a
new
radical
concept
that
just
came
into
existence
now
but
in
reality,
it
is
a
capability
that
is
possible
only
now,
due
to
the
advances
in
database
technology
like
SAP
HANA
and
due
to
the
capability
to
do
complex
operaTons
on
huge
datasets
in
a
blink
of
an
eye.
So
coming
back
to
our
use-‐case
for
Internet
of
Things,
which
we
are
going
to
cover
now,
we
have
selected
a
smart
home
example
that
will
monitor
our
house;
it
is
an
example
that
everyone
can
relate
to.
In
the
setup,
we
have
a
photo
sensor
that
is
connected
to
our
Arduino
Uno
that
reads
the
analogue
data
and
sends
it
to
Raspberry
Pi,
via
serial
communicaTon.
There
is
a
Java
program
running
in
the
Raspberry
Pi
that
reads
the
data
from
the
serial
port
and,
if
there
is
a
change,
it
sends
the
data
to
SAP
HANA
by
XSJS
calls.
On
the
frontend
side,
we
have
an
SAPUI5
applicaTon
that
will
show
the
readings,
in
real-‐Tme,
in
some
nice
Tles.
Let
us
see
how
we
achieved
this
setup:
▪ Part
1:
IntroducTon
to
Arduino,
Raspberry
Pi
and
why
we
have
selected
them
▪ Part
2:
Seong
up
Arduino
Uno
▪ Part
3:
Seong
up
Raspberry
Pi
▪ Part
4:
Seong
up
Java
Program
to
read
serial
port
in
Raspberry
Pi
▪ Part
5:
Seong
up
SAP
HANA
using
NaTve
development
▪ Part
6:
Seong
up
SAP
UI5
▪ Part
7:
Go-‐Live
|
16 56
17. UI5CN.com
|
SAP
HANA
(IoT)
Internet
of
Things
Project
2. INTRODUCTION
TO
ARDUINO
UNO
AND
RASPEBERRY
PI
Before
starTng
the
project,
we
should
know
why
we
have
selected
both
Arduino
Uno
and
Raspberry
Pi.
Why
Raspberry
Pi?
The
Raspberry
Pi
is
a
low-‐cost
credit-‐card-‐size
computer
with
an
ARM-‐processor
that
has
a
huge
community
to
help
to
build
applicaTons.
Raspberry
Pi
can
mul<task
processes
–
it
can
run
mulTple
programs
in
the
background
while
acTvated;
for
example,
you
can
have
a
Raspberry
Pi
that
is
serving
as
both
a
print
server
and
a
VPN
server,
at
the
same
Tme.
Why
Arduino?
Arduino
is
a
micro-‐controller
with
easier
capability
to
integrate
analogue
input.
The
Arduino
IDE
is
significantly
easier
to
use
than
Linux.
For
example,
if
you
wanted
to
write
a
program
to
blink
a
LED,
with
Raspberry
Pi
you
would
need
to
install
an
operaTng
system
and
some
code
libraries
–
and
that
is
just
to
start.
Whereas
with
Arduino,
you
can
get
a
LED
light
to
blink
in
just
eight
lines
of
code.
Arduino
isn’t
designed
to
run
an
OS
or
a
lot
of
soEware;
you
can
just
plug
it
in
and
get
started.
You
can
leave
an
Arduino
plugged
in
as
it
conducts
a
single
process
for
a
long
Tme,
and
just
unplug
it
when
you’re
not
using
it.
This
is
why
we
recommend
the
Arduino
for
beginners
before
going
for
Pi.
As
per
Limor
Fried,
the
founder
of
Adafruit,
a
DIY
electronics
store
that
offers
parts
and
kits
for
both
Arduino
and
Pi
projects,
“The
Arduino
is
simpler,
harder
to
‘break’
or
‘damage’
and
has
much
|
17 56
18. UI5CN.com
|
SAP
HANA
(IoT)
Internet
of
Things
Project
more
learning
resources
at
this
:me
for
beginners;
with
the
Pi
you
have
to
learn
some
Linux
as
well
as
programming—such
as
Python.
The
Arduino
works
with
any
computer
and
can
run
off
a
baFery.
You
can
also
turn
it
on
and
off,
safely
at
any
:me.
The
Pi
setup
can
be
damaged
by
unplugging
it
without
a
proper
shutdown.”
While
the
Raspberry
Pi
shines
in
soEware
applica<on,
the
Arduino
makes
hardware
projects
very
simple.
It’s
simply
a
maLer
of
figuring
out
what
you
want
to
do.
Sound
like
Raspberry
Pi
is
superior
to
Arduino,
but
that’s
only
when
it
comes
to
soEware
applica<ons.
Arduino’s
simplicity
makes
it
a
much
beLer
bet
for
pure
hardware
projects.
The
ulTmate
answer
when
deciding
between
the
Pi
and
Arduino
is,
“Why
choose?”
If
you
are
looking
to
learn
about
IoT,
each
one
will
teach
you
something
different.
Raspberry
Pi
and
Arduino
are
complementary.
Ideally,
expert
suggests
a
scenario
where
the
Arduino
is
the
sensory
workhouse,
while
the
Pi
doles
out
direcTons.
Our
SAP
HANA
IoT
Project
Steps
Therefore,
we
are
going
to
do
exactly
that,
in
the
following
secTons
we
are
going
to
use:
1. Arduino
for
analogue
interface
2. and
providing
data
in
digital
format
to
Raspberry
Pi
3. and
Pi
should
take
care
of
communicaTon
to
SAP
HANA
Simplified
steps
are:
|
18 56
19. UI5CN.com
|
SAP
HANA
(IoT)
Internet
of
Things
Project
Step
1:
Connect
Arduino
to
a
Computer
and
checking
if
the
analogue
input
is
working
perfectly.
For
this
experiment,
we
have
photo
sensors
that
will
detect
light
intensity
and
give
the
data
to
a
computer
by
serial
port
communicaTon,
through
Arduino.
Step
2:
Connect
Raspberry
Pi
to
Arduino
and
able
to
establish
the
same
configuraTon,
which
was
achieved
via
computer
and
Arduino.
Also,
seong
up
a
webserver
in
Raspberry
Pi
that
can
communicate
over
internet.
Step
3:
Storing
data
into
the
SAP
HANA
system
from
Pi
and
displaying
it
using
SAPUI5
in
near
real
Tme.
|
19 56
20. UI5CN.com
|
SAP
HANA
(IoT)
Internet
of
Things
Project
3. SETTING
UP
ARDUINO
UNO
In
this
secTon,
we
will
connect
our
Arduino
to
a
computer
and
checking
if
the
analogue
input
is
working
perfectly.
For
this
experiment,
we
have
photo
sensors
that
will
detect
the
light
intensity
and
give
the
data
to
a
computer
by
serial
port
communicaTon.
First,
install
the
Arduino
Kit
from
hLp://www.arduino.cc/en/Main/Sofware,
to
your
computer;
in
our
scenario,
we
will
be
using
Windows.
It
looks
like
this,
afer
the
installaTon:
|
20 56
21. UI5CN.com
|
SAP
HANA
(IoT)
Internet
of
Things
Project
Check
also
the
serial
port
that
is
connected
to
Arduino
and
set
the
right
port
in
your
installed
sofware:
|
21 56
22. UI5CN.com
|
SAP
HANA
(IoT)
Internet
of
Things
Project
Now,
for
this
demo
we
are
going
to
follow
the
circuit
in
this
diagram:
Our
circuit
looks
like
this:
|
22 56
23. UI5CN.com
|
SAP
HANA
(IoT)
Internet
of
Things
Project
Let
us
have
a
look
at
the
code
that
takes
analogue
input
from
serial
output:
1. /*
2.
3. Analog
input,
analog
output,
serial
output
4. Reads
an
analog
input
pin,
maps
the
result
to
a
range
from
0
to
255
5. and
uses
the
result
to
set
the
pulsewidth
modulation
(PWM)
of
an
output
pin.
6. Also
prints
the
results
to
the
serial
monitor.
7. The
circuit:
8. *
potentiometer
connected
to
analog
pin
0.
9. Center
pin
of
the
potentiometer
goes
to
the
analog
pin.
10. side
pins
of
the
potentiometer
go
to
+5V
and
ground
11. *
LED
connected
from
digital
pin
9
to
ground
12. created
29
Dec.
2008
13. modified
9
Apr
2012
14. by
Tom
Igoe
15. This
example
code
is
in
the
public
domain.
16. */
17. //
These
constants
won’t
change.
They’re
used
to
give
names
18. //
to
the
pins
used:
19. const
int
analogInPin
=
A0;
//
Analog
input
pin
that
the
potentiometer
is
attached
to
20. const
int
analogOutPin
=
9;
//
Analog
output
pin
that
the
LED
is
attached
to
21. int
sensorValue
=
0;
//
value
read
from
the
pot
22. int
outputValue
=
0;
//
value
output
to
the
PWM
(analog
out)
23. void
setup()
{
24. //
initialize
serial
communications
at
9600
bps:
25. Serial.begin(9600);
26. }
27. void
loop()
{
28. //
read
the
analog
in
value:
29. sensorValue
=
analogRead(analogInPin);
30. //
map
it
to
the
range
of
the
analog
out:
31. outputValue
=
map(sensorValue,
0,
1023,
0,
255);
32. //
change
the
analog
out
value:
33. analogWrite(analogOutPin,
outputValue);
34. //
print
the
results
to
the
serial
monitor:
35. Serial.println(sensorValue);
36. //
wait
5
milliseconds
before
the
next
loop
37. //
for
the
analog-‐to-‐digital
converter
to
settle
38. //
after
the
last
reading:
39. delay(500);
40. }
Here
we
are
trying
to
read
the
analogue
signal
from
the
photo
sensor,
via
Arduino,
and
then
Arduino
will
send
it
via
serial
port
to
the
computer
and
use
it
to
show
the
sensor
data
readings.
Afer
wriTng
the
program,
you
should
upload
the
program
to
the
Arduino
Uno.
|
23 56
24. UI5CN.com
|
SAP
HANA
(IoT)
Internet
of
Things
Project
And
now
to
see
the
magic
happening,
open
the
serial
monitor
in
top
right
side
of
the
program.
We
have
demonstrated
the
result
in
this
video:
SAP
HANA
IoT
with
Arduino
and
Raspberry
Pi.
QR
code
for
the
link:
|
24 56
25. UI5CN.com
|
SAP
HANA
(IoT)
Internet
of
Things
Project
4. SETTING
UP
RASPBERRY
PI
In
this
secTon,
we
will
connect
Raspberry
Pi
to
Arduino
and
able
to
establish
the
same
configuraTon
which
was
achieved
via
computer
and
Arduino.
Here,
we
are
going
to
do
the
Raspberry
Pi
configuraTon
and
connecTng
it
to
the
Arduino
Uno.
Raspberry
Pi
is
capable
of
running
a
complete
operaTng
system
and
the
real
advantage
is
the
capability
to
running
with
so
less
power
consumpTon
and
the
easiness
to
interface
with
other
micro-‐controllers
and
digital/analogue
devices.
|
25 56
26. UI5CN.com
|
SAP
HANA
(IoT)
Internet
of
Things
Project
Why
do
we
use
Arduino
here?
Raspberry
Pi
is
a
fine
liLle
computer
board,
though
not
nearly
as
good
as
the
Arduino
when
it
comes
to
I/O
capabiliTes.
Since
our
experiment
has
a
sensor
network
setup,
it
will
be
simpler
to
interface
it
with
Arduino
Uno.
Once
we
have
the
Arduino
connecTon
setup,
then
we
can
connect
the
Raspberry
Pi
through
serial
connecTon
and
do
wonders
with
it.
Now,
we
are
going
to
see
how
you
can
setup
the
connecTon
of
Raspberry
and
Arduino
Uno
in
10
simple
steps:
Step
1:
Download
the
RASPBIAN
OS
in
Raspberry
download
secTon.
Step
2:
Write
the
image
to
the
disc
(SD
card)
using
Win32
image.
Bear
in
mind
that
if
you
copy
and
paste
the
disk
to
image
then
it
will
not
work.
|
26 56
27. UI5CN.com
|
SAP
HANA
(IoT)
Internet
of
Things
Project
Step
3.Open
the
SD
card
in
your
computer
and
add
the
following
line
to
the
end
of
file
cmdline.txt.
Make
sure
that
you
leave
a
line
break
at
the
end,
as
in
Linux
it
will
be
assumed
to
be
execuTon
of
the
command.
It
will
be
beLer
to
use
notepad++
to
edit,
as
someTmes
notepad
can
insert
some
windows
specific
characters
in
the
file
which
will
not
work
in
Linux
(Raspberry
system).
In
the
above
image,
the
Raspberry
IP
address
is
the
first
one
and
our
Ethernet
port
IP
is
the
second
one.
This
will
enable
to
connect
Raspberry
Pi
to
the
Internet
through
our
computer.
Step
4:
Change
the
IP
of
your
Ethernet
port
to
the
IP,
which
you
have
specified
in
the
config.
file.
In
this
tutorial,
it
is
192.168.137.1
|
27 56
28. UI5CN.com
|
SAP
HANA
(IoT)
Internet
of
Things
Project
Step
5:
Install
Xming
and
PuFy.
PuFy
will
be
used
to
establish
a
SSH
connecTon
to
Raspberry
Pi
and
Xming
will
be
used
to
create
a
graphical
session.
Download
here
the
link
of
PuLy
and
Xming.
Step
6:
Once
you
have
installed
them,
run
Xming
server
and
then
open
PuLy.
Enter
the
IP
address
of
the
Raspberry
Pi
you
configured
in
step
3,
i.e.
192.168.137.10
|
28 56
29. UI5CN.com
|
SAP
HANA
(IoT)
Internet
of
Things
Project
Also,
make
sure
that
you
have
SSH
enabled
in
X11:
Now
press
open.
Step
7:
It
will
ask
for
a
user
name
and
password:
username
is
pi
and
password
is
raspberry
|
29 56
30. UI5CN.com
|
SAP
HANA
(IoT)
Internet
of
Things
Project
Now
you
are
inside
the
Raspberry
Pi.
To
view
the
graphical
interface,
you
have
to
type
lxsession
and
if
everything
is
correct,
you
will
be
able
to
see
the
graphical
navigaTon
window
of
Raspberry:
Step
8:
Afer
you
have
closed
the
graphical
session
using
CTR+
Z,
install
Arduino
to
Raspberry,
using
the
bellow
commands:
sudo apt-get update
sudo apt-get install Arduino
Afer
the
installaTon,
you
will
get
a
success
message
as
well.
|
30 56
31. UI5CN.com
|
SAP
HANA
(IoT)
Internet
of
Things
Project
Step
9:
Open
the
graphical
session
again
using
lxsession
command
and
open
the
Arduino
sketch
IDE
that
has
been
installed:
Step
10:
Now
we
have
the
Arduino’s
sketch
installed
in
the
Raspberry
Pi
OS.
This
final
step
is
to
check
if
we
can
see
the
serial
port
connecTon
visible
(/dev/byACM0
in
Raspberry
OS
).
We
will
use
port
/dev/byACM0
for
our
devices’ communicaTon,
in
the
use
cases.
|
31 56
32. UI5CN.com
|
SAP
HANA
(IoT)
Internet
of
Things
Project
5. SETTING
UP
JAVA
PROGRAM
TO
READ
SERIAL
PORT
In
this
secTon,
we
will
use
Java
in
Raspberry
Pi
in
order
to
read
serial
data
of
Arduino
This
part
is
the
most
challenging
part
for
someone
who
is
new
to
Raspberry
Pi,
so
we
have
decided
to
create
the
enTre
setup
in
the
utmost
simplisTc
way
in
five
sub-‐steps:
Step
1:
Install
java
in
the
Raspberry
Pi.
Usually
Raspbian
comes
with
Java
installed
but
you
can
sTll
check
it
via
the
following
command:
java –version
When
you
update
your
Raspbian,
it
will
also
update
the
Java
library,
if
required.
sudo apt-get update
Step
2:
The
communicaTon
is
in
serial
mode,
between
Arduino
and
Raspberry
Pi,
so
we
need
a
way
to
make
our
Java
program
to
understand
it.
So
download
the
below
files:
• libjawt.so
from
here
• librxtxSerial.so
from
here
• RXTXcomm.jar
from
here
(if
you
are
reading
it
in
printed
version
please
use
the
free
digital
version
to
reach
the
link
or
visit
UI5CN.com)
and
go
to
the
download
folder
of
the
files
and
type
the
below
commands;
it
will
place
all
the
necessary
files
in
the
appropriate
folder
to
allow
the
serial
communicaTon
from
Raspberry
Pi
and
Arduino:
sudo cp libjawt.so /usr/lib/jvm/jdk-8-oracle-arm-vfp-hflt/lib/arm
sudo cp RXTXcomm.jar /usr/lib/jvm/jdk-8-oracle-arm-vfp-hflt/jre/lib
sudo cp librxtxSerial.so /usr/lib/jvm/jdk-8-oracle-arm-vfp-hflt/lib/arm
sudo cp librxtxSerial.so /usr/lib/jni/
|
32 56
33. UI5CN.com
|
SAP
HANA
(IoT)
Internet
of
Things
Project
Now,
we
are
assuming
here
that
you
have
your
jdk-‐8-‐oracle-‐arm-‐vfp-‐hflt
inside
your
/usr/lib/jvm.
If
you
don’t,
then
your
Java
won’t
be
updated
to
jdk-‐8
and
you
have
to
update
the
JDK
and
JRE.
sudo apt-get install oracle-java8-installer
Step
3:
Now
you
can
copy
below
Java
code.
1. import
java.io.BufferedReader;
2. import
java.io.InputStreamReader;
3. import
java.io.OutputStream;
4. import
gnu.io.CommPortIdentifier;
5. import
gnu.io.SerialPort;
6. import
gnu.io.SerialPortEvent;
7. import
gnu.io.SerialPortEventListener;
8. import
java.util.Enumeration;
9. import
java.net.HttpURLConnection;
10. import
java.net.URL;
11.
12. public
class
SerialTestGET
implements
SerialPortEventListener
{
13. SerialPort
serialPort;
14. static
int
sensorValue
=
0;
15. /**
The
port
we're
normally
going
to
use.
*/
16. private
static
final
String
PORT_NAMES[]
=
{
17. "/dev/tty.usbserial-‐A9007UX1",
//
Mac
OS
X
18. "/dev/ttyACM0",
//
Raspberry
Pi
19. "/dev/ttyUSB0",
//
Linux
20. "COM3",
//
Windows
21. };
22. /**
23. *
A
BufferedReader
which
will
be
fed
by
a
InputStreamReader
24. *
converting
the
bytes
into
characters
25. *
making
the
displayed
results
codepage
independent
26. */
27. private
BufferedReader
input;
28. /**
The
output
stream
to
the
port
*/
29. private
OutputStream
output;
30. /**
Milliseconds
to
block
while
waiting
for
port
open
*/
31. private
static
final
int
TIME_OUT
=
2000;
32. /**
Default
bits
per
second
for
COM
port.
*/
33. private
static
final
int
DATA_RATE
=
9600;
34.
35. public
void
initialize()
{
36. //
the
next
line
is
for
Raspberry
Pi
and
37. //
gets
us
into
the
while
loop
and
was
suggested
here
was
suggested
http://
www.raspberrypi.org/phpBB3/viewtopic.php?f=81&t=32186
38. System.setProperty("gnu.io.rxtx.SerialPorts",
"/dev/ttyACM0");
39.
40. CommPortIdentifier
portId
=
null;
41. Enumeration
portEnum
=
CommPortIdentifier.getPortIdentifiers();
42.
43. //First,
Find
an
instance
of
serial
port
as
set
in
PORT_NAMES.
44. while
(portEnum.hasMoreElements())
{
45. CommPortIdentifier
currPortId
=
(CommPortIdentifier)
portEnum.nextElement();
46. for
(String
portName
:
PORT_NAMES)
{
47. if
(currPortId.getName().equals(portName))
{
|
33 56
34. UI5CN.com
|
SAP
HANA
(IoT)
Internet
of
Things
Project
48. portId
=
currPortId;
49. break;
50. }
51. }
52. }
53. if
(portId
==
null)
{
54. System.out.println("Could
not
find
COM
port.");
55. return;
56. }
57.
58. try
{
59. //
open
serial
port,
and
use
class
name
for
the
appName.
60. serialPort
=
(SerialPort)
portId.open(this.getClass().getName(),
61. TIME_OUT);
62.
63. //
set
port
parameters
64. serialPort.setSerialPortParams(DATA_RATE,
65. SerialPort.DATABITS_8,
66. SerialPort.STOPBITS_1,
67. SerialPort.PARITY_NONE);
68.
69. //
open
the
streams
70. input
=
new
BufferedReader(new
InputStreamReader(serialPort.getInputStream()));
71. output
=
serialPort.getOutputStream();
72.
73. //
add
event
listeners
74. serialPort.addEventListener(this);
75. serialPort.notifyOnDataAvailable(true);
76. }
catch
(Exception
e)
{
77. System.err.println(e.toString());
78. }
79. }
80.
81. /**
82. *
This
should
be
called
when
you
stop
using
the
port.
83. *
This
will
prevent
port
locking
on
platforms
like
Linux.
84. */
85. public
synchronized
void
close()
{
86. if
(serialPort
!=
null)
{
87. serialPort.removeEventListener();
88. serialPort.close();
89. }
90. }
91.
92. /**
93. *
Handle
an
event
on
the
serial
port.
Read
the
data
and
print
it.
94. */
95. public
synchronized
void
serialEvent(SerialPortEvent
oEvent)
{
96. if
(oEvent.getEventType()
==
SerialPortEvent.DATA_AVAILABLE)
{
97. try
{
98. String
inputLine=input.readLine();
99. //System.out.println(inputLine);
100. sendGet(inputLine);
101. }
catch
(Exception
e)
{
102. System.err.println(e.toString());
103. serialPort.removeEventListener();
104. serialPort.close();
105. }
|
34 56
35. UI5CN.com
|
SAP
HANA
(IoT)
Internet
of
Things
Project
106. }
107. //
Ignore
all
the
other
eventTypes,
but
you
should
consider
the
other
ones.
108. }
109.
110. //
HTTP
GET
request
111. public
void
sendGet(String
inputLine)
throws
Exception
{
112.
113. try{
114. //if
difference
is
more
than
3
then
send
data
to
SAP
HANA
115. if(inputLine
!=
null
&&
inputLine
.length()
>
0
&&
Math.abs(sensorValue
-‐
Integer.parseInt(inputLine))
>
3
){
116.
117. sensorValue
=
Integer.parseInt(inputLine);
118. //Considering
that
A001
sensor
is
connection
with
this
raspberry
pie
for
now
119. //we
can
even
pass
this
with
command
line
but
for
simplicityhardcoding
it
120. //Replace
with
your
HANA
server
URL
and
port
number
121. String
url
=
"http:///demoApp/demo01/app01/services/putSensorReading.xsjs?
id=A001&value=";
122. url
=
url
+
inputLine;
123.
124. URL
obj
=
new
URL(url);
125. HttpURLConnection
con
=
(HttpURLConnection)
obj.openConnection();
126.
127. //
optional
default
is
GET
128. con.setRequestMethod("GET");
129.
130. //add
request
header
131. //con.setRequestProperty("User-‐Agent",
USER_AGENT);
132.
133. int
responseCode
=
con.getResponseCode();
134. if(responseCode
==
200){
135. System.out.println("OK
value:"+inputLine);
136. }else{
137. System.out.println("Error:
Response
code
"+responseCode);
138. }
139.
140. }
141. System.out.println("OK
value:
Less
than
3");
142. }catch
(Exception
e)
{
143. System.err.println(e.toString());
144. serialPort.removeEventListener();
145. serialPort.close();
146. }
147.
148. }
149.
150. public
static
void
main(String[]
args)
throws
Exception
{
151. SerialTestGET
main
=
new
SerialTestGET();
152. main.initialize();
153.
154. Thread
t=new
Thread()
{
155. public
void
run()
{
156. //the
following
line
will
keep
this
app
alive
for
1000
seconds,
157. //waiting
for
events
to
occur
and
responding
to
them
(printing
incoming
messages
to
console).
158. try
{Thread.sleep(1000000);}
catch
(InterruptedException
ie)
{}
159. }
160. };
|
35 56
36. UI5CN.com
|
SAP
HANA
(IoT)
Internet
of
Things
Project
161. t.start();
162. System.out.println("Started");
163. }
164. }
Step
4:
Compile
it
using
below
command:
javac -source 1.6 -target 1.6 -cp /usr/lib/jvm/jdk-8-oracle-arm-vfp-hflt/jre/lib/
RXTXcomm.jar SerialTestGET.java
Here,
we
are
giving
a
class
path
of
our
RXTX.jar
file
and
using
1.6
compaTble
compiler
mode
because
the
Jar
file
is
1.6
compaTble.
Step
5:
If
there
is
no
error
(warnings
may
come),
then
your
setup
is
right
and
you
can
now
read
the
Arduino
data
in
your
serial
port
of
Raspberry
Pi,
with
the
step
4
Java
compiled
code.
You
can
change
the
Java
code
of
Step
3
and
recompile
it,
in
order
to
fit
your
requirements
as
well.
|
36 56
37. UI5CN.com
|
SAP
HANA
(IoT)
Internet
of
Things
Project
6. SETTING
UP
SAP
HANA
USING
NATIVE
DEVELOPMENT
We
have
already
covered
all
the
steps
related
to
hardware
setup
and
configuraTon.
Now
we
will
focus
our
aLenTon
on
SAP
HANA
and
interfacing
it
with
our
SAPUI5
frontend.
Steps
that
we
are
going
to
follow
for
configuring
SAP
HANA:
Step1:
Create
the
Data
DefiniTon
for
our
HANA
XS,
which
will
be
storing
the
data.
Step2:
Create
the
SQL
procedures
to
do
data
operaTons.
Step3:
Create
the
XSJS
services
to
act
as
a
Gateway
between
the
SQL
Procedures
calls
and
the
service
calls
for
Raspberry
Pi
and
SAPUI5
applica<on.
Step1:
Create
the
Data
DefiniTon
for
HANA
XS
We
are
going
to
name
it
Demo
Schema
.hdbschema.
|
37 56
38. UI5CN.com
|
SAP
HANA
(IoT)
Internet
of
Things
Project
Note
here
that
demoApp.demo01.app02
is
the
package
path
and
SHIOT_02
is
the
project
name:
1. namespace
demoApp.demo01.app02.SHIOT_02.Data;
2.
3. @Schema:
'DemoSchema'
4.
5. context
demo02sensorNetwork
{
6.
7. type
sensor_key
:
String(10);
8.
9. @Schema:
'DemoSchema'
10.
11. context
demo02sensorNetwork
{
12.
13. type
sensor_key
:
String(10);
14.
15. @Catalog.tableType
:
#COLUMN
16.
17. Entity
demo02sensor_info_MD
{
18.
19. key
ID:
sensor_key;
20.
21. DESC:
String(200);
22.
23. };
24.
25. @Catalog.tableType
:
#COLUMN
26.
27. Entity
demo02sensor_active_TS
{
28.
29. key
ID:
sensor_key;
30.
31. key
time_stamp:
UTCTimestamp;
32.
33. value
:
Integer;
34.
35. };
Once
you
have
acTvated
the
code,
you
need
to
create
two
tables:
demo02sensor_active_TS and
demo02sensor_info_MD.
demo02sensor_active_TS:
Stores
the
transacTonal
Data
of
the
sensors
(readings
with
Tmestamp).
demo02sensor_info_MD:
Stores
the
Master
Data
of
the
sensors
(Sensor
Id’s)
Step2:
Create
the
SQL
procedures
to
do
data
operaTons
|
38 56
39. UI5CN.com
|
SAP
HANA
(IoT)
Internet
of
Things
Project
We
have
to
create
two
SQL
procedures
for
data
operaTons:
insert_sensor_reading.hdbprocedure
and
sensor_read.hdbprocedure.
As
the
names
suggest,
the
first
one
is
going
to
insert
sensor
data
in
sensor
table
and
second
one
is
going
to
read
the
recent
sensor
data
from
the
table.
insert_sensor_reading.hdbprocedure
is
inside
the
folder
Procedures.
It
is
taking
sensor
ID
and
sensor
reading
as
input:
PROCEDURE
1. "DemoSchema"."demoApp.demo01.app02.SHIOT_02.Procedures::insert_sensor_reading"
(
2.
3. IN
SENSORID
NVARCHAR(10),
4.
5. IN
sensor_reading
INTEGER
)
6.
7. LANGUAGE
SQLSCRIPT
AS
8.
9. BEGIN
10.
11. /*****************************
12.
13. Inserting
sensor
Data
14.
15. *****************************/
16.
17. insert
into
"demoApp.demo01.app02.SHIOT_02.Data::demos02sensorNetwork.demo02sensor_active_TS"
18.
19. VALUES(:SENSORID,
CURRENT_TIMESTAMP
,
sensor_reading
20.
21. );
22.
23. END;
sensor_read.hdbprocedure
is
inside
the
folder
Procedures.
It
takes
sensor
ID
as
input
and
returns
one
data
set
of
demo02sensor_active_TS.
PROCEDURE
1. "DemoSchema"."demoApp.demo01.app02.SHIOT_02.Procedures::sensor_read(
2.
3. IN
id
NVARCHAR(10),
4.
5. OUT
result
"DemoSchema"."demoApp.demo01.app02.SHIOT_02.Data::demo02sensorNetwork.demo02sensor_activ
e_TS")
6.
|
39 56
40. UI5CN.com
|
SAP
HANA
(IoT)
Internet
of
Things
Project
7. LANGUAGE
SQLSCRIPT
8.
9. SQL
SECURITY
INVOKER
10.
11. -‐-‐DEFAULT
SCHEMA
12.
13. READS
SQL
DATA
<u>AS</u>
14.
15. BEGIN
16.
17. /*****************************
18.
19. Reading
sensors
Data
20.
21. *****************************/
22.
23. result
=
select
*
24.
25. from
"DemoSchema"."demoApp.demo01.app02.SHIOT_02.Data::demo02sensorNetwork.demo02sensor_activ
e_TS"
26.
27. where
"ID"
=
:id
and
"time_stamp"
=
(select
max("time_stamp")
from
28.
29. "DemoSchema"."demoApp.demo01.app02.SHIOT_02.Data::demo02sensorNetwork.demo02sensor_activ
e_TS"
30.
31. where
"ID"=
:id);
32.
33. END;
Step3:
Create
the
XSJS
services
Create
the
XSJS
services
to
act
as
a
Gateway
between
the
SQL
Procedures
calls
and
the
service
calls
for
Raspberry
Pi
and
SAP
UI5
applica<on.
We
have
two
services.
The
first
one
is
getSensorReading.xsjs,
which
reads
the
recent
sensor
reading
for
the
sensor
id,
passed
in
the
URL.
It
uses
sensor_read.hdbprocedure
for
database
call.
1. var
sensorId
=
$.request.parameters.get("id");
2.
3. var
body
=
"error";
4.
5. var
data
={
6.
7. "id":"error",
8.
|
40 56
42. UI5CN.com
|
SAP
HANA
(IoT)
Internet
of
Things
Project
67. }
68.
69. $.response.contentType
=
"text/plain";
70.
71. $.response.setBody(body);
Then
afer
that,
we
use
putSensorReading.xsjs,
which
reads
the
recent
sensor
reading
for
the
sensor
id
and
sensor
value
passed
in
the
URL.
It
uses
insert_sensor_reading.hdbprocedure
for
database
call
to
store
the
data.
1. var
sensorId
=
$.request.parameters.get("id");
2.
3. var
sensorReading
=
$.request.parameters.get("value");
4.
5. sensorReading
=
parseInt(sensorReading,10);
6.
7. var
body
=
"error";
8.
9. if(sensorId
===
undefined){
10.
11. $.response.setBody(
"Invalid
key
!!!");
12.
13. }
14.
15. else{
16.
17. $.response.contentType
=
"text/plain";
18.
19. $.response.setBody(sensorId);
20.
21. try
{
22.
23. var
conn
=
$.db.getConnection();
24.
25. var
query
=
'call
"demoApp.demo01.app02.SHIOT_02.Procedures::insert_sensor_reading
"(?,?)';
26.
27. var
cst
=
conn.prepareCall(query);
28.
29. cst.setString(1,
sensorId);
30.
31. cst.setInteger(2,
sensorReading);
32.
33. var
rs
=
cst.execute();
34.
35. conn.commit();
36.
37. //as
no
record
returned
38.
39. if(rs
==
0){
40.
41. body
=
true;
42.
43. }
44.
|
42 56
43. UI5CN.com
|
SAP
HANA
(IoT)
Internet
of
Things
Project
45. conn.close();
46.
47. }
catch
(e)
{
48.
49. body
=
e.stack
+
"nName:"+
e.name+"nMsg"
+
e.message;
50.
51. $.response.status
=
$.net.http.BAD_REQUEST;
52.
53. }
54.
55. }
56.
57. $.response.contentType
=
"text/plain";
58.
59. $.response.setBody(body);
In
the
real
world
setup,
we
need
also
to
assign
the
security
key
to
each
sensor
and
pass
it
to
verify
the
readings.
In
addiTon,
it
would
be
beLer
to
have
the
Tmestamp
taken
from
the
sensor
source
and
store
it
in
the
database
but
for
keeping
the
coding
and
complexity
minimum
we
are
focusing
on
the
core
steps.
|
43 56
44. UI5CN.com
|
SAP
HANA
(IoT)
Internet
of
Things
Project
7. SETTING
UP
SAPUI5
We
will
configure
now
the
UI,
which
is
going
to
show
the
sensor
informaTon.
The
UI
is
simple
and
we
have
kept
two
Tles
The
first
Tle
is
showing
the
value
of
the
sensor
i.e.
the
LUX
value
or
light
intensity.
The
small
window,
below
the
reading
value,
tells
how
the
sensor
looks
like
(used
custom
CSS
mapping).
We
are
going
to
create
a
simple
view
and
controller
and
place
the
Tles
in
the
view.
The
Tles
will
be
placed
in
the
Tle
container
and
the
Tle
container
will
be
returned
inside
the
content
of
the
page.
There
are
3
main
components
1. Index.html
2. View
3. Controller
|
44 56
45. UI5CN.com
|
SAP
HANA
(IoT)
Internet
of
Things
Project
Code
for
the
above
components:
Index.html
1. HANA
IoT
2.
3. <script>//
<![CDATA[
4. sap.ui.localResources("shiot_ui");
app
=
new
sap.m.App({initialPage:"idshiot_ui1"});
var
page
=
sap.ui.view({id:"idshiot_ui1",
viewName:"shiot_ui_02.shiot_ui_02",
type:sap.ui.core.mvc.ViewType.JS});
app.addPage(page);
app.placeAt("content");
5. //
]]></script>
6.
7. <div
id="splash-‐screen">
8. <div
class="splash-‐screen-‐text">
9. <div
class="en">Welcome
to
HANA
IoT
Demo</div>
10. </div>
11. <div
class="splash-‐screen-‐circle-‐outer"></div>
12. <div
class="splash-‐screen-‐circle-‐inner"></div>
13. </div>
14. <script
id="sap-‐ui-‐bootstrap"
src="https://sapui5.hana.ondemand.com/resources/sap-‐ui-‐
core.js"
data-‐sap-‐ui-‐libs="sap.m,sap.suite.ui.commons,sap.ui.core,sap.viz"
data-‐sap-‐ui-‐
theme="sap_bluecrystal">//
<![CDATA[
15.
16. //
]]></script>
View
1. sap.ui.jsview("shiot_ui_02.shiot_ui_02",
{
2.
3. /**
Specifies
the
Controller
belonging
to
this
View.
4.
5. *
In
the
case
that
it
is
not
implemented,
or
that
"null"
is
returned,
this
View
does
not
have
a
Controller.
6.
7. *
@memberOf
shiot_ui_02.shiot_ui_02
8.
9. */
10.
11. getControllerName
:
function()
{
12.
13. return
"shiot_ui_02.shiot_ui_02";
14.
15. },
16.
17. /**
Is
initially
called
once
after
the
Controller
has
been
instantiated.
It
is
the
place
where
the
UI
is
constructed.
18.
19. *
Since
the
Controller
is
given
to
this
method,
its
event
handlers
can
be
attached
right
away.
20.
21. *
@memberOf
shiot_ui_02.shiot_ui_02
22.
23. */
24.
25. createContent
:
function(oController)
{
|
45 56
48. UI5CN.com
|
SAP
HANA
(IoT)
Internet
of
Things
Project
142.
143. });
144.
145. tileCompr.addStyleClass("sapMTile
backGroundWhite");
146.
147. var
custeReading
=
new
sap.m.CustomTile({
148.
149. content:
[
150.
151. tileContent
152.
153. ]
154.
155. });
156.
157. var
custeCompare
=
new
sap.m.CustomTile({
158.
159. content:
[
160.
161. tileCompr
162.
163. ]
164.
165. });
166.
167. var
tileContainer
=
new
sap.m.TileContainer("idMainTiles",
{
168.
169. tiles:
[
170.
171. custeReading,
172.
173. custeCompare
174.
175. ]
176.
177. });
178.
179. //Polling
implementation
180.
181. setInterval(oController.changeKPITest,
1000
*
3);
182.
183. //
create
the
page
holding
the
List
184.
185. var
page1
=
new
sap.m.Page({
186.
187. title:
"HANA
IoT
KPI",
188.
189. enableScrolling:
false,
190.
191. content
:
[
192.
193. tileContainer
194.
195. ]
196.
197. });
198.
199. return
page1;
|
48 56
49. UI5CN.com
|
SAP
HANA
(IoT)
Internet
of
Things
Project
200.
201. }
202.
203. });
Controller
1. sap.ui.controller("shiot_ui_02.shiot_ui_02",
{
2.
3. /**
4.
5. *
Called
when
a
controller
is
instantiated
and
its
View
controls
(if
available)
are
already
created.
6.
7. *
Can
be
used
to
modify
the
View
before
it
is
displayed,
to
bind
event
handlers
and
do
other
one-‐time
initialization.
8.
9. *
@memberOf
shiot_ui_02.shiot_ui_02
10.
11. */
12.
13. //onInit:
function()
{
14.
15. //
16.
17. //},
18.
19. /**
20.
21. *
Similar
to
onAfterRendering,
but
this
hook
is
invoked
before
the
controller's
View
is
re-‐rendered
22.
23. *
(NOT
before
the
first
rendering!
onInit()
is
used
for
that
one!).
24.
25. *
@memberOf
shiot_ui_02.shiot_ui_02
26.
27. */
28.
29. onBeforeRendering:
function()
{
30.
31. var
data
=
{
32.
33. "value":
0,
34.
35. "direction":
"Down",
36.
37. "comparisonValue1":
0,
38.
39. "comparisonValue2":
0,
40.
41. "comparisonValue3":
0
42.
43. };
44.
45. var
oModel
=
new
sap.ui.model.json.JSONModel();
46.
47. oModel.setData(data);
|
49 56
50. UI5CN.com
|
SAP
HANA
(IoT)
Internet
of
Things
Project
48.
49. sap.ui.getCore().setModel(oModel);
50.
51. },
52.
53. //Triggers
automatically
for
display
test
54.
55. changeKPITest:
function(){
56.
57. /*var
min
=
0;
58.
59. var
max
=
100;
60.
61. var
newRandomreading
=
Math.floor(Math.random()
*
(max
-‐
min))
+
min;*/
62.
63. var
url
=
"http:///demoApp/demo01/app01/services/getSensorReading.xsjs?id=";
64.
65. var
_SENSORID
=
"A001";
66.
67. var
_MAXLIMIT
=
170;
68.
69. var
_MINLIMIT
=
25;
70.
71. var
data
=
{
72.
73. "value":
0,
74.
75. "direction":
"Down",
76.
77. "comparisonValue1":
_MAXLIMIT,
78.
79. "comparisonValue2":
0,
80.
81. "comparisonValue3":
_MINLIMIT
82.
83. };
84.
85. var
oModel;
86.
87. var
newColorCode;
88.
89. //for
now
hardcoding
the
sensor
ID
90.
91. url
=
url
+
_SENSORID;
92.
93. //Doing
the
asyn
call
to
HANA
system
94.
95. jQuery.ajax({
96.
97. url:
url,
98.
99. async:
true,
100.
101. dataType:
'json',
102.
103. type:
'GET',
104.
105. success:
function(oData)
{
|
50 56
51. UI5CN.com
|
SAP
HANA
(IoT)
Internet
of
Things
Project
106.
107. if
(!oData)
{
108.
109. sap.m.MessageToast.show("Not
able
to
get
Data");
110.
111. }
else
{
112.
113. data["value"]
=
oData["value"];
114.
115. data["comparisonValue2"]
=
oData["value"];
116.
117. oModel
=
sap.ui.getCore().getModel();
118.
119. if(oModel.getData()["comparisonValue2"]
>
data["comparisonValue2"]){
120.
121. data["direction"]
=
"Down";
122.
123. }else{
124.
125. data["direction"]
=
"Up";
126.
127. }
128.
129. oModel.setData(data);
130.
131. oModel.refresh();
132.
133. //changing
the
color
as
well
134.
135. newColorCode
=
parseInt(data["value"])*2
;
136.
137. if(newColorCode
>
255){
138.
139. newColorCode
=
255;
140.
141. }
142.
143. $('#idInTileCont-‐footer-‐text').css("background-‐color",
"rgba("+newColorCode+",
"+newColorCode+",
"+newColorCode+",
0.99)");
144.
145. }
146.
147. },
148.
149. error:
function(XMLHttpRequest,
textStatus,
errorThrown)
{
150.
151. sap.m.MessageToast.show("Connection
not
able
to
establish");
152.
153. }
154.
155. });
156.
157. },
158.
159. /**
160.
161. *
Called
when
the
View
has
been
rendered
(so
its
HTML
is
part
of
the
document).
Post-‐
rendering
manipulations
of
the
HTML
could
be
done
here.
|
51 56
52. UI5CN.com
|
SAP
HANA
(IoT)
Internet
of
Things
Project
162.
163. *
This
hook
is
the
same
one
that
SAPUI5
controls
get
after
being
rendered.
164.
165. *
@memberOf
shiot_ui_02.shiot_ui_02
166.
167. */
168.
169. //onAfterRendering:
function()
{
170.
171. //
172.
173. //},
174.
175. /**
176.
177. *
Called
when
the
Controller
is
destroyed.
Use
this
one
to
free
resources
and
finalize
activities.
178.
179. *
@memberOf
shiot_ui_02.shiot_ui_02
180.
181. */
182.
183. //onExit:
function()
{
184.
185. //
186.
187. //}
188.
189. });
Here
the
controller
funcTon
changeKPITest is
polled
every
3
sec
and
we
have
the
new
data
bound
to
model,
which
is
returned
from
SAP
HANA
XSJS
AJAX
call.
It
is
beLer
to
have
a
push
noTficaTon
feature
in
here
instead
of
polling,
which
is
called
web-‐sockets,
but
for
simplicity
purpose,
we
have
kept
the
configuraTon
minimal.
|
52 56
53. UI5CN.com
|
SAP
HANA
(IoT)
Internet
of
Things
Project
8. TYING
LOOSE
ENDS
AND
GOING
LIVE
All
the
components
are
now
setup
individually
and
all
we
need
to
do
is
to
run
them
synchronously.
We
should
double
check
the
URLs
of
the
services
that
link
Raspberry
Pi
to
SAP
HANA
system,
from
the
sensor
side,
and
SAP
HANA
system
to
SAPUI5,
from
the
front
end
user’s
side.
Let
us
go
for
the
go-‐live
for
that
we
are
going
to
open
the
SAPUI5
app
screen
and
start
the
Java
program
that
reads
the
serial
data
and
sends
the
data
back
to
HANA
system.
Now,
once
we
start
the
Java
program,
we
will
instantly
see
the
SAPUI5
app
starts
updaTng
all
the
sensors
data,
on
near
real
Tme
basis.
A
video
result
is
shown
here:
CongratulaTons,
we
have
now
a
working
prototype
ready
of
applicaTon
leveraging
Internet
of
Things
with
Raspberry
Pi,
Arduino
Uno,
sensors,
SAP
HANA
and
SAPUI5.
|
53 56
54. UI5CN.com
|
SAP
HANA
(IoT)
Internet
of
Things
Project
4. BONUS
With
all
the
above
steps,
we
have
covered
an
enTre
Internet
of
Things
use
case
with
SAP
HANA.
The
steps
involving
hardware
configuraTon
and
integraTon
can
be
challenging
and
for
that
reason,
we
have
compiled
this
enTre
series
in
an
easy
to
understand
video
course.
The
course
will
give
you
a
360-‐degree
view
on
how
to
work
with
IoT
and
giving
a
glimpse
of
some
already
implemented
use
cases
in
the
marketplace.
This
course
is
exclusively
available
in
Udemy
:
To
grab
35%
discount
coupon
click
here
or
you
can
use
below
QR
code:
|
54 56
55. UI5CN.com
|
SAP
HANA
(IoT)
Internet
of
Things
Project
REFERENCING
AND
BIBLIOGRAPHY
• Ida.gov.sg,
‘The
Internet
of
Things
(IOT)’[Online]
Available
from],
hLps://www.ida.gov.sg/~/media/Files/
Infocomm%20Landscape/Technology/TechnologyRoadmap/InternetOfThings.pdf
• Cisco
,‘The
Internet
of
Things
(IOT)’[Online]
Available
from]
hLps://www.cisco.com/web/about/ac79/docs/
innov/IoT_IBSG_0411FINAL.pdf
• arduino.cc
Example
and
instrucTon
of
Serial
communicaTon
instrucTon
using
Java.
• raspberrypi.org
InstrucTon
of
using
Raspberry
Pi
and
interfacing
with
other
devices.
• gartner.com
The
Internet
of
Things
(IOT)’[Online]
Publicly
available
esTmaTon
figure
of
Internet
of
Things.
|
55 56
56. UI5CN.com
|
SAP
HANA
(IoT)
Internet
of
Things
Project
|
56 56