Basic drafting week 10 powerpoint drafting the house floor plan
•Download as PPTX, PDF•
7 likes•2,490 views

This document provides guidance on drafting a floor plan from a thumbnail sketch. It outlines steps such as enlarging the sketch to scale using a photocopier, measuring dimensions to determine the correct enlargement factor, and then tracing over the sketch while rationalizing elements like wall thicknesses and locations of doors and windows. It emphasizes starting with the general outline and proceeding to more specific elements, using varying line weights and poché shading to clearly convey the plan.

Recommended
Recommended
More Related Content
What's hot
What's hot (20)
Viewers also liked
Viewers also liked (20)
Similar to Basic drafting week 10 powerpoint drafting the house floor plan
Similar to Basic drafting week 10 powerpoint drafting the house floor plan (20)
More from Freya Van Saun
More from Freya Van Saun (12)
Recently uploaded
Recently uploaded (20)
Basic drafting week 10 powerpoint drafting the house floor plan
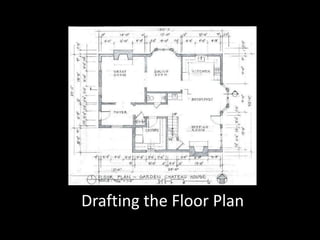
- 1. Drafting the Floor Plan
- 2. • When charged with drawing up a plan for a house, one may be given nothing more than a thumbnail sketch of a plan and expected to draft up some ideas for a potential layout. • It is important to be able to translate the thumbnail sketch into a scale drawing in order to test fit several possible design schemes. • Look for hints of sizes – here are overall dimensions. First, double the size (200% enlargement) on the photocopier, if the original is small.
- 3. • If the first doubling in size (200% enlargement) doesn’t bring the plan up to scalable size, double the enlargement again (enter “200%” on the photocopier zoom function). You could also tell the photo copier enlargement facility (copy center) to make the depth of the house in plan measure 42’ in the scale you want the final drawing to be (we will do the final drawing at 3/16”=1’-0” scale).
- 4. • When the plan is scaled up to the point where you can measure in the desired scale (3/16”=1’-0”), measure a line you determine to be of a certain length (here, 42’-0” for the length of the house from the bay window to the front of the house) and divide that (here, 35’-6”) into the length you want that to be (42’-0”) to get the enlargement (or reduction) factor: 42.0 ÷ 35.5 = 1.18, or, 118% enlargement on the photocopier.
- 5. • Once the plan is scaled up to the desired scale (here, 3/16”=1’-0”), you’ll begin to trace over the rough plan and rationalize the layout by fixing the exterior walls (assume 9” thick), the interior walls (assume 6” thick), doors and openings, stairs, windows, cabinetry, appliances and fixtures.
- 6. • To start laying out the plan, center the plan on the sheet and proceed from the general to the specific (start with the outline of the house, add the thickness of the exterior walls, locate the interior walls, locate the doors and windows and the interior elements, then begin to bring up the line weights.
- 7. • Continue with laying out the elements of the floor plan and checking the dimensions and relationships (i.e. centering, alignment, rhythm, balance, clearance). Enhance line weights as needed to differentiate elements appropriately (structure being the heaviest).
- 8. • Consider the judicious use of line weights in terms of expressing relative positions of spatial elements as well as elements cut in section. Note the difference between these two renditions of the Vanna Venturi House plan, one with line weight hierarchy and one without.
- 9. • Consider also the judicious use of poché for rendering the walls and structural elements in the plan in order to express the plan clearly. As the illustrations above show, the level of poché may vary with the complexity of textural elements in the floor plan.
- 10. • Compare the two plans here, one with poché and one without, and see how the floor plan pops more with the poché. All the dimensioning calls for the use of poché to make the plan read more clearly – if the dimensions were eliminated, then it might be sufficient to depend on line weights to make the plan read. • Note the jogged section reference marker to indicate the longitudinal section, which will be drafted later on a separate sheet – after we draft the furniture plan.