amalgam manipulation dental material
•Download as PPS, PDF•
60 likes•20,530 views

amalgam manipulation dental material

Recommended
More Related Content
What's hot
What's hot (20)
Similar to amalgam manipulation dental material
Similar to amalgam manipulation dental material (20)
More from Dr-Faisal Al-Qahtani
More from Dr-Faisal Al-Qahtani (20)
Recently uploaded
Recently uploaded (20)
amalgam manipulation dental material
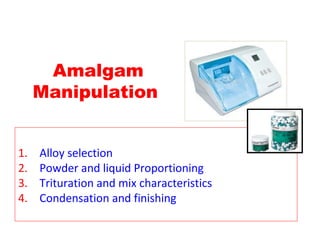
- 1. Amalgam Manipulation 1. Alloy selection 2. Powder and liquid Proportioning 3. Trituration and mix characteristics 4. Condensation and finishing
- 2. 1. Alloy Selection1. Alloy Selection • Copper content High-Cu u.c, High-Cu admix or Low-Cu • Zinc content Zn-containing or Zn-Free • Particle shape lathe-cut, spherical or spheroid √ √ √ √ √ √ √
- 3. 2. Proportioning2. Proportioning powder & Liquidpowder & Liquid • Weighing balance • Powder scope and Hg dropper • Alloy tablets & Hg dispenser • Hand dispenser • Automatic dispenser • Pre-weighed capsules The correct ratio is 1 : 1 by wt. √
- 4. 3. Trituration (1. Mixing)3. Trituration (1. Mixing) Using pestle & mortar Using palm & Thumb or pen grasp tech. Takes more time (45 s) Needs some experience Hand Trituration Mechanical Trituration Using amalgamator and Pre-weighed capsules Using amalgamizer with mechanical dispenser Accurate proportions Saves time (5-20 s)
- 5. 3. Trituration (2. Proper Mix)3. Trituration (2. Proper Mix) Under Triturated Properly triturated Shiny mass as a result of Hg diffusion into the alloy particles Cohesive & not adhere either to capsule or mortar walls (i.e. if tapped it is collected in the center of the mortar) If the mass falls down from 2-3 inches high, it will remain coherent Plastic, easily molded and condensed Able to produce the finger print on light touch Over Triturated The mass is shiny Adhere to mortar and capsule walls Hard and difficult to be condensed The mass is dull friable
- 6. 3. Trituration (3.Squeezing & Mulling)3. Trituration (3.Squeezing & Mulling) Mulling is to redistribute mercury evenly within the mixed, squeezed mass ….Usually done by rubbing the amalgam mass in rubber fingers Squeezing is to minimize the mercury content of the mix ….Usually done by twisting the mixed amalgam mass in a piece of gauze
- 8. 4. Condensation4. Condensation (Filling tooth cavities)(Filling tooth cavities) Condensation is usually done by the use of hand, automatic or ultrasonic condensers. • Amalgam must be condensed with 3-5 kg force • Amalgam increments are condensed by overlapping steps and lateral pushing. • Small condensers provide greater condensation force • Ultrasonic condensers are not preferred to avoid mercury evaporation • The cavity should be overfilled before carving to ensure proper closure of margins and removal of mercury-enriched layer. Objectives of condensation 1.Make coherent mass of filling 2.Minimize voids within the amalgam mass 3.Adapt the amalgam to all cavity walls, margins and line angles 4.Reduce the mercury content as much as possible
- 9. 4. Carving , Finishing & Polishing4. Carving , Finishing & Polishing The newly inserted amalgam restorations is can be used safely after 24h Carving • should start 2-3 min after mixing • should be stopped when amalgam is felt hard (i.e. 5-10min after mixing) • done by the use of sharp hand carvers. Finishing and polishing • should be carried out 24h after amalgam insertion. • provide better esthetic, and allow prolonged service with minimal corrosion. • Use … rubber abrasive points, fine abrasive pate
- 10. 4. Carving , Finishing & Polishing4. Carving , Finishing & Polishing The newly inserted amalgam restorations is can be used safely after 24h Carving • should start 2-3 min after mixing • should be stopped when amalgam is felt hard (i.e. 5-10min after mixing) • done by the use of sharp hand carvers. Finishing and polishing • should be carried out 24h after amalgam insertion. • provide better esthetic, and allow prolonged service with minimal corrosion. • Use … rubber abrasive points, fine abrasive pate