
Recommended
More Related Content
Viewers also liked
Viewers also liked (15)
Similar to 808 #18 DR32 DVR English User Manual
Similar to 808 #18 DR32 DVR English User Manual (20)
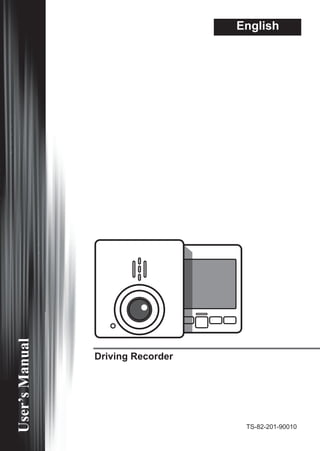
808 #18 DR32 DVR English User Manual
- 2. • Welcome: Thanks for purchasing this product. Please read the instructions carefully before using this product. • FCC Compliance Statement: This device complies with Part 15 of the FCC Rules. Operation is subjected to the following two conditions: (1) this device may not cause harmful interference, and (2) this device must accept any interference received, including interference that may cause undesired operation. This equipment has been tested and found to comply with limits for a Class B digital device, pursuant to Part 15 of the FCC rules. These limits are designed to provide reasonable protection against harmful interference in residential installations. This equipment generates, uses, and can radiate radio frequency energy, and if not in- stalled and used in accordance with the instructions, may cause harmful interference to radio communications. However, there is no guarantee that interference will not occur in a particular instal- lation. If this equipment does cause interference to radio or television equipment reception, which can be determined by turning the equipment off and on, the user is encouraged to try to correct the interference by one or more of the following measures: - Reorient or relocate the receiving antenna. - Move the equipment away from the receiver. - Plug the equipment into an outlet on a circuit different from that to which the receiver is connected. - Consult the dealer or an experienced radio/television technician for additional sug- gestions. You are cautioned that any change or modifications to the equipment not expressly approved by the party responsible for compliance could void your authority to oper- ate such equipment. The symbol of the crossed out wheeled bin indicates this product should not be placed in municipal waste. Instead, you need to dispose of the waste equipment by handing it over to a designated collection point for the recycling of waste electrical and electronic equipment.
- 3. 1 Caution 1. Do not drop, puncture or disassemble the device; otherwise the warranty will be voided. 2. Avoid all contact with water, and dry hands before using. 3. Use the device with care. Avoid pressing hard on the device body. 4. Use only the accessories supplied by the manufacturer. 5. Keep the device out of the reach of infants. 6. For your own safety, don’t operate the device while driving. This device is intended to be used as a car cam aid only. If car lighter still on after car power off, make sure to pull off the car charger, in case to run out all the battery or cause any accident. Over high/low temperature, will auto power off.
- 4. 2 Product Overview Removable Bracket MicroSD card slot Power Switch (On / off) Power connector / USB port Tripod socket Speaker Reset button LCD Display Led indicator (Led position may vary depending on the model.) HDMI out port Microphone Lens AV-out port Menu / Mode Playback / Return Lock file / OK Up Down / LCD off
- 5. 3 Air Safty Bag Warning Do not put the device within the area of air safety bag. Our company is not responsible for any damage or injure caused by air safety bag. Put the device around the area of front rear view mirror, to have better view. Make sure the lens is within windshield wiper area, to have the clear video quality in the raining day. Make sure the mount place is clean without dust. Install/Uninstall Installation 1. Attach the device to the bracket. Screw the bracket into the device tripod socket. Ensure that it is screwed in tightly. 2. Place the device in an appropriate place on the windshield, so as not to obstruct the driver’s view. 3. Attach the bracket to the windshield. Push down on the suction cup of the bracket and use the side pump to pump out any excess air ensuring a tight seal. 4. Adjust the angle. 5. Connect to the car charger. Uninstallation 1. To remove the bracket simply pull up the side bump. 2. Peel the suction cup off at one of the sides. 1 2 1 1 3 4 5 2 5
- 6. 4 Start to Use Power On 1. Insert the car charger into the car lighter. 2. Connect the USB terminal to the device’s USB port. 3. Insert MicroSD card into the MicroSD card slot, and switch for Power ON. Please use at least Class 6, 8GB MicroSD card. Before use, please formatting the MicroSD card. 1 2 Recording After start up the car enigne, the device will auto power on and start cycled recording. ▶▶Recording Icons Recording Icon Video Time Video Reserved Space Current Time Voice Recording Menu Playback Lock file LCD Off
- 7. 5 Playback 1. Press the Playback key ( ) to enter playback mode. 2. Select file types you want by Up( ) or down key( ). 3. Press OK key to show the video clip. 4. Use Up( ) or down( ) key to shift between files. 5. Press ( ) key to start playing. ▶▶Playback Icons Back to Recording Mode OK Up Down Play / Pause Key Icon Video Time Current / Total Recordings File name File Lock Icon Menu Back Play / Pause Next Previous Lock files in video reserved space Two ways to save the current video clip as a read-only file to prevent for overwritten and delete. 1. Manual Lock : Press Lock File button during recording to lock the current file. 2. Bump Auto Lock : When any bump happened, will activate auto lock system. • A “Beep“ sound will occur when any bump happened. • A message “Lock File” will show on the screen. System can only save up to 5 locked files. A message, “ Reserved space is full” will show on the screen when 5 locked files exist. It’s still recording while the message is showing.. To free the reserved space, please enter Playback mode to change the file attribute from locked files to normal files.
- 8. 6 Advanced Operations Menu Options in Setting mode Item Options Description Cycle Time 1min / 5 min Each recording file is 1min / 5 min, and will overwritten while out of SD card memory. Video Resolution 1080P 30fps / 720P 60fps / 720P 30fps Voice Recording On / Off On / off voice recording. Bump Auto Lock (Sensetivity) Off / Low / Mid / High To set the sensitivity level. LCD Auto off 1min / 5 min / Always On To set LCD always on or auto off after 1 or 5 minutes. *For safety driving, “Always On” is valid for one time only. The setting will be changed to “1 mins” when restarting. Realizing the LED indicator LED color Status Red Recording Green Standby Glittering Error / Warning Storage capacity 1080P/30 720P/60 720P/30 8G 80 mins 120 mins 155 mins 16G 160 mins 240 mins 310 mins 32G 320 mins 480 mins 620 mins Note : The actual value of capacity may vary (up to ± 30%) depending on the color saturation and complexity of your subject and surroundings.
- 9. 7 Menu Options in Playback mode Item Options Description Slideshow On / Off Repeat playing all video files. File attribute Normal File / Locked File Change the file attribute to normal file or locked file. Format function can delete all locked and unlock files. Item Options Description EV -2 ~ +2 Manually adjust the exposure to gain better effect when the preview image appears too bright or too dark. Beep On / Off Enable beep sound on/off. Volume Off / 1 / 2 / 3 Adjust system volume. Date Stamp On / Off Enable time and date embedded on/off. Clock Set date and time. Language Support multi-languages. TV System NTSC / PAL Set TV system compatibility to NTSC / PAL. Flicker 50HZ / 60HZ Set flicker frequency to 50HZ or 60HZ. Format Card Yes / No Format the SD card. Note that all files will be gone. Default Yes / No To have all settings reset to default status.
- 12. • 歡迎: 非常榮幸您選擇我們產品。 在使用之前,請詳細閱讀下面的聲明。 • FCC Compliance Statement: This device complies with Part 15 of the FCC Rules. Operation is subjected to the following two conditions: (1) this device may not cause harmful interference, and (2) this device must accept any interference received, including interference that may cause undesired operation. This equipment has been tested and found to comply with limits for a Class B digital device, pursuant to Part 15 of the FCC rules. These limits are designed to provide reasonable protection against harmful interference in residential installations. This equipment generates, uses, and can radiate radio frequency energy, and if not installed and used in accordance with the instructions, may cause harmful interference to radio communications. However, there is no guarantee that interference will not occur in a particular instal- lation. If this equipment does cause interference to radio or television equipment reception, which can be determined by turning the equipment off and on, the user is encouraged to try to correct the interference by one or more of the following measures: - Reorient or relocate the receiving antenna. - Move the equipment away from the receiver. - Plug the equipment into an outlet on a circuit different from that to which the receiver is connected. - Consult the dealer or an experienced radio/television technician for additional sug- gestions. You are cautioned that any change or modifications to the equipment not expressly approved by the party responsible for compliance could void your authority to oper- ate such equipment. 當本設備超過使用時效而必須予以丟棄時,請遵循法令進行所有配 件的回收。 請勿將電池和充電電池和家用垃圾一同丟棄!請將電池和充電電池攜 至當地的回收站進行回收。 讓我們為環境共盡一份心力。
- 14. 2 產品概述 可拆式車架 MicroSD 記憶卡插槽 電源開關 (開/關) 電源連接器 / USB 接口 車架孔 喇叭 重置鍵 液晶螢幕 指示燈 (位置根據機種有所差異) HDMI輸出接口 麥克風 鏡頭 影音輸出接口 選單 檔案鎖定 / OK 上 下 / 關閉螢幕
- 16. 4 開始使用 開機 車用變壓器插入汽車點煙器插頭。 車用變壓器USB接頭插入主機USB孔。 MicroSD卡插入MicroSD插槽後,將電源開關右切至ON。 建議使用Class6、容量8GB以上之 MicroSD卡,本機最高支援 32GB。 使用前務必將 MicroSD卡進行格式化。 1 2 錄影 發動引擎後,將會自動開機並開始循環錄影。 <<錄影圖示>> 錄影圖示 影片時間 檔案保留空間 目前時間 錄音 選單 播放 檔案鎖定 關閉螢幕
- 17. 5 播放 1. 按下播放鍵 ( )進入播放模式。 2. 以上下鍵( )選擇你想要的檔案類別。 3. 按OK鍵出現錄影檔案。 4. 以上下鍵( )選擇你想要的檔案。 5. 按OK鍵開始播放。 <<播放圖示>> 返回錄影模式 OK 上 下 播放 / 暫停圖示 影片時間 目前錄影 / 所有錄影數 檔案名稱 檔案鎖定圖示 選單 返回 播放 / 暫停 下一段 前一段 保留空間內的鎖定檔案 以下兩種方法可將影片儲存為鎖定的唯讀檔。 1. 手動鎖定 : 在錄影狀態下, 按下機台上的檔案鎖定鍵, 正在錄製的檔案便會存成唯讀檔並保存在 保留空間內。 2. 自動鎖定 : 當有撞擊發生, 裝置會啟動鎖定檔案機制 (G-sensor)。 • 當有撞擊發生, 裝置會發出“嗶”警告聲。 • 螢幕上會出現“鎖定檔案”警示語。 保留空間內容量可儲存 5 個鎖定檔案。 在保留空間內已有5個鎖定檔案,螢幕會出現"保留空間已滿"的警示語,此時本機仍保持 錄影狀態。 如需加入鎖定檔案,請由原先5個鎖定檔案變更檔案屬性為一般檔案,得以再加入新的鎖定 檔案。
- 18. 6 進階操作 設定選單項目 項目 選項 說明 循環時間 1分鐘 / 5 分鐘 循環時間預設每段影片長度為1分鐘 / 5分鐘,並於SD卡空 間不足時覆蓋舊檔。 攝影解析度 1080P 30fps / 720P 60fps / 720P 30fps 錄音 開啟 / 關閉 開啟 / 關閉 錄音。 碰撞自動鎖定 (敏感度) 關閉 / 低 / 中 / 高 敏感度設定。 螢幕自動關閉 1分鐘 / 5 分 鐘 / 永遠 開啟 設定螢幕永遠開啟或1、5分鐘後自動關閉。 *為了行車安全,“恆亮”設定只有一次性有效,當機台 重新啟動後,設定值會回復為“5分鐘”。 了解 LED 指示燈 LED 指示燈顏色 狀態 紅 錄影中 綠 待機 閃爍 錯誤 / 警告 存儲容量 1080P/30 720P/60 720P/30 8G 80分鐘 120分鐘 155分鐘 16G 160分鐘 240分鐘 310分鐘 32G 320分鐘 480分鐘 620分鐘 註 : 實際儲存容量可能會因顏色飽和及場景複雜程度有高達30%的差異。
- 19. 7 回放模式下的選單 項目 選項 說明 循環播放 開啟 / 關閉 重複播放所有影片。 檔案屬性 鎖定檔案 / 一 般檔案 變更檔案的屬性由鎖定檔案變更為一般檔案,亦可將一般 檔案變更為鎖定檔案。 格式化功能可以刪除所有鎖定及非鎖定的檔案。 項目 選項 說明 曝光補償 -2~ +2 當預覽畫面顯示太亮或太暗時,手動調整曝光補償,以獲 得較佳的效果。 按鍵音 開啟 / 關閉 開啟或關閉按鍵音。 音量 關閉 / 1 / 2 / 3 調整系統音量大小。 日期顯示 開啟 / 關閉 啟用此功能會在影片中嵌入時間與日期。 時間設定 - 設定日期與時間。 語言 - 支援多國語系。 電視系統 NTSC / PAL 將電視系統相容性設為 NTSC / PAL。 閃爍頻率 50赫茲 / 60 赫茲 設定閃爍頻率為 50赫茲或60赫茲。 格式化 是 / 否 格式化儲存媒體。 請注意:所有在儲存媒體上的檔案都會消失。 回復出廠設定 是 / 否 回復出廠預設值。請注意:所有目前設定都會被覆蓋。
- 22. • 欢迎: 非常荣幸您选择我们产品。 在使用之前,请详细阅读下面的声明。 • FCC Compliance Statement: This device complies with Part 15 of the FCC Rules. Operation is subjected to the following two conditions: (1) this device may not cause harmful interference, and (2) this device must accept any interference received, including interference that may cause undesired operation. This equipment has been tested and found to comply with lim- its for a Class B digital device, pursuant to Part 15 of the FCC rules. These limits are designed to provide reasonable protection against harmful interference in residential installations. This equipment generates, uses, and can radiate radio frequency energy, and if not installed and used in accordance with the instructions, may cause harmful interference to radio communications. However, there is no guarantee that interference will not occur in a particular instal- lation. If this equipment does cause interference to radio or television equipment reception, which can be determined by turning the equipment off and on, the user is encouraged to try to correct the interference by one or more of the following measures: - Reorient or relocate the receiving antenna. - Move the equipment away from the receiver. - Plug the equipment into an outlet on a circuit different from that to which the receiver is connected. - Consult the dealer or an experienced radio/television technician for additional sug- gestions. You are cautioned that any change or modifications to the equipment not expressly approved by the party responsible for compliance could void your authority to oper- ate such equipment. 当本设备超过使用时效而必须予以丢弃时,请遵循法令进行所有配 件的回收。 请勿将电池和充电电池和家用垃圾一同丢弃!请将电池和充电电池携 至当地的回收站进行回收。 让我们为环境共尽一份心力。
- 24. 2 产品概述 可拆式车架 MicroSD 记忆卡插槽 电源开关 (开/关) 电源连接器 / USB 埠 车架孔 喇叭 重置键 液晶屏幕 指示灯 (位置根据机种有所差异) HDMI输出埠 麦克风 镜头 影音输出埠 选单 回放 / 返回 档案锁定 / OK 上 下 / 关闭屏幕
- 26. 4 开始使用 开机 车用变压器插入汽车点烟器插头。 车用变压器USB接头插入主机USB孔。 MicroSD卡插入MicroSD插槽后,将电源开关右切至ON。 建议使用Class6、容量8GB以上之 MicroSD卡,本机最高支援 32GB。 使用前务必将 MicroSD卡进行格式化。 1 2 录影 发动引擎后,将会自动开机并开始循环录影。 <<录影图示>> 录影图示 影片时间 影片保留空间 目前时间 录音 选单 回放 档案锁定 关闭屏幕
- 27. 5 回放 1. 按下回放键 ( )进入拨放模式。 2. 以上下键( )选择你想要的档案类别。 3. 按OK键出现录影档案。 4. 以上下键( )选择你想要的档案。 5. 按OK键开始回放。 <<回放图示>> 返回录影模式 OK 上 下 回放 / 暂停图示 影片时间 目前录影 / 所有录影数 档案名称 档案锁定图示 选单 返回 回放 / 暂停 下一段 前一段 保留空间内的锁定档案 以下两种方法可将影片储存为锁定的唯读档。 1. 手动锁定 : 在录影状态下, 按下机台上的档案锁定键, 正在录制的档案便会存成唯读档并保存在 保留空间内 2. 自动锁定 : 当有撞击发生, 装置会启动锁定档案机制(G-sensor)。 • 当有撞击发生, 装置会发出“哔”警告声 • 荧幕上会出现“锁定档案”警示语 保留空间内容量可储存 5 个锁定档案。 在保留空间内已有5个锁定档案,荧幕会出现”保留空间已满”的警示语,此时本机仍保持 录影状态。 如需加入锁定档案,请由原先5个锁定档案变更档案属性为一般档案,得以再加入新的锁定 档案。
- 28. 6 进阶操作 設定選單項目 项目 选项 说明 循环时间 1分钟 / 5 分钟 循环时间预设每段影片长度为1分钟 / 5分钟,并于SD卡空 间不足时覆盖旧档。 摄影解析度 1080P 30fps / 720P 60fps / 720P 30fps 录音 开启 / 关闭 开启 / 关闭 录音。 碰撞自动锁定 (敏感度) 关闭 / 低 / 中 / 高 敏感度设定。 荧幕逾时 1分钟 / 5 分 钟 / 永远 开启 设定荧幕永远开启或1、5分钟后自动关闭。 *为了行车安全,“恒亮”设定只有一次性有效,当机台 重新启动后,设定值会回复为“5分钟”。 了解 LED 指示燈 LED 指示灯颜色 状态 红 录影中 绿 待机 闪烁 错误 / 警告 存儲容量 1080P/30 720P/60 720P/30 8G 80分钟 120分钟 155分钟 16G 160分钟 240分钟 310分钟 32G 320分钟 480分钟 620分钟 注 : 实际储存容量可能会因颜色饱和及场景复杂程度有高达30%的差异。
- 29. 7 回放模式下的选单 项目 选项 说明 循环播放 开启 / 关闭 重复播放所有影片。 档案属性 锁定档案 / 一 般档案 变更档案的属性由锁定档案变更为一般档案,亦可将一般 档案变更为锁定档案。 格式化功能可以删除锁有锁定及非锁定的档案。 项目 选项 说明 曝光补偿 -2~ +2 当预览画面显示太亮或太暗时,手动调整曝光补偿,以获 得较佳的效果。 按键音 开启 / 关闭 开启或关闭按键音。 音量 关闭/ 1 / 2 / 3 调整系统音量大小。 日期打印 开启 / 关闭 启用此功能会在影片中嵌入时间与日期。 时间 - 设定日期与时间。 语言 - 支援多国语系 电视系统 NTSC / PAL 将电视系统相容性设为 NTSC / PAL 交流频率 50HZ / 60HZ 设定闪烁频率为 50Hz或60Hz。 格式化 是 / 否 “格式化储存媒体。 请注意:所有在储存媒体上的档案都会消失。” 回复出厂设定 是 / 否 回复出厂预设值。请注意:所有目前设定都会被覆盖。