1. FINAL IMAGE CONCLUSION
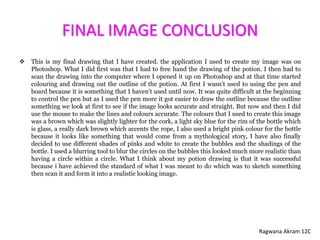
This is my final drawing that I have created. the application I used to create my image was on
Photoshop. What I did first was that I had to free hand the drawing of the potion. I then had to
scan the drawing into the computer where I opened it up on Photoshop and at that time started
colouring and drawing out the outline of the potion. At first I wasn’t used to using the pen and
board because it is something that I haven't used until now. It was quite difficult at the beginning
to control the pen but as I used the pen more it got easier to draw the outline because the outline
something we look at first to see if the image looks accurate and straight. But now and then I did
use the mouse to make the lines and colours accurate. The colours that I used to create this image
was a brown which was slightly lighter for the cork, a light sky blue for the rim of the bottle which
is glass, a really dark brown which accents the rope, I also used a bright pink colour for the bottle
because it looks like something that would come from a mythological story, I have also finally
decided to use different shades of pinks and white to create the bubbles and the shadings of the
bottle. I used a blurring tool to blur the circles on the bubbles this looked much more realistic than
having a circle within a circle. What I think about my potion drawing is that it was successful
because i have achieved the standard of what I was meant to do which was to sketch something
then scan it and form it into a realistic looking image.
Ragwana Akram 12C
2. BEFORE AFTER
Ragwana Akram 12C
This was the tool I used to
paint/colour in my potion. This
was also the only tool I have
been using the most because
majority of my potion was
based on colouring inside the
outlines.
This was the blurring tool. I
used this to blur out the
circles which are the
bubbles. The reason as to
why I have done this is
because it creates my image
to look more realistic.
This tool was used
because I had to match
the colour to my potion as
I can only use two colours
at a time however
because I am using seven
colours I am only able to
switch between black and
another colour e.g. black
and brown.
I used this button to
change the size of my
brushes this was because I
needed different sizes to
vary with the images'
outline.
This tool is the eraser. This
erases any unwanted lines
or colours. I have used this
quite a lot to make my
image look a bit neater.
I used this button here
because it had a button
which had ‘undo’ on it. The
reason why I had to use
that is because the Ctrl+Z
wasn’t working as I was on
Photoshop.
This is where I have chosen and
changed my colours for my potion.
The reason to why I have had to use
this tool was because I had a choice
to choose from more than seven
different various of shades to make my
potion look appealing.