Denture base resins ./ cosmetic dentistry training
•
23 likes•2,266 views

This document discusses denture base resins, including their history, composition, classifications, properties, and specifications. It notes that denture bases are commonly made from polymers like acrylic resins, which are chosen based on factors like availability, stability, and biocompatibility. The document outlines the various types of acrylic resins like heat-cured, self-cured, and light-cured and discusses how they have evolved over time from materials like vulcanite and wood. It also reviews the American Dental Association specifications for denture base resins and their ideal requirements.

Recommended
More Related Content
What's hot
What's hot (20)
Viewers also liked
Viewers also liked (20)
Similar to Denture base resins ./ cosmetic dentistry training
Similar to Denture base resins ./ cosmetic dentistry training (20)
More from Indian dental academy
More from Indian dental academy (20)
Recently uploaded
Recently uploaded (20)
Denture base resins ./ cosmetic dentistry training
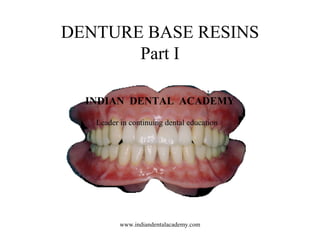
- 1. DENTURE BASE RESINS Part I INDIAN DENTAL ACADEMY Leader in continuing dental education www.indiandentalacademy.com
- 2. TABLE OF CONTENTS • INTRODUCTION • HISTORY • REVIEW OF LITREATURE • IDEAL REQUIREMENTS OF DENTURE BASE RESINS • COMPOSITION www.indiandentalacademy.com
- 3. • ANSI/ADA SPECIFICATIONS • CLASSIFICATION OF DENTURE BASE RESINS. • PROPERTIES OF DENTURE BASE RESINS • TECHNICAL CONSIDERATIONS & MANIPULATION OF DENTURE BASE RESINS. • www.indiandentalacademy.com
- 4. • STRENGHTNING OF DENTURE BASE RESINS. • CHARECTARISATION OF DENTURE BASE MATERIALS • ALLERGIC REACTIONS OF DENTURE BASE RESINS. • SUMMARY • CONCLUSION • REFERENCES www.indiandentalacademy.com
- 5. INTRODUCTION A denture prosthesis is composed of artificial teeth which are attached to the denture base.In turn the denture base derives its support from the underlying tissues or implants. Although individual denture bases may be formed from metal or metal alloys,majority of the dentures bases are fabricated using common polymers. Such polymers are chosen based on availability,dimensional stability,handling characteristics,color &compatibility with tissues www.indiandentalacademy.com
- 6. HISTORY OF DENTURE BASE RESINS 1800 : Was 200th anniversary of united states and by this time dentistry depended to a large degree of naturally available materials such as hard wood ,ivory or natural bone with teeth held by screws. 1839 :Dr Charles Goodyear discovered vulcanisation. www.indiandentalacademy.com
- 8. 1853: first vulcanite denture was fabricated 1891: vulcanite was considered as the universal material for fabrication of dentures. 1901:Dr Otto Rohm ,as a part of his Phd thesis, produced www.indiandentalacademy.com
- 10. Solid , transperent polymers of acryl acid 1927:Acryloid and Plexigum, both polymers of methyl methacrylate were produced by Rohm and Hass as molding powders. 1932:mixtures of PVC and vinyl acetate both polymers were used as denture base materials . 1936:Veronite : a poly methyl methacrylate , heat processed was used as denture base materials. www.indiandentalacademy.com
- 11. 1943:self cure resins were introduced. 1945:plastic teeth were made from resins. 1960:Dr Rafeal Bowen discovered high molecular weight monomer 1970:Light cure resins were developed. www.indiandentalacademy.com
- 12. REVIEW OF LITREATURE Alexander A.Fisher(1956):-Four patients were studied who had allergic type of dermatitis of hands and were clinically proved by patch test as allergic sensitivity to monomer.They concluded that methyl methacrylate liquid is the sensitizer and caused allergic type of reaction on skin & oral mucosa. www.indiandentalacademy.com
- 13. • DH.Anthony, FA. Peyton(1962):- evaluated the fit of dentures made from different materials& processed by different techniques.they concluded that : A) dentures processed using self cure had better fit as there were fewer processing strains. b)injection molded group of dentures showed overall accuracy of dentures www.indiandentalacademy.com
- 14. Walter H.Swartz(1966) tested the retention exerted by various dentures.The materials tested were heat cure acrylic resins processed 12hrs at 1700 F, cold cure acrylic,porcelain,aluminium. They concluded that the cast aluminium alloys were most resistant to vertical dislodgement in all tests. www.indiandentalacademy.com
- 15. Jerome C. Strain (1967):-did a clinical study of 321 denture patients with sore mouth.He concluded that a)the reaction to colored denture base materials did not differ from the reaction to pure ,clear,methyl methacrylate resin when it was implanted in laboratory animals. b)Trauma is probably one of the important causative factors in neoplastic changes associtated with denture base materials. c)the prolonged &continuous combined action of the dissolved polymer &illfitting dentures may lead to tumour formation in man www.indiandentalacademy.com
- 16. Theodore Berg et al (1967):-observed and defined the relationships between pressures involved in denture compressibility, vascular bed embarassement, comfort threshold,adaption of denture impression materials & the physiological qualities of complete dentures. They concluded that the retention & denture seal should be retention by extention rather than excessive destructive adaption to soft tissue’ www.indiandentalacademy.com
- 17. Ellesworthy Kelly(1969):-observed the flexibility of the dentures which leads to breakage of dentures. The concluded that the flexibility can be reduced by incorporating nylon, rayon or acrylic fibers. William M.Harisson BruceE.Stansbury(1970) investigated and evaluated three of more commonly used surface dentures used for repair of dentures.The experimental data found that the rounded joint is clearly superior to the rabetted joint &the butt joint. www.indiandentalacademy.com
- 18. AA. Grant , H. F. Atikson(1971) compared the dimensional accuracy of dentures produced with pour type of acrylic resin & heat processed materials. They found that the heat cure resins showed uniform vertical dimension in tooth height that can be compensated by grinding the teeth but the tooth movement in fluid resin technique were un predictable. www.indiandentalacademy.com
- 19. I.Eystein Ruyter, Svend A.Svendson(1980):- investigated the flexural properties of heat polymerised, self cure,&pour type of resins. They found that heat polymerised resins with the cross linking agent 1,4-BDMA have similar flexural properties but better than self cure resins.The self cure resins crosslinked with 1,4-BDMA has flexure properties intermediate to heat cure resins. www.indiandentalacademy.com
- 20. • Xia chun Ming, DMD, Shi Changxi, DMD, and He Weizhou (1996) • This study introduces a new rapid-processing procedure for curing polymethyl methacrylate denture base resin in an automatically controlled pressure cooker. The cooker filled with water was inflated with 6 kgf/cm2 air pressure and heated to 120 C (248 F) and maintained for 10 minutes. No significant differences were found between the new pressure cooker method and the conventional method for surface hardness and porosity (p>0.05). The pressure cooker significantly shortened polymerization time, and the polymerization is controlled automatically. www.indiandentalacademy.com
- 21. • Kenneth B. May, Jeffery R. Shotwell, Andrew Koran III, Rui-Feng Wang,(1996) • Several quick heat-cured denture base resin systems and microwave provessing resins have been introduced to provide easier and faster processing. The microwave processing method is the fastest of the heat-cured processing methods. Conventional acrylic resins processed with the microwave method seem to possess adequate physical properties, and one study indicated that a microwave acrylic resin was reasonably color stable under conditions of accelerated aging, although manufactures do not recommend using them for microwave processing www.indiandentalacademy.com
- 22. • The purpose of this study was to evaluate the color stability of seven conventional and one microwave heat-cured denture base materials processed with the microwave method. The results of this study revealed that color changes occurred after accelerated aging in heat-cured denture base resins and Acron GC microwave acrylic resins processed with the microwave method. Hy-pro and TruTone materials exhibited the least color change; Hy-pro material was the most color stable material. www.indiandentalacademy.com
- 23. • Van Ramos, Dennis A. Runyan, Loren C. Christensen(1996) • • The effect of a plasma-treated polyethylene fiber on the fracture strength of polymethyl methacrylate was evaluated in this study. Under the conditions of this experiment the treated bars showed a mean fracture strength of 12.56 MPa compared with 9.81 MPa for the untreated samples. In addition to the increased fracture strength, the treated bars also demonstrated resistance to crack propagation. The bars remained in one piece, held together throughout the compression loading by the polyethylene fiber. • www.indiandentalacademy.com
- 24. Nur Hersek, Senay Canay, Gulay Uzun, Fatih Yildiz.(1999) • • The color stability of 5 commercially available denture base acrylic resins (QC-20, Meliodent, Trevalon, Trevalon High, and Lucitone) was studied in vitro. In this study, Lucitone QC-20 acrylic resin specimens exhibited noticeable color change or staining in compliance with the NBS unit system. Staining in Meliodent, Trevalon, and Trevalon High acrylic resins were at Slight or trace levels. As the frequency of ingestion and contact of the erythosine, tartrazine, and sunset yellow food colorants with dentures was limited to only a few minutes a day, it is unlikely the colorants can stain clean acrylic resin surfaces. www.indiandentalacademy.com
- 25. • Eiichi Nagai, Kenji Otani, Yoshinori Satoh, shiro Suzuki.((2001) • This study evaluated the strength and modalus elasticity of repaired acrylic specimens reinforced with various processes. The results of this study indicate that the mechanical strength of a repaired acrylic denture base can be improved by pretreatment of the surface with methylene chloride. Woven glass fiber reinforcement with methylene chloride may most effectively minimize the recurrent fracture of repaired denture bases. www.indiandentalacademy.com
- 26. • Rafael Leonardo Xediek Consani, Saide Sarckis Domitti, simonides Consani.(2002) • Investigated differences between the dimensional stability of standardized simulated denture bases processed by traditional moist heat- polymerization and those processed by use of a new tension system www.indiandentalacademy.com
- 27. The maxillary denture bases; however, the dimensional changes were probably not clinically significant processed with the new tension packing system were statistically more dimensionally stable than those processed with the conventional acrylic resin packing method. www.indiandentalacademy.com
- 28. • Rodrigo Nunes Rached, John M. Powers, Altair Antoninha Del Bel Curry.(2004) • This study evaluated the transverse repair strength of a conventional heat-polymerized (Lucitone 199, “L”) and a microwave-polymerized (Acron MC, “A”) acrylic resin that were repaired with these same resins and with an autopolymerizing acrylic resin (Acron MC/R, “AR”). In this in vitro study, the autopolymerizing acrylic resin material exhibited repair strengths equal to the conventional heat-polymerized acrylic resins tested. Specimens made of microwave-polymerized acrylic resins exhibited the highest strength of all materials tested. www.indiandentalacademy.com
- 29. • Macro Antonio Compagnoni, Debora Barros Barbosa, Raphael Freitas De Souza, Ana Carolina Pero.(2004) • This study evaluated the effect of different microwave polymerization cycles on the porosity of a denture base resin designed for microwave polymerization. The results of this in vitro study suggest that microwave polymerization can produce denture base resin with similar levels of porosity to conventional water bath polymerized resin, thus saving processing time. www.indiandentalacademy.com
- 30. Y.Sinasi Sarac , Duguya Sarac(2005) studied the shear bond strenght of 4 acrylic resins following the use of 3 chemical solvents & to examine treated acrylic surfaces under a field emmision scanning electron microscope.they concluded that chemical treatment prior to denture base repair showed significant improvement on the bond strenght of the base materials. www.indiandentalacademy.com
- 31. • The following are the requirements of clinically acceptable denture base materials:- 1. Adequate strength and durability. 2. Satisfactory thermal properties. 3. Processing ability and dimensional stability. 4 . Good chemical stability. 5. Insolubility in and low sorption of oral fluids. 6 Absence of taste and odour www.indiandentalacademy.com
- 32. • 7. Biocompatibility. • 8. Natural appearance • 9. Color stability. • 10. Adhesion to plastics, metals and porcelain. • 11. Easy to fabricate and repair. • 12. Moderate cost. www.indiandentalacademy.com
- 33. PHYSICAL FORM AND COMPOSITION. Denture base resins are commonly supplied in two forms:- • 1. Powder and liquid form. • 2. Gel form. www.indiandentalacademy.com
- 34. • Composition of powder and liquid form of acrylics. • POWDER:- Acrylic polymer (copolymer) beads Initiator –benzoyl peroxide Opacifiers Pigments Dyes www.indiandentalacademy.com
- 35. • Dyed organic fillers • Inorganic particles • LIQUID:- .Monomer • Inhibitor • Accelator • Plasticisers • Cross linking agent www.indiandentalacademy.com
- 36. ANSI/ADA SPECIFICATIONS FOR DENTURE BASE RESINS • The ANSI/ADA specification No 12 lists the scope requirements , procedures for evaluating denture base plastics.This specification includes acrylic, vinyl, styrene polymers and mixture of any of these polymers. www.indiandentalacademy.com
- 37. • The specifications are :- • 1.The liquid should be clear as water and free from extraneous materials. • 2.the powder, plastic cake, precured blanks should be free of impurities such as dust or lint www.indiandentalacademy.com
- 38. • 3.A statisfactory denture will result when manufacturers instructions are followed. • 4.The denture base should be non porous and free fromsurface defects. • 5.The cured plastic should teke high gloss when polished. • 6The processed denture should be non toxic to healthy,normal individuals www.indiandentalacademy.com
- 39. • 7.The colour should be as specified. • 8.The plastic should be translucent. • 9.The cured plastic should not show any bubbles or voids. www.indiandentalacademy.com
- 40. • The specific requirements are :- 1.Within 5 minutes after reaching the proper consistency, indicated by a clean seperation from the walls of a glass mixing jar, the material shall hava adequate flow properties so it will intrude to a depth of atleast 0.5 mm into a 0.75mm diameter hole when a load of 500gm is placed on a plate 5mm thick and 50mmin area. www.indiandentalacademy.com
- 41. 2.The water solubility shall not be more than 0.8mg/cm.after immersion in water for 7 days at 370 c. 3.The solubility shall not be more than 0.04mg/cm2 after the water sorption specimen is dried to constant weight. 4.The resin shall show no more than slight color change when exposed to a specified ultraviolet lamp test. www.indiandentalacademy.com
- 42. CLASSIFICATION • Heat cured acrylic resins • Self cure acrylic resins • Light cure acrylic resins www.indiandentalacademy.com
- 43. Modified types of denture materials Pour type of resins :They contain smaller acrylic beads& when mixed with monomer the mix is fluid. They are also called as “fluid resins” or”hydrophillic resins”. High impact resins :they are reinforced with butadiene-styrene rubber. www.indiandentalacademy.com
- 44. Rapid heat polymerised resins: the initiator is formulated with both chemical and heat activated initiators with out the porosities that one might expect. www.indiandentalacademy.com
- 45. Properties of denture base resins www.indiandentalacademy.com
- 55. DENTURE BASE RESINS (PART II) www.indiandentalacademy.com
- 56. Chemistry of denture base resins Monomers may be joined via one of two types of reactions: 1)Addition polymerization. 2)Condensation polymerization. www.indiandentalacademy.com
- 57. Addition polymerization: is used to describe formation of chains of linked molecules, monomer molecules join to form polymer chains that can be linear or cross-linked macromolecules. If different monomers (Comonomers) are joined, copolymer are formed. Acrylic polymers set by this mechanisms. www.indiandentalacademy.com
- 58. • Addition polymerization occurs in three main stages • Initiation • Propagation • Chain transfer • Termination www.indiandentalacademy.com
- 59. • Initiation This first step requires input of heat, light or chemical energy in order to form free radicals [chemical groups with unshared electrons] by opening unsaturated (double or triple) bonds in the monomer molecules. www.indiandentalacademy.com
- 63. • The free radicals join other free radicals in adjacent monomer molecules and linkage occurs . • In heat activated resins heat is the activator. heat decomposes benzoylperoxide to two free radicals which react with the monomer nolecules to initiate chain growth. www.indiandentalacademy.com
- 64. If any initiators are present they react with the free radicals which increase the length of induction period. www.indiandentalacademy.com
- 65. In self cure resins the amine reduces the temperature required to break the initiator into free radicals at mouth temperature. The amine complex with benzyol peroxide reduces the thermal energy required to split into free radicals. www.indiandentalacademy.com
- 66. In light cure resins the photons from light activate the initiator to produce free radicals. www.indiandentalacademy.com
- 67. Propagation: The resulting free radical monomer complex then acts as new radical center when it approches another monomer to form dimer, which also become free radical.this inturn add to large number of ethylene molecules so that polymerisation continues. www.indiandentalacademy.com
- 70. Chain transfer:in this process ,the free radical of a growing chain is transferred to another molecule and a free radical further is created. www.indiandentalacademy.com
- 73. • III. Termination Propagation continues until no free radicals are available either because all have been joined or because there are no adjacent linkages available. www.indiandentalacademy.com
- 74. • Step-Growth Polymerization • The reactions that produce step-growth polymerization can progress by any of the chemical reaction mechanisms that join two or more molecules in producing a simple, nonmacromolecular structure www.indiandentalacademy.com
- 75. • In step-growth polymerization, a linear chain of repeating mer units is obtained by the stepwise intermolecular condensation or addition of the reactive groups in which bifunctional or trifunctional monomers are all simultaneously activated, as opposed to the activation of one monomer at a time in chain-growth addition polymerization www.indiandentalacademy.com
- 76. Heat polymerising denture base resins. • Compression molding technique: • Preparation of the Mold • At this stage, the master cast and completed tooth arrangement are removed from the dental articulator. • The master cast is coated with a thin layer of separator to prevent adherence of dental stone during the flasking process.www.indiandentalacademy.com
- 77. • The lower portion of a denture flask is filled with freshly mixed dental stone, and the master cast is placed into the mixture of the dental stone is contoured to facilitate wax elimination, packing and deflasking procedures. Upon reaching its initial set, the stone is coated with an appropriate separator. www.indiandentalacademy.com
- 78. • The lower portion of a denture flask is filled with freshly mixed dental stone, and the master cast is placed into the mixture.. • The dental stone is contoured to facilitate wax elimination, packing and deflasking procedures. Upon reaching its initial set, the stone is coated with an appropriate separator. www.indiandentalacademy.com
- 79. • The upper portion of the selected denture flask is then positioned atop the lower portion of the flask. • The dental stone is poured into the denture flask. • Care is taken to ensure that the investing stone achieves intimate contact with all external surfaces. • The investing stone is added until all surfaces of the denture flask. www.indiandentalacademy.com
- 80. • Care is taken to ensure that the investing stone achieves intiamate the tooth arrangement and denture base are completely covered. • Incisal and occlusal surfaces are minimally exposed to facilitate subsequent deflasking procedures. • The stone is permitted to set and is coated with separator. www.indiandentalacademy.com
- 81. • At this point, an additional increment of dental stone is mixed, and the reminder of the flask is filled. • The lid of the flask is gentally taped into place, and the stone is allowed to set. www.indiandentalacademy.com
- 82. • Upon completion of the setting process, the record base and wax must be removed from the mold. • To accomplish this, the denture flask is immersed in boiling water for 4 min. the flask is then removed from the water, and the appropriate segments are separated. www.indiandentalacademy.com
- 83. • The record base and softened wax remain in the lower portion of the denture flask, while the prosthetic teeth remain firmly embedded in the investing stone of the remaining segment. • The record base and softened wax are carefully removed from the surface of the mold www.indiandentalacademy.com
- 84. • The record base and softened wax are carefully removed from the surface of the mold • . Residual wax is removed from the mold cavity using wax solvent. • The mold cavity subsequently is cleaned with a mild detergent solution and rinsed with boiling water. www.indiandentalacademy.com
- 85. • Selection and Application of a Separating Medium: • The next step in denture base fabrication involves the application of an appropriate separating medium onto the walls of the mold cavity. This medium must prevent direct contact between the denture base resin and the mold surface. Failure to place an appropriate separating medium may lead to two major difficulties:www.indiandentalacademy.com
- 86. • 1) If water is permitted to diffuse from the mold surface into the denture base resin, it may affect the polymerization rate as well as the optical and physical properties of the resultant denture base • (2) If dissolved polymer of free monomer is permitted to soak into the mold surface, portions of the investing medium may become fused to the denture base. These difficulties often produce compromises in the physical and aesthetic properties of processed denture bases. www.indiandentalacademy.com
- 94. • Polymer-monomer ratio. • The powder consists of prepolymerized poly (methyl methacrylate) beads, commonly referred to as polymer. The liquid contains non polymerized methyl methacrylate and therefore is termed the monomer. • When the powder and liquid components are mixed in the proper proportions, a doughlike mass results. www.indiandentalacademy.com
- 95. • The accepted polymer-to-monomer ration is 3:1 by volume. This provides sufficient monomer to thoroughly wet the polymer particles, but this ratio does not contribute excess monomer that would led to increased polymerization shrinkage • Using a 3:1 ratio, the volumetric shrinkage may be limited to approximately 6% (0.5%) linear shrinkage). www.indiandentalacademy.com
- 96. • Polymer- Monomer Interaction • When monomer and polymer are mixed in the proper proportions, a workable mass is produced. Upon standing, the resultant mass passes through five district stages • . These stages may be described as (1) sandy, (2) stringy, (3) doughlike, (4) rubbery or elastic, and (5) stiff www.indiandentalacademy.com
- 97. • During the sandy stage, little or no interaction occurs on a molecular level. Polymer beads remain unaltered, and the consistency of the mixture may be described as “coarse” or “grainy”. • Later, the mixture enters a stringy stage. During this stage, the monomer attacks the surfaces of individual polymer beads. Some polymer chains are dispersed in the liquid monomer. www.indiandentalacademy.com
- 98. • Subsequently, the mass enters a doughlike stage. Clinically, the mass behaves as a pliable dough. • It is no longer tacky and does not adhere to the surfaces of the mixing vessel or spatula. • The physical and chemical characteristics exhibited during the latter phases of this the mold cavity during the latter phases of the doughlike stage. www.indiandentalacademy.com
- 99. • These polymer chains uncoil, thereby increasing the viscosity of the mix. This stage is characterized by “stringiness” or “stickiness” when the material is touched or drawn apart www.indiandentalacademy.com
- 100. • Following the doughlike stage, the mixture enters a rubbery or elastic stage. • Monomer is dissipated by evaporation and by further penetration into remaining polymer beads. • In clinical use, the mass rebounds when compressed or stretched. Because the mass no longer flows freely to assume the shape of its container, it cannot be molded by conventional compression techniques. www.indiandentalacademy.com
- 101. • Dough-Forming Time • The time required for the resin mixture to reach a doughlike stage is termed the dough-terming time. • American National Standards Institute/American Dental Association (ANSI/ADA) Specification NO.12 for denture base resins requires that this consistency be attained in less than 40 min from the start of the mixing process. In clinical use, the majority of resins reach a doughlike consistency in less than 10 min. www.indiandentalacademy.com
- 102. • Working Time • Working may be defined as the time that a denture base material remains in the doughlike stage. This period is critical to the compression molding process. ANSI/ADA Specification No.12 requires the dough to remain moldable for at least 5 min. www.indiandentalacademy.com
- 103. • Packing • The placement and adaptation of denture base resin within the mold cavity is termed packing. This process represents one of the most critical steps in denture base fabrication. It is essential that the mold cavity be properly filled at the time of polymerization. www.indiandentalacademy.com
- 104. • The placement of too much material, that is, “overpacking,” leads to a denture base that exhibits excessive thickness and resultant malpositioning of prosthetic teeth. Conversely, the use of too little material, that is, “underpacking,” leads no noticeable denture base porosity. To minimize the likelihood of overpacking or underpacking, the mold cavity is packed in several steps www.indiandentalacademy.com
- 105. • A fresh polyethylene sheet is placed between the major portions of the flask, and the flask assembly is once again placed in the press. Another trial closure is made. In most instances, the flask can be closed entirely during the second trial closure. Care should be taken not to apply excessive force to effect closure. Trial closures are repeated until no flash is observed. www.indiandentalacademy.com
- 106. • A fresh polyethylene sheet is placed between the major portions of the. • When flash is no longer apparent, definitive closure of the mold may be accomplished. • During the final closure process, no polyethylene sheet is interposed between the major mold sections. • The mold sections are properly oriented and placed in a flask press.the flask is transferred to the flask carreir which maintains pressure on the flask during processing.www.indiandentalacademy.com
- 111. Injection molding technique. In this technique one half of the flask is filled with the dental stone & the master cast is settled into the stone. The sprues are attached to the denture base. The remaining portion of the flask is seated & the investment is completed. www.indiandentalacademy.com
- 112. The flask is placed into the carrier that maintains the pressure on the assembly during resin introduction & processing. Upon completion of these steps the resin is injected into the mold cavity. The resin is mixed & introduced into the mold cavity at room temperature. www.indiandentalacademy.com
- 113. The flask is then placed in the water bath for polymerisation . As the material polymerises ,additional resin is introduced into the mold cavity. This process ofsets the effects the polymerisation shrinkage. www.indiandentalacademy.com
- 114. Upon completion the denture is recovered & finished. Available data & clinical information indicate dentures processed by thi s method may provide slightly improved clinical accuracy. www.indiandentalacademy.com
- 119. Polymerisation procedure. Benzyol peroxide when heated around 600 c decompose to yeild neutral unpaired electrons. These are free radiclals. Each free radical react with the monomer molecule to initiate chain growth polymerisation. www.indiandentalacademy.com
- 120. Since the reaction also posseses unpaired electrons, the additional monomer molecule become attached to individual polymer chains. This process is terminated by 1)Coupling of two chains. 2)Transfer of hydrogen ions from one chain to other. Hence heat is the activator that decomposes benzoyl peroxide &benzyol peroxide is the initiator. www.indiandentalacademy.com
- 121. Temperature rise: The polymerisation of denture base resin is exothermic, the amount of heat effects the properties of denture base resins. The temperature of the resin lags during initial stages of polymerisation because resin occupies the central portion of the flask. www.indiandentalacademy.com
- 122. The dental stone & resin is poor thermal conductors the heat of reaction cannot be dissipated. www.indiandentalacademy.com
- 123. Internal porosity. The polymerization is exothermic, if the the temperature of resin exceeds the boiling temperature the unreacted monomer may boil which leads to internal porosities usually not seen on the surface of the dentures. www.indiandentalacademy.com
- 124. As resin is poor thermal conductor heat generated in the thick portions cannot be dissipated leading to internal porosities of denture. www.indiandentalacademy.com
- 125. Polymerisation cycle The heating process used to control is termed as polymerisation cycle. Research has lead to the development of guidelines for polymerisation that would decrease the internal porosities. www.indiandentalacademy.com
- 126. 1) This technique involves processing dentures in constant temperature in a water bath at 740 c for 8hrs with no terminal boiling treatment. 2) Processing the dentures at 740 c for 8hrs & increasing the temperature to 1000 c for 1hr. www.indiandentalacademy.com
- 127. 3)Processing the resin at 740 c for 2hrs & at 1000 c for 1hr. Following completion the flask is cooled slowly to room temperature, if rapidly cooled causes warpage of denture base because of differences in the thermal contraction of resin & investing medium. www.indiandentalacademy.com
- 128. The flask should be bench cooled for 30mins, followed by cool tap water for 15mins. www.indiandentalacademy.com
- 129. Polymerisation via microwave energy. This technique involves specially formulated resin & non metallic flask. A conventional microwave oven is used for this polymerisation. The advantage of this technique is speed of polymerisation &similar levels of porosities. (J Prosthet Dent2004;91:281-5)www.indiandentalacademy.com
- 131. Acron GC material cure by microwave method exhibited good color stability (J Prosthet Dent1996;76:581-9) www.indiandentalacademy.com
- 132. As the temperature rises above 700 c the temperature of the resin increases &decomposition of the benzyol peroxide is increased. This leads to increased rate of polymerisation which inturn increases in the exothermic heat. www.indiandentalacademy.com
- 133. Effect of auxillary materials on denture resins. Number of materials are used in making the dentures which may effect the final properties & function of denture. They are: www.indiandentalacademy.com
- 134. Plaster & dental stone: The thermal coefficient of expansion or contraction of dental stone is different of that of dental stone this creates residual stresses in the acrylic as it cools .These stresses are released after the dentures are processed & deformation or crazing may result. www.indiandentalacademy.com
- 135. Impression materials : The presence of zinc oxide eugenol on the cast from the impression will function as an inhibitor in polymerisation of resins. Waxes: Baseplate wax that is not removed from the crown portion of the teeth prevents the adherance of the teeth to the resins. www.indiandentalacademy.com
- 136. Mold seperators: Care should be taken to aviid coating of mold seperators to teeth as they interfere with bond between denture base & the teeth. www.indiandentalacademy.com
- 137. Denture cleansers: Denture cleansers have pronounced effect on the plastic dentures as they cause scratches & wear of the dentures, The use of soap water produced little effect on dentures. A solution containing 1tsp of hypochlorite(clorox) & 2tsp of glassy phosphate(colgon) in half glass of water is recommended for cleaning of dentures. www.indiandentalacademy.com
- 138. Chemically accelerated denture base resins. Compression molding technique: The principle difference between the heat cure acrylics & self cure acrylics is that of chemical reaction is accelerated chemical accelerator such as amines rather than heat. www.indiandentalacademy.com
- 139. The amine accelerator reacts with the peroxide reactor at room temperature & sufficient free radicals are produced to initiate the polymerisation reaction.Except for initation all the reactions are same as that heat cure resins.The reaction is exothermic. www.indiandentalacademy.com
- 140. It is considered that the polymerisation is not complete as is heat cure resins. The residual monomer acts as a plasticiser which decreases the strenght of the denture &residual monomer acts as a irritant. www.indiandentalacademy.com
- 141. Technical considerations: self cure resins are usually molded with compression techniques therefore mold preparation & resin packing is same as those described for heat cure resins. www.indiandentalacademy.com
- 142. Polymer & monomer are supplied in powder & liquid form. They are mixed according to the manufacturers directions to attain a doughy stage. The working time is shorter than heat cure resins so attention should be paid to consistency of resins. www.indiandentalacademy.com
- 143. To increase the working time refrigeration of the liquid mass /mixing vessel is done. Mold preparation& packing is same as heat cure resin. Due to minimal working time more than two trial closures cannot be done. Following final closure of the denture flask,pressure should be maintained throught the polymerising period. www.indiandentalacademy.com
- 144. Initial hardening occurs within 30min of final flask closure. However to ensure sufficient polymerisation,the flask is held under pressure for 3hrs. Resins polymerised via chemical activation generally display 3% to 5% of free monomer. www.indiandentalacademy.com
- 145. Fluid resin technique: this technique employs a pourable , chemically activated resin for fabrication of dentures. The resin is supplied in powder & liquid form, when mixed yeild a low viscosity resin. After tooth arrangement is accomplished, it is sealed to the cast a & placed in a specially designed flask. www.indiandentalacademy.com
- 146. The flask is filled with reversible hydrocolloid investment material & rthe assembly is cooled. Following gelation ,the cast with teeth arrangement is removed from the flask. At this stage the, sprues& vents are cut from external surface of the flask to the mold cavity. Wax is eliminated using hot water ,the teeth are retrieved & placed in positions within the mold. www.indiandentalacademy.com
- 147. The resin is mixed as per as manufacturers direction & poured into the mold via the sprue channels. The flask is placed under pressure for 30- 45mins. Following completion the denture is retrieved &polished. www.indiandentalacademy.com
- 154. Advantages: 1.Improved adaptation to underlying soft tissue, 2.Decreased probability of damage to teeth & denture during deflasking. 3.Reduced material costs. 4.Simple technique. www.indiandentalacademy.com
- 155. Disadvantages: 1.Shifting of teeth 2.Air entrapment within denture base. 3.Poor bonding between denture teeth &denture base. 4.Technique sensitivity. www.indiandentalacademy.com
- 156. Light activated denture base resins. The material used is described as a composite having matrix of urethane dimethacrylate, silica& high molecular weight acrylic monomers. Visible light is the activator & camphorquinone is used as initiator. www.indiandentalacademy.com
- 157. The material is supplied as a single sheet or rope forms & is packed in light-proof pouches. Opaque investing media prevents passage of light, so they cannot be flasked in conventional manner. After try in of dentures,a roll of light activated acrylic is placed on the occlusal surfaces of the teeth to form a template with three references. www.indiandentalacademy.com
- 158. The template is cured in light chambers for 10mins. The teeth are removed from the trial dentures, wax is eliminated using high intensity light bulbs. The teeth are arranged on the template. Master cast is coated with the seperating medium. www.indiandentalacademy.com
- 159. A sheet of light cure resin is adapted on the cast and trimmed to the boxing edge. The base is polymerised in the light curing chamber. A strip of resin is placed on the under side of the teeth after they have been coated with a bonding agent. www.indiandentalacademy.com
- 160. The teeth are repositioned on the denture base using the template. The teeth are fixed in position by polymerisation in the light cure chamber. The anatomical portion is sculpted & the final shape of the denture is developed. www.indiandentalacademy.com
- 164. Sterenghtning of denture base materials. As complex stresses act on the denture bases in the oral cavity the denture bases shuld have enough strength to resist fracture. www.indiandentalacademy.com
- 165. The strength of the denture base can be increased by: Decreasing the free monomer content in the final dentures. To accomplish this the dentures should be boiled in water for 3hrs www.indiandentalacademy.com
- 166. By using high impact denture base resins. Reinforcing denture base resins using woven metal &glass metal(JPD2001;85;496-500) Curing in microwave increases the strength of denture base resins(JPD2004;92:79-82) Fine polymer beads contributes to the greater fatigue strength &that even stronger results may be obtained if the polymer beads are fine but not if uniform size (JPD1969;21(3):257-64) www.indiandentalacademy.com
- 167. The foreign particles act as stress concentrators &results in fracture.Hence the polymers should be free of impurities. (JPD1969;21;257-264) Heat polymerising resins with cross linking agents increases the flexure strenght of resins (JPD1980;43(1);95-104. www.indiandentalacademy.com
- 168. Addition of whiskers of alumina , silicon carbide, boron nitride &corbon fibres are added to improve the strenght of denture base resins. www.indiandentalacademy.com
- 169. Tissue compatibily of denture base resins. Tissue compatibility or allergic reactions of skin and oral mucosa are reported. Allergy is cused due to free monomer content of the denture base. Allergic reactions to heat cure dentures occur less frequently than in cold cure resins; www.indiandentalacademy.com
- 170. The effect ot methyl methacrylate monomer vapours on respiration & circulation in rats was studied. It showed that MMA resulted in abnormal respiratory patterns,increased systolic BP with increased RR &heart rate. (JPD1982;48;344-37) www.indiandentalacademy.com
- 171. Four patients were studied who had allergic type of dermatitis of hands and were clinically proved by patch test as allergic sensitivity to monomer.They concluded that methyl methacrylate liquid is the sensitizer and caused allergic type of reaction on skin & oral mucosa. (JPD1956;6:596-603) www.indiandentalacademy.com
- 172. Aclinical study of 321 denture patients with sore mouth.He concluded that a)the reaction to colored denture base materials did not differ from the reaction to pure ,clear,methyl methacrylate resin when it was implanted in laboratory animals. www.indiandentalacademy.com
- 173. b)Trauma is probably one of the important causative factors in neoplastic changes associtated with denture base materials. c)the prolonged &continuous combined action of the dissolved polymer &illfitting dentures may lead to tumour formation in man (JPD1967;18:465-467 www.indiandentalacademy.com
- 174. Characterization of denture base. www.indiandentalacademy.com
- 175. Visible soft tissues simulated by denture bases should include the unattached (marginal) gingiva, the attached gingiva, the gingival papillae, the alveolar mucosa, and the frenum attachments. www.indiandentalacademy.com
- 176. Papillae and the attached and unattached gingiva are described as being coral pink in the Caucasian, although there is much variation in the shade. Physiologic pigmentation caused by melanin-containing cells is a common finding in the gingival tissues of non- Caucasians www.indiandentalacademy.com
- 178. Hence charectarisation & tinting of the denture base is necessary for the natural appearance of the denture base. www.indiandentalacademy.com
- 179. Charecterization of denture base is done by incorporating rugea areas,gingival sulcus, interdental papillae etc., & by incorporating the colors & shades of the natural oral tissues. www.indiandentalacademy.com
- 181. Several techniques are put forward to achive charecterisation of denture base to achieve more natural appearance. www.indiandentalacademy.com
- 182. SIFT-IN technique : This technique is proposed by Pound in 1951. www.indiandentalacademy.com
- 183. PROCEDURE Usually, five stains or tinting resins were adequate to characterize dentures. The stains used were Kayon denture stains(Kay-see manufacturing co.) www.indiandentalacademy.com
- 184. H, basic color (light pink as in attached gingival) F, light red A, medium red, use cautiously E, purple, use sparingly in most dentures B, brown, used for patients with heavy gingival pigmentation www.indiandentalacademy.com
- 186. The resin used was Natural Coe-Lor denture resin.(Coe Labs,inc.,Chicago.) www.indiandentalacademy.com
- 188. 1. When waxing the denture, use care in carving appropriate contours on the denture base. Skillful contouring is probably more important for esthetics than tinting. Application of stains is related to carved contours 2. Flask and boil out of the denture, paint it with tinfoil substitute and allow to dry. www.indiandentalacademy.com
- 189. 3. Modify a glass dropper by heating and drawing to create a smaller orifice and better monomer control. Use heat-curing monomer to wet the resin. www.indiandentalacademy.com
- 190. 4. Sift H resin over the facial aspect of the flasking stone in the region occupied by the attached gingival and saturate it with monomer. Tint half the denture, then tint the other half. www.indiandentalacademy.com
- 192. 5. Sift a light coat of F over the H, and extend the F higher on the flange. www.indiandentalacademy.com
- 193. 6.Sift E sparingly on the area of the attached gingival/mucosa junction and saturate it with monomer. Do not overwet the resin, or it may pool in the lower gingival areas. www.indiandentalacademy.com
- 194. 7.Sift A higher on the flanges to the borders of the denture. Use care, since A is red. www.indiandentalacademy.com
- 196. 8. After tinting one side of the denture, complete the other side in the same manner. Continually refer to the tinted side for comparison to avoid a pronounced difference color and distribution of the tinting resin www.indiandentalacademy.com
- 197. 9. Place a plastic sheet over the tinted flask, and allow it to set for 15 to 20 minutes before packing the denture base. If the denture is packed too soon, the tinting resin can be squeezed out of the mold. • 10. Cure the denture and finish and polish it in the usual manner www.indiandentalacademy.com
- 199. The above technique describes the tinting of the denture base without pigmented oral tissues. www.indiandentalacademy.com
- 200. This method involves use of brown & purple resins for those with pigmented oral tissues. www.indiandentalacademy.com
- 201. • PROCUDURE 1. Sift F resin over necks of teeth and saturate with monomer. This should be a very thin layer. www.indiandentalacademy.com
- 203. 2. Sift a layer of brown resin over the F resin. Take care to correlate the thickness of the layer to obtain desired intensity of the brown tint. www.indiandentalacademy.com
- 205. 3. Place red fibers above the mucogingival junction on attached mucosal regions and sift A resin over the fibers www.indiandentalacademy.com
- 207. 4. Add E resin to mucosal areas to create a mottled or scattered pattern. A slight amount of yellow can be used as a highlighter over the root eminences. Saturate with monomer 5. Completed denture simulates color and texture of natural tissue www.indiandentalacademy.com
- 209. • Disadvantage • The principal problem with this technique is related to poor results because of improper application of the tinting resin. www.indiandentalacademy.com
- 210. • It is important to note that the brown gingival colors can be made more or less intense with a variation of the thickness of the application. • The procedure must not be done hastily or in a slipshod manner. www.indiandentalacademy.com
- 211. • It is important to overlay each addition of tinting resin to produce a gradual color change, rather than a striped appearance. • Experience is very important in achieving an acceptable result www.indiandentalacademy.com
- 212. Characterization of dentures using self cure resins www.indiandentalacademy.com
- 213. • Previous color characterization techniques have generally involved applying gingival stains to the gingival surfaces in the flask after boil-out. www.indiandentalacademy.com
- 214. • Applying stains to the gingival surfaces in the flask before packing has a major disadvantage. If any reshaping of these surfaces is required after processing, the stains are lost in finishing and in polishing www.indiandentalacademy.com
- 215. • Custom staining can be done quickly and requires the following armamentarium www.indiandentalacademy.com
- 216. • Denture tinting chart • Soft tissue shade guide • a #6 camel hair brush • Acrylic resin stains or shade modifiers in a variety of colors including red, brown and black. • Dappen dishes • Pressure pot or a light curing unit for curing the stains www.indiandentalacademy.com
- 217. Denture tinting chart • A simple method of charting is needed to record observations. The denture tinting chart below may be reproduced and used to provide instructions for the dental laboratory. www.indiandentalacademy.com
- 218. • AG = Attached Gingiva Shade Light reddish pink • AM = Alveolar Mucosa Shade Reddish pink B = Blanched areas over roots Shade Pale pink F = Frenum Attachments Shade Red stain • P = Papillae Shade Light reddish pink www.indiandentalacademy.com
- 219. Soft tissue guide. • A soft tissue shade guide may be easily made by removing the teeth from an old shade guide and replacing them with processed buttons of acrylic resin stain colors and denture base colors www.indiandentalacademy.com
- 220. • The custom shade guide includes tabs of mild, moderate and heavy Coe-Lor denture resin (GC America Inc., Chicago, IL); and tabs of resin shade modifiers in pale pink, tan, brown, purple, red and black www.indiandentalacademy.com
- 221. • The soft tissue shade guide is used to select a denture base material which is most representative of each patient's tissues. This is done at the appointment when the artificial teeth are selected. Using this same shade guide, other tissue colors and unusual characteristics, i.e., blotches of melanin, are also recorded on the denture tinting chart. www.indiandentalacademy.com
- 222. Stippling the denture base • Stippling of the areas representing the attached gingiva may be accomplished in a variety of ways but the blow-wax method is preferred herein. www.indiandentalacademy.com
- 223. • A strip of masking tape is placed over the artificial teeth and marginal gingiva. Another strip of masking tape is placed over the alveolar mucosa, leaving the band of attached gingiva exposed www.indiandentalacademy.com
- 224. • The result is natural looking, positive stippling which seems to collect less debris and calculus, and is easier to clean than the indentations made by negative stippling techniques www.indiandentalacademy.com
- 225. • If the positive stippling is to be preserved in the finished denture, care must be taken in waxing the denture to the proper thickness and in finishing and polishing the denture after processing www.indiandentalacademy.com
- 226. • Newer, autopolymerizing and light-cured shade modifiers are cadmium-free and are preferred. When the the denture has been processed in the appropriate shade of denture base material, it is contoured and smoothed with an acrylic bur but not polished. • Custom tinting is done at this time. An example of a typical procedure for a Caucasian is as follows:www.indiandentalacademy.com
- 227. • Place monomer and colored powders in different dappen dishes. • Brush monomer on surfaces to be tinted. • Wet brush and pick up increments of pale pink powder (or gingival toner) and apply to the blanched areas over root prominences. www.indiandentalacademy.com
- 228. • Clean the brush and place red stain on the alvoelar mucosa and frenum attachments. • The unattached and attached gingiva and the papillae remain as unstained denture base material. • Keep stains moist with the monomer during this time to prevent crystallization. www.indiandentalacademy.com
- 229. • Cure the acrylic resin stains in the pressure pot or light-curing unit according to the manufacturers instructions. www.indiandentalacademy.com
- 231. • The stains used are:Kayon Denture Stains, Kay See Dental Mfg. Co., Kansas City, MO. • The self cure resin used are :Palamed Acrylic ShadeModifiers, Heraeus Kulzer, Irvine, CA. www.indiandentalacademy.com
- 232. Characterization using photo cured resins • The light cured resins used are:Dentacolor creactive Photocuring Colorfluids, Heraeus Kulzer, Irvine, CA . www.indiandentalacademy.com
- 233. • Previous color characterization techniques rarely recommended surface staining of finished dentures with autopolymerizing acrylic resin stains because of the lack of color stability and the lack of abrasion resistance of these stains www.indiandentalacademy.com
- 234. • In this technique, surface staining of finished dentures is possible because of clear, light-cured resin coating. www.indiandentalacademy.com
- 235. • The clear coating provides a hard, high gloss which makes the polishing of dentures unnecessary. • The coating seals the surface which promotes the color stability of the base and the stains. • Abrasion resistance of the denture base and custom staining should be greatly improved . www.indiandentalacademy.com
- 236. • It is claimed that the coating render the denture more wettable and retentive, and that urethane coatings may prevent allergic responses to poly-methyl methacrylate; but these claims cannot be confirmed. www.indiandentalacademy.com
- 237. • The technique is as follows: • Lightly sand or sandblast the unpolished denture avoiding stained areas, then clean with detergent solution and dry with oil- free air. • Using a soft clean brush, apply the coating in a thin even film, painting in one direction only to avoid air bubbles. Do not brush a second time. www.indiandentalacademy.com
- 238. • Polymerize in the manufacturer's laboratory light curing unit according to instructions. www.indiandentalacademy.com
- 239. Technique for packing & staining complete or partial dentures. This technique was described by Howard B.Jhosnon (JPD1956:6(2):154-58) www.indiandentalacademy.com
- 240. The technique allows the operator to observe his results while the staining the resin, and it avoids the danger of crazing acrylic resin teeth by the monomer as the stains are applied. Also it prevents the difficulty of having the stone core adhere to the acrylic resin teeth at the gingival crevice if the monomer contacts the teeth. www.indiandentalacademy.com
- 241. TECHNIQUE The denture is waxed-up and contoured to reproduce the buccal and labial anatomy as accurately as possible. The labial flange must not be waxed too thick as it cannot be thinned down after the denture is processed. (The stained resin would be scraped or polished away). www.indiandentalacademy.com
- 242. The wax pattern of the flange must have a stippled effect over the buccal and labial surfaces. Stippling may be accomplished by tapping the wax with a brush with stiff, short bristles, or by crumpling tin foil into a ball and pressing it against the softened surface of the wax .The wax should be flamed gently after stippling to round off the sharp points. www.indiandentalacademy.com
- 243. • The first half of the flasking procedure is carried out in the usual manner. • Separating medium is applied and a core of stone is painted over the labial and buccal portions of the wax pattern and the teeth to a depth of one-eighth inch. • This stone will record every detail in the pattern, including the stippling. www.indiandentalacademy.com
- 244. • A separating medium is applied to the core and the investing is completed in the usual manner. www.indiandentalacademy.com
- 245. • The wax in the flask is boiled out and while the flask is still hot, the cast and the stone core are pained with a tin-foil substitute. • After the flask has cooled to room temperature, a quarter-inch groove is cut around the labial portion of the land, about 3 mm, from the pattern of the flange . www.indiandentalacademy.com
- 247. • This moat is to allow any excess acrylic resin to press into it, rater than to prevent complete closure of the flask. • A sheet of rubber dam is laid over the top half of the flask covering the teeth and all of the investing stone. • The acrylic resin is placed in the top half of the flask so that the rubber dam is between the teeth and resin www.indiandentalacademy.com
- 249. • The trial closures are made. • The flask is opened carefully and usually the resin will remain attached to the cast in the bottom half of the flask. If it does not, the resin and the rubber dam are removed from the top half of the flask and placed in position on the cast. Then the rubber dam is removed. www.indiandentalacademy.com
- 250. • With the acrylic resin in place on the cast in the bottom half of the flask, the portion of the resin to be stained is visible. • The teeth remain in the top half of the flask because they were separated from the resin during the trial packing by the sheet of rubber dam.www.indiandentalacademy.com
- 251. • The stains used are the colors suggested by Pound except that yellow is substituted for white, as recommended by Hardy. • The stains are dusted into the desired positions from their special containers • After the powder is placed (opposite four teeth at a time) it is wetted with monomer from an eye dropper with a 19 gauge needle attached. www.indiandentalacademy.com
- 252. • The stain should be approximately 0.5 mm. in thickness. This small addition will not cause the mold to be overpacked. www.indiandentalacademy.com
- 255. • The stone in the top half of the flask is painted with a second coat of a tin-foil substitute. The flask is closed carefully in such a way that the stained portion of the resin does not scrape on the stone of the top half of the mold. • The resin is cured in the usual manner, separated and a minimum of polishing is done . www.indiandentalacademy.com
- 256. Esthetics & the denture base Donald F. kemnitizer (JPD 1956;6(5):603-15) www.indiandentalacademy.com
- 257. Natural denture bases are obtained by (1) an esthetic wax-up which re- produces the contours of oral anatomy lost with extraction of teeth and alveolar resorption. (2) staining these contours to give them a vital appearance. One is of little value without the other. www.indiandentalacademy.com
- 258. • The structures included in waxing the maxillary are : the buccal and labial frenula, the gingival margin (smooth surface), the attached gingivae ( stippled surface), the interdental papillae, the root surfaces. • The incisive papilla, the rugae, the lingual margin proximal to posterior teeth, and the contour on approximation with the anterior teeth are included on the lingual or palatal surfaces. www.indiandentalacademy.com
- 259. • Rugae- the thickness of wax on the hard palate is reduced until the color of the cast just commences to become apparent through it. The tin-foil rugae pattern made earlier is placed in position and its edges are sealed with a warm spatula. The reduction of wax until the cast color is visible through it creates minimal impingement on the tongue space by the vault surfaces www.indiandentalacademy.com
- 261. • Base-Anterior Teeth- A common error in contouring palatal surfaces is burying the cingula of anterior teeth in the acrylic resin. The lingual surfaces of the anterior teeth should be given a natural cingulum form and lingual anatomy by contouring the wax adjacent to them . www.indiandentalacademy.com
- 262. • Base-Posterior Teeth- The maxillary bone structure of skulls shows a moderate thickness of alveolar process lingual to the teeth (in fact, it is thicker than that on the buccal side). This is recreated in the denture by leaving 0.5 to 1 mm. of buccolingual thickness of the wax alveolar crest between the teeth and the lateral alveolar processes during wax-up. www.indiandentalacademy.com
- 263. • Frenula: A small amount of wax melted on the fine end of the spatula is drawn from the fold toward the marginal termination point. Wax bulk will be greatest where the spatula is first applied and minor carving to give the frenula definition is all that is done. www.indiandentalacademy.com
- 266. • Stippling- The surface of natural attached gingiva appears rough when it is wiped dry. This stippled effect is produced on the denture by the use of a stiff-bristled toothbrush, trimmed to one shortened cross-row of bristles so that its application can be will controlled. The stippling terminates just posterior to the last tooth in the arch www.indiandentalacademy.com
- 268. • The width of the stippled area is optional but 1 cm. is the maximum width ever necessary. Stippling acts to blend the individual anatomic components and causes an uneven light refraction, which is an important factor contributing to naturalness. www.indiandentalacademy.com
- 269. • Gingival Sulcus-The sulcus is produced by inserting a explorer tip or similar sharp instrument between the tooth and the wax at the gingival margin and moving it mesiodistally along this junction. www.indiandentalacademy.com
- 271. • All components of the form having been completed the wax surfaces are buffed with a silk cloth, repeatedly dipped in cool water to produce a hard, polished surface on the wax. www.indiandentalacademy.com
- 272. Characterization of dentures • Hobart H. proctor • JPD1953;3(5):339-49 www.indiandentalacademy.com
- 281. COE-LOR™ RTC SELF-CURED DENTURE BASE RESIN www.indiandentalacademy.com
- 284. References Restorative dental materials- Robert G. Craig tenth edition. Walter L Shepard ,Colonel :dentures produced from fluid resins.J prosthet Dent 24:561,1968 www.indiandentalacademy.com
- 285. Anthony DH, PeytonFA: Dimensional accuracy of various denture base resins.J Prosthet Dent12:67,1962. Braden M,:The absorption of water by acrylic resins & other materials,J Prosthet Dent14:307,1964. Ellesworth K:Fatigue failure in denture base resins,J Prosthet Dent.21:257,1969; www.indiandentalacademy.com
- 286. Firtell ,Harman:Porosity in boilable resins. J Prosthet Dent.49:133,1983. Grant, Atkinson:Comparission of denture bases processed pour type & heat type of resins. J Prosthet Dent.26:296,1971. Harrision, Stanbury:the effect of joint contours on transverse strenght of repaired acrylic dentures. J Prosthet Dent.23:246,1970. www.indiandentalacademy.com
- 287. Ruyter, Svendson : Flexsural properties of denture base resins. J Prosthet Dent43:95,1980. Nur Hersek, Senay:Color stability of denture base acrylic resin. J Prosthet Dent1999:81:375-9 Eiichi, Kenji: Repair of denture base resin using woven metal & glass fiber. J Prosthet Dent2001:85:496-95 www.indiandentalacademy.com
- 288. Rafeal et al:Effect of a new tension system, used in acrylic resin flasking. J Prosthet Dent 2002 ;88:285-9 Macro Antonio,Deboro et al :The effect of polymerisation cycles on the porosities if microwave processed dentures. J Prosthet Dent 2004;91:281-5. www.indiandentalacademy.com
- 289. Thank you For more details please visit www.indiandentalacademy.com www.indiandentalacademy.com
Editor's Notes
- BY DR.VIJAYA LAXMI