
Recommended
More Related Content
What's hot
What's hot (20)
Similar to Lumi Printing Process - A Natural Material Printing Technique
Similar to Lumi Printing Process - A Natural Material Printing Technique (20)
Recently uploaded
Recently uploaded (20)
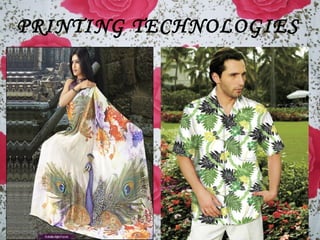
Lumi Printing Process - A Natural Material Printing Technique
- 2. PRINTING IS NOT ONLY DONE IN FABRIC USED FOR DRESSES 2
- 3. 3 LUMI PRINTING PROCESS • WHAT IS LUMI? • INVENTORS • SOMETHING ABOUT LUMI • EXAMPLE • ADVANTAGES
- 4. A textile printing process using INKODYE that creates vivid photo-realistic imagery on all natural materials, including raw leather without any chemical treatment or processing 4
- 5. 5 LUMI TEAM MEMBERS
- 6. 6 Invented around 2005 and 2006 after 5 years of research! By JESSE GENET’S FASHION INDUSTR Y Inventors are Jesse and Stephen, Los Angel designers
- 7. • JESSE began to study types of printing that weren’t textile related, that is when she uncovered the building blocks to the Lumi Process. • It isn’t a stencil process (like screen-printing) or a transfer process (like sublimation) and it doesn’t rely on ink-jet technologies (like digital printing). • With Lumi we are able to print photography, without any manipulation, onto all-natural materials, without needing to coat them or use harsh chemicals to set the print 7
- 8. 8 This is a water-based printing Inkodye and sunlight (of course LUMI MEANS LIGHT) are the main ingredients Inkodye is the formula of the dye in the 1950s - light is very sensitive to it, which is a photographic property. however, in cloudy weather, the "Print" have to spend double the time to achieve the desired effect.
- 9. 9 The best use out of cotton, wool, silk and natural fibres such as Lumi process effect, it also can be used for suede and wood The ink can be the shades of red, orange and blue, because the persistent longest of these colours will not fade after repeated washing. Lumi provides a kit, but the most basic starter kit at around $ 35 Some of lumi studio’s partners include PUMA, Junkfood Clothing, Cisco Home, Summit Series and more.
- 10. An exAmple of lumi process 10 ribbon process Materials required: Violet Inkodye, foam brush, pins, silk ribbon, b&w negatives a work surface
- 11. 11 Making your negatives: You can buy a B&W disposable camera and take your own shots! High contrast negatives are needed for this project to work so try to overexpose the pics you take! Cut your ribbon to the size of the negatives you'd like to print
- 12. Lay the ribbon in correct position on the work board in order to take it easily to the sun Pour the INKODYE directly on the ribbon without diluting 12
- 13. Now apply the dye evenly to all places of the ribbon by a foam brush 13
- 14. Next, place the negative on the ribbon , smooth it evenly and pin them onto the board 14
- 15. Now take the board to sun and wait for 5 minutes (up to 12 minutes in cloudy weather) 15
- 16. Uncover the ribbon by taking out the negative 16
- 17. 17 Wash vigorously in HOT soapy water. Preferably use a strong textile soap like synthrapol. If you do not wash enough your project may continue to develop after it is dry.
- 18. Dry it in shadow and enjoy using it!!! 18
- 19. 19 Advantages: Photographic quality No pre-treatment Eco safe Wash fast Prints over textures
- 20. BURNT -OUT PRINTING PROCESS 20 WHAT IS BURNT OUT PRINTING? INVENTION INFORMATIONS PROCEDURES PRECAUTIONS WASHING INSTRUCTIONS DISADVANTAGES
- 21. 21 1ST TYPE: Printing with a chemical substance - destroys the fibre in the design area, resulting a designed hole in the fabric 2ND TYPE: Involves blended fabrics – ONE FIBRE IS BURNT OUT, and ANOTHER FIBRE IS LEFT UNDAMAGED when treated with chemicals EX: A rayon/polyester blend. When the burn-out printing is done, RAYON PORTION DISAPPEARS(burn-out) leaving the polyester unchanged. The result is a gauze-like print portion of the fabric
- 22. 22
- 23. 23 IN 1920 By EUROPE FOR VElVET MADE OF VISCOSE & SIlk USING SODIUM HyDROGEN SUlPHATE
- 24. 24 Some information about Some information about bbuurrnntt--oouutt pprriinntt 1) Other names - Devour process, Corrosion process, transparency process, carbonization printing 2) Flat bed screen printing 3) Acids instead of colours 4) Normally the cost of burnout print without profit is $4.5 to $5.0/kg 5) Can be done only on some selected fabrics ( cellulose & synthetic blend or cellulose & cotton blend) 6) best composition- 60% polyester and 40% cotton fabric or vice versa 7) Common chemical use - Sulphuric acid, mixed into a colourless print paste 8) Mostly done on velvet fabrics
- 25. 25 EyElET EFFECT 1st printing is done with acid – it destroys a fibre and produce designed holes – then over printed with embroidery stitch
- 26. 26 PROCEDURE CHEMICAl REqUIREMENTS: 1.Sodium bisulphate 2.Synthrapol 3.Guar gum (thickener) 4.Soda Ash 5.Glycerine
- 27. EqUIPMENTS NEEDED 1.Scouring m/c 2.Blender 3.Printing table 4.Printing source 5.iron 27
- 28. 1. Scour the fabric using soda ash and synthrapol in hot water at about 60⁰ to remove oil, dirt and sizing 2. Rinse thoroughly 3. Prepare thickener paste – take water in a blender and gradually add the guar gum. Continue blending till it is smooth 4. Next add sodium bisulphate to water for burn-out paste 5. When acid is dissolved, add to it the glycerine(hygroscopic) and the above prepared thickener paste and blend well 6. Prepare the padded printing surface 7. Apply the burn out paste by any form of printing source – screen or stencil or freehand with foam or bristle brush 28 StepS to be followed
- 29. 29 1.Allow the fabric to dry through air 2.When dried, it is taken to the ironing table, place a cloth over it 3.Iron the fabric for about 3 – 5 minutes or until the fabric becomes medium brown. 4.Carefully remove the burnt out areas by hand wash or brushing off or small vacuum 5.Wash with warm water (by hand or m/c) by adding synthrapol detergent 6.Rinse thoroughly and hang to dry
- 30. 30 precautionS & inStructionS 1. Mix the thickener paste a few hours, or even the day before you need to use 2. Make the burn-out paste just before you are ready to use it. 3. The best paste penetration is achieved by screen printing, followed by stencilling, and then freehand applications 4. When working on silk/rayon velvet, it is best to print on the back side of the fabric rather than the pile 5. Don't overheat the burn-out areas to a black colour, otherwise you run the risk of permanently discolouring the fabric. 6. While working with sodium bisulphate it is important to wear a dust/mist respirator, rubber gloves, safety goggles, and an apron or old clothes. Avoid contact with skin or eyes
- 31. 31 diSadvantageS Costly When fixation temperature is varied slightly, big colour variation occurs and residues can’t be removed off easily Printing paste when used on next day will not give a smooth finishing (excess=waste) Excess time / temperature may cause yellowing in unprinted areas Risky acids – skin damage
- 32. 32
- 33. THANK YOU FRIENDS 33