Tema 1 Objetivos de la Ordenación de Montes
•
4 likes•4,812 views

Este documento describe los conceptos y objetivos clave de la ordenación forestal. Explica que la ordenación implica la planificación, gestión y control de los bosques de acuerdo con objetivos económicos, ecológicos y sociales a largo plazo. También cubre las herramientas, tipos de producción forestal y la función del gestor forestal en la toma de decisiones a largo plazo.

Recommended
More Related Content
What's hot
What's hot (20)
Similar to Tema 1 Objetivos de la Ordenación de Montes
Similar to Tema 1 Objetivos de la Ordenación de Montes (20)
More from Miguel Ángel Cogolludo Agustín
More from Miguel Ángel Cogolludo Agustín (20)
Recently uploaded
Recently uploaded (20)
Tema 1 Objetivos de la Ordenación de Montes
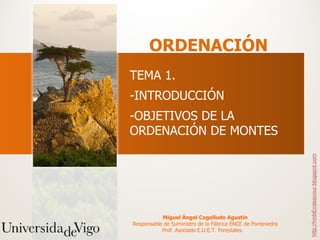
- 1. ORDENACIÓN TEMA 1. -INTRODUCCIÓN -OBJETIVOS DE LA ORDENACIÓN DE MONTES http://hmbEndeavour.blogspot.com Miguel Ángel Cogolludo Agustín Responsable de Suministro de la Fábrica ENCE de Pontevedra Prof. Asociado E.U.E.T. Forestales.
- 2. Contenido 1. Definiciones y concepto de Ordenación. 2. Antecedentes. 3. Desarrollo de la Gestión Forestal. 4. Condicionantes de la Gestión Forestal. 5. Herramientas para una buena gestión. 6. Objetivos de la Gestión Forestal. http://hmbEndeavour.blogspot.com 7. Tipos de Producción. 8. La Función del Gestor Forestal.
- 3. Definiciones • MACKAY, 1944. Ordenar un monte es organizarlo conforme a las leyes económicas sin infringir las biológicas que la investigación selvícola y epidométrica revelan. • DAVIS, 1966. Ordenación de montes es la aplicación de los métodos empresariales y de los principios técnicos forestales a la gestión de una propiedad forestal. http://hmbEndeavour.blogspot.com • OFFICE NATIONAL DES FORÊTS, 1969. Ordenar un monte es primeramente fijar unos objetivos, para a continuación prever las medidas necesarias para alcanzar dichos objetivos.
- 4. Concepto de Ordenación de Montes • Planificación. – Económica. – Física de base ecológica. – Ordenación del Territorio. • Gestión. • Control. http://hmbEndeavour.blogspot.com Es necesaria una coordinación con otros instrumentos de planificación de ámbito sectorial o territorial.
- 5. Concepto de Ordenación de Montes • Escuela americana: Repoblaciones a través del análisis de inversiones y la programación lineal. • Escuela centroeuropea: Se basa en la observación y la Selvicultura. Es más detallista. http://hmbEndeavour.blogspot.com En España hay mezcla de ambas: – En montes privados (Escuela americana) – En montes públicos (E. centroeuropea)
- 6. Antecedentes http://hmbEndeavour.blogspot.com Manual de ordenación por rodales. JM González, M Piqué, P Vericat. 2006. Capítulo 3 “La ordenación forestal como herramienta de planificación de los espacios forestales”
- 7. Antecedentes • Repaso de la Historia Forestal Española. • Serie TVE, El Bosque protector: Repoblaciones productoras. http://www.rtve.es/alacarta/videos/el-bosque-protector http://hmbEndeavour.blogspot.com
- 8. Desarrollo de la Gestión Forestal Fijar OBJETIVOS PLANIFICAR CONTROL acciones de la gestión http://hmbEndeavour.blogspot.com Análisis Toma de Datos Diagnóstico
- 9. Planificación Forestal en España http://hmbEndeavour.blogspot.com
- 10. Condicionantes de la Gestión • Políticos: falta de una definitiva política forestal, crisis de objetivos de la gestión forestal (no tenemos claro cual es la función de los bosques porque no están planificados) y tipo de propiedad. • Sociales: identificación monte y naturaleza. • Técnico-Forestales: Falta de atención a la ordenación http://hmbEndeavour.blogspot.com de montes. Se necesita un cambio de mentalidad. Grupos de intereses en conflicto: investigadores, población urbana, propietarios y ONGs.
- 11. Condicionantes de la Gestión Peculiaridades de la actividad Forestal: • El largo plazo • Alto coste sobre el capital invertido • Incertidumbre • Naturaleza dual del producto • Baja relación entre producción y existencias • Naturaleza conjunta de la producción forestal http://hmbEndeavour.blogspot.com • Bienes y servicios sin precio de mercado • Bajo valor monetario de las producciones forestales
- 13. Whereas balanced functions… Social Ecologic Economic
- 14. …general public opinion Social Ecologic Economic
- 15. …environmental activist Social Ecologic Econmic
- 16. …border agent* Social Ecologic Economic * border agent: forest owners and other rural stakeholders
- 17. Herramientas para la Gestión • Sistemas de información geográfica (GIS y GPS). • Cartografía temática, MDT... • Herramientas daso: Tablas y/o modelos de producción y fórmulas de cubicación. • Informática: hojas de cálculo y bases de datos. • Datos base de clima, vegetación y suelo. Inventarios por muestreo. http://hmbEndeavour.blogspot.com • Análisis financiero. • Técnicas de gestión multicriterio: Maximización de los objetivos. Función económica. Función ambiental. Función compromiso.
- 18. Objetivos Clásicos • Persistencia: implica que el vuelo no deje de ocupar suelo durante tiempo alguno apreciable, de tal forma que no hay Selvi perdida de su capacidad productiva. Las perdidas deben preverse en la planificación. • Rentabilidad: obtención de productos de carácter anual o periódico, de tal forma que la producción sea lo más Ord constante posible. • Máximo rendimiento: (o máximo de utilidades) exige la optimización de las diferentes utilidades que pueden obtenerse de los montes. Edad óptima de corta para el http://hmbEndeavour.blogspot.com Ord mejor aprovechamiento, evitando los sacrificios de cortabilidad. Se cortará por el criterio de máxima renta en especie (el crecimiento medio es máximo y coincide con el crecimiento corriente anual).
- 19. Objetivos Revisados MANTENIMIENTO DE LOS PROCESOS Persistencia: ECOLÓGICOS ESENCIALES SOSTENIBILIDAD DEL SISTEMA A LARGO Rentabilidad: PLAZO http://hmbEndeavour.blogspot.com Máximo rendimiento: MÁXIMO BENEFICIO NETO SOCIAL
- 20. Tipos de Producción Producción primaria: o Producción primaria directa: misma naturaleza que el que lo produce. (Ej. leña y madera). o Producción primaria mediata: tienen naturalezas diferentes. (Ej. resinas, corcho y frutos). Producción secundaria: o Productos vegetales: aromáticas, hongos y trufas, mantillo, helechos. o Productos animales: caza y pesca. o Productos minerales: arenas, gravillas, grava, canteras. Beneficios indirectos: (producción terciaria) protección física y biológica, http://hmbEndeavour.blogspot.com paisaje y uso social. Externalidades: beneficio o perjuicio por un bien que beneficia o perjudica a otro externo a él. Son positivas o negativas. Ej. Vías de comunicación, fábricas, producción oxígeno.
- 21. La Función del Gestor Forestal • Tomar decisiones: que son a largo plazo, por lo que son problemáticas debido a la dificultad de rectificación. • Responsabilidad de las decisiones: El gestor debe poder justificar sus decisiones para ello puede tomar las decisiones de dos formas (Procedimientos de toma de decisiones): http://hmbEndeavour.blogspot.com – Ética: es una planificación insegura. – Lógicas: “Análisis financiero”, análisis técnico. (Decisiones justificables). – Ilógicas: Bola de cristal, olfato y vista. (No son justificables).
Editor's Notes
- Animated title moves behind picture (Intermediate) To reproduce the shape effects on this slide, do the following: On the Home tab, in the Slides group, click Layout , and then click Blank . On the Home tab, in the Drawing group, click Shapes , and then under Rectangles click Rectangle (first option from the left). On the slide, drag to draw a rectangle. Select the rectangle. Under Drawing Tools , on the Format tab, in the Size group, do the following: In the Shape Height box, enter 3.17” . In the Shape Width box, enter 9.5” . Drag the rectangle slightly above the middle of the slide. Select the rectangle. On the Home tab, in the Drawing group, click Arrange , point to Align , and then do the following: Click Align to Slide . Click Align Left . Under Drawing Tools , on the Format tab, in the Shape Styles group, click the next to Shape Outline , and then click No Outline . Under Drawing Tools , on the Format tab, in the Shape Styles group, click the Format Shape dialog box launcher. In the Format Shape dialog box, click Fill in the left pane, select Gradient fill in the Fill pane, and then do the following: In the Type list, select Linear . In the Angle box, enter 0 . Under Gradient stops , click Add gradient stops or Remove gradient stops until two stops appear in the slider. Also under Gradient stops , customize the gradient stops as follows: Select the first stop in the slider, and then do the following: In the Position box, enter 0% . Click the button next to Color , and then under Theme Colors click Orange, Accent 6, Darker 50% (fifth row, 10 th option from the left). Select the next stop in the slider, and then do the following: In the Position box, enter 100% . Click the button next to Color , and then under Theme Colors click Orange, Accent 6, Darker 25% (fourth row, 10 th option from the left). To reproduce the “heading” text box on this slide, do the following: On the Insert tab, in the Text group, select Text Box . On the slide, drag to draw a text box. Enter the heading text, and then select text. On the Home tab, in the Font group, do the following: In the Font list, select Calibri . In the Font Size box, enter 38 . Click Bold . Click the arrow next to Font Color , and then under Theme Colors click Orange, Accent 6, Darker 25% (fourth row, 10 th option from the left). On the Home tab, in the Paragraph group, click Align Text Left . Drag the text box just above the rectangle, in the right half of the slide. To reproduce the second text box on this slide, do the following: On the Insert tab, in the Text group, click Text Box . On the slide, drag to draw a text box. Enter three lines of text with paragraph breaks, and then select the text. On the Home tab, in the Font group, do the following: In the Font list, select Calibri . In the Font Size list, select 28 . Click Bold . Click the arrow next to Font Color , and then under Theme Colors click White, Background 1 (first row, first option from the left). On the Home tab, in the Paragraph group, click the Paragraph dialog box launcher. In the Paragraph dialog box, do the following: On the Indents and Spacing tab, under General , select Left in the Alignment box. Under Spacing , select 12 in the After box. Drag the second text box onto the rectangle, below the “heading” text box. To reproduce the full-color picture on this slide, do the following: On the Insert tab, in the Images group, click Picture . In the Insert Picture dialog box, select a picture, and then click Insert . On the slide, select the picture. Under Picture Tools , on the Format tab, in the Size group, click the Size and Position dialog box launcher. In the Format Picture dialog box, resize or crop the image so that the height is set to 5.08” and the width is set to 2.61” . To crop the picture, click Crop in the left pane, and in the right pane, under Crop position , enter values into the Height , Width , Left , and Top boxes. To resize the picture, click Size in the left pane, and in the right pane, under Size and rotate , enter values into the Height and Width boxes. Also in the Format Picture dialog box, click Glow and Soft Edges in the left pane, and then, in the Glow and Soft Edges pane, do the following: Under Glow , click the button next to Presets , and then click Blue, 5 pt glow Accent color 1 (first row, first option from the left). Click the button next to Color , and then under Theme Colors click White, Background 1 (first row, first option from the left). Drag the full-color picture on top of the rectangle, to the left of the text boxes. On the Home tab, in the Drawing group, click Arrange , point to Align , and then do the following: Click Align to Slide . Click Align Top . To reproduce the second picture on this slide, do the following: On the Insert tab, in the Images group, click Picture . In the Insert Picture dialog box, select the same picture, and then click Insert . On the slide, select the picture. On the slide, select the picture. Under Picture Tools , on the Format tab, in the Size group, click the Size and Position dialog box launcher. In the Format Picture dialog box, resize or crop the image so that the height is set to 2.44” and the width is set to 2.61” . To crop the picture, click Crop in the left pane, and in the right pane, under Crop position , enter values into the Height , Width , Left , and Top boxes. To resize the picture, click Size in the left pane, and in the right pane, under Size and rotate , enter values into the Height and Width boxes. On the slide, drag the new picture directly below the first one, and then, in the Format Picture dialog box, in the Crop tab, under Picture Position , adjust the Offset X and Offset Y settings to align the content of the two images so that they appear continuous. Also in the Format Picture dialog box, click Picture Corrections in the left pane, and in the Picture Corrections pane, under Brightness and Contrast , do the following: In the Brightness box, enter 70% . In the Contrast box, enter -70% . Select the smaller picture. On the Home tab, in the Drawing group, click Arrange , point to Align , and then do the following: Click Align to Slide . Click Align Bottom . Press and hold CTRL, and then select both pictures. On the Home tab, in the Drawing group, click Arrange , point to Align , and then do the following: Click Align Selected Objects . Click Align Center . To reproduce the animation effects on this slide, do the following: On the slide, select the “heading” text box. On the Animations tab, in the Advanced Animation group, click Add Animation , and then under Entrance click Fade. On the Animations tab, in the Timing group, in the Start list, select With Previous . On the Animations tab, in the Timing group, in the Duration box, enter 2 . On the Animations tab, in the Timing group, in the Delay box, enter 1.5 . On the slide, select the “heading” text box. On the Animations tab, in the Advanced Animation group, click Add Animation , and then under Motion Paths click Lines. On the Animations tab, in the Timing group, in the Start list, select With Previous . On the Animations tab, in the Timing group, in the Duration box, enter 2 . On the Animations tab, in the Animation group, click Effect Options , and then click Left . On the Animations tab, in the Animation group, click Effect Options , and then click Reverse Path Direction . On the slide, select the motion path for the “heading” text box, point to the starting point (green arrow) of the motion path until the cursor becomes a two-headed arrow. Press and hold SHIFT, and then drag the starting point about 1.5” off the left edge of the slide. ( Note: If your lines of text are longer than in the example above, you may need to further increase the length of the motion path. ) On the slide, select the second text box. On the slide, select the “heading” text box. On the Animations tab, in the Advanced Animation group, click Add Animation , and then under Entrance click Fade. On the Animations tab, in the Animation group, click the Show Additional Effect Options dialog box launcher. In the Fade dialog box, do the following: On the Effect tab, in the Animate text list, select By Letter . In the % delay between letters box, enter 5 . On the Timing tab, in the Start list, select After Previous . In the Duration list, select 0.5 seconds ( Very Fast) . On the Text Animation tab, in the Group text list, select By 1 st Level Paragraphs . To reproduce the background on this slide, do the following: One the Design tab, in the Background group, click Background Styles , and then click Format Background . In the Format Background dialog box, click Fill in the left pane, select Gradient fill in the Fill pane, and then do the following: In the Type list, select Radial . Click the button next to Direction , and then click From Center (third option from the left). Under Gradient stops , click Add gradient stops or Remove gradient stops until three stops appear in the slider. Also under Gradient stops , customize the gradient stops as follows: Select the first stop in the slider, and then do the following: In the Position box, enter 0% . Click the button next to Color , and then under Theme Colors click White, Background 1 (first row, first option from the left). In the Transparency box, enter 0%. Select the next stop in the slider, and then do the following: In the Position box, enter 40% . Click the button next to Color , and then under Theme Colors click White, Background 1 (first row, first option from the left). In the Transparency box, enter 0%. Select the next stop in the slider, and then do the following: In the Position box, enter 100% . Click the button next to Color , click More Colors , and then in the Colors dialog box, on the Custom tab, enter values for Red: 232 , Green: 227 , and Blue: 216 .
- 01/05/12
- 01/05/12
- 01/05/12
- 01/05/12