Honeymoon Suite Bedroom VR Render
•
44 likes•4,941 views

This tutorial summarizes the process of creating a 3D bedroom scene in SketchUp and rendering it with VRay. Key steps include: 1. Importing models from 3ds Max into SketchUp and ensuring all faces are oriented correctly. 2. Positioning the camera and adding basic lighting before furnishing to improve performance. 3. Using an IES light for interior lighting plus a rectangular light from the window. 4. Applying various textures like wood, velvet, and transparency maps to furnishings. 5. Adjusting render settings and using post-processing in Photoshop to warm the scene.

Recommended
Recommended
More Related Content
What's hot
What's hot (20)
Viewers also liked
Viewers also liked (20)
Similar to Honeymoon Suite Bedroom VR Render
Similar to Honeymoon Suite Bedroom VR Render (20)
More from Nomer Adona
More from Nomer Adona (19)
Recently uploaded
Recently uploaded (20)
Honeymoon Suite Bedroom VR Render
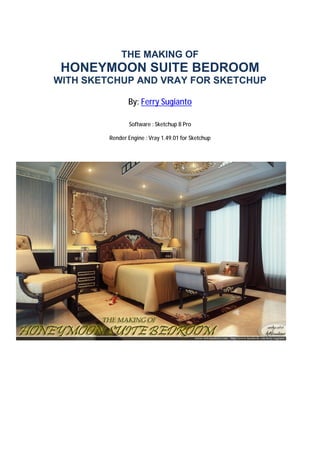
- 1. THE MAKING OF HONEYMOON SUITE BEDROOM WITH SKETCHUP AND VRAY FOR SKETCHUP By: Ferry Sugianto Software : Sketchup 8 Pro Render Engine : Vray 1.49.01 for Sketchup
- 2. A. Introduction Hai all.. nice to meet you again. This is my second mini tutorial about vray for sketchup. Actually, there is no special technique in this scene, its just a simple classic bedroom scene. The model, some of them is got from my 3dsmax library then converted to sketchup, and some is my own modelling with sketchup. Many people asking that sometimes its difficult to export an object from 3dsmax because basically in 3dsmax is a mesh object type, so i suggest you, when exporting from max, try export to OBJ file type, and then import to sketchup using plugin "OBJ Importer". This plugin can be found on Sketchucation Forum. I already included some material bitmap on this tutorial. Next Tip, like what i ever wrote before, just make sure that all object on your scene is absulutely in the right face. Many people sometimes just ignoring this part, but for me, this is very important. You can check the right or false face using "Monochrome" view from your sketchup. If you found a face with color like a grey bluish, reverse the face. Here is my sketchup view. If you notice, there is no false faces on each object.
- 3. B. The Working Process and Camera Position Usually, the general problem using vray sketchup is the heavy of our scene. But, for me, i have my own way how to manage our work even with a bigger and heavier scene. Firstly, dont put any furniture object, just remain the floor, ceiling and the walls. Then, find a good angle from which you want to targeted on. Here is my empty building when i am starting doing this project. After i get my appropriate angle, i save the current angle, and then, put some texturing for some test. And then putting some testing lights so at least you feel that the scene is not too dark. Next Part will talk about the lighting point. C. LIGHTING POINT In this scene, i use 2 types of light, its "IES light" for the interior, and additional light with "vray rectangular light" from outside the window. I am not using HDRI this time, just use normal sun and sky from the vray itself. Image above is how i put my IES light.
- 4. The setting of the IES light is : Image above is draft render for the interior before the furnitures comes in. Image below is the sketchup condition after filling with furnitures and ceiling decoration.
- 5. D. TEXTURING D.1. General Dark Wood
- 6. D2. Curtain Brown Velvet I use falloff in the diffuse map, and here is the falloff setting So, there is 2 different color in the Color 1 and Color2.
- 7. D3. Transparancy Sheer i use vray 2sided material, there is 3 maps, i will show you each of them
- 8. Map2 and Map3 is actually the same, contain a bitmap on the transparency slot.
- 9. D4. Bed Cover D5. Leather Headboard
- 10. E. Render Option
- 11. sun settings
- 13. F. Original Render And here is my post production in Photoshop 1 » Original image from vray frame buffer 2 » Exposure 3 » Color Balance 4 » Channel Mixer
- 14. 5&9 » Photolooks Magic Bullet plugin to get warm mood scene 6 » Photo Filter in photoshop 7&8 » Knoll light plugin to make a flare effect on the downlight That all .. You can explore yourself, for example, you can add a displacement carpet for more realistic scene. And, finally, here is the final image after post production. Dedicated to :