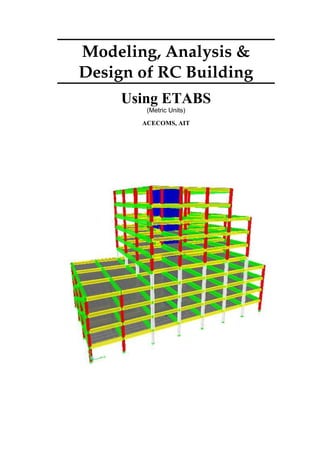
SlideShare a Scribd company logo
1 of 83
Download to read offline
Modeling, Analysis &
Design of RC Building
Using ETABS
(Metric Units)
ACECOMS, AIT
Table of Content
Objective 5
Problem 5
Step by Step 12
1. Start Model with Template 12
2. Define Material Properties 14
3. Define Member Sections 15
4. Draw the Members 20
5. Define Load Cases and Assign Loads 50
6. Define Mass Source 61
7. Define the Design Codes 62
8. Assign Rigid Diaphragm and Mesh the Frame 64
9. Add Load Combinations 66
10. Set Analysis Options 68
11. Run Analysis 69
12. Run Concrete Frame Design and View the Results 70
13. Run Shear Wall Design and View the Results 75
14. Check Story Drift 82
ETABS Tutorial Example ACECOMS, AIT
Modeling, Analysis & Design of RC Building 5/83
Objective
To demonstrate and practice step-by-step on the modeling,
analysis and design of 10 story RC building by static lateral
force procedure.
Problem
Carry out analysis, and design of 10 story RC building as
shown in following details using UBC-97 static lateral force
procedure.
3D View
ETABS Tutorial Example ACECOMS, AIT
Modeling, Analysis & Design of RC Building 6/83
Plan View (Unit in m)
BASE – STORY 4
STORY 5 – STORY 8
ETABS Tutorial Example ACECOMS, AIT
Modeling, Analysis & Design of RC Building 7/83
STORY 9 – STORY 10
Elevation View
ETABS Tutorial Example ACECOMS, AIT
Modeling, Analysis & Design of RC Building 8/83
Elevation View of Elevator Shaft
ETABS Tutorial Example ACECOMS, AIT
Modeling, Analysis & Design of RC Building 9/83
Material Properties for Concrete (Unit in kg and cm)
Section Properties
Member Dimension
Beam – B1 (width x height) 30 x 60 cm
Beam – B2 (width x height) 40 x 80 cm
Column – C1 40 x 40 cm
Column – C2 50 x 50 cm
Slab Thickness = 15 cm
Shear wall Thickness = 20 cm
ETABS Tutorial Example ACECOMS, AIT
Modeling, Analysis & Design of RC Building 10/83
Story Height Data
Story Height
Typical Story 3.00 m
Static Load Cases
Load
Name
Load Type Details Value
Self Weight of Structural Members
Calculate automatically using Self
Weight Multiplier in ETABS
-
DEAD Dead Load
Uniform Load on Slabs:
(Finishing + Partition Load)
0.20 t/m2
LIVE
Reducible
Live Load
Uniform Load on Slabs:
(Use Tributary Area: UBC97)
0.25 t/m2
Wind Load Cases (UBC97)
Load Case
Parameter
WINDX WINDY
Wind Direction X Y
Wind Speed 70 mph
Exposure Type B (Suburban area)
Importance Factor 1 (Building normal importance)
ETABS Tutorial Example ACECOMS, AIT
Modeling, Analysis & Design of RC Building 11/83
Static Lateral Force Parameters (UBC-97)
Parameter Values Remark
Seismic Zone 2A
Seismic Zone Factor 0.15 Table 16-I (UBC-97)
Soil Profile Type SD
Overstrength Factor 6.5
Dual Systems
Concrete Shear Walls
with Concrete IMRF
Table 16-N (UBC-97)
Importance Factor 1 Table 16-K (UBC-97)
Ct 0.02
Section 1630.2.2
(UBC-97)
Eccentricity Ratio 0.05
Section 1630.6
(UBC-97)
Static Lateral Force Case
Load Case Name
Direction and
Eccentricity
% Eccentricity
EQX X Dir + Eccen. Y 0.05
EQNX X Dir - Eccen. Y 0.05
EQY Y Dir + Eccen. X 0.05
EQNY Y Dir - Eccen. X 0.05
ETABS Tutorial Example ACECOMS, AIT
Modeling, Analysis & Design of RC Building 12/83
Step by Step
1. Start Model with Template
Step 1-1: Select Working Unit and Start New Model using Template
Start up screen of ETABS, select working unit to be “ton-m” at drop-down menu on
the bottom-right of screen and click on New Model button to start new model
using template
Note: Click the Default.edb button. This means that the definitions and
preferences will be initialized (get their initial values) from the Default.edb file that is
in the same directory as your ETABS.exe file. If the Default.edb file does not exist in
this directory then the definitions and preferences are initialized using ETABS built-in
defaults.
You should create your Default.edb file such that you most commonly click this
button.
In some cases you may want to click the Choose.edb button and specify a different
file from which the definitions and preferences are to be initialized. For example, a
certain client or project may require certain things in your model to be done in a
certain way that is different from your typical office standards. You could have a
specific .edb file set up for this client or project which could then be used to initialize
all models for the client or project. This will allow setting of the repeatedly used
preferences.
Click the No button if you just want to use the built-in ETABS defaults.
ETABS Tutorial Example ACECOMS, AIT
Modeling, Analysis & Design of RC Building 13/83
Step 1-2: Specify Grid and Story Dimension
Specify grid dimension and story dimension as shown in figure below. Select “Grid
Only” option to add the structural objects later.
Step 1-3: Save the Model
The grid system has been created as parameters specified from previous steps. Go
to File >> Save, and save the file.
ETABS Tutorial Example ACECOMS, AIT
Modeling, Analysis & Design of RC Building 14/83
2. Define Material Properties
Step 2-1: Change Working Unit
Change working unit to “kg-cm” and go to Define >> Material. Click “Add New
Material” button to add the new concrete material.
Note: You may select “N-mm” or “Kip-in” or whatever unit to input material properties.
Step 2-2: Specify the Material Properties
Specify material properties of concrete (fc’ = 240 ksc) as shown in the figure below.
ETABS Tutorial Example ACECOMS, AIT
Modeling, Analysis & Design of RC Building 15/83
3. Define Member Sections
Step 3-1: Define Frame Section for Beam (30 cm x 60 cm)
Go to Define >> Frame Sections and select on “Add Rectangular” from second
drop-down menu. Enter beam section properties for B1 as shown in figure below.
ETABS Tutorial Example ACECOMS, AIT
Modeling, Analysis & Design of RC Building 16/83
Step 3-2: Define Frame Section for Beam (40 cm x 80 cm)
Select on “Add Rectangular” from second drop-down menu. Enter beam section
properties for B2 as shown in figure below.
ETABS Tutorial Example ACECOMS, AIT
Modeling, Analysis & Design of RC Building 17/83
Step 3-3: Define Frame Section for Column (40 cm x 40 cm)
Select on “Add Rectangular” from second drop-down menu. Enter column section
properties for C1 as shown in figure below.
ETABS Tutorial Example ACECOMS, AIT
Modeling, Analysis & Design of RC Building 18/83
Step 3-4: Define Frame Section for Column (50 cm x 50 cm)
Select on “Add Rectangular” from second drop-down menu. Enter column section
properties for C2 as shown in figure below.
ETABS Tutorial Example ACECOMS, AIT
Modeling, Analysis & Design of RC Building 19/83
Step 3-5: Define Area Section for Slab (15 cm thk.)
Go to Define >> Wall/Slab/Deck Sections and select on “Add New Slab” from
drop-down menu. Enter slab section properties as shown in figure below.
Step 3-6: Define Area Section for Wall (20 cm thk.)
Select on “Add New Wall” from drop-down menu. Enter wall section properties as
shown in figure below.
ETABS Tutorial Example ACECOMS, AIT
Modeling, Analysis & Design of RC Building 20/83
4. Draw the Members
Step 4-1: Change View to Plan View and Change Working Unit to “Ton-m”
Activate left window by clicking on left window area, click on Set Plan View button
and select “STORY1”. Change working unit to “Ton-m”
Step 4-2: Draw Columns at Story 1
Click on button, select the property of column in “Properties of Object” dialogue.
Window the grid intersections from Grid A4 to H1.
ETABS Tutorial Example ACECOMS, AIT
Modeling, Analysis & Design of RC Building 21/83
Step 4-3: Draw Beams at Story 1
Click on button, select the property of beam in “Properties of Object” dialogue.
Window the grid intersections from Grid A4 to H1.
ETABS Tutorial Example ACECOMS, AIT
Modeling, Analysis & Design of RC Building 22/83
Step 4-4: Draw Slabs at Story 1
Click on button, select the property of slab in “Properties of Object” dialogue.
Window the grid intersections from Grid A4 to H1.
ETABS Tutorial Example ACECOMS, AIT
Modeling, Analysis & Design of RC Building 23/83
Step 4-5: Set Building View Options
Click on button, set the building as shown in the figure below.
ETABS Tutorial Example ACECOMS, AIT
Modeling, Analysis & Design of RC Building 24/83
Step 4-6: Assign the Beam Section (B2)
Select the beams along Y-direction. Go to Assign >> Frame/Line >> Frame
Section, and assign “B40x80” section as shown in the figure below.
ETABS Tutorial Example ACECOMS, AIT
Modeling, Analysis & Design of RC Building 25/83
Step 4-7: Mesh the Slabs
Select all the slabs and go to Edit >> Mesh Areas. Enter the number of meshes as
shown in the figure below.
ETABS Tutorial Example ACECOMS, AIT
Modeling, Analysis & Design of RC Building 26/83
Step 4-8: Draw the Wall
Click on Rubber Band Zoom button to zoom plan view at shear wall location. Go
to Draw >> Draw Point Objects, enter “Plan Offset X” in “Properties of Object”
dialogue and click 4 nodes as shown in figure below.
ETABS Tutorial Example ACECOMS, AIT
Modeling, Analysis & Design of RC Building 27/83
Click on button and select the property of wall in “Properties of Object”
dialogue. Draw the wall segments from node to node as shown in figure below.
ETABS Tutorial Example ACECOMS, AIT
Modeling, Analysis & Design of RC Building 28/83
Go to Select >> by Area Object Type, and select wall to select the walls.
Go to Edit >> Replicate, and replicate mirror about the line as shown in the figure
below.
ETABS Tutorial Example ACECOMS, AIT
Modeling, Analysis & Design of RC Building 29/83
Step 4-9: Delete the beams on the wall
Select the beams on the walls and delete them.
ETABS Tutorial Example ACECOMS, AIT
Modeling, Analysis & Design of RC Building 30/83
Step 4-10: Draw the Beams Connecting to the Wall
Click on button and select “B40x80” in “Properties of Object” dialogue. draw
the beams connecting the columns and the walls.
ETABS Tutorial Example ACECOMS, AIT
Modeling, Analysis & Design of RC Building 31/83
Step 4-11: Change the Stiffness Modifiers
Select the beams connecting to the wall. Go to Assign >> Frame/Line >> Frame
Property Modifiers, and change the torsional stiffness as shown in the figure
below.
ETABS Tutorial Example ACECOMS, AIT
Modeling, Analysis & Design of RC Building 32/83
Step 4-12: Mesh the Floor between the Core Walls
Select the floor between the core walls. Go to Edit >> Mesh Areas, mesh the floor at
the intersection with wall segments as shown in the figure below.
ETABS Tutorial Example ACECOMS, AIT
Modeling, Analysis & Design of RC Building 33/83
Step 4-13: Delete the Floor inside the Core Walls
Select the floor inside the core walls and delete them as shown in the figure below.
ETABS Tutorial Example ACECOMS, AIT
Modeling, Analysis & Design of RC Building 34/83
Step 4-14: Draw Developed Elevation Definition
Go to Draw >> Draw Developed Elevation Definition, type “H1” in the Developed
Elevation Name and click “Add New Name”. Click “OK” and draw the line as shown
in the figure below.
ETABS Tutorial Example ACECOMS, AIT
Modeling, Analysis & Design of RC Building 35/83
Do the same step as above for other developed elevations of core walls as shown
in the figure below.
H1
H2
V1 V2 V3
ETABS Tutorial Example ACECOMS, AIT
Modeling, Analysis & Design of RC Building 36/83
Step 4-15: Make the Openings in Walls
Go to Select >> Select Area Object Type, and select “Wall”. Go to View >> Show
Selection Only.
ETABS Tutorial Example ACECOMS, AIT
Modeling, Analysis & Design of RC Building 37/83
Click on and select “H1” and click “OK”.
Go to Select >> by Area Object Type, and select wall.
Go to Edit >> Mesh Areas, and mesh the walls as shown in the figure below..
ETABS Tutorial Example ACECOMS, AIT
Modeling, Analysis & Design of RC Building 38/83
Click on Rubber Band Zoom button to zoom elevation view “H1”. Delete the wall
segments for openings as shown in the figure below.
Do the same step as above for elevation “H2” and delete the wall segments for
openings.
ETABS Tutorial Example ACECOMS, AIT
Modeling, Analysis & Design of RC Building 39/83
Step 4-16: Assign Pier Labels and Spandrel Labels
Click on and select “2” and click “OK”. Select the walls and go to Assign >>
Shell/Area >> Pier Label, select pier name “P1” and click “OK” as shown in the
figure below.
ETABS Tutorial Example ACECOMS, AIT
Modeling, Analysis & Design of RC Building 40/83
Click on and select “H1” and click “OK”. Click on Rubber Band Zoom button
to zoom elevation view at shear wall location. Select the walls at the left side and go
to Assign >> Shell/Area >> Pier Label, type pier name “P2” in the Pier Name Box.
Click “Add New Name” and then “OK” as shown in the figure below.
ETABS Tutorial Example ACECOMS, AIT
Modeling, Analysis & Design of RC Building 41/83
Select the walls above the opening and go to Assign >> Shell/Area >> Spandrel
Label, select spandrel name “S1” and click “OK” as shown in the figure below.
ETABS Tutorial Example ACECOMS, AIT
Modeling, Analysis & Design of RC Building 42/83
Perform the same steps as above to assign the pier label and spandrel as shown in
the following figure.
ETABS Tutorial Example ACECOMS, AIT
Modeling, Analysis & Design of RC Building 43/83
Step 4-17: Replicate the Floor
Click on button, select “STORY 1” and change to plan view as shown in the
figure below. Go to View >> Show All.
ETABS Tutorial Example ACECOMS, AIT
Modeling, Analysis & Design of RC Building 44/83
Select the members by windowing and go to Edit >> Replicate. Select from
STORY 2 to STORY 10 in “Story” tab and replicate as shown in the figure below.
ETABS Tutorial Example ACECOMS, AIT
Modeling, Analysis & Design of RC Building 45/83
Step 4-18: Delete the Members
Click on button, select “STORY 5”. Select and delete the members as shown in
the figure below.
Repeat the above step for STORY 6, 7 and 8.
ETABS Tutorial Example ACECOMS, AIT
Modeling, Analysis & Design of RC Building 46/83
Click on button, select “STORY 9”. Select and delete the members as shown in
the figure below.
Repeat the above step for STORY 10.
ETABS Tutorial Example ACECOMS, AIT
Modeling, Analysis & Design of RC Building 47/83
Step 4-19: Assign the Columns
Click on and select “1” and click “OK”. Select the columns as shown in the
figure below.
ETABS Tutorial Example ACECOMS, AIT
Modeling, Analysis & Design of RC Building 48/83
Go to Assign >> Frame Line >> Frame Section, and select C50x50 and click
“OK”.
Repeat the above steps to assign the columns in Elevations 2, 3 and 4.
ETABS Tutorial Example ACECOMS, AIT
Modeling, Analysis & Design of RC Building 49/83
Step 4-20: Assign the Supports
Click on button, select “BASE” and change to plan view as shown in the figure
below. Select the points by windowing as shown in the figure below.
Go to Assign >> Joint/Point >> Restraints (Supports), and restrained all DOFs
as shown in the figure below.
ETABS Tutorial Example ACECOMS, AIT
Modeling, Analysis & Design of RC Building 50/83
5. Define Load Cases and Assign Loads
Step 5-1: Define Load Cases
Go to Define >> Static Load Cases, modify the “LIVE” Load as Reducible Live
Load as shown in the figure below.
Add “SDL” Load as Superimposed Dead Load as shown in the figure below.
ETABS Tutorial Example ACECOMS, AIT
Modeling, Analysis & Design of RC Building 51/83
Add “WX” Load as Wind Load as shown in the figure below.
Modify the “WX” Load as shown in the figure below.
ETABS Tutorial Example ACECOMS, AIT
Modeling, Analysis & Design of RC Building 52/83
Add “WY” Load as Wind Load as shown in the figure below.
Modify the “WY” Load as shown in the figure below.
ETABS Tutorial Example ACECOMS, AIT
Modeling, Analysis & Design of RC Building 53/83
Add “EQX” Load as Quake Load as shown in the figure below.
Modify the “EQX” Load as shown in the figure below.
ETABS Tutorial Example ACECOMS, AIT
Modeling, Analysis & Design of RC Building 54/83
Add “EQNX” Load as Quake Load as shown in the figure below.
Modify the “EQNX” Load as shown in the figure below.
ETABS Tutorial Example ACECOMS, AIT
Modeling, Analysis & Design of RC Building 55/83
Add “EQY” Load as Quake Load as shown in the figure below.
Modify the “EQY” Load as shown in the figure below.
ETABS Tutorial Example ACECOMS, AIT
Modeling, Analysis & Design of RC Building 56/83
Add “EQNY” Load as Quake Load as shown in the figure below.
Modify the “EQY” Load as shown in the figure below.
ETABS Tutorial Example ACECOMS, AIT
Modeling, Analysis & Design of RC Building 57/83
Step 5-2: Define Special Seismic Load Effects
Go to Define >> Special Seismic Load Effects, and enter the parameters to
consider in special seismic design as shown in the figure below.
E = ρ Eh + Ev (30-1)
Em = Ω0 Eh (30-2)
E = the earthquake load on an element of the structure resulting
from the combination of the horizontal component, Eh, and the
vertical component Ev
Eh = the earthquake load due to the base shear, V, as set forth in
Section 1630.2 or the design lateral force, Fp, as set forth in
Section 1632
Ev = the load effect resulting from the vertical component of the
earthquake ground motion and is equal to an addition of 0.5 Ca
ID to the dead load effect, D, for Strength Design, and may be
taken as zero for Allowable Stress Design
In this case Ca = 0.22, 0.5 Ca I = 0.5 x 0.22 x 1 = 0.11
Ω0 = the seismic force amplification factor that is required to account
for structural overstrength, as set forth in Section 1630.3.1
ETABS Tutorial Example ACECOMS, AIT
Modeling, Analysis & Design of RC Building 58/83
ρ = Reliability/Redundancy Factor as given by the following formula
ρ = 2 – 20 / (rmax x sqrt(AB)) (30-3)
= 2 – 6.1 / (rmax x sqrt(AB)) (For SI)
rmax = the maximum element-story shear ratio. For a given direction of
loading, the element-story shear ratio is the ratio of the design
story shear in the most heavily loaded single element divided by
the total design story shear. For any given Story Level i, the
element story shear ratio is denoted as ri. The maximum
element-story shear ratio rmax is defined as the largest of the
element story shear ratios, ri, which occurs in any of the story
levels at or below the two-thirds height level of building.
ETABS Tutorial Example ACECOMS, AIT
Modeling, Analysis & Design of RC Building 59/83
Step 5-3: Assign the Loads
Go to Select >> by Area Object Type, select “Floor” as shown in the figure below.
Go to Assign >> Shell/Area Loads >> Uniform, and assign Live Load of 0.25 t/m2
as shown in the figure below.
ETABS Tutorial Example ACECOMS, AIT
Modeling, Analysis & Design of RC Building 60/83
Click on to reselect the floor areas. Go to Assign >> Shell/Area Loads >>
Uniform, and assign “SDL” Load of 0.2 t/m2
as shown in the figure below.
ETABS Tutorial Example ACECOMS, AIT
Modeling, Analysis & Design of RC Building 61/83
6. Define Mass Source
Step 6-1: Define Mass Source
Go to Define >> Mass Source, and add the mass from loads as shown in the figure
below.
ETABS Tutorial Example ACECOMS, AIT
Modeling, Analysis & Design of RC Building 62/83
7. Define the Design Codes
Step 7-1: Define Design Code for Concrete Frame Design
Go to Options >> Preferences >> Concrete Frame Design, change the Design
Code
ETABS Tutorial Example ACECOMS, AIT
Modeling, Analysis & Design of RC Building 63/83
Step 7-2: Define Design Code for Shear Wall Design
Go to Options >> Preferences >> Shear Wall Design, change the Design Code
ETABS Tutorial Example ACECOMS, AIT
Modeling, Analysis & Design of RC Building 64/83
8. Assign Rigid Diaphragm and Mesh the Frame
Step 8-1: Assign Rigid Diaphragm
Go to Select >> by Area Object Type, and select “Floor”.
Go to Assign >> Shell/Area >> Diaphragms, select “D1” and click “OK”.
ETABS Tutorial Example ACECOMS, AIT
Modeling, Analysis & Design of RC Building 65/83
Step 8-2: Mesh the Frame
Click on button and go to Assign >> Frame/Line >> Automatic Frame
Subdivide, select the second option as shown in the figure below.
ETABS Tutorial Example ACECOMS, AIT
Modeling, Analysis & Design of RC Building 66/83
9. Add Load Combinations
Step 9-1: Add Load Combinations
Go to Define >> Add Default Design Combos, and add the default combinations
as shown in the figure below.
Click on button and go to Design >> Concrete Frame Design >> View/Revise
Overwrites, change Element Type to Sway Intermediate as shown in the figure
below.
ETABS Tutorial Example ACECOMS, AIT
Modeling, Analysis & Design of RC Building 67/83
Step 9-2: Special Seismic Data
Go to Define >> Special Seismic Load Effects, and select no to include Special
Seismic Design Data as shown in the figure below.
ETABS Tutorial Example ACECOMS, AIT
Modeling, Analysis & Design of RC Building 68/83
10. Set Analysis Options
Step 10-1: Set Analysis Options
Go to Analyze >> Set Analysis Options, and set the Dynamic Parameters as
shown in the figure below.
ETABS Tutorial Example ACECOMS, AIT
Modeling, Analysis & Design of RC Building 69/83
11. Run Analysis
Step 11-1: Run Analysis
Go to Analyze >> Run Analysis or click on Run Analysis button to start
analysis.
ETABS will display deformed shape of model when analysis complete.
ETABS Tutorial Example ACECOMS, AIT
Modeling, Analysis & Design of RC Building 70/83
12.Run Concrete Frame Design and View the Results
Step 12-1: Run Concrete Frame Design
Go to Design >> Concrete Frame Design >> Start Design/Check Structure.
ETABS Tutorial Example ACECOMS, AIT
Modeling, Analysis & Design of RC Building 71/83
Step 12-2: View the Results
Click on button, and set up the building view options as shown in the following
figure.
ETABS Tutorial Example ACECOMS, AIT
Modeling, Analysis & Design of RC Building 72/83
Activate the left window and Click on button, select “STORY 1”. Change the
working unit to “kg-cm”. Go to Design >> Concrete Frame Design >> Display
Design Info, select design output as shown in the following figure.
ETABS Tutorial Example ACECOMS, AIT
Modeling, Analysis & Design of RC Building 73/83
Right click on the member to view the design details.
ETABS Tutorial Example ACECOMS, AIT
Modeling, Analysis & Design of RC Building 74/83
Beam Reinforcement Column Reinforcement
2
3
Shear
Reinforcement
Bottom
Reinforcement
Top
Reinforcement
2
3
Minor Shear
Reinforcement
Major Shear
Reinforcement
Longitudinal
Reinforcement
ETABS Tutorial Example ACECOMS, AIT
Modeling, Analysis & Design of RC Building 75/83
13. Run Shear Wall Design and View the Results
Step 13-1: Run Shear Wall Design
Go to Design >> Shear Wall Design >> Start Design/Check Structure.
ETABS Tutorial Example ACECOMS, AIT
Modeling, Analysis & Design of RC Building 76/83
Step 13-2: View the Results
Click on button, and set up the building view options as shown in the following
figure.
ETABS Tutorial Example ACECOMS, AIT
Modeling, Analysis & Design of RC Building 77/83
Activate the left window, click on button and select “H1”. Click on Rubber Band
Zoom button to zoom elevation view at shear wall location. Right click on the
pier to view the design details.
ETABS Tutorial Example ACECOMS, AIT
Modeling, Analysis & Design of RC Building 78/83
Reinforcement Details in Pier
ETABS Tutorial Example ACECOMS, AIT
Modeling, Analysis & Design of RC Building 79/83
Go to Design >> Shear Wall Design >> Display Design Info, select design output
as shown in the following figure.
ETABS Tutorial Example ACECOMS, AIT
Modeling, Analysis & Design of RC Building 80/83
Reinforcement Details in Spandrel
ETABS Tutorial Example ACECOMS, AIT
Modeling, Analysis & Design of RC Building 81/83
Note: Typical Detailing of Shear Wall
ETABS Tutorial Example ACECOMS, AIT
Modeling, Analysis & Design of RC Building 82/83
14. Check Story Drift
P-∆ Effects
In general, P-∆ effects need not be considered when the stability coefficient (θ)
defined as the ratio of secondary moments to primary moments, is less than or equal
to 0.1. The stability coefficient (θ) for a given story can be computed from the
following equation:
θ = Px ∆ / (Vx hsx)
Px = total unfactored gravity load at and above level x
∆ = seismic story drift
Vx = seismic shear force between levels x and x-1
hsx = story height below level x
From ETABS,
∆ / hsx is extracted from diaphragm drift of ETABS results.
Px is extracted by section cut.
V is extracted from story shear.
Compute θ and if θ < 1, P-∆ effects needs not be considered.
In Seismic Zones 3 and 4, P-∆ effects need not be considered when the story drift (∆)
is less than or equal to 0.02hsx / R.
Story Drift Limitations
According to 1630.10, story drifts shall be computed using the maximum inelastic
response displacement (∆M), which is an approximation of the displacement that
occurs when the structure is subjected to the design basis ground motion:
∆M = 0.7 R ∆S
∆S is the design level response displacements.
For structures with a fundamental period (T) less than 0.7 seconds, the calculated
story drift using ∆M shall not be exceed 0.025 times the story height. For structures
ETABS Tutorial Example ACECOMS, AIT
Modeling, Analysis & Design of RC Building 83/83
with T greater than or equal to 0.7 seconds, the story drift shall not exceed 0.020
times the story height.
From ETABS,
Calculated story drift is determined by multiplying the diaphragm drift into 0.7 x R.

More Related Content

What's hot

Etabs concrete-design
Etabs concrete-designEtabs concrete-design
Etabs concrete-designmamilli
 
CE 72.32 (January 2016 Semester): Lecture 1b: Analysis and Design of Tall Bui...
CE 72.32 (January 2016 Semester): Lecture 1b: Analysis and Design of Tall Bui...CE 72.32 (January 2016 Semester): Lecture 1b: Analysis and Design of Tall Bui...
CE 72.32 (January 2016 Semester): Lecture 1b: Analysis and Design of Tall Bui...Fawad Najam
 
Membrane - Plate - Shell
Membrane - Plate - ShellMembrane - Plate - Shell
Membrane - Plate - Shellneikrof
 
Optimized modeling and design of steel structures using etabs
Optimized modeling and design of steel structures using etabsOptimized modeling and design of steel structures using etabs
Optimized modeling and design of steel structures using etabsMd. Shahadat Hossain
 
Matching base shear in Etabs 2016
Matching base shear in Etabs 2016Matching base shear in Etabs 2016
Matching base shear in Etabs 2016Vamsi krishna reddy
 
Rcc structure design by etabs (acecoms)
Rcc structure design by etabs (acecoms)Rcc structure design by etabs (acecoms)
Rcc structure design by etabs (acecoms)Md. Shahadat Hossain
 
Etabs presentation
Etabs presentationEtabs presentation
Etabs presentationyaasiin123
 
Tower design-Chapter 2-pile caps design
Tower design-Chapter 2-pile caps designTower design-Chapter 2-pile caps design
Tower design-Chapter 2-pile caps designNada Zarrak
 
CASE STUDY: PERFORMANCE-BASED SEISMIC DESIGN OF REINFORCED CONCRETE DUAL SYST...
CASE STUDY: PERFORMANCE-BASED SEISMIC DESIGN OF REINFORCED CONCRETE DUAL SYST...CASE STUDY: PERFORMANCE-BASED SEISMIC DESIGN OF REINFORCED CONCRETE DUAL SYST...
CASE STUDY: PERFORMANCE-BASED SEISMIC DESIGN OF REINFORCED CONCRETE DUAL SYST...AIT Solutions
 
ANALYSIS & DESIGN OF G+3 STORIED REINFORCED CONCRETE BUILDING
ANALYSIS & DESIGN OF G+3 STORIED REINFORCED CONCRETE BUILDING ANALYSIS & DESIGN OF G+3 STORIED REINFORCED CONCRETE BUILDING
ANALYSIS & DESIGN OF G+3 STORIED REINFORCED CONCRETE BUILDING Abhilash Chandra Dey
 
SAP2000 Piperack Tutorial 2010.pdf
SAP2000 Piperack Tutorial 2010.pdfSAP2000 Piperack Tutorial 2010.pdf
SAP2000 Piperack Tutorial 2010.pdfsdads1
 
AITC Shear Wall Design Procedure (20151106)
AITC Shear Wall Design Procedure (20151106)AITC Shear Wall Design Procedure (20151106)
AITC Shear Wall Design Procedure (20151106)Fawad Najam
 
Baf Shaheen College (B+12) ETABS Dynamic Analysis.pptx
Baf Shaheen College (B+12) ETABS Dynamic Analysis.pptxBaf Shaheen College (B+12) ETABS Dynamic Analysis.pptx
Baf Shaheen College (B+12) ETABS Dynamic Analysis.pptxDES Engineers Ltd
 
Analysis and design of pre engineered building using is 800:2007 and Internat...
Analysis and design of pre engineered building using is 800:2007 and Internat...Analysis and design of pre engineered building using is 800:2007 and Internat...
Analysis and design of pre engineered building using is 800:2007 and Internat...Pratik R. Atwal
 
CE 72.32 (January 2016 Semester) Lecture 3 - Design Criteria
CE 72.32 (January 2016 Semester) Lecture 3 - Design Criteria CE 72.32 (January 2016 Semester) Lecture 3 - Design Criteria
CE 72.32 (January 2016 Semester) Lecture 3 - Design Criteria Fawad Najam
 

What's hot (20)

Etabs (atkins)
Etabs (atkins)Etabs (atkins)
Etabs (atkins)
 
CSI ETABS & SAFE MANUAL: Slab Analysis and Design to EC2
CSI ETABS & SAFE MANUAL: Slab Analysis and Design to EC2CSI ETABS & SAFE MANUAL: Slab Analysis and Design to EC2
CSI ETABS & SAFE MANUAL: Slab Analysis and Design to EC2
 
Etabs tutorial
Etabs tutorialEtabs tutorial
Etabs tutorial
 
Etabs concrete-design
Etabs concrete-designEtabs concrete-design
Etabs concrete-design
 
CE 72.32 (January 2016 Semester): Lecture 1b: Analysis and Design of Tall Bui...
CE 72.32 (January 2016 Semester): Lecture 1b: Analysis and Design of Tall Bui...CE 72.32 (January 2016 Semester): Lecture 1b: Analysis and Design of Tall Bui...
CE 72.32 (January 2016 Semester): Lecture 1b: Analysis and Design of Tall Bui...
 
Membrane - Plate - Shell
Membrane - Plate - ShellMembrane - Plate - Shell
Membrane - Plate - Shell
 
Optimized modeling and design of steel structures using etabs
Optimized modeling and design of steel structures using etabsOptimized modeling and design of steel structures using etabs
Optimized modeling and design of steel structures using etabs
 
Matching base shear in Etabs 2016
Matching base shear in Etabs 2016Matching base shear in Etabs 2016
Matching base shear in Etabs 2016
 
Rcc structure design by etabs (acecoms)
Rcc structure design by etabs (acecoms)Rcc structure design by etabs (acecoms)
Rcc structure design by etabs (acecoms)
 
Etabs presentation
Etabs presentationEtabs presentation
Etabs presentation
 
Seismic Design Basics - Superstructure
Seismic Design Basics - SuperstructureSeismic Design Basics - Superstructure
Seismic Design Basics - Superstructure
 
Etabs acecoms rcc structure design
 Etabs acecoms rcc structure design Etabs acecoms rcc structure design
Etabs acecoms rcc structure design
 
Tower design-Chapter 2-pile caps design
Tower design-Chapter 2-pile caps designTower design-Chapter 2-pile caps design
Tower design-Chapter 2-pile caps design
 
CASE STUDY: PERFORMANCE-BASED SEISMIC DESIGN OF REINFORCED CONCRETE DUAL SYST...
CASE STUDY: PERFORMANCE-BASED SEISMIC DESIGN OF REINFORCED CONCRETE DUAL SYST...CASE STUDY: PERFORMANCE-BASED SEISMIC DESIGN OF REINFORCED CONCRETE DUAL SYST...
CASE STUDY: PERFORMANCE-BASED SEISMIC DESIGN OF REINFORCED CONCRETE DUAL SYST...
 
ANALYSIS & DESIGN OF G+3 STORIED REINFORCED CONCRETE BUILDING
ANALYSIS & DESIGN OF G+3 STORIED REINFORCED CONCRETE BUILDING ANALYSIS & DESIGN OF G+3 STORIED REINFORCED CONCRETE BUILDING
ANALYSIS & DESIGN OF G+3 STORIED REINFORCED CONCRETE BUILDING
 
SAP2000 Piperack Tutorial 2010.pdf
SAP2000 Piperack Tutorial 2010.pdfSAP2000 Piperack Tutorial 2010.pdf
SAP2000 Piperack Tutorial 2010.pdf
 
AITC Shear Wall Design Procedure (20151106)
AITC Shear Wall Design Procedure (20151106)AITC Shear Wall Design Procedure (20151106)
AITC Shear Wall Design Procedure (20151106)
 
Baf Shaheen College (B+12) ETABS Dynamic Analysis.pptx
Baf Shaheen College (B+12) ETABS Dynamic Analysis.pptxBaf Shaheen College (B+12) ETABS Dynamic Analysis.pptx
Baf Shaheen College (B+12) ETABS Dynamic Analysis.pptx
 
Analysis and design of pre engineered building using is 800:2007 and Internat...
Analysis and design of pre engineered building using is 800:2007 and Internat...Analysis and design of pre engineered building using is 800:2007 and Internat...
Analysis and design of pre engineered building using is 800:2007 and Internat...
 
CE 72.32 (January 2016 Semester) Lecture 3 - Design Criteria
CE 72.32 (January 2016 Semester) Lecture 3 - Design Criteria CE 72.32 (January 2016 Semester) Lecture 3 - Design Criteria
CE 72.32 (January 2016 Semester) Lecture 3 - Design Criteria
 

Viewers also liked

Numerical and experimental impact analysis of square crash box structure with...
Numerical and experimental impact analysis of square crash box structure with...Numerical and experimental impact analysis of square crash box structure with...
Numerical and experimental impact analysis of square crash box structure with...sahril afandi sitompul
 
Masters' Thesis Defense Slides
Masters' Thesis Defense SlidesMasters' Thesis Defense Slides
Masters' Thesis Defense SlidesRam Subramanian
 
Book for Beginners, RCC Design by ETABS
Book for Beginners, RCC Design by ETABSBook for Beginners, RCC Design by ETABS
Book for Beginners, RCC Design by ETABSYousuf Dinar
 
Powerpoint presentation M.A. Thesis Defence
Powerpoint presentation M.A. Thesis DefencePowerpoint presentation M.A. Thesis Defence
Powerpoint presentation M.A. Thesis DefenceCatie Chase
 
Thesis Powerpoint
Thesis PowerpointThesis Powerpoint
Thesis Powerpointneha47
 
Thesis Power Point Presentation
Thesis Power Point PresentationThesis Power Point Presentation
Thesis Power Point Presentationriddhikapandya1985
 

Viewers also liked (7)

Numerical and experimental impact analysis of square crash box structure with...
Numerical and experimental impact analysis of square crash box structure with...Numerical and experimental impact analysis of square crash box structure with...
Numerical and experimental impact analysis of square crash box structure with...
 
Masters' Thesis Defense Slides
Masters' Thesis Defense SlidesMasters' Thesis Defense Slides
Masters' Thesis Defense Slides
 
Book for Beginners, RCC Design by ETABS
Book for Beginners, RCC Design by ETABSBook for Beginners, RCC Design by ETABS
Book for Beginners, RCC Design by ETABS
 
Building Information Modeling (BIM)
Building Information Modeling (BIM)Building Information Modeling (BIM)
Building Information Modeling (BIM)
 
Powerpoint presentation M.A. Thesis Defence
Powerpoint presentation M.A. Thesis DefencePowerpoint presentation M.A. Thesis Defence
Powerpoint presentation M.A. Thesis Defence
 
Thesis Powerpoint
Thesis PowerpointThesis Powerpoint
Thesis Powerpoint
 
Thesis Power Point Presentation
Thesis Power Point PresentationThesis Power Point Presentation
Thesis Power Point Presentation
 

Similar to Rc bldg. modeling & analysis

Modeling seismic analysis_and_design_of_rc_building_10_story
Modeling seismic analysis_and_design_of_rc_building_10_storyModeling seismic analysis_and_design_of_rc_building_10_story
Modeling seismic analysis_and_design_of_rc_building_10_storyAliAlmayalee
 
Training on Structural designing by CADD centre
Training on Structural designing by CADD centreTraining on Structural designing by CADD centre
Training on Structural designing by CADD centreyashvant meena
 
Practical work 6
Practical work 6Practical work 6
Practical work 6wkhairil80
 
Worked examples for Cross section analysis and design software
Worked examples for Cross section analysis and design softwareWorked examples for Cross section analysis and design software
Worked examples for Cross section analysis and design softwareGeorge Nafpaktitis
 
Introduction to c si bridge
Introduction to c si bridgeIntroduction to c si bridge
Introduction to c si bridgeCristian Cabrera
 
9d9a98a8-4723-486c-8be1-c821336df48a.handout9918OG9918ExtendedStructuralWorkf...
9d9a98a8-4723-486c-8be1-c821336df48a.handout9918OG9918ExtendedStructuralWorkf...9d9a98a8-4723-486c-8be1-c821336df48a.handout9918OG9918ExtendedStructuralWorkf...
9d9a98a8-4723-486c-8be1-c821336df48a.handout9918OG9918ExtendedStructuralWorkf...CleytonLAlves
 
EELE 5331 Digital ASIC DesignLab ManualDr. Yushi Zhou.docx
EELE 5331 Digital ASIC DesignLab ManualDr. Yushi Zhou.docxEELE 5331 Digital ASIC DesignLab ManualDr. Yushi Zhou.docx
EELE 5331 Digital ASIC DesignLab ManualDr. Yushi Zhou.docxtoltonkendal
 
End of chapter problem 4
End of chapter problem 4End of chapter problem 4
End of chapter problem 4wkhairil80
 
ANALYSIS AND DESIGN OF HIGH RISE BUILDING BY USING ETABS
ANALYSIS AND DESIGN OF HIGH RISE BUILDING BY USING ETABSANALYSIS AND DESIGN OF HIGH RISE BUILDING BY USING ETABS
ANALYSIS AND DESIGN OF HIGH RISE BUILDING BY USING ETABSila vamsi krishna
 
Introductory tutorial etab2016
Introductory tutorial etab2016Introductory tutorial etab2016
Introductory tutorial etab2016TPHCM
 
IRJET- Analysis and Design of Multistorey Building (G+3) by using ETABS Software
IRJET- Analysis and Design of Multistorey Building (G+3) by using ETABS SoftwareIRJET- Analysis and Design of Multistorey Building (G+3) by using ETABS Software
IRJET- Analysis and Design of Multistorey Building (G+3) by using ETABS SoftwareIRJET Journal
 
Csicol users-manual (2)
Csicol users-manual (2)Csicol users-manual (2)
Csicol users-manual (2)Pham Tuan
 
Analysis of G+2 building with seismic load using Etabs
Analysis of G+2 building with seismic load using EtabsAnalysis of G+2 building with seismic load using Etabs
Analysis of G+2 building with seismic load using EtabsIRJET Journal
 
Online Scrutiny Application traning
Online Scrutiny Application traningOnline Scrutiny Application traning
Online Scrutiny Application traningSachin Wankhede
 

Similar to Rc bldg. modeling & analysis (20)

Modeling seismic analysis_and_design_of_rc_building_10_story
Modeling seismic analysis_and_design_of_rc_building_10_storyModeling seismic analysis_and_design_of_rc_building_10_story
Modeling seismic analysis_and_design_of_rc_building_10_story
 
Training on Structural designing by CADD centre
Training on Structural designing by CADD centreTraining on Structural designing by CADD centre
Training on Structural designing by CADD centre
 
Practical work 6
Practical work 6Practical work 6
Practical work 6
 
Worked examples for Cross section analysis and design software
Worked examples for Cross section analysis and design softwareWorked examples for Cross section analysis and design software
Worked examples for Cross section analysis and design software
 
Etabs multistory-steel
Etabs multistory-steelEtabs multistory-steel
Etabs multistory-steel
 
Etabs steel-design
Etabs steel-designEtabs steel-design
Etabs steel-design
 
Introduction to c si bridge
Introduction to c si bridgeIntroduction to c si bridge
Introduction to c si bridge
 
4. safe tutorial v. 12 ingles
4.  safe tutorial v. 12 ingles4.  safe tutorial v. 12 ingles
4. safe tutorial v. 12 ingles
 
4. safe tutorial v. 12 ingles
4.  safe tutorial v. 12 ingles4.  safe tutorial v. 12 ingles
4. safe tutorial v. 12 ingles
 
RC Design - Gen
RC Design - GenRC Design - Gen
RC Design - Gen
 
9d9a98a8-4723-486c-8be1-c821336df48a.handout9918OG9918ExtendedStructuralWorkf...
9d9a98a8-4723-486c-8be1-c821336df48a.handout9918OG9918ExtendedStructuralWorkf...9d9a98a8-4723-486c-8be1-c821336df48a.handout9918OG9918ExtendedStructuralWorkf...
9d9a98a8-4723-486c-8be1-c821336df48a.handout9918OG9918ExtendedStructuralWorkf...
 
EELE 5331 Digital ASIC DesignLab ManualDr. Yushi Zhou.docx
EELE 5331 Digital ASIC DesignLab ManualDr. Yushi Zhou.docxEELE 5331 Digital ASIC DesignLab ManualDr. Yushi Zhou.docx
EELE 5331 Digital ASIC DesignLab ManualDr. Yushi Zhou.docx
 
End of chapter problem 4
End of chapter problem 4End of chapter problem 4
End of chapter problem 4
 
ANALYSIS AND DESIGN OF HIGH RISE BUILDING BY USING ETABS
ANALYSIS AND DESIGN OF HIGH RISE BUILDING BY USING ETABSANALYSIS AND DESIGN OF HIGH RISE BUILDING BY USING ETABS
ANALYSIS AND DESIGN OF HIGH RISE BUILDING BY USING ETABS
 
Introductory tutorial etab2016
Introductory tutorial etab2016Introductory tutorial etab2016
Introductory tutorial etab2016
 
IRJET- Analysis and Design of Multistorey Building (G+3) by using ETABS Software
IRJET- Analysis and Design of Multistorey Building (G+3) by using ETABS SoftwareIRJET- Analysis and Design of Multistorey Building (G+3) by using ETABS Software
IRJET- Analysis and Design of Multistorey Building (G+3) by using ETABS Software
 
Etabs Syllabus
Etabs SyllabusEtabs Syllabus
Etabs Syllabus
 
Csicol users-manual (2)
Csicol users-manual (2)Csicol users-manual (2)
Csicol users-manual (2)
 
Analysis of G+2 building with seismic load using Etabs
Analysis of G+2 building with seismic load using EtabsAnalysis of G+2 building with seismic load using Etabs
Analysis of G+2 building with seismic load using Etabs
 
Online Scrutiny Application traning
Online Scrutiny Application traningOnline Scrutiny Application traning
Online Scrutiny Application traning
 

More from Ramil Artates

135430741 4-storey-commercial-bldg-by-staadpro-using-ubc-american-code
135430741 4-storey-commercial-bldg-by-staadpro-using-ubc-american-code135430741 4-storey-commercial-bldg-by-staadpro-using-ubc-american-code
135430741 4-storey-commercial-bldg-by-staadpro-using-ubc-american-codeRamil Artates
 
Tbi peer2010 05 guidelines for performance based seismic design of tall buil...
Tbi peer2010 05  guidelines for performance based seismic design of tall buil...Tbi peer2010 05  guidelines for performance based seismic design of tall buil...
Tbi peer2010 05 guidelines for performance based seismic design of tall buil...Ramil Artates
 
Staad.pro2007 full course
Staad.pro2007 full courseStaad.pro2007 full course
Staad.pro2007 full courseRamil Artates
 
Reinforced concrete design with analysis (w.h. mosley) 4th edition
Reinforced concrete design with analysis (w.h. mosley)   4th editionReinforced concrete design with analysis (w.h. mosley)   4th edition
Reinforced concrete design with analysis (w.h. mosley) 4th editionRamil Artates
 
Performance based design what does it take to make it happen (20141108)
Performance based design   what does it take to make it happen (20141108)Performance based design   what does it take to make it happen (20141108)
Performance based design what does it take to make it happen (20141108)Ramil Artates
 
Example314b taskgroupb-c-120730160543-phpapp01
Example314b taskgroupb-c-120730160543-phpapp01Example314b taskgroupb-c-120730160543-phpapp01
Example314b taskgroupb-c-120730160543-phpapp01Ramil Artates
 
Designofmulti storeyedbuildingsusingstaadpro-140603003704-phpapp01
Designofmulti storeyedbuildingsusingstaadpro-140603003704-phpapp01Designofmulti storeyedbuildingsusingstaadpro-140603003704-phpapp01
Designofmulti storeyedbuildingsusingstaadpro-140603003704-phpapp01Ramil Artates
 
Aitc step by-step procedure for pbd of 40-story rc building_overall (20141105)
Aitc step by-step procedure for pbd of 40-story rc building_overall (20141105)Aitc step by-step procedure for pbd of 40-story rc building_overall (20141105)
Aitc step by-step procedure for pbd of 40-story rc building_overall (20141105)Ramil Artates
 

More from Ramil Artates (11)

135430741 4-storey-commercial-bldg-by-staadpro-using-ubc-american-code
135430741 4-storey-commercial-bldg-by-staadpro-using-ubc-american-code135430741 4-storey-commercial-bldg-by-staadpro-using-ubc-american-code
135430741 4-storey-commercial-bldg-by-staadpro-using-ubc-american-code
 
253283568 stm
253283568 stm253283568 stm
253283568 stm
 
Tbi peer2010 05 guidelines for performance based seismic design of tall buil...
Tbi peer2010 05  guidelines for performance based seismic design of tall buil...Tbi peer2010 05  guidelines for performance based seismic design of tall buil...
Tbi peer2010 05 guidelines for performance based seismic design of tall buil...
 
Staad.pro2007 full course
Staad.pro2007 full courseStaad.pro2007 full course
Staad.pro2007 full course
 
Staad. pro tuto
Staad. pro tutoStaad. pro tuto
Staad. pro tuto
 
Safe tutorial
Safe tutorialSafe tutorial
Safe tutorial
 
Reinforced concrete design with analysis (w.h. mosley) 4th edition
Reinforced concrete design with analysis (w.h. mosley)   4th editionReinforced concrete design with analysis (w.h. mosley)   4th edition
Reinforced concrete design with analysis (w.h. mosley) 4th edition
 
Performance based design what does it take to make it happen (20141108)
Performance based design   what does it take to make it happen (20141108)Performance based design   what does it take to make it happen (20141108)
Performance based design what does it take to make it happen (20141108)
 
Example314b taskgroupb-c-120730160543-phpapp01
Example314b taskgroupb-c-120730160543-phpapp01Example314b taskgroupb-c-120730160543-phpapp01
Example314b taskgroupb-c-120730160543-phpapp01
 
Designofmulti storeyedbuildingsusingstaadpro-140603003704-phpapp01
Designofmulti storeyedbuildingsusingstaadpro-140603003704-phpapp01Designofmulti storeyedbuildingsusingstaadpro-140603003704-phpapp01
Designofmulti storeyedbuildingsusingstaadpro-140603003704-phpapp01
 
Aitc step by-step procedure for pbd of 40-story rc building_overall (20141105)
Aitc step by-step procedure for pbd of 40-story rc building_overall (20141105)Aitc step by-step procedure for pbd of 40-story rc building_overall (20141105)
Aitc step by-step procedure for pbd of 40-story rc building_overall (20141105)
 

Recently uploaded

Electronically Controlled suspensions system .pdf
Electronically Controlled suspensions system .pdfElectronically Controlled suspensions system .pdf
Electronically Controlled suspensions system .pdfme23b1001
 
Indian Dairy Industry Present Status and.ppt
Indian Dairy Industry Present Status and.pptIndian Dairy Industry Present Status and.ppt
Indian Dairy Industry Present Status and.pptMadan Karki
 
Work Experience-Dalton Park.pptxfvvvvvvv
Work Experience-Dalton Park.pptxfvvvvvvvWork Experience-Dalton Park.pptxfvvvvvvv
Work Experience-Dalton Park.pptxfvvvvvvvLewisJB
 
Class 1 | NFPA 72 | Overview Fire Alarm System
Class 1 | NFPA 72 | Overview Fire Alarm SystemClass 1 | NFPA 72 | Overview Fire Alarm System
Class 1 | NFPA 72 | Overview Fire Alarm Systemirfanmechengr
 
CCS355 Neural Network & Deep Learning Unit II Notes with Question bank .pdf
CCS355 Neural Network & Deep Learning Unit II Notes with Question bank .pdfCCS355 Neural Network & Deep Learning Unit II Notes with Question bank .pdf
CCS355 Neural Network & Deep Learning Unit II Notes with Question bank .pdfAsst.prof M.Gokilavani
 
Sachpazis Costas: Geotechnical Engineering: A student's Perspective Introduction
Sachpazis Costas: Geotechnical Engineering: A student's Perspective IntroductionSachpazis Costas: Geotechnical Engineering: A student's Perspective Introduction
Sachpazis Costas: Geotechnical Engineering: A student's Perspective IntroductionDr.Costas Sachpazis
 
Instrumentation, measurement and control of bio process parameters ( Temperat...
Instrumentation, measurement and control of bio process parameters ( Temperat...Instrumentation, measurement and control of bio process parameters ( Temperat...
Instrumentation, measurement and control of bio process parameters ( Temperat...121011101441
 
Risk Assessment For Installation of Drainage Pipes.pdf
Risk Assessment For Installation of Drainage Pipes.pdfRisk Assessment For Installation of Drainage Pipes.pdf
Risk Assessment For Installation of Drainage Pipes.pdfROCENODodongVILLACER
 
TechTAC® CFD Report Summary: A Comparison of Two Types of Tubing Anchor Catchers
TechTAC® CFD Report Summary: A Comparison of Two Types of Tubing Anchor CatchersTechTAC® CFD Report Summary: A Comparison of Two Types of Tubing Anchor Catchers
TechTAC® CFD Report Summary: A Comparison of Two Types of Tubing Anchor Catcherssdickerson1
 
Arduino_CSE ece ppt for working and principal of arduino.ppt
Arduino_CSE ece ppt for working and principal of arduino.pptArduino_CSE ece ppt for working and principal of arduino.ppt
Arduino_CSE ece ppt for working and principal of arduino.pptSAURABHKUMAR892774
 
Call Us ≽ 8377877756 ≼ Call Girls In Shastri Nagar (Delhi)
Call Us ≽ 8377877756 ≼ Call Girls In Shastri Nagar (Delhi)Call Us ≽ 8377877756 ≼ Call Girls In Shastri Nagar (Delhi)
Call Us ≽ 8377877756 ≼ Call Girls In Shastri Nagar (Delhi)dollysharma2066
 
Application of Residue Theorem to evaluate real integrations.pptx
Application of Residue Theorem to evaluate real integrations.pptxApplication of Residue Theorem to evaluate real integrations.pptx
Application of Residue Theorem to evaluate real integrations.pptx959SahilShah
 
Introduction-To-Agricultural-Surveillance-Rover.pptx
Introduction-To-Agricultural-Surveillance-Rover.pptxIntroduction-To-Agricultural-Surveillance-Rover.pptx
Introduction-To-Agricultural-Surveillance-Rover.pptxk795866
 
Why does (not) Kafka need fsync: Eliminating tail latency spikes caused by fsync
Why does (not) Kafka need fsync: Eliminating tail latency spikes caused by fsyncWhy does (not) Kafka need fsync: Eliminating tail latency spikes caused by fsync
Why does (not) Kafka need fsync: Eliminating tail latency spikes caused by fsyncssuser2ae721
 
INFLUENCE OF NANOSILICA ON THE PROPERTIES OF CONCRETE
INFLUENCE OF NANOSILICA ON THE PROPERTIES OF CONCRETEINFLUENCE OF NANOSILICA ON THE PROPERTIES OF CONCRETE
INFLUENCE OF NANOSILICA ON THE PROPERTIES OF CONCRETEroselinkalist12
 

Recently uploaded (20)

Electronically Controlled suspensions system .pdf
Electronically Controlled suspensions system .pdfElectronically Controlled suspensions system .pdf
Electronically Controlled suspensions system .pdf
 
Indian Dairy Industry Present Status and.ppt
Indian Dairy Industry Present Status and.pptIndian Dairy Industry Present Status and.ppt
Indian Dairy Industry Present Status and.ppt
 
Work Experience-Dalton Park.pptxfvvvvvvv
Work Experience-Dalton Park.pptxfvvvvvvvWork Experience-Dalton Park.pptxfvvvvvvv
Work Experience-Dalton Park.pptxfvvvvvvv
 
Class 1 | NFPA 72 | Overview Fire Alarm System
Class 1 | NFPA 72 | Overview Fire Alarm SystemClass 1 | NFPA 72 | Overview Fire Alarm System
Class 1 | NFPA 72 | Overview Fire Alarm System
 
Design and analysis of solar grass cutter.pdf
Design and analysis of solar grass cutter.pdfDesign and analysis of solar grass cutter.pdf
Design and analysis of solar grass cutter.pdf
 
CCS355 Neural Network & Deep Learning Unit II Notes with Question bank .pdf
CCS355 Neural Network & Deep Learning Unit II Notes with Question bank .pdfCCS355 Neural Network & Deep Learning Unit II Notes with Question bank .pdf
CCS355 Neural Network & Deep Learning Unit II Notes with Question bank .pdf
 
young call girls in Rajiv Chowk🔝 9953056974 🔝 Delhi escort Service
young call girls in Rajiv Chowk🔝 9953056974 🔝 Delhi escort Serviceyoung call girls in Rajiv Chowk🔝 9953056974 🔝 Delhi escort Service
young call girls in Rajiv Chowk🔝 9953056974 🔝 Delhi escort Service
 
Sachpazis Costas: Geotechnical Engineering: A student's Perspective Introduction
Sachpazis Costas: Geotechnical Engineering: A student's Perspective IntroductionSachpazis Costas: Geotechnical Engineering: A student's Perspective Introduction
Sachpazis Costas: Geotechnical Engineering: A student's Perspective Introduction
 
9953056974 Call Girls In South Ex, Escorts (Delhi) NCR.pdf
9953056974 Call Girls In South Ex, Escorts (Delhi) NCR.pdf9953056974 Call Girls In South Ex, Escorts (Delhi) NCR.pdf
9953056974 Call Girls In South Ex, Escorts (Delhi) NCR.pdf
 
Instrumentation, measurement and control of bio process parameters ( Temperat...
Instrumentation, measurement and control of bio process parameters ( Temperat...Instrumentation, measurement and control of bio process parameters ( Temperat...
Instrumentation, measurement and control of bio process parameters ( Temperat...
 
POWER SYSTEMS-1 Complete notes examples
POWER SYSTEMS-1 Complete notes  examplesPOWER SYSTEMS-1 Complete notes  examples
POWER SYSTEMS-1 Complete notes examples
 
Risk Assessment For Installation of Drainage Pipes.pdf
Risk Assessment For Installation of Drainage Pipes.pdfRisk Assessment For Installation of Drainage Pipes.pdf
Risk Assessment For Installation of Drainage Pipes.pdf
 
🔝9953056974🔝!!-YOUNG call girls in Rajendra Nagar Escort rvice Shot 2000 nigh...
🔝9953056974🔝!!-YOUNG call girls in Rajendra Nagar Escort rvice Shot 2000 nigh...🔝9953056974🔝!!-YOUNG call girls in Rajendra Nagar Escort rvice Shot 2000 nigh...
🔝9953056974🔝!!-YOUNG call girls in Rajendra Nagar Escort rvice Shot 2000 nigh...
 
TechTAC® CFD Report Summary: A Comparison of Two Types of Tubing Anchor Catchers
TechTAC® CFD Report Summary: A Comparison of Two Types of Tubing Anchor CatchersTechTAC® CFD Report Summary: A Comparison of Two Types of Tubing Anchor Catchers
TechTAC® CFD Report Summary: A Comparison of Two Types of Tubing Anchor Catchers
 
Arduino_CSE ece ppt for working and principal of arduino.ppt
Arduino_CSE ece ppt for working and principal of arduino.pptArduino_CSE ece ppt for working and principal of arduino.ppt
Arduino_CSE ece ppt for working and principal of arduino.ppt
 
Call Us ≽ 8377877756 ≼ Call Girls In Shastri Nagar (Delhi)
Call Us ≽ 8377877756 ≼ Call Girls In Shastri Nagar (Delhi)Call Us ≽ 8377877756 ≼ Call Girls In Shastri Nagar (Delhi)
Call Us ≽ 8377877756 ≼ Call Girls In Shastri Nagar (Delhi)
 
Application of Residue Theorem to evaluate real integrations.pptx
Application of Residue Theorem to evaluate real integrations.pptxApplication of Residue Theorem to evaluate real integrations.pptx
Application of Residue Theorem to evaluate real integrations.pptx
 
Introduction-To-Agricultural-Surveillance-Rover.pptx
Introduction-To-Agricultural-Surveillance-Rover.pptxIntroduction-To-Agricultural-Surveillance-Rover.pptx
Introduction-To-Agricultural-Surveillance-Rover.pptx
 
Why does (not) Kafka need fsync: Eliminating tail latency spikes caused by fsync
Why does (not) Kafka need fsync: Eliminating tail latency spikes caused by fsyncWhy does (not) Kafka need fsync: Eliminating tail latency spikes caused by fsync
Why does (not) Kafka need fsync: Eliminating tail latency spikes caused by fsync
 
INFLUENCE OF NANOSILICA ON THE PROPERTIES OF CONCRETE
INFLUENCE OF NANOSILICA ON THE PROPERTIES OF CONCRETEINFLUENCE OF NANOSILICA ON THE PROPERTIES OF CONCRETE
INFLUENCE OF NANOSILICA ON THE PROPERTIES OF CONCRETE
 

Rc bldg. modeling & analysis

  • 1. Modeling, Analysis & Design of RC Building Using ETABS (Metric Units) ACECOMS, AIT
  • 2.
  • 3. Table of Content Objective 5 Problem 5 Step by Step 12 1. Start Model with Template 12 2. Define Material Properties 14 3. Define Member Sections 15 4. Draw the Members 20 5. Define Load Cases and Assign Loads 50 6. Define Mass Source 61 7. Define the Design Codes 62 8. Assign Rigid Diaphragm and Mesh the Frame 64 9. Add Load Combinations 66 10. Set Analysis Options 68 11. Run Analysis 69 12. Run Concrete Frame Design and View the Results 70 13. Run Shear Wall Design and View the Results 75 14. Check Story Drift 82
  • 4.
  • 5. ETABS Tutorial Example ACECOMS, AIT Modeling, Analysis & Design of RC Building 5/83 Objective To demonstrate and practice step-by-step on the modeling, analysis and design of 10 story RC building by static lateral force procedure. Problem Carry out analysis, and design of 10 story RC building as shown in following details using UBC-97 static lateral force procedure. 3D View
  • 6. ETABS Tutorial Example ACECOMS, AIT Modeling, Analysis & Design of RC Building 6/83 Plan View (Unit in m) BASE – STORY 4 STORY 5 – STORY 8
  • 7. ETABS Tutorial Example ACECOMS, AIT Modeling, Analysis & Design of RC Building 7/83 STORY 9 – STORY 10 Elevation View
  • 8. ETABS Tutorial Example ACECOMS, AIT Modeling, Analysis & Design of RC Building 8/83 Elevation View of Elevator Shaft
  • 9. ETABS Tutorial Example ACECOMS, AIT Modeling, Analysis & Design of RC Building 9/83 Material Properties for Concrete (Unit in kg and cm) Section Properties Member Dimension Beam – B1 (width x height) 30 x 60 cm Beam – B2 (width x height) 40 x 80 cm Column – C1 40 x 40 cm Column – C2 50 x 50 cm Slab Thickness = 15 cm Shear wall Thickness = 20 cm
  • 10. ETABS Tutorial Example ACECOMS, AIT Modeling, Analysis & Design of RC Building 10/83 Story Height Data Story Height Typical Story 3.00 m Static Load Cases Load Name Load Type Details Value Self Weight of Structural Members Calculate automatically using Self Weight Multiplier in ETABS - DEAD Dead Load Uniform Load on Slabs: (Finishing + Partition Load) 0.20 t/m2 LIVE Reducible Live Load Uniform Load on Slabs: (Use Tributary Area: UBC97) 0.25 t/m2 Wind Load Cases (UBC97) Load Case Parameter WINDX WINDY Wind Direction X Y Wind Speed 70 mph Exposure Type B (Suburban area) Importance Factor 1 (Building normal importance)
  • 11. ETABS Tutorial Example ACECOMS, AIT Modeling, Analysis & Design of RC Building 11/83 Static Lateral Force Parameters (UBC-97) Parameter Values Remark Seismic Zone 2A Seismic Zone Factor 0.15 Table 16-I (UBC-97) Soil Profile Type SD Overstrength Factor 6.5 Dual Systems Concrete Shear Walls with Concrete IMRF Table 16-N (UBC-97) Importance Factor 1 Table 16-K (UBC-97) Ct 0.02 Section 1630.2.2 (UBC-97) Eccentricity Ratio 0.05 Section 1630.6 (UBC-97) Static Lateral Force Case Load Case Name Direction and Eccentricity % Eccentricity EQX X Dir + Eccen. Y 0.05 EQNX X Dir - Eccen. Y 0.05 EQY Y Dir + Eccen. X 0.05 EQNY Y Dir - Eccen. X 0.05
  • 12. ETABS Tutorial Example ACECOMS, AIT Modeling, Analysis & Design of RC Building 12/83 Step by Step 1. Start Model with Template Step 1-1: Select Working Unit and Start New Model using Template Start up screen of ETABS, select working unit to be “ton-m” at drop-down menu on the bottom-right of screen and click on New Model button to start new model using template Note: Click the Default.edb button. This means that the definitions and preferences will be initialized (get their initial values) from the Default.edb file that is in the same directory as your ETABS.exe file. If the Default.edb file does not exist in this directory then the definitions and preferences are initialized using ETABS built-in defaults. You should create your Default.edb file such that you most commonly click this button. In some cases you may want to click the Choose.edb button and specify a different file from which the definitions and preferences are to be initialized. For example, a certain client or project may require certain things in your model to be done in a certain way that is different from your typical office standards. You could have a specific .edb file set up for this client or project which could then be used to initialize all models for the client or project. This will allow setting of the repeatedly used preferences. Click the No button if you just want to use the built-in ETABS defaults.
  • 13. ETABS Tutorial Example ACECOMS, AIT Modeling, Analysis & Design of RC Building 13/83 Step 1-2: Specify Grid and Story Dimension Specify grid dimension and story dimension as shown in figure below. Select “Grid Only” option to add the structural objects later. Step 1-3: Save the Model The grid system has been created as parameters specified from previous steps. Go to File >> Save, and save the file.
  • 14. ETABS Tutorial Example ACECOMS, AIT Modeling, Analysis & Design of RC Building 14/83 2. Define Material Properties Step 2-1: Change Working Unit Change working unit to “kg-cm” and go to Define >> Material. Click “Add New Material” button to add the new concrete material. Note: You may select “N-mm” or “Kip-in” or whatever unit to input material properties. Step 2-2: Specify the Material Properties Specify material properties of concrete (fc’ = 240 ksc) as shown in the figure below.
  • 15. ETABS Tutorial Example ACECOMS, AIT Modeling, Analysis & Design of RC Building 15/83 3. Define Member Sections Step 3-1: Define Frame Section for Beam (30 cm x 60 cm) Go to Define >> Frame Sections and select on “Add Rectangular” from second drop-down menu. Enter beam section properties for B1 as shown in figure below.
  • 16. ETABS Tutorial Example ACECOMS, AIT Modeling, Analysis & Design of RC Building 16/83 Step 3-2: Define Frame Section for Beam (40 cm x 80 cm) Select on “Add Rectangular” from second drop-down menu. Enter beam section properties for B2 as shown in figure below.
  • 17. ETABS Tutorial Example ACECOMS, AIT Modeling, Analysis & Design of RC Building 17/83 Step 3-3: Define Frame Section for Column (40 cm x 40 cm) Select on “Add Rectangular” from second drop-down menu. Enter column section properties for C1 as shown in figure below.
  • 18. ETABS Tutorial Example ACECOMS, AIT Modeling, Analysis & Design of RC Building 18/83 Step 3-4: Define Frame Section for Column (50 cm x 50 cm) Select on “Add Rectangular” from second drop-down menu. Enter column section properties for C2 as shown in figure below.
  • 19. ETABS Tutorial Example ACECOMS, AIT Modeling, Analysis & Design of RC Building 19/83 Step 3-5: Define Area Section for Slab (15 cm thk.) Go to Define >> Wall/Slab/Deck Sections and select on “Add New Slab” from drop-down menu. Enter slab section properties as shown in figure below. Step 3-6: Define Area Section for Wall (20 cm thk.) Select on “Add New Wall” from drop-down menu. Enter wall section properties as shown in figure below.
  • 20. ETABS Tutorial Example ACECOMS, AIT Modeling, Analysis & Design of RC Building 20/83 4. Draw the Members Step 4-1: Change View to Plan View and Change Working Unit to “Ton-m” Activate left window by clicking on left window area, click on Set Plan View button and select “STORY1”. Change working unit to “Ton-m” Step 4-2: Draw Columns at Story 1 Click on button, select the property of column in “Properties of Object” dialogue. Window the grid intersections from Grid A4 to H1.
  • 21. ETABS Tutorial Example ACECOMS, AIT Modeling, Analysis & Design of RC Building 21/83 Step 4-3: Draw Beams at Story 1 Click on button, select the property of beam in “Properties of Object” dialogue. Window the grid intersections from Grid A4 to H1.
  • 22. ETABS Tutorial Example ACECOMS, AIT Modeling, Analysis & Design of RC Building 22/83 Step 4-4: Draw Slabs at Story 1 Click on button, select the property of slab in “Properties of Object” dialogue. Window the grid intersections from Grid A4 to H1.
  • 23. ETABS Tutorial Example ACECOMS, AIT Modeling, Analysis & Design of RC Building 23/83 Step 4-5: Set Building View Options Click on button, set the building as shown in the figure below.
  • 24. ETABS Tutorial Example ACECOMS, AIT Modeling, Analysis & Design of RC Building 24/83 Step 4-6: Assign the Beam Section (B2) Select the beams along Y-direction. Go to Assign >> Frame/Line >> Frame Section, and assign “B40x80” section as shown in the figure below.
  • 25. ETABS Tutorial Example ACECOMS, AIT Modeling, Analysis & Design of RC Building 25/83 Step 4-7: Mesh the Slabs Select all the slabs and go to Edit >> Mesh Areas. Enter the number of meshes as shown in the figure below.
  • 26. ETABS Tutorial Example ACECOMS, AIT Modeling, Analysis & Design of RC Building 26/83 Step 4-8: Draw the Wall Click on Rubber Band Zoom button to zoom plan view at shear wall location. Go to Draw >> Draw Point Objects, enter “Plan Offset X” in “Properties of Object” dialogue and click 4 nodes as shown in figure below.
  • 27. ETABS Tutorial Example ACECOMS, AIT Modeling, Analysis & Design of RC Building 27/83 Click on button and select the property of wall in “Properties of Object” dialogue. Draw the wall segments from node to node as shown in figure below.
  • 28. ETABS Tutorial Example ACECOMS, AIT Modeling, Analysis & Design of RC Building 28/83 Go to Select >> by Area Object Type, and select wall to select the walls. Go to Edit >> Replicate, and replicate mirror about the line as shown in the figure below.
  • 29. ETABS Tutorial Example ACECOMS, AIT Modeling, Analysis & Design of RC Building 29/83 Step 4-9: Delete the beams on the wall Select the beams on the walls and delete them.
  • 30. ETABS Tutorial Example ACECOMS, AIT Modeling, Analysis & Design of RC Building 30/83 Step 4-10: Draw the Beams Connecting to the Wall Click on button and select “B40x80” in “Properties of Object” dialogue. draw the beams connecting the columns and the walls.
  • 31. ETABS Tutorial Example ACECOMS, AIT Modeling, Analysis & Design of RC Building 31/83 Step 4-11: Change the Stiffness Modifiers Select the beams connecting to the wall. Go to Assign >> Frame/Line >> Frame Property Modifiers, and change the torsional stiffness as shown in the figure below.
  • 32. ETABS Tutorial Example ACECOMS, AIT Modeling, Analysis & Design of RC Building 32/83 Step 4-12: Mesh the Floor between the Core Walls Select the floor between the core walls. Go to Edit >> Mesh Areas, mesh the floor at the intersection with wall segments as shown in the figure below.
  • 33. ETABS Tutorial Example ACECOMS, AIT Modeling, Analysis & Design of RC Building 33/83 Step 4-13: Delete the Floor inside the Core Walls Select the floor inside the core walls and delete them as shown in the figure below.
  • 34. ETABS Tutorial Example ACECOMS, AIT Modeling, Analysis & Design of RC Building 34/83 Step 4-14: Draw Developed Elevation Definition Go to Draw >> Draw Developed Elevation Definition, type “H1” in the Developed Elevation Name and click “Add New Name”. Click “OK” and draw the line as shown in the figure below.
  • 35. ETABS Tutorial Example ACECOMS, AIT Modeling, Analysis & Design of RC Building 35/83 Do the same step as above for other developed elevations of core walls as shown in the figure below. H1 H2 V1 V2 V3
  • 36. ETABS Tutorial Example ACECOMS, AIT Modeling, Analysis & Design of RC Building 36/83 Step 4-15: Make the Openings in Walls Go to Select >> Select Area Object Type, and select “Wall”. Go to View >> Show Selection Only.
  • 37. ETABS Tutorial Example ACECOMS, AIT Modeling, Analysis & Design of RC Building 37/83 Click on and select “H1” and click “OK”. Go to Select >> by Area Object Type, and select wall. Go to Edit >> Mesh Areas, and mesh the walls as shown in the figure below..
  • 38. ETABS Tutorial Example ACECOMS, AIT Modeling, Analysis & Design of RC Building 38/83 Click on Rubber Band Zoom button to zoom elevation view “H1”. Delete the wall segments for openings as shown in the figure below. Do the same step as above for elevation “H2” and delete the wall segments for openings.
  • 39. ETABS Tutorial Example ACECOMS, AIT Modeling, Analysis & Design of RC Building 39/83 Step 4-16: Assign Pier Labels and Spandrel Labels Click on and select “2” and click “OK”. Select the walls and go to Assign >> Shell/Area >> Pier Label, select pier name “P1” and click “OK” as shown in the figure below.
  • 40. ETABS Tutorial Example ACECOMS, AIT Modeling, Analysis & Design of RC Building 40/83 Click on and select “H1” and click “OK”. Click on Rubber Band Zoom button to zoom elevation view at shear wall location. Select the walls at the left side and go to Assign >> Shell/Area >> Pier Label, type pier name “P2” in the Pier Name Box. Click “Add New Name” and then “OK” as shown in the figure below.
  • 41. ETABS Tutorial Example ACECOMS, AIT Modeling, Analysis & Design of RC Building 41/83 Select the walls above the opening and go to Assign >> Shell/Area >> Spandrel Label, select spandrel name “S1” and click “OK” as shown in the figure below.
  • 42. ETABS Tutorial Example ACECOMS, AIT Modeling, Analysis & Design of RC Building 42/83 Perform the same steps as above to assign the pier label and spandrel as shown in the following figure.
  • 43. ETABS Tutorial Example ACECOMS, AIT Modeling, Analysis & Design of RC Building 43/83 Step 4-17: Replicate the Floor Click on button, select “STORY 1” and change to plan view as shown in the figure below. Go to View >> Show All.
  • 44. ETABS Tutorial Example ACECOMS, AIT Modeling, Analysis & Design of RC Building 44/83 Select the members by windowing and go to Edit >> Replicate. Select from STORY 2 to STORY 10 in “Story” tab and replicate as shown in the figure below.
  • 45. ETABS Tutorial Example ACECOMS, AIT Modeling, Analysis & Design of RC Building 45/83 Step 4-18: Delete the Members Click on button, select “STORY 5”. Select and delete the members as shown in the figure below. Repeat the above step for STORY 6, 7 and 8.
  • 46. ETABS Tutorial Example ACECOMS, AIT Modeling, Analysis & Design of RC Building 46/83 Click on button, select “STORY 9”. Select and delete the members as shown in the figure below. Repeat the above step for STORY 10.
  • 47. ETABS Tutorial Example ACECOMS, AIT Modeling, Analysis & Design of RC Building 47/83 Step 4-19: Assign the Columns Click on and select “1” and click “OK”. Select the columns as shown in the figure below.
  • 48. ETABS Tutorial Example ACECOMS, AIT Modeling, Analysis & Design of RC Building 48/83 Go to Assign >> Frame Line >> Frame Section, and select C50x50 and click “OK”. Repeat the above steps to assign the columns in Elevations 2, 3 and 4.
  • 49. ETABS Tutorial Example ACECOMS, AIT Modeling, Analysis & Design of RC Building 49/83 Step 4-20: Assign the Supports Click on button, select “BASE” and change to plan view as shown in the figure below. Select the points by windowing as shown in the figure below. Go to Assign >> Joint/Point >> Restraints (Supports), and restrained all DOFs as shown in the figure below.
  • 50. ETABS Tutorial Example ACECOMS, AIT Modeling, Analysis & Design of RC Building 50/83 5. Define Load Cases and Assign Loads Step 5-1: Define Load Cases Go to Define >> Static Load Cases, modify the “LIVE” Load as Reducible Live Load as shown in the figure below. Add “SDL” Load as Superimposed Dead Load as shown in the figure below.
  • 51. ETABS Tutorial Example ACECOMS, AIT Modeling, Analysis & Design of RC Building 51/83 Add “WX” Load as Wind Load as shown in the figure below. Modify the “WX” Load as shown in the figure below.
  • 52. ETABS Tutorial Example ACECOMS, AIT Modeling, Analysis & Design of RC Building 52/83 Add “WY” Load as Wind Load as shown in the figure below. Modify the “WY” Load as shown in the figure below.
  • 53. ETABS Tutorial Example ACECOMS, AIT Modeling, Analysis & Design of RC Building 53/83 Add “EQX” Load as Quake Load as shown in the figure below. Modify the “EQX” Load as shown in the figure below.
  • 54. ETABS Tutorial Example ACECOMS, AIT Modeling, Analysis & Design of RC Building 54/83 Add “EQNX” Load as Quake Load as shown in the figure below. Modify the “EQNX” Load as shown in the figure below.
  • 55. ETABS Tutorial Example ACECOMS, AIT Modeling, Analysis & Design of RC Building 55/83 Add “EQY” Load as Quake Load as shown in the figure below. Modify the “EQY” Load as shown in the figure below.
  • 56. ETABS Tutorial Example ACECOMS, AIT Modeling, Analysis & Design of RC Building 56/83 Add “EQNY” Load as Quake Load as shown in the figure below. Modify the “EQY” Load as shown in the figure below.
  • 57. ETABS Tutorial Example ACECOMS, AIT Modeling, Analysis & Design of RC Building 57/83 Step 5-2: Define Special Seismic Load Effects Go to Define >> Special Seismic Load Effects, and enter the parameters to consider in special seismic design as shown in the figure below. E = ρ Eh + Ev (30-1) Em = Ω0 Eh (30-2) E = the earthquake load on an element of the structure resulting from the combination of the horizontal component, Eh, and the vertical component Ev Eh = the earthquake load due to the base shear, V, as set forth in Section 1630.2 or the design lateral force, Fp, as set forth in Section 1632 Ev = the load effect resulting from the vertical component of the earthquake ground motion and is equal to an addition of 0.5 Ca ID to the dead load effect, D, for Strength Design, and may be taken as zero for Allowable Stress Design In this case Ca = 0.22, 0.5 Ca I = 0.5 x 0.22 x 1 = 0.11 Ω0 = the seismic force amplification factor that is required to account for structural overstrength, as set forth in Section 1630.3.1
  • 58. ETABS Tutorial Example ACECOMS, AIT Modeling, Analysis & Design of RC Building 58/83 ρ = Reliability/Redundancy Factor as given by the following formula ρ = 2 – 20 / (rmax x sqrt(AB)) (30-3) = 2 – 6.1 / (rmax x sqrt(AB)) (For SI) rmax = the maximum element-story shear ratio. For a given direction of loading, the element-story shear ratio is the ratio of the design story shear in the most heavily loaded single element divided by the total design story shear. For any given Story Level i, the element story shear ratio is denoted as ri. The maximum element-story shear ratio rmax is defined as the largest of the element story shear ratios, ri, which occurs in any of the story levels at or below the two-thirds height level of building.
  • 59. ETABS Tutorial Example ACECOMS, AIT Modeling, Analysis & Design of RC Building 59/83 Step 5-3: Assign the Loads Go to Select >> by Area Object Type, select “Floor” as shown in the figure below. Go to Assign >> Shell/Area Loads >> Uniform, and assign Live Load of 0.25 t/m2 as shown in the figure below.
  • 60. ETABS Tutorial Example ACECOMS, AIT Modeling, Analysis & Design of RC Building 60/83 Click on to reselect the floor areas. Go to Assign >> Shell/Area Loads >> Uniform, and assign “SDL” Load of 0.2 t/m2 as shown in the figure below.
  • 61. ETABS Tutorial Example ACECOMS, AIT Modeling, Analysis & Design of RC Building 61/83 6. Define Mass Source Step 6-1: Define Mass Source Go to Define >> Mass Source, and add the mass from loads as shown in the figure below.
  • 62. ETABS Tutorial Example ACECOMS, AIT Modeling, Analysis & Design of RC Building 62/83 7. Define the Design Codes Step 7-1: Define Design Code for Concrete Frame Design Go to Options >> Preferences >> Concrete Frame Design, change the Design Code
  • 63. ETABS Tutorial Example ACECOMS, AIT Modeling, Analysis & Design of RC Building 63/83 Step 7-2: Define Design Code for Shear Wall Design Go to Options >> Preferences >> Shear Wall Design, change the Design Code
  • 64. ETABS Tutorial Example ACECOMS, AIT Modeling, Analysis & Design of RC Building 64/83 8. Assign Rigid Diaphragm and Mesh the Frame Step 8-1: Assign Rigid Diaphragm Go to Select >> by Area Object Type, and select “Floor”. Go to Assign >> Shell/Area >> Diaphragms, select “D1” and click “OK”.
  • 65. ETABS Tutorial Example ACECOMS, AIT Modeling, Analysis & Design of RC Building 65/83 Step 8-2: Mesh the Frame Click on button and go to Assign >> Frame/Line >> Automatic Frame Subdivide, select the second option as shown in the figure below.
  • 66. ETABS Tutorial Example ACECOMS, AIT Modeling, Analysis & Design of RC Building 66/83 9. Add Load Combinations Step 9-1: Add Load Combinations Go to Define >> Add Default Design Combos, and add the default combinations as shown in the figure below. Click on button and go to Design >> Concrete Frame Design >> View/Revise Overwrites, change Element Type to Sway Intermediate as shown in the figure below.
  • 67. ETABS Tutorial Example ACECOMS, AIT Modeling, Analysis & Design of RC Building 67/83 Step 9-2: Special Seismic Data Go to Define >> Special Seismic Load Effects, and select no to include Special Seismic Design Data as shown in the figure below.
  • 68. ETABS Tutorial Example ACECOMS, AIT Modeling, Analysis & Design of RC Building 68/83 10. Set Analysis Options Step 10-1: Set Analysis Options Go to Analyze >> Set Analysis Options, and set the Dynamic Parameters as shown in the figure below.
  • 69. ETABS Tutorial Example ACECOMS, AIT Modeling, Analysis & Design of RC Building 69/83 11. Run Analysis Step 11-1: Run Analysis Go to Analyze >> Run Analysis or click on Run Analysis button to start analysis. ETABS will display deformed shape of model when analysis complete.
  • 70. ETABS Tutorial Example ACECOMS, AIT Modeling, Analysis & Design of RC Building 70/83 12.Run Concrete Frame Design and View the Results Step 12-1: Run Concrete Frame Design Go to Design >> Concrete Frame Design >> Start Design/Check Structure.
  • 71. ETABS Tutorial Example ACECOMS, AIT Modeling, Analysis & Design of RC Building 71/83 Step 12-2: View the Results Click on button, and set up the building view options as shown in the following figure.
  • 72. ETABS Tutorial Example ACECOMS, AIT Modeling, Analysis & Design of RC Building 72/83 Activate the left window and Click on button, select “STORY 1”. Change the working unit to “kg-cm”. Go to Design >> Concrete Frame Design >> Display Design Info, select design output as shown in the following figure.
  • 73. ETABS Tutorial Example ACECOMS, AIT Modeling, Analysis & Design of RC Building 73/83 Right click on the member to view the design details.
  • 74. ETABS Tutorial Example ACECOMS, AIT Modeling, Analysis & Design of RC Building 74/83 Beam Reinforcement Column Reinforcement 2 3 Shear Reinforcement Bottom Reinforcement Top Reinforcement 2 3 Minor Shear Reinforcement Major Shear Reinforcement Longitudinal Reinforcement
  • 75. ETABS Tutorial Example ACECOMS, AIT Modeling, Analysis & Design of RC Building 75/83 13. Run Shear Wall Design and View the Results Step 13-1: Run Shear Wall Design Go to Design >> Shear Wall Design >> Start Design/Check Structure.
  • 76. ETABS Tutorial Example ACECOMS, AIT Modeling, Analysis & Design of RC Building 76/83 Step 13-2: View the Results Click on button, and set up the building view options as shown in the following figure.
  • 77. ETABS Tutorial Example ACECOMS, AIT Modeling, Analysis & Design of RC Building 77/83 Activate the left window, click on button and select “H1”. Click on Rubber Band Zoom button to zoom elevation view at shear wall location. Right click on the pier to view the design details.
  • 78. ETABS Tutorial Example ACECOMS, AIT Modeling, Analysis & Design of RC Building 78/83 Reinforcement Details in Pier
  • 79. ETABS Tutorial Example ACECOMS, AIT Modeling, Analysis & Design of RC Building 79/83 Go to Design >> Shear Wall Design >> Display Design Info, select design output as shown in the following figure.
  • 80. ETABS Tutorial Example ACECOMS, AIT Modeling, Analysis & Design of RC Building 80/83 Reinforcement Details in Spandrel
  • 81. ETABS Tutorial Example ACECOMS, AIT Modeling, Analysis & Design of RC Building 81/83 Note: Typical Detailing of Shear Wall
  • 82. ETABS Tutorial Example ACECOMS, AIT Modeling, Analysis & Design of RC Building 82/83 14. Check Story Drift P-∆ Effects In general, P-∆ effects need not be considered when the stability coefficient (θ) defined as the ratio of secondary moments to primary moments, is less than or equal to 0.1. The stability coefficient (θ) for a given story can be computed from the following equation: θ = Px ∆ / (Vx hsx) Px = total unfactored gravity load at and above level x ∆ = seismic story drift Vx = seismic shear force between levels x and x-1 hsx = story height below level x From ETABS, ∆ / hsx is extracted from diaphragm drift of ETABS results. Px is extracted by section cut. V is extracted from story shear. Compute θ and if θ < 1, P-∆ effects needs not be considered. In Seismic Zones 3 and 4, P-∆ effects need not be considered when the story drift (∆) is less than or equal to 0.02hsx / R. Story Drift Limitations According to 1630.10, story drifts shall be computed using the maximum inelastic response displacement (∆M), which is an approximation of the displacement that occurs when the structure is subjected to the design basis ground motion: ∆M = 0.7 R ∆S ∆S is the design level response displacements. For structures with a fundamental period (T) less than 0.7 seconds, the calculated story drift using ∆M shall not be exceed 0.025 times the story height. For structures
  • 83. ETABS Tutorial Example ACECOMS, AIT Modeling, Analysis & Design of RC Building 83/83 with T greater than or equal to 0.7 seconds, the story drift shall not exceed 0.020 times the story height. From ETABS, Calculated story drift is determined by multiplying the diaphragm drift into 0.7 x R.