
Recommended
More Related Content
What's hot
What's hot (9)
Similar to Instructional module building your own flounder light
Similar to Instructional module building your own flounder light (20)
Recently uploaded
Recently uploaded (20)
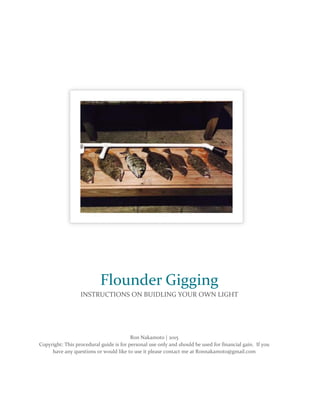
Instructional module building your own flounder light
- 6. PAGE 5 Let’s Get Started PREPARING THE LIGHT When you get the light from Oznium.com it comes in a box with the mount and the spot light installed. The box also comes with the flood lens so be careful when opening it. You’re going to remove the mount and discard. You will not need this. You will need to switch out the spot light lens with the flood light lens. This lens allows the light to be dispersed at a wider angle to cover more area. This is done by unscrewing the cover and removing the lens. Note: when attempting to take out the spot lens the rubber ring can make it hard to remove. You can take a flat screw driver to get this out. The lens is also a great magnifying glass and my daughter plays with it when looking at her nature finds. The lights come with an AC adapter as they can be used for other purposes then gigging. This will need to be cut off and stripped to allow enough wire to be used in the butt connectors. Using the AC adapter will not work in this use as a gig light.
- 7. PAGE 6 In order to prepare the light to fit into the one inch PVC threaded adapter you have to remove the back. This piece unscrews but you have to be careful when you remove the back as you can strip the wire out of the light or tear the black silicone that makes the light waterproof. When you look at the top of the back you will notice that there is a small silicone piece in between the black wire and the metal top. I took a knife and cut two slits in this piece and took it off with little effort. Once you unscrew the top it should slide right off of the wire. Take the PVC thread adapter and wrap Teflon plumbers tape around the thread. Insert the threaded part of the adapter into the light. Optional: Some people will fill in the space behind the light with additional silicone. I chose not to do this so that I can unscrew the light as needed if water got into the PVC to allow it to dry. It also makes it harder to work on the light or replace it if there are any issues. Once you place the silicone in the light and you have to remove it there is a good chance it will pull on the black silicone in the light that makes the light waterproof.
- 8. PAGE 7 Optional: Might be redundant since there is already silicone in the holes you took the screws out for the mount but since you removed the screws I recommend that you put a few drops of silicone in each hole to fill up the space. Allow it to dry and then take the knife and cut it flush. PREPARING THE SWITCH (OPTIONAL) Using a 3/4 inch bit or step drill bit you’re going to prepare the PVC cap for the switch. Secure the PVC cap and drill a 3/4 inch hole so that the switch fits tight. If you’re unsure of the measurements go slow and continue to test if the switch will fit snug in the hole. If not, cut a little more until you have a snug fit.
- 11. PAGE 10 For the arm rest you have two options. If your arm is small enough you can use the 3 inch or 4 inch coupling (based on your arm) and use the entire piece as your arm support. Or you can cut the coupling in half. I recommend you sand the middle section that sticks out and the corners to add to the comfort. In order to find out where the arm rest works for you, you are going to have to put the pieces together and test the arm rest out to fit you.
- 13. PAGE 12 Place the arm rest back on the 2 foot PVC piece matching up the mark that you made when resting the location of the arm rest. Take your pen and mark the spot on the 2 foot PVC piece where you need to drill the rivet holes to connect the arm rest. Drill holes using a 3/16 inch drill bit
- 14. PAGE 13 Test the holes by placing the rivets into the arm rest and the 2 inch PVC piece. Once you’ve confirmed that it matches up you can seal the arm rest. Take your silicone and place a dab on the holes on the 2 inch PVC piece. Place silicone on each end of the rivet that goes into the PVC. Then put the rivet into the arm rest and then 2 inch PVC piece. This silicone will fill in the holes and prevent water from entering. Using your rivet gun secure the rivet. Wipe off any excess silicone and allow it to dry.
- 15. PAGE 14 Before using purple primer, make sure that you have either a protective cloth or similar laid down, so you don’t make a mess on your work surface. Using the applicator that comes with the primer, wipe the primer on all areas of the PVC that you will be connecting. Make sure to do the inside of the connectors and caps and the ends of the actual pipes. It will dry within 20 to 30 seconds. PUTTING IT ALL TOGETHER Note: This cement dries super‐fast. When you connect the pieces, make sure you set them properly. Makes sure when you place the cement on the PVC you get all around the pieces that will connect to make a good seal. Using the 2 inch PVC piece, place cement on the inside of the adapter and then around one end of the 2 inch PVC. Next you take the 45 degree elbow and connect it to the other half of the 2 inch PVC piece.