Arduino اردوينو
•Download as PPSX, PDF•
8 likes•2,142 views

محاضرة تعريفية عن الاردوينو مع امثلة بدائية جدا وبسيطة ضمن ورشة اقامتها موصل سبيس بالتعاون مع قسم الهندسة الكهربائية جامعة الموصل

Recommended
More Related Content
What's hot
What's hot (20)
Viewers also liked
Viewers also liked (20)
Similar to Arduino اردوينو
Similar to Arduino اردوينو (20)
More from salih mahmod
Recently uploaded
Recently uploaded (20)
Arduino اردوينو
- 2. What is arduino Arduino is an open-source prototyping platform based on easy-to-use hardware and software. Arduino boards are able to read inputs - light on a sensor, a finger on a button, or a Twitter message - and turn it into an output - activating a motor, turning on an LED, publishing something online. You can tell your board what to do by sending a set of instructions to the microcontroller on the board. To do so you use the arduino programming language (based on wiring), and the arduino software (IDE), based on processing .
- 3. Arduino development process Level1 based on 8 bit mcu like arduino uno ,mega ,nano , micro, lilypad and demulive
- 4. Arduino development process Level2 based on 32 bit mcu like arduino due , zero and teensyduino
- 5. Arduino development process Level3 FPGA boards with mcu and programmed by arduino software platform like papilio pro , one and duo .
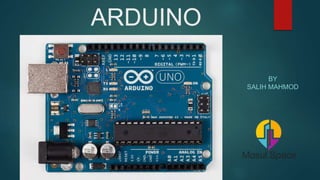
- 6. Arduino architecture We will talk here about more common board arduino uno
- 8. Arduino programming platform (IDE) we program arduino using an programming languge named “Arduino c” also we can program it using matlab , labview ,python ,c# ,flowcode and embedded c To start with arduio 1- download the arduino software (IDE) 2- connect the board 3- install the drivers 4- launch the arduino application 5- write code or open an example 6- select your board 7- select your serial port 8- upload the program
- 9. Arduino IDE Here we will go to arduino IDE to see it
- 10. Arduino c program body -المتغيرات عن االعالن يتم وانواعها وقيمها -ت التي الدوال كتابة يتمنفذ التشغيل عند واحدة مرة -يع التي الدوال كتابة يتماد حيث دورة كل تنفيذها بهذا يكتب الذي البرنامج بصور يتكرر يبقى الجزءة النهائية حلقة
- 11. Data type
- 12. Digital I/O pinMode(pin, mode); pin:- the number of the pin whose mode you wish to set mode:- INPUT or OUTPUT digitalWrite(pin, value); pin:- the pin number value:- HIGH or LOW digitalRead(pin); pin:- the number of the digital pin you want to read (int) returns:- HIGH or LOW
- 13. Pullup and pulldown resistors If a pull-down resistor is used, the input pin will be LOW when the switch is open and HIGH when the switch is closed. If a pull-up resistor is used, the input pin will be HIGH when the switch is open and LOW when the switch is closed. -To active pullup resistor in arduino use this function pinMode(2,INPUT_PULLUP) ; this active pullup for pin 2 therefore we will connect switch between GND and pin2
- 14. Analog I/O analogRead(pin); pin:- the number of the analog input pin to read from (0 to 5 on most boards) returns:- int (0 to 1023) analogWrite(pin, value); pin:- the pin to write to. value:- the duty cycle: between 0 (always off) and 255 (always on). Here we haven't DAC to generate an analog output but we use PWM
- 15. PWM(Pulse Width Modulation) - PWM, is a technique for getting analog results with digital means. Digital control is used to create a square wave, a signal switched between on and off. This on-off pattern can simulate voltages in between full on (5 Volts) and off (0 Volts) by changing the portion of the time the signal spends on versus the time that the signal spends off.
- 16. Time functions millis() ; Returns the number of milliseconds since the Arduino board began running the current program. This number will overflow (go back to zero), after approximately 50 days micros() ; returns the number of microseconds since the Arduino board began running the current program. This number will overflow (go back to zero), after approximately 70 minutes. delay(ms) ; ms: the number of milliseconds to pause (unsigned long)
- 17. Blink code example Hardware Required - Arduino Board - LED - resistor less than 1kohm
- 18. Blink code example void setup() { // initialize digital pin 13 as an output. pinMode(13, OUTPUT); } // the loop function runs over and over again forever void loop() { digitalWrite(13, HIGH); // turn the LED on (HIGH is the voltage level) delay(1000); // wait for a second digitalWrite(13, LOW); // turn the LED off by making the voltage LOW delay(1000); // wait for a second }
- 20. Arduino shields
- 21. Arduino libraries Libraries are a collection of code that makes it easy for you to connect to a sensor, display, module, etc. For example, the built- in LiquidCrystal library makes it easy to talk to character LCD displays. There are hundreds of additional libraries available on the Internet for download.
- 22. Liquid crystal code example