2. Assembly Instructions
• Sharp scissors.
• Paper-cutting knife (recommended: X-Acto knife with a #11 blade).
• Sturdy tweezers with smooth edges. (Tweezers with rough edges or teeth
will mar the surface of the pieces.)
• Metal ruler to make a straight cut or score.
• Toothpicks for reaching into tiny corners and spreading drops of glue.
• White glue and glue stick.
• Cutting surface (recommended: a cutting mat).
• Dry pen (no ink) or blunt knife for scoring.
Steps To Follow To Assemble Your Model
1. Read the assembly instructions carefully and assemble in order as shown on the diagram
pages. Study each of the steps for each section and find the different pieces of the model
section. Some pieces may be found on sheets that include pieces from other sections.
2. Cut out all pieces needed to assemble one section, but at this time don’t cut along the
lines. The different pieces are numbered.
3. Work on one piece at a time:
• Score along the dotted lines.
• Cut along the solid lines.
• Fold along the dotted lines, but don’t add glue to any pieces yet.
VERY IMPORTANT: Try out the pieces to be glued before applying the glue. This
will help you understand how the pieces fit together, and you will be able to take
note of any adjustments that might be needed. Then apply a small amount of glue
on the tab indicated by a black dot.
Usually, a piece for a card stock model is cut out in two stages.
First, the piece is separated from the rest of the pieces by cutting roughly around it with scissors.
Don’t cut along the lines at this step.
Once the piece is separated, you can work on it without damaging other pieces. It’s best to do
the scoring and folding before proceeding to the fine cutting.
With small pieces and narrow tabs, it’s easier to fold them neatly while there is still waste paper
surrounding the piece.
Scoring
Mountain
fold
Valley
fold
Score the fold lines to make a crisp straight fold. It’s especially
important for the smallest pieces to be scored before folding. To
score, place a metal ruler along the fold line, and then press with
a dull point (a dry pen or dull knife) along the fold line to compress
the paper. This will help to achieve a crisp fold.
There are two kinds of folds:
Most pieces require a mountain fold, though a few use a valley
fold. Valley folds will be indicated on the model pieces and in the
instruction manual with the valley fold symbol.
Cutting
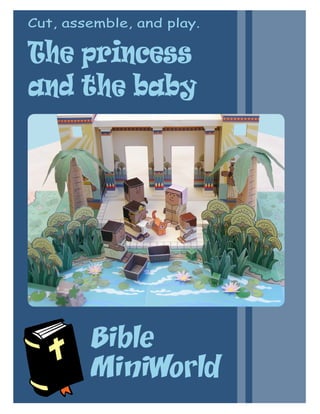
Bible MiniWorld - The princess and the baby - page 2
3. Bible MiniWorld - The princess and the baby - page 3
When assembling a wall with a window or a door,
before gluing it together you need to first glue the
door or window frame into place.
Prepare the wall and frame by
scoring and cutting. Do a pre-fold
to prepare the piece, then glue
the frame to one side of the wall.
Then fold over the other piece of the wall and
glue it to the frame as well. Afterward, glue the
other tabs into position.
Don’t try to glue everything at the same time,
or the glue might dry before you have finished
assembling.
Assembling the terrain tiles
There are many different ways. It’s up to you to experiment and find what you prefer.
Cut out each floor
tile individually and
glue it to a piece
of cardboard, foam
core, or display
board of the same
size.
Then you can simply
attach them together with
a piece of tape on the
back. That way, if in the
future you wish to change
the order of your tiles, it
will be easy to separate
and rearrange them .
Or you can glue them all together. Another option is to
prepare each piece
individually, then prepare
a frame with cardboard
or foam core that you can
set your floor tiles within
without the need to glue
or tape them together.
This makes it easier to
rearrange the tiles as
desired.
Assembling door and window frames
4. Bible MiniWorld - The princess and the baby - page 4
Pieces with extra border color
Some pieces have extra color around them; arms for example. Fold these pieces in half and
glue before cutting, so that the piece will have texture on both sides. Simply fold along the
dotted line and apply some glue, preferably using a glue stick.
Once the glue on the
piece has dried, cut
it out. You don’t have
to cut right on the
line, it’s fine to leave
a millimeter or two
around it.
AND ALWAYS TRY OUT BEFORE
GLUING, as the piece of cardboard (or
other material) may need small adjustments
before being glued into place.
Cut out the desired
shape and insert it
inside the base or wall.
Another technique is to use a piece of
cardboard, foam board, or Styrofoam that
correspond to the thickness of the part.
Adding extra strength to walls and bases
At the end of the model pages, you will find a
page with small pieces in white; these are to add
extra strength to walls and bases. (The pieces are
numbered to indicate the coresponding walls or
base parts.)
Fold them into triangles. Then glue them
inside the bases or the walls.
Caution
• Be careful when using scissors or a
paper cutting knife.
• Glue, scissors, and other tools may be
dangerous, so be sure to keep them out
of the reach of young children.
And remember,
there is no hurry.
TAKE YOUR
TIME!
5. Assembling the house
2
3
4
5
6
7
8
9
1
10
11 12 13 14
15
Then glue together the top (part
15). It is very important to make
sure the three columns align and
are glued on the small drawn
squares drawn under the top part.
Start by assembling the base (part 1), then the
3 columns. Glue these onto the base.
Then assemble the back wall (parts 11
through 14), and glue it onto the base, making
sure you align it properly with the back of the
base.
Guide for where to
glue the columns.
Guides for where to
glue the columns.
Bible MiniWorld - The princess and the baby - page 5
6. 20
16 17
18
19
21 22
23
24
25
26
27
Assemble the two small
towers and glue to the
side of the building.
Finally, assemble and glue the two front bases and
glue them together with the rest of the building.
You can then glue the whole
building unto the two grass terrain
tiles or keep it separate.
Bible MiniWorld - The princess and the baby - page 6
7. Assembling the Mini-people
Assembling the basket
These instructions apply to the basic shape of all mini-people.
Some mini-people have additional parts.
Score, cut, fold,
and glue the side
first; then glue the
top.
Optional:
Before gluing the
bottom piece, glue
in a small coin to
add weight to the
mini-people.
To form the arms: fold in the middle, glue
together, and when dry, cut around the arm.
Tip: When cutting around the arms or other similar pieces, you
don’t necessarily have to cut right on the black line. You can
cut a millimeter or two from it outside in the colored area.
Assembling cats and frogs
Bible MiniWorld - The princess and the baby - page 7
Fold and glue the sides,
then fold down the other
part and glue inside to have
color texture inside the box
Fold and glue the
frog figure as a small
box, then fold the feet
outward.
Fold and glue the
cat body as a small
box, then glue in
place the head and
tail.