SlideShare a Scribd company logo
1 of 18
Download to read offline
Use And Care Of Tools
Maintenance And Storage
A Place for Everything
There is probably nothing that discourages a home handyman faster than being unable to find a
specific tool quickly when it is needed. Some kind of wall rack or storage system should be set
up for all tools as soon as possible. Arrange tools so that all screwdrivers are together, all pliers
together, etc. If lack of space does not permit putting up a regular workshop wall rack, then buy
or build a tool box with compartments for all items. Do not simply throw everything together in
one empty box. Sharp tools will be damaged, and small ones lost or misplaced.
Photo owned by Wolfgang Sauber
Identify Tools
When working outdoors, the home handyman will frequently have small tools scattered around
the outside on lawn or terrace. Make them all easier to spot by painting the handle of each one
with a bright identifying color such as red or yellow. This also makes it easier for borrowing
neighbors to remember where they came from.
Sharpen for Safety
Contrary to what some people think, sharp chisels, knives and planes are safer to use than dull
ones. Dull tools may slip or gouge the work, and require extra pressure—all of which makes
them more hazardous to use. Keep tools sharp by honing edges frequently on an oilstone. Grind
them only when the blades have been badly worn or nicked.
Storing Sharp Tools
To preserve the edge on chisels, gouges and other sharp tools build a small rack which holds
them vertically with the tips or blades shoved into the top of a slab of synthetic sponge. The soft
material will keep the blades from banging against each other, and also keeps the sharp blades
covered so there is less danger of the handyman cutting himself.
Using Oilstones
When honing chisels or plane blades on an oilstone always place the blade so that the beveled
edge rests flat on the stone (Fig. 1). Stroke the blade gently over the surface in
a forward direction only. Do not draw it backwards since this will cause slight burrs or wire
edges to form. Some old time craftsmen do work back and forth with an oval motion so that any
burrs that are formed on the backward stroke are honed off on the next forward stroke—but this
calls for greater skill and careful handling. Don't forget to keep the stone saturated with cutting
oil to prevent clogging and to assure smooth cutting.
Fig. 1
For a Keen Edge
Chisels are usually kept sharp by ocassional honing on an oilstone. However, when nicks must
be grounded out, or when extreme re-shaping of the edge is needed, then a grinding wheel must
be used. Always grind carefully, taking off only a little at a time. Otherwise the blade may be
entirely ruined. Let the blade cool after every three or four passes across the face of the wheel as
hot metal has more tendency to chip. In extreme cases the temper may even be drawn from the
blade so that it will not hold a sharp edge at all.
Sharpening Drills
When twist drill bits become dull they do not only bore slowly. They are also more hazardous to
use and more prone to slip or wobble. Sharpening them is not difficult if an inexpensive grinding
jig, which is sold for this purpose at all hardware stores, is used. These gadgets hold the drill bits
at the correct angle for grinding, and enable you to put a keen, accurate edge on the bit in a
matter of minutes.
Renewing Oilstone
Oilstones, used to put a final razor-edge shape on knives, chisels and other tools eventually
become clogged with dirt, oil and metal particles. To restore their original abrasive-ness, fill a
shallow pan with water and boil the stone in this till the old dirt is loosened up. If necessary,
scrub with a stiff fiber brush and repeat the process several times until the stone is clean. Handli
Perspiration from the hands can cause steel saw blades and similar tools to rust rather quickly.
To prevent this, avoid handling a saw by its blade whenever possible. In addition, always wipe
both sides with a lightly oiled rag before putting it away after the job is done.
Protect Glass Cutter
Cutting wheels on glass cutters are easily damaged if they are allowed to bang around in a tool
chest or drawer. To protect them slip a short length of rubber tubing over the cutting end before
putting the tool away.
Sharpening Guide
When sharpening tools on a power-driven grinding wheel, the angle at which a tool is held
against the surface of the wheel is all important accurate, smooth edge is to be assured. To
provide a solid rest of exactly the right angle, cut a wooden block with a bevel at the top. Shape
this bevel to hold the blade at the proper angle (Fig. 2). Take time out to make a separate block
for each tool angle required so that in the future it will take only moments to sharpen each type
of blade. Label the blocks clearly on the back so there will be no possibility of using the wrong
one.
Fig. 2
Improvised Home
A small strip of emery cloth tacked to the top of a block of wood makes an excellent hone for
sharpening pocket knives and other cutting tools. Hold the tool blade at right angles to the length
of the strip and move the edge sideways along the strip with light pressure. Replace the strip
when it becomes clogged or worn.
Plane Blade
A properly sharpened plane blade can be easily nicked or dulled if the blade is left exposed when
the plane is not in use. To protect the razor sharp edge from damage, the blade should be
retracted when the plane is put away—or a strip of plastic adhesive tape can be pressed over the
protruding blade.
Wood Bit Care
The lead-in screws on the tips of auger bits often become dull from contact with other tools in
storage. To prevent this, use the manufacturer's trick. Screw each one into a bottle cork a little
larger than the diameter of the drill so that the lead screw and cutting spurs are covered. This will
prevent damage to all the cutting edges.
Circular Saw Blade Cover
To keep small saw blades from becoming nicked or dulled when stored in drawers or tool boxes,
protect the teeth by stretching a wide rubber band cut out of a strip of old inner tube around the
outside. This also protects the fingers against accidental scratching when the blade is handled.
Hacksaw Blades:
Easily damaged hacksaw blades or coping saw blades can be stored and protected against
toolbox abuse by wiping with an oily rag, then inserting in a length of aluminum tubing
(available at hardware stores) about an inch longer than the blade length. Securely plug each end
of the tube with a cork and you have an excellent damage-proof case for the blades.
Protect Blades
Power saw blades can be kept clean and rust-free if they are wrapped in heavy waxed paper
before they are put away. For best results wipe the blade with a clean cloth to remove dirt, then
repeat with an oily cloth to lightly coat the blade before wrapping it in wax paper. This system is
also excellent for storing drill bits, chisels and other sharp tools.
Saw Table Care
To keep the metal table on your power saw from rusting and to keep it Well lubricated so that
rough pieces of lumber will slide easily across its surface, a thin coat of paste wax should be
rubbed on periodically. This will not stain the wood the way oil or grease does, yet it will still
provide effective protection against corrosion.
Screwdriver Care
When a screwdrive blade starts to wear it tends to slip out of the screw slots easily. This makes it
difficult to tighten the screws securely and chews up the heads of tightly seated screws which
must be loosened. To prevent this, the blade tip should be dressed occasionally by stroking with
a flat file to eliminate rounded edges and to make the end blunt once more. Be careful to
maintain the original bevel of the side faces and file across the tip at right angles so as to keep
the blade end square (Fig. 3).
Fig. 3
Claw Hammers
When the claws on a claw hammer show signs of slipping every time a small-headed nail is
pulled, try renewing their grip by filing the notch between them with a triangular file. Use a
corner of the file to slightly deepen and sharpen the crevice between the claws. This improves
their grip so they will "bite" the nail head more firmly.
Hammer Handles
Hammer handles sometimes work loose because the wood has dried exclusively so that slight
shrinkage occurs inside the metal socket. To swell the wood back up again and make it tight once
more, soak the head end of the handle in a bucket of water for several hours. The handle can be
kept from shrinking in the future by sealing the top end where it comes through the head with
several coats of varnish or lacquer.
Pliers Care
When pliers accumulate dirt in the serrated teeth on the inside of their jaws they have a tendency
to slip and will call for much greater pressure in order to hold. To correct this clean jaws out with
solvent and a stiff wire brush, and re-sharpen individual teeth occasionally by dressing lightly
with the edge of a three-cornered file.
For Easier Reading
Steel squares and other engraved metal rules often become difficult to read as they get older. For
easier reading rub a crayon across the markings. Select one in a contrasting color. Then wipe off
with a flat pad of cloth that has been moistened with a little kerosene or turpentine. The color
will be wiped off the surface but will remain in the bottom of the grooved markings.
Cleaning Threads
Cleaning accumulated grease and dirt out of the threaded adjustment wheels on power tools is
often a difficult job because it is so hard to reach into the grooves. Home craftsmen will find that
an old toothbrush dipped into benzine or other solvent will do the trick nicely.
Drill rock
One of the simplest ways to build a neat rack for drill bits of any size is to use a two or three-
inch-thick block of hardwood for the rack. Use the bits themselves to drill the exact sized holes
required. Store drill bits with the points down to protect against damage. To protect against rust
the holes can each be saturated with a drop or two of oil.
Vise Jaws
A quick way to install new wooden jaws on the inside of your bench vise is to glue the blocks in
place with contact cement. This adhesive is sold in all hardware stores and can be successfully
used to glue wood-to-wood or wood-to-metal.
Hardwood jaws will last longest, but a soft wood such as pine will have less tendency to mar
delicate work. When jaws have to be changed, the blocks can be removed by tapping with a
chisel between the wood and steel.
Toolbox Tip
A small piece of rubber floor matting of the kind which is available at most hardware, auto or
floor covering stores can be fitted into the bottom of a toolbox to prevent rattling and to keep
tools from sliding around and banging together when the box is moved. The matting also
prevents tools from coming in contact with rusty metal in the event the bottom starts to corrode.
Storing Chalkline
A chalk line or plumb line can be easily and neatly stored by wrapping it around an empty
adhesive tape spool. Snapping the spool into its original cover will keep the line clean, and will
protect it against unwinding or tangling.
Storing Planes
Fig. 4
When laying a plane down between jobs or for storage, never place the tool so that it rests on its
blade. Either lay the plane on its side, or place it so that the front edge rests on top of a thin block
of wood. This raises its front end sufficiently to keep the blade clear of the surface and protects it
against nicking or dulling. (See Fig. 4.)
Proper Usage
Sanding Machines
When electric sanding machines are used on furniture or cabinets only moderate pressure is
required for fast, efficient cutting. On horizontal surfaces the weight of the machine is usually
just about all the pressure needed. Handymen who bear down excessively only slow up the
cutting action of the machine and will actually reduce its sanding speed and efficiency. In
addition, there is the danger of overloading the motor.
Easier Sawing
Hand saws and hacksaws of all types will stay sharp longer and will cut less effort if pressure is
applied only on the cutting, or forward, stroke. Bear down firmly while pushing the blade
forward but lift up slightly when drawing it back. This avoids wearing down the cutting teeth
needlessly.
Lubricate Saw
When hand saws are used for cutting through hard woods or gummy woods, they frequently bind
or “grab”, thus making the saw more difficult to push. To ease the job, try rubbing a bar of soap
along the teeth and on each side of the blade. The soap acts as an effective lubricant and keeps
gum from sticking to the sides of the saw blade, but it will leave no stains on the wood.
Drilling by hand
When holes must be bored with a hand drill, it is easier to keep the bit Square to the surface if the
drill is used in the horizontal position whenever possible. This simplifies sighting downward on
the drill and prevents side-to-side deviations.
Keep Blade Clean
When tin snips and knives are used for cutting tarpaper or roll roofing, the black gum which
accumulates on the blade is difficult to remove and interferes with efficient cutting action. To
prevent this from happening, dip the blades in a pail of water between cuts. The water will keep
the blade lubricated and will prevent the black tar or gum from sticking to the sides.
Drilling in Masonry
Carbide-tipped masonry drills sometimes show a tendency to “creep” away from their marked
position when the hole is just being started. To prevent this, use a scrap of wood as a guide. Drill
it with a hole to match the size of the bit and hold it over the spot where the hole is to be bored.
The hole in the block will serve as a guide for the carbide bit and will help keep it square, while
at the same time keeping it from creeping.
Easier Planing
When using a wood plane, the home handyman will find that it cuts smoother and easier if the
tool is held at a slight angle to the cutting line as it is moved forward over the surface of the work
(Fig. 5). This slight angle gives the cutting edge a slicing, or shearing, action which is much
simpler to control than would be the case if the plane were pushed straight ahead with its cutting
edge at right angles to the grain. Be sure to maintain a steady downward pressure at the same
time.
Fig. 5
Planing Edges
To prevent rounded corners at the beginning and end of a board when its edge is being planed,
avoid rocking the plane by letting it dip over the far end of the piece or by letting it sag when you
start the stroke. Either action will cause rounded corners at the ends. To prevent this, apply extra
pressure on the front of the plane at the beginning of the stroke, and then apply extra pressure on
the back end of the plane at the end of the stroke.
Star Drill Handle
Handling a star drill is uncomfortable work and often results in blisters and sore hands. A quick
modification that saves hands is to wrap a number of layers of friction tape or masking tape
around the drill shank to provide a slip-proof grip. The tape should be about one-eighth-inch
thick. It will absorb most of the shock and vibration from the pounding.
Depth Gauge
When a number of holes must be drilled to the same depth with an ordinary electric drill, the
problem of measuring the depth of each hole accurately can be an annoying and time-consuming
chore. To speed the job considerably, wrap a strip of plastic tape around the bit at the height
desired. Then drill each hole until the edge of the tape touches the surface.
Keep Chuck Key Handy
Many electric drill chucks require special keys to tighten them up. Keep this key handy by
fastening it to the electric cord with a short piece of flexible wire or a heavy rubber band.
Testing a Level
If you are in doubt about the accuracy of your level, place it on the surface which you believe to
be practically level and then note the location of the bubble in the glass. Now turn the level end-
for-end and check the position of the bubble again. It should be in exactly the same position—in
other words, it should have moved to the other side of the glass vial by exactly the same amount
as it did the first time. If the surface used for testing is actually perfectly level, then the bubble
should be precisely in the center no matter which way the level is placed.
Storing Nail Set
A nail set is always used with a hammer, so it is logical to keep them together. One easy way to
do this is to bore a deep hole in the end of the handle' large enough and deep enough to permit
the nail set to be slipped inside. It can be kept in place by plugging the hole with a small cork.
Correct Screwdriver
Home handymen should never use a single screwdriver for all size screws. The wrong size driver
may chew up the screw heads unnecessarily, and may even ruin the tool itself. For best results,
keep several sizes handy, and always pick the one whose blade fills the slot in the screwhead as
much as possible. For most jobs around the home, three sizes (plus a Phillips-head driver) are all
that will be needed.
Prevent Slipping
To provide a better grip for screwdriver blades, and to prevent slippage when heavy pressure
must be applied, rub the tip of the blade over a cake of chalk beforehand. Ordinary blackboard
chalk works fine.
Starting Screws
When a screw must be started in a hard-to-get at place it can be held with the end of the
screwdriver blade if you will first fold a small piece of tape or paper over the blade before
inserting it in the screw slot. Use enough thicknesses to permit wedging the blade in the slot, thus
holding the screw in position on the end of the blade until it is started.
Cutting Tubing
Sawing thin-wall metal tubing with a hacksaw is often a difficult job because the blades tend to
grab or chatter- on the return stroke. Minimize this by mounting two blades in the hacksaw with
teeth pointing in opposite directions. Then stroke lightly with even pressure on both forward and
backward strokes.
Improve Miter Gauge
When mitering on a circular saw, home craftsmen often have trouble with work "creeping" or
slipping along the polished face of the miter gauge. Avoid this by cementing a sheet of
sandpaper to the face of the gauge with rubber cement. This will provide a nonslip surface
against which the work can be held without difficulty.
Softer Grip
Use a small sponge-rubber ball to protect your hand when hammering on a cold chisel. Push the
chisel through the soft rubber ball to provide a cushion grip for the hand while the tool is being
struck with a hammer. It will absorb shocks and greatly lessen fatigue.
Measuring Trick
When using a steel measuring tape to make long measurements without the aid of an assistant,
the hook end can be anchored in position by use of a small piece of plastic or cellophane tape.
You can then stretch the other end as far as necessary without having to worry about the starting
end slipping.
Keep Yardstick in Place
To keep long rulers or yardsticks from sliding around on the face of the work, glue small strips
of fine sandpaper on the back at each end, and at intervals along its length. Use rubber cement so
that the sandpaper can be easily peeled off when necessary.
Jigs And Accessories
Emergency Drill
When necessary to bore a small hole in tight quarters where an ordinary brace or hand drill
cannot be used, try using an ordinary door knob as a handle for the drill bit.
Slip the knob over the shank of the bit and tighten the set screw so that it grips firmly. The door
knob will give sufficient leverage to enable you to turn the drill bit by hand and to bore through
soft woods of moderate thickness.
Fig. 6
Substitute for Level
In the absence of a level, a good substitute can be improvised from a steel square, a piece of
string, and a plumb bob (Fig. 6). Place the square on the edge of the surface being tested as
shown here. Then suspend the plumb bob (or other weight) at the end of the string. The surface is
exactly level when the string is parallel to the upright leg of the square.
Tool Trays
Old bread pans and pie tins make handy tool trays which simplify the job of the home handyman
when he has to make repairs away from his workbench or shop. All allied tools, hardware and
parts can be carried in one or more trays to and from the job without danger of losing parts or for
getting needed items, and without the annoyance of trying to carry everything loosely in the
hands.
Soldering Iron Holder
A wide-mouthed tin can such as a coffee can will make an excellent holder for a hot soldering
iron. Cut notches in the top rim on opposite sides of the can so that when the iron is laid across
the top it cannot roll off. Rolls of solder and cans of flux can be stored inside the can. (See Fig.
7.)
Fig. 7
Dust Brush
Home mechanics should save one of their small, worn-out paint brushes after it has outlived its
usefulness for applying paint. Clean it as thoroughly as possible, then keep it handy around the
workbench for dusting out corners and hidden crevices on woodworking projects.
Extra Blade
Save steps by always keeping an extra hacksaw blade or coping saw blade handy when working
with these tools away from the shop. One easy way to do this is to tape an extra blade to the long
side of the saw frame where it will be instantly available when needed.
Useful Knife
A handy knife for marking or cutting around the workshop can be made from a piece of an old
hacksaw blade. A handle can be provided by placing a strip of wood on each side and then
wrapping with friction tape or plastic tape. Leave about three or four inches of the metal
protruding at one end and grind the edge to form a sharp knife-like blade.
Holding Small Pieces
An adjustable wrench or locking-type pliers is ideal for firmly gripping very small pieces while
drilling. Lock tightly onto the work and then clamp the wrench to the top of the drill press table
or to a heavy wooden backing block. This can then be clamped in working position to hold the
small piece safely.
Testing a Straightedge
To test the accuracy of a long board which you want to use as a straightedge, here is a simple
method you can use. Lay the straightedge on a flat, smooth surface and draw a pencil line on the
surface using the straightedge as a guide. Then turn the straightedge end-for-end, but with the
same side still up and facing you. Place the board so that its original edge is again over the line
just drawn. Its edge should now again match the line exactly. If it curves away at any point, then
your board has a bend or curve in its edge.
Protect Metal Tubing
Thin-wall pipe or tubing is difficult to grip firmly in an ordinary vise without crushing or
scratching it. Next time this comes up, try wrapping the tubing with a number of fine steel wool
pads. These will provide a slip-proof grip which will hold firmly with a minimum of pressure
between the jaws.
Rubber Handle
Anyone who has occasion to use a hammer a great deal will find that as his hands perspire the
handle sometimes slips in his grip. To prevent this, wrap the handle with a layer of rubber
electrician's tape or with adhesive tape. The grip provided will not only be slip-proof, it will also
have less tendency to form blisters on the palms or fingers.
Miniature Vise
When working with small assemblies, or when tiny parts must be clamped together for soldering
or for other ticklish jobs, an ordinary vise is sometimes too large and bulky to do the job
properly. In such cases it will be found handier to grip the back of a C-clamp in the vise and then
use the jaws of the clamp to hold the work instead. The clamp is easier to manipulate and the
smaller jaws will be more convenient for holding small jobs. (See Fig. 8.)
Fig. 8
Cutting Sandpaper
When sheets of sandpaper have to be cut to size to fit sanding blocks or power sanders, they can
be most accurately torn over a sharp metal edge such as the corner of a power saw table or other
power tool top. Lay a ruler over the paper and snap the free end straight down for a clean, neat
cut.
Foot Switch
A foot switch frees both hands for operating power tools such as drill presses and band saws.
Such a switch can be inexpensively made by mounting an ordinary make-and-break push button
switch (rated for 110 volts, 10 amps) on a wedge-shaped piece of 2 x 4. This holds the switch
steady and raises it high enough to permit easy operation with the toe of one foot. The switch is
wired in series with an outlet which is attached to the side of the block, and both are connected in
series with an extension cord which plugs into a source of power. The tool is then plugged into
the outlet at the side of the block.
Rubber Hammer
An ordinary hammer can be used instead of a rubber or plastic mallet when it is necessary to do
light pounding on furniture or soft metals without damaging the finished surfaces. To convert a
metal hammer for this purpose, slip a large rubber crutch tip over the head. These tips come in
several sizes and are available at many drugstores or surgical supply stores.
Driver for Large Screws
To ease the job of driving long, heavy screws into hard woods—or for other heavy screwdriving
jobs—home handymen should remember that special bits are available which can be fitted into
an ordinary auger bit brace. Available in all sizes and equipped with square shanks so that they
can be firmly gripped in the chuck, these screwdriver bits can be used in a brace when extra
leverage is needed, or when speed is desirable because a large number of screws must be driven.
Eliminate Workshop Dust
To remove dust around the home workshop when doing a great deal of power sanding or sawing,
put your wife's vacuum cleaner to work. Clamp or tie the nozzle of the cleaner beneath the power
tool table. Have it running at the time sawing or sanding is going on. Sawdust will be sucked up
promptly before it can spread to other parts of the house.
Fine Sawing
For a really smooth, fine cut when sawing small moldings and thin veneers use a regular metal-
cutting hacksaw if you do not have a cabinetmaker's hacksaw. Select a fine-toothed blade and
mount it so that the teeth cut on the forward stroke. A hacksaw also works well for cutting wood
in a miter box when thin strips must be cut at precise angles and no standard fine-toothed saw is
available.
Handle Comfort
Wire handles on heavy cans or pails can be uncomfortable to hold on to when they are fully
loaded. To alleviate this problem slit a piece of garden hose and slip it over the wire handle. The
result will be a broader, more comfortably cushioned grip that will eliminate sore hands.
Improvised Punch
Small punches for making holes in leather, rubber, cork, or cardboard are simple to make. Use
metal pipe or tubing of the desired diameter. Cut off a three or four-inch length and place in a
vise- File a one-half-inch-wide bevel around one end of the pipe until a sharp edge is created.
Use the punch by hammering through the material which has been laid over a block of hard
wood. This will make the punch easier to pull out, will give a clean cut, and will preserve its
sharpened edge.
Using Ladders
Protect Ladders
Wooden ladders will last longer if they are protected with occasional applications of clear
varnish or penetrating sealer. Do not use an opaque paint. This might hide cracks or other defects
so that it will be difficult to tell when the ladder becomes unsafe.
Non-Skid Steps
For a gritty, non-skid surface on ladder rungs, the homeowner can sprinkle fine sand over each
one immediately after it is varnished. A less gritty surface will result if the sand is mixed right in
with the varnish before it is applied.
Save Steps
Three or four half-inch holes drilled in the top platform of a stepladder will save much climbing
to reclaim dropped tools while working on jobs requiring use of a ladder. The holes are used as a
temporary rack to hold screwdrivers, pliers and the like. It keeps them handy in an upright
position without the danger of their rolling off.
Protect Siding
When using an extension ladder on the outside of the house, the top of the ladder will sometimes
mar siding or trip where it leans against the house. To prevent this, wrap the upper ends of the
ladder with several thicknesses of heavy cloth. Or, you can also use a pair of old work gloves,
slipping one over the top of each rail.
Carrying Stepladder
A heavy-duty drawer handle or screen door handle can simplify the job of carrying a stepladder
from job to job around the house. Screw the handle to one of the vertical side rails (Fig. 9) to
permit easier carrying of the ladder while it is laying down in the horizontal position. Take time
to locate the handle at the center of balance so that the ladder will not tip when it is carried.
Fig. 9
Prevent Slipping
To keep a stepladder from slipping dangerously on smooth polished interior floors, nail a pair of
rubber heels to the bottom of each of the front legs. On metal ladders that do not have rubber feet
the heels can be pasted in place with contact cement, used according to the directions on the
bottle.
Support for Ladder
When a tall extension ladder must be used outdoors on soft ground, provide a firm rest for the
legs by laying a short length of wide planking under the ladder ends. To keep the legs from
slipping off the plank, nail a strip of scrap molding lengthwise along the plank's surface where it
will act as a wedge under the ladder legs.
Ladder Tray
You can convert the top platform of any stepladder into a handy tray which will hold nails,
screws, or tools without having to worry about their falling off. To do this, nail strips of quarter-
round molding around the outside edge on top of the platform so as to provide a rim or low wall
on all sides.
Ladder Safety
When using an extension ladder to reach high places remember to always set it up so that the
base of the ladder is away from the base of the building by a distance equal to approximately
twenty-five per cent the total height of the ladder. This makes for the safest angle and will
prevent falling or slipping. In addition, never go higher than the fourth rung from the top when
climbing.
Ladder Rest
Fig. 10
To permit leaning extension ladders against the outside of the house where windows occur, a
wide board of softwood can be nailed across the ladder at its top end to provide a "bridge" or
brace. This will contact the window frame on both sides and will keep the ladder ends from
touching the glass or screens. This board should be at least as long as the widest window frame
likely to be encountered and about six inches wide. (See Fig. 10.)
Storing Ladders
Long extension ladders are usually stored by hanging on garage walls. This not only takes up a
good deal of valuable wall space, it also requires a great deal of maneuvering each time the
ladder is used. To simplify this problem and to save on space, the ladder can be easily stored on
the garage floor by laying it down the middle directly under the car. The car can be driven right
over it without interference, and a sheet of tarpaper will protect the ladder against oil drippings.
Caring for your tools is important for the success of any construction or DIY project. It is also
important in ensuring your safety while at work.
Want to know other tools you will need for a safe and successful construction project? Visit this
page today.

More Related Content

More from Deborah Davis

Flowers and Shrubs to Grow This Summer
Flowers and Shrubs to Grow This SummerFlowers and Shrubs to Grow This Summer
Flowers and Shrubs to Grow This SummerDeborah Davis
 
5 Essential Tips for Safe Mobile Crane Operations
5 Essential Tips for Safe Mobile Crane Operations5 Essential Tips for Safe Mobile Crane Operations
5 Essential Tips for Safe Mobile Crane OperationsDeborah Davis
 
Do I Have PTSD? - The Signs & Symptoms of Post-Traumatic Stress Disorder
Do I Have PTSD? - The Signs & Symptoms of Post-Traumatic Stress DisorderDo I Have PTSD? - The Signs & Symptoms of Post-Traumatic Stress Disorder
Do I Have PTSD? - The Signs & Symptoms of Post-Traumatic Stress DisorderDeborah Davis
 
Essential Equine Supplies for First-Time Horse Owners
Essential Equine Supplies for First-Time Horse OwnersEssential Equine Supplies for First-Time Horse Owners
Essential Equine Supplies for First-Time Horse OwnersDeborah Davis
 
Equine Dentistry: Pelham Bits Explained
Equine Dentistry: Pelham Bits ExplainedEquine Dentistry: Pelham Bits Explained
Equine Dentistry: Pelham Bits ExplainedDeborah Davis
 
Equine Dentistry: Equine Teeth Cleaning with Equine Dentist Mark Burnell
Equine Dentistry: Equine Teeth Cleaning with Equine Dentist Mark BurnellEquine Dentistry: Equine Teeth Cleaning with Equine Dentist Mark Burnell
Equine Dentistry: Equine Teeth Cleaning with Equine Dentist Mark BurnellDeborah Davis
 
Facial Volume Loss and Dermal Fillers
Facial Volume Loss and Dermal FillersFacial Volume Loss and Dermal Fillers
Facial Volume Loss and Dermal FillersDeborah Davis
 
Framing Basics to Remember for Stronger Homes
Framing Basics to Remember for Stronger HomesFraming Basics to Remember for Stronger Homes
Framing Basics to Remember for Stronger HomesDeborah Davis
 
Quick Guide to Solve Minor Housekeeping Concerns
Quick Guide to Solve Minor Housekeeping ConcernsQuick Guide to Solve Minor Housekeeping Concerns
Quick Guide to Solve Minor Housekeeping ConcernsDeborah Davis
 

More from Deborah Davis (9)

Flowers and Shrubs to Grow This Summer
Flowers and Shrubs to Grow This SummerFlowers and Shrubs to Grow This Summer
Flowers and Shrubs to Grow This Summer
 
5 Essential Tips for Safe Mobile Crane Operations
5 Essential Tips for Safe Mobile Crane Operations5 Essential Tips for Safe Mobile Crane Operations
5 Essential Tips for Safe Mobile Crane Operations
 
Do I Have PTSD? - The Signs & Symptoms of Post-Traumatic Stress Disorder
Do I Have PTSD? - The Signs & Symptoms of Post-Traumatic Stress DisorderDo I Have PTSD? - The Signs & Symptoms of Post-Traumatic Stress Disorder
Do I Have PTSD? - The Signs & Symptoms of Post-Traumatic Stress Disorder
 
Essential Equine Supplies for First-Time Horse Owners
Essential Equine Supplies for First-Time Horse OwnersEssential Equine Supplies for First-Time Horse Owners
Essential Equine Supplies for First-Time Horse Owners
 
Equine Dentistry: Pelham Bits Explained
Equine Dentistry: Pelham Bits ExplainedEquine Dentistry: Pelham Bits Explained
Equine Dentistry: Pelham Bits Explained
 
Equine Dentistry: Equine Teeth Cleaning with Equine Dentist Mark Burnell
Equine Dentistry: Equine Teeth Cleaning with Equine Dentist Mark BurnellEquine Dentistry: Equine Teeth Cleaning with Equine Dentist Mark Burnell
Equine Dentistry: Equine Teeth Cleaning with Equine Dentist Mark Burnell
 
Facial Volume Loss and Dermal Fillers
Facial Volume Loss and Dermal FillersFacial Volume Loss and Dermal Fillers
Facial Volume Loss and Dermal Fillers
 
Framing Basics to Remember for Stronger Homes
Framing Basics to Remember for Stronger HomesFraming Basics to Remember for Stronger Homes
Framing Basics to Remember for Stronger Homes
 
Quick Guide to Solve Minor Housekeeping Concerns
Quick Guide to Solve Minor Housekeeping ConcernsQuick Guide to Solve Minor Housekeeping Concerns
Quick Guide to Solve Minor Housekeeping Concerns
 

Recently uploaded

High Profile Call Girls Nagpur Meera Call 7001035870 Meet With Nagpur Escorts
High Profile Call Girls Nagpur Meera Call 7001035870 Meet With Nagpur EscortsHigh Profile Call Girls Nagpur Meera Call 7001035870 Meet With Nagpur Escorts
High Profile Call Girls Nagpur Meera Call 7001035870 Meet With Nagpur EscortsCall Girls in Nagpur High Profile
 
Introduction and different types of Ethernet.pptx
Introduction and different types of Ethernet.pptxIntroduction and different types of Ethernet.pptx
Introduction and different types of Ethernet.pptxupamatechverse
 
Call Girls in Nagpur Suman Call 7001035870 Meet With Nagpur Escorts
Call Girls in Nagpur Suman Call 7001035870 Meet With Nagpur EscortsCall Girls in Nagpur Suman Call 7001035870 Meet With Nagpur Escorts
Call Girls in Nagpur Suman Call 7001035870 Meet With Nagpur EscortsCall Girls in Nagpur High Profile
 
Structural Analysis and Design of Foundations: A Comprehensive Handbook for S...
Structural Analysis and Design of Foundations: A Comprehensive Handbook for S...Structural Analysis and Design of Foundations: A Comprehensive Handbook for S...
Structural Analysis and Design of Foundations: A Comprehensive Handbook for S...Dr.Costas Sachpazis
 
University management System project report..pdf
University management System project report..pdfUniversity management System project report..pdf
University management System project report..pdfKamal Acharya
 
Call Girls Pimpri Chinchwad Call Me 7737669865 Budget Friendly No Advance Boo...
Call Girls Pimpri Chinchwad Call Me 7737669865 Budget Friendly No Advance Boo...Call Girls Pimpri Chinchwad Call Me 7737669865 Budget Friendly No Advance Boo...
Call Girls Pimpri Chinchwad Call Me 7737669865 Budget Friendly No Advance Boo...roncy bisnoi
 
Coefficient of Thermal Expansion and their Importance.pptx
Coefficient of Thermal Expansion and their Importance.pptxCoefficient of Thermal Expansion and their Importance.pptx
Coefficient of Thermal Expansion and their Importance.pptxAsutosh Ranjan
 
Introduction to IEEE STANDARDS and its different types.pptx
Introduction to IEEE STANDARDS and its different types.pptxIntroduction to IEEE STANDARDS and its different types.pptx
Introduction to IEEE STANDARDS and its different types.pptxupamatechverse
 
result management system report for college project
result management system report for college projectresult management system report for college project
result management system report for college projectTonystark477637
 
Online banking management system project.pdf
Online banking management system project.pdfOnline banking management system project.pdf
Online banking management system project.pdfKamal Acharya
 
MANUFACTURING PROCESS-II UNIT-2 LATHE MACHINE
MANUFACTURING PROCESS-II UNIT-2 LATHE MACHINEMANUFACTURING PROCESS-II UNIT-2 LATHE MACHINE
MANUFACTURING PROCESS-II UNIT-2 LATHE MACHINESIVASHANKAR N
 
Booking open Available Pune Call Girls Pargaon 6297143586 Call Hot Indian Gi...
Booking open Available Pune Call Girls Pargaon  6297143586 Call Hot Indian Gi...Booking open Available Pune Call Girls Pargaon  6297143586 Call Hot Indian Gi...
Booking open Available Pune Call Girls Pargaon 6297143586 Call Hot Indian Gi...Call Girls in Nagpur High Profile
 
CCS335 _ Neural Networks and Deep Learning Laboratory_Lab Complete Record
CCS335 _ Neural Networks and Deep Learning Laboratory_Lab Complete RecordCCS335 _ Neural Networks and Deep Learning Laboratory_Lab Complete Record
CCS335 _ Neural Networks and Deep Learning Laboratory_Lab Complete RecordAsst.prof M.Gokilavani
 
Call for Papers - Educational Administration: Theory and Practice, E-ISSN: 21...
Call for Papers - Educational Administration: Theory and Practice, E-ISSN: 21...Call for Papers - Educational Administration: Theory and Practice, E-ISSN: 21...
Call for Papers - Educational Administration: Theory and Practice, E-ISSN: 21...Christo Ananth
 
Call Girls Service Nashik Vaishnavi 7001305949 Independent Escort Service Nashik
Call Girls Service Nashik Vaishnavi 7001305949 Independent Escort Service NashikCall Girls Service Nashik Vaishnavi 7001305949 Independent Escort Service Nashik
Call Girls Service Nashik Vaishnavi 7001305949 Independent Escort Service NashikCall Girls in Nagpur High Profile
 
UNIT-II FMM-Flow Through Circular Conduits
UNIT-II FMM-Flow Through Circular ConduitsUNIT-II FMM-Flow Through Circular Conduits
UNIT-II FMM-Flow Through Circular Conduitsrknatarajan
 
The Most Attractive Pune Call Girls Manchar 8250192130 Will You Miss This Cha...
The Most Attractive Pune Call Girls Manchar 8250192130 Will You Miss This Cha...The Most Attractive Pune Call Girls Manchar 8250192130 Will You Miss This Cha...
The Most Attractive Pune Call Girls Manchar 8250192130 Will You Miss This Cha...ranjana rawat
 

Recently uploaded (20)

High Profile Call Girls Nagpur Meera Call 7001035870 Meet With Nagpur Escorts
High Profile Call Girls Nagpur Meera Call 7001035870 Meet With Nagpur EscortsHigh Profile Call Girls Nagpur Meera Call 7001035870 Meet With Nagpur Escorts
High Profile Call Girls Nagpur Meera Call 7001035870 Meet With Nagpur Escorts
 
Introduction and different types of Ethernet.pptx
Introduction and different types of Ethernet.pptxIntroduction and different types of Ethernet.pptx
Introduction and different types of Ethernet.pptx
 
Call Girls in Nagpur Suman Call 7001035870 Meet With Nagpur Escorts
Call Girls in Nagpur Suman Call 7001035870 Meet With Nagpur EscortsCall Girls in Nagpur Suman Call 7001035870 Meet With Nagpur Escorts
Call Girls in Nagpur Suman Call 7001035870 Meet With Nagpur Escorts
 
Structural Analysis and Design of Foundations: A Comprehensive Handbook for S...
Structural Analysis and Design of Foundations: A Comprehensive Handbook for S...Structural Analysis and Design of Foundations: A Comprehensive Handbook for S...
Structural Analysis and Design of Foundations: A Comprehensive Handbook for S...
 
University management System project report..pdf
University management System project report..pdfUniversity management System project report..pdf
University management System project report..pdf
 
Call Girls Pimpri Chinchwad Call Me 7737669865 Budget Friendly No Advance Boo...
Call Girls Pimpri Chinchwad Call Me 7737669865 Budget Friendly No Advance Boo...Call Girls Pimpri Chinchwad Call Me 7737669865 Budget Friendly No Advance Boo...
Call Girls Pimpri Chinchwad Call Me 7737669865 Budget Friendly No Advance Boo...
 
Coefficient of Thermal Expansion and their Importance.pptx
Coefficient of Thermal Expansion and their Importance.pptxCoefficient of Thermal Expansion and their Importance.pptx
Coefficient of Thermal Expansion and their Importance.pptx
 
Introduction to IEEE STANDARDS and its different types.pptx
Introduction to IEEE STANDARDS and its different types.pptxIntroduction to IEEE STANDARDS and its different types.pptx
Introduction to IEEE STANDARDS and its different types.pptx
 
result management system report for college project
result management system report for college projectresult management system report for college project
result management system report for college project
 
Online banking management system project.pdf
Online banking management system project.pdfOnline banking management system project.pdf
Online banking management system project.pdf
 
MANUFACTURING PROCESS-II UNIT-2 LATHE MACHINE
MANUFACTURING PROCESS-II UNIT-2 LATHE MACHINEMANUFACTURING PROCESS-II UNIT-2 LATHE MACHINE
MANUFACTURING PROCESS-II UNIT-2 LATHE MACHINE
 
Water Industry Process Automation & Control Monthly - April 2024
Water Industry Process Automation & Control Monthly - April 2024Water Industry Process Automation & Control Monthly - April 2024
Water Industry Process Automation & Control Monthly - April 2024
 
Roadmap to Membership of RICS - Pathways and Routes
Roadmap to Membership of RICS - Pathways and RoutesRoadmap to Membership of RICS - Pathways and Routes
Roadmap to Membership of RICS - Pathways and Routes
 
DJARUM4D - SLOT GACOR ONLINE | SLOT DEMO ONLINE
DJARUM4D - SLOT GACOR ONLINE | SLOT DEMO ONLINEDJARUM4D - SLOT GACOR ONLINE | SLOT DEMO ONLINE
DJARUM4D - SLOT GACOR ONLINE | SLOT DEMO ONLINE
 
Booking open Available Pune Call Girls Pargaon 6297143586 Call Hot Indian Gi...
Booking open Available Pune Call Girls Pargaon  6297143586 Call Hot Indian Gi...Booking open Available Pune Call Girls Pargaon  6297143586 Call Hot Indian Gi...
Booking open Available Pune Call Girls Pargaon 6297143586 Call Hot Indian Gi...
 
CCS335 _ Neural Networks and Deep Learning Laboratory_Lab Complete Record
CCS335 _ Neural Networks and Deep Learning Laboratory_Lab Complete RecordCCS335 _ Neural Networks and Deep Learning Laboratory_Lab Complete Record
CCS335 _ Neural Networks and Deep Learning Laboratory_Lab Complete Record
 
Call for Papers - Educational Administration: Theory and Practice, E-ISSN: 21...
Call for Papers - Educational Administration: Theory and Practice, E-ISSN: 21...Call for Papers - Educational Administration: Theory and Practice, E-ISSN: 21...
Call for Papers - Educational Administration: Theory and Practice, E-ISSN: 21...
 
Call Girls Service Nashik Vaishnavi 7001305949 Independent Escort Service Nashik
Call Girls Service Nashik Vaishnavi 7001305949 Independent Escort Service NashikCall Girls Service Nashik Vaishnavi 7001305949 Independent Escort Service Nashik
Call Girls Service Nashik Vaishnavi 7001305949 Independent Escort Service Nashik
 
UNIT-II FMM-Flow Through Circular Conduits
UNIT-II FMM-Flow Through Circular ConduitsUNIT-II FMM-Flow Through Circular Conduits
UNIT-II FMM-Flow Through Circular Conduits
 
The Most Attractive Pune Call Girls Manchar 8250192130 Will You Miss This Cha...
The Most Attractive Pune Call Girls Manchar 8250192130 Will You Miss This Cha...The Most Attractive Pune Call Girls Manchar 8250192130 Will You Miss This Cha...
The Most Attractive Pune Call Girls Manchar 8250192130 Will You Miss This Cha...
 

A Quick Guide For Handyman's Use and Care of Tools

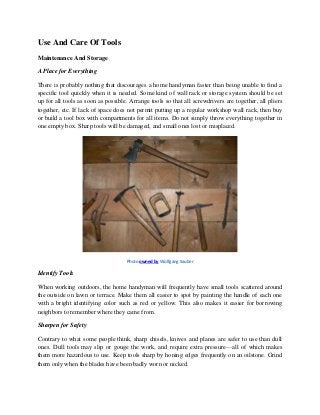
  • 1. Use And Care Of Tools Maintenance And Storage A Place for Everything There is probably nothing that discourages a home handyman faster than being unable to find a specific tool quickly when it is needed. Some kind of wall rack or storage system should be set up for all tools as soon as possible. Arrange tools so that all screwdrivers are together, all pliers together, etc. If lack of space does not permit putting up a regular workshop wall rack, then buy or build a tool box with compartments for all items. Do not simply throw everything together in one empty box. Sharp tools will be damaged, and small ones lost or misplaced. Photo owned by Wolfgang Sauber Identify Tools When working outdoors, the home handyman will frequently have small tools scattered around the outside on lawn or terrace. Make them all easier to spot by painting the handle of each one with a bright identifying color such as red or yellow. This also makes it easier for borrowing neighbors to remember where they came from. Sharpen for Safety Contrary to what some people think, sharp chisels, knives and planes are safer to use than dull ones. Dull tools may slip or gouge the work, and require extra pressure—all of which makes them more hazardous to use. Keep tools sharp by honing edges frequently on an oilstone. Grind them only when the blades have been badly worn or nicked.
  • 2. Storing Sharp Tools To preserve the edge on chisels, gouges and other sharp tools build a small rack which holds them vertically with the tips or blades shoved into the top of a slab of synthetic sponge. The soft material will keep the blades from banging against each other, and also keeps the sharp blades covered so there is less danger of the handyman cutting himself. Using Oilstones When honing chisels or plane blades on an oilstone always place the blade so that the beveled edge rests flat on the stone (Fig. 1). Stroke the blade gently over the surface in a forward direction only. Do not draw it backwards since this will cause slight burrs or wire edges to form. Some old time craftsmen do work back and forth with an oval motion so that any burrs that are formed on the backward stroke are honed off on the next forward stroke—but this calls for greater skill and careful handling. Don't forget to keep the stone saturated with cutting oil to prevent clogging and to assure smooth cutting. Fig. 1 For a Keen Edge Chisels are usually kept sharp by ocassional honing on an oilstone. However, when nicks must be grounded out, or when extreme re-shaping of the edge is needed, then a grinding wheel must be used. Always grind carefully, taking off only a little at a time. Otherwise the blade may be entirely ruined. Let the blade cool after every three or four passes across the face of the wheel as hot metal has more tendency to chip. In extreme cases the temper may even be drawn from the blade so that it will not hold a sharp edge at all. Sharpening Drills When twist drill bits become dull they do not only bore slowly. They are also more hazardous to use and more prone to slip or wobble. Sharpening them is not difficult if an inexpensive grinding
  • 3. jig, which is sold for this purpose at all hardware stores, is used. These gadgets hold the drill bits at the correct angle for grinding, and enable you to put a keen, accurate edge on the bit in a matter of minutes. Renewing Oilstone Oilstones, used to put a final razor-edge shape on knives, chisels and other tools eventually become clogged with dirt, oil and metal particles. To restore their original abrasive-ness, fill a shallow pan with water and boil the stone in this till the old dirt is loosened up. If necessary, scrub with a stiff fiber brush and repeat the process several times until the stone is clean. Handli Perspiration from the hands can cause steel saw blades and similar tools to rust rather quickly. To prevent this, avoid handling a saw by its blade whenever possible. In addition, always wipe both sides with a lightly oiled rag before putting it away after the job is done. Protect Glass Cutter Cutting wheels on glass cutters are easily damaged if they are allowed to bang around in a tool chest or drawer. To protect them slip a short length of rubber tubing over the cutting end before putting the tool away. Sharpening Guide When sharpening tools on a power-driven grinding wheel, the angle at which a tool is held against the surface of the wheel is all important accurate, smooth edge is to be assured. To provide a solid rest of exactly the right angle, cut a wooden block with a bevel at the top. Shape this bevel to hold the blade at the proper angle (Fig. 2). Take time out to make a separate block for each tool angle required so that in the future it will take only moments to sharpen each type of blade. Label the blocks clearly on the back so there will be no possibility of using the wrong one. Fig. 2
  • 4. Improvised Home A small strip of emery cloth tacked to the top of a block of wood makes an excellent hone for sharpening pocket knives and other cutting tools. Hold the tool blade at right angles to the length of the strip and move the edge sideways along the strip with light pressure. Replace the strip when it becomes clogged or worn. Plane Blade A properly sharpened plane blade can be easily nicked or dulled if the blade is left exposed when the plane is not in use. To protect the razor sharp edge from damage, the blade should be retracted when the plane is put away—or a strip of plastic adhesive tape can be pressed over the protruding blade. Wood Bit Care The lead-in screws on the tips of auger bits often become dull from contact with other tools in storage. To prevent this, use the manufacturer's trick. Screw each one into a bottle cork a little larger than the diameter of the drill so that the lead screw and cutting spurs are covered. This will prevent damage to all the cutting edges. Circular Saw Blade Cover To keep small saw blades from becoming nicked or dulled when stored in drawers or tool boxes, protect the teeth by stretching a wide rubber band cut out of a strip of old inner tube around the outside. This also protects the fingers against accidental scratching when the blade is handled. Hacksaw Blades: Easily damaged hacksaw blades or coping saw blades can be stored and protected against toolbox abuse by wiping with an oily rag, then inserting in a length of aluminum tubing (available at hardware stores) about an inch longer than the blade length. Securely plug each end of the tube with a cork and you have an excellent damage-proof case for the blades. Protect Blades Power saw blades can be kept clean and rust-free if they are wrapped in heavy waxed paper before they are put away. For best results wipe the blade with a clean cloth to remove dirt, then repeat with an oily cloth to lightly coat the blade before wrapping it in wax paper. This system is also excellent for storing drill bits, chisels and other sharp tools. Saw Table Care To keep the metal table on your power saw from rusting and to keep it Well lubricated so that rough pieces of lumber will slide easily across its surface, a thin coat of paste wax should be
  • 5. rubbed on periodically. This will not stain the wood the way oil or grease does, yet it will still provide effective protection against corrosion. Screwdriver Care When a screwdrive blade starts to wear it tends to slip out of the screw slots easily. This makes it difficult to tighten the screws securely and chews up the heads of tightly seated screws which must be loosened. To prevent this, the blade tip should be dressed occasionally by stroking with a flat file to eliminate rounded edges and to make the end blunt once more. Be careful to maintain the original bevel of the side faces and file across the tip at right angles so as to keep the blade end square (Fig. 3). Fig. 3 Claw Hammers When the claws on a claw hammer show signs of slipping every time a small-headed nail is pulled, try renewing their grip by filing the notch between them with a triangular file. Use a corner of the file to slightly deepen and sharpen the crevice between the claws. This improves their grip so they will "bite" the nail head more firmly. Hammer Handles Hammer handles sometimes work loose because the wood has dried exclusively so that slight shrinkage occurs inside the metal socket. To swell the wood back up again and make it tight once more, soak the head end of the handle in a bucket of water for several hours. The handle can be kept from shrinking in the future by sealing the top end where it comes through the head with several coats of varnish or lacquer.
  • 6. Pliers Care When pliers accumulate dirt in the serrated teeth on the inside of their jaws they have a tendency to slip and will call for much greater pressure in order to hold. To correct this clean jaws out with solvent and a stiff wire brush, and re-sharpen individual teeth occasionally by dressing lightly with the edge of a three-cornered file. For Easier Reading Steel squares and other engraved metal rules often become difficult to read as they get older. For easier reading rub a crayon across the markings. Select one in a contrasting color. Then wipe off with a flat pad of cloth that has been moistened with a little kerosene or turpentine. The color will be wiped off the surface but will remain in the bottom of the grooved markings. Cleaning Threads Cleaning accumulated grease and dirt out of the threaded adjustment wheels on power tools is often a difficult job because it is so hard to reach into the grooves. Home craftsmen will find that an old toothbrush dipped into benzine or other solvent will do the trick nicely. Drill rock One of the simplest ways to build a neat rack for drill bits of any size is to use a two or three- inch-thick block of hardwood for the rack. Use the bits themselves to drill the exact sized holes required. Store drill bits with the points down to protect against damage. To protect against rust the holes can each be saturated with a drop or two of oil. Vise Jaws A quick way to install new wooden jaws on the inside of your bench vise is to glue the blocks in place with contact cement. This adhesive is sold in all hardware stores and can be successfully used to glue wood-to-wood or wood-to-metal. Hardwood jaws will last longest, but a soft wood such as pine will have less tendency to mar delicate work. When jaws have to be changed, the blocks can be removed by tapping with a chisel between the wood and steel. Toolbox Tip A small piece of rubber floor matting of the kind which is available at most hardware, auto or floor covering stores can be fitted into the bottom of a toolbox to prevent rattling and to keep tools from sliding around and banging together when the box is moved. The matting also prevents tools from coming in contact with rusty metal in the event the bottom starts to corrode.
  • 7. Storing Chalkline A chalk line or plumb line can be easily and neatly stored by wrapping it around an empty adhesive tape spool. Snapping the spool into its original cover will keep the line clean, and will protect it against unwinding or tangling. Storing Planes Fig. 4 When laying a plane down between jobs or for storage, never place the tool so that it rests on its blade. Either lay the plane on its side, or place it so that the front edge rests on top of a thin block of wood. This raises its front end sufficiently to keep the blade clear of the surface and protects it against nicking or dulling. (See Fig. 4.) Proper Usage Sanding Machines When electric sanding machines are used on furniture or cabinets only moderate pressure is required for fast, efficient cutting. On horizontal surfaces the weight of the machine is usually just about all the pressure needed. Handymen who bear down excessively only slow up the cutting action of the machine and will actually reduce its sanding speed and efficiency. In addition, there is the danger of overloading the motor. Easier Sawing Hand saws and hacksaws of all types will stay sharp longer and will cut less effort if pressure is applied only on the cutting, or forward, stroke. Bear down firmly while pushing the blade forward but lift up slightly when drawing it back. This avoids wearing down the cutting teeth needlessly.
  • 8. Lubricate Saw When hand saws are used for cutting through hard woods or gummy woods, they frequently bind or “grab”, thus making the saw more difficult to push. To ease the job, try rubbing a bar of soap along the teeth and on each side of the blade. The soap acts as an effective lubricant and keeps gum from sticking to the sides of the saw blade, but it will leave no stains on the wood. Drilling by hand When holes must be bored with a hand drill, it is easier to keep the bit Square to the surface if the drill is used in the horizontal position whenever possible. This simplifies sighting downward on the drill and prevents side-to-side deviations. Keep Blade Clean When tin snips and knives are used for cutting tarpaper or roll roofing, the black gum which accumulates on the blade is difficult to remove and interferes with efficient cutting action. To prevent this from happening, dip the blades in a pail of water between cuts. The water will keep the blade lubricated and will prevent the black tar or gum from sticking to the sides. Drilling in Masonry Carbide-tipped masonry drills sometimes show a tendency to “creep” away from their marked position when the hole is just being started. To prevent this, use a scrap of wood as a guide. Drill it with a hole to match the size of the bit and hold it over the spot where the hole is to be bored. The hole in the block will serve as a guide for the carbide bit and will help keep it square, while at the same time keeping it from creeping. Easier Planing When using a wood plane, the home handyman will find that it cuts smoother and easier if the tool is held at a slight angle to the cutting line as it is moved forward over the surface of the work (Fig. 5). This slight angle gives the cutting edge a slicing, or shearing, action which is much simpler to control than would be the case if the plane were pushed straight ahead with its cutting edge at right angles to the grain. Be sure to maintain a steady downward pressure at the same time.
  • 9. Fig. 5 Planing Edges To prevent rounded corners at the beginning and end of a board when its edge is being planed, avoid rocking the plane by letting it dip over the far end of the piece or by letting it sag when you start the stroke. Either action will cause rounded corners at the ends. To prevent this, apply extra pressure on the front of the plane at the beginning of the stroke, and then apply extra pressure on the back end of the plane at the end of the stroke. Star Drill Handle Handling a star drill is uncomfortable work and often results in blisters and sore hands. A quick modification that saves hands is to wrap a number of layers of friction tape or masking tape around the drill shank to provide a slip-proof grip. The tape should be about one-eighth-inch thick. It will absorb most of the shock and vibration from the pounding. Depth Gauge When a number of holes must be drilled to the same depth with an ordinary electric drill, the problem of measuring the depth of each hole accurately can be an annoying and time-consuming chore. To speed the job considerably, wrap a strip of plastic tape around the bit at the height desired. Then drill each hole until the edge of the tape touches the surface. Keep Chuck Key Handy Many electric drill chucks require special keys to tighten them up. Keep this key handy by fastening it to the electric cord with a short piece of flexible wire or a heavy rubber band. Testing a Level If you are in doubt about the accuracy of your level, place it on the surface which you believe to be practically level and then note the location of the bubble in the glass. Now turn the level end- for-end and check the position of the bubble again. It should be in exactly the same position—in
  • 10. other words, it should have moved to the other side of the glass vial by exactly the same amount as it did the first time. If the surface used for testing is actually perfectly level, then the bubble should be precisely in the center no matter which way the level is placed. Storing Nail Set A nail set is always used with a hammer, so it is logical to keep them together. One easy way to do this is to bore a deep hole in the end of the handle' large enough and deep enough to permit the nail set to be slipped inside. It can be kept in place by plugging the hole with a small cork. Correct Screwdriver Home handymen should never use a single screwdriver for all size screws. The wrong size driver may chew up the screw heads unnecessarily, and may even ruin the tool itself. For best results, keep several sizes handy, and always pick the one whose blade fills the slot in the screwhead as much as possible. For most jobs around the home, three sizes (plus a Phillips-head driver) are all that will be needed. Prevent Slipping To provide a better grip for screwdriver blades, and to prevent slippage when heavy pressure must be applied, rub the tip of the blade over a cake of chalk beforehand. Ordinary blackboard chalk works fine. Starting Screws When a screw must be started in a hard-to-get at place it can be held with the end of the screwdriver blade if you will first fold a small piece of tape or paper over the blade before inserting it in the screw slot. Use enough thicknesses to permit wedging the blade in the slot, thus holding the screw in position on the end of the blade until it is started. Cutting Tubing Sawing thin-wall metal tubing with a hacksaw is often a difficult job because the blades tend to grab or chatter- on the return stroke. Minimize this by mounting two blades in the hacksaw with teeth pointing in opposite directions. Then stroke lightly with even pressure on both forward and backward strokes. Improve Miter Gauge When mitering on a circular saw, home craftsmen often have trouble with work "creeping" or slipping along the polished face of the miter gauge. Avoid this by cementing a sheet of sandpaper to the face of the gauge with rubber cement. This will provide a nonslip surface against which the work can be held without difficulty.
  • 11. Softer Grip Use a small sponge-rubber ball to protect your hand when hammering on a cold chisel. Push the chisel through the soft rubber ball to provide a cushion grip for the hand while the tool is being struck with a hammer. It will absorb shocks and greatly lessen fatigue. Measuring Trick When using a steel measuring tape to make long measurements without the aid of an assistant, the hook end can be anchored in position by use of a small piece of plastic or cellophane tape. You can then stretch the other end as far as necessary without having to worry about the starting end slipping. Keep Yardstick in Place To keep long rulers or yardsticks from sliding around on the face of the work, glue small strips of fine sandpaper on the back at each end, and at intervals along its length. Use rubber cement so that the sandpaper can be easily peeled off when necessary. Jigs And Accessories Emergency Drill When necessary to bore a small hole in tight quarters where an ordinary brace or hand drill cannot be used, try using an ordinary door knob as a handle for the drill bit. Slip the knob over the shank of the bit and tighten the set screw so that it grips firmly. The door knob will give sufficient leverage to enable you to turn the drill bit by hand and to bore through soft woods of moderate thickness. Fig. 6
  • 12. Substitute for Level In the absence of a level, a good substitute can be improvised from a steel square, a piece of string, and a plumb bob (Fig. 6). Place the square on the edge of the surface being tested as shown here. Then suspend the plumb bob (or other weight) at the end of the string. The surface is exactly level when the string is parallel to the upright leg of the square. Tool Trays Old bread pans and pie tins make handy tool trays which simplify the job of the home handyman when he has to make repairs away from his workbench or shop. All allied tools, hardware and parts can be carried in one or more trays to and from the job without danger of losing parts or for getting needed items, and without the annoyance of trying to carry everything loosely in the hands. Soldering Iron Holder A wide-mouthed tin can such as a coffee can will make an excellent holder for a hot soldering iron. Cut notches in the top rim on opposite sides of the can so that when the iron is laid across the top it cannot roll off. Rolls of solder and cans of flux can be stored inside the can. (See Fig. 7.) Fig. 7 Dust Brush Home mechanics should save one of their small, worn-out paint brushes after it has outlived its usefulness for applying paint. Clean it as thoroughly as possible, then keep it handy around the workbench for dusting out corners and hidden crevices on woodworking projects. Extra Blade Save steps by always keeping an extra hacksaw blade or coping saw blade handy when working with these tools away from the shop. One easy way to do this is to tape an extra blade to the long side of the saw frame where it will be instantly available when needed.
  • 13. Useful Knife A handy knife for marking or cutting around the workshop can be made from a piece of an old hacksaw blade. A handle can be provided by placing a strip of wood on each side and then wrapping with friction tape or plastic tape. Leave about three or four inches of the metal protruding at one end and grind the edge to form a sharp knife-like blade. Holding Small Pieces An adjustable wrench or locking-type pliers is ideal for firmly gripping very small pieces while drilling. Lock tightly onto the work and then clamp the wrench to the top of the drill press table or to a heavy wooden backing block. This can then be clamped in working position to hold the small piece safely. Testing a Straightedge To test the accuracy of a long board which you want to use as a straightedge, here is a simple method you can use. Lay the straightedge on a flat, smooth surface and draw a pencil line on the surface using the straightedge as a guide. Then turn the straightedge end-for-end, but with the same side still up and facing you. Place the board so that its original edge is again over the line just drawn. Its edge should now again match the line exactly. If it curves away at any point, then your board has a bend or curve in its edge. Protect Metal Tubing Thin-wall pipe or tubing is difficult to grip firmly in an ordinary vise without crushing or scratching it. Next time this comes up, try wrapping the tubing with a number of fine steel wool pads. These will provide a slip-proof grip which will hold firmly with a minimum of pressure between the jaws. Rubber Handle Anyone who has occasion to use a hammer a great deal will find that as his hands perspire the handle sometimes slips in his grip. To prevent this, wrap the handle with a layer of rubber electrician's tape or with adhesive tape. The grip provided will not only be slip-proof, it will also have less tendency to form blisters on the palms or fingers. Miniature Vise When working with small assemblies, or when tiny parts must be clamped together for soldering or for other ticklish jobs, an ordinary vise is sometimes too large and bulky to do the job properly. In such cases it will be found handier to grip the back of a C-clamp in the vise and then use the jaws of the clamp to hold the work instead. The clamp is easier to manipulate and the smaller jaws will be more convenient for holding small jobs. (See Fig. 8.)
  • 14. Fig. 8 Cutting Sandpaper When sheets of sandpaper have to be cut to size to fit sanding blocks or power sanders, they can be most accurately torn over a sharp metal edge such as the corner of a power saw table or other power tool top. Lay a ruler over the paper and snap the free end straight down for a clean, neat cut. Foot Switch A foot switch frees both hands for operating power tools such as drill presses and band saws. Such a switch can be inexpensively made by mounting an ordinary make-and-break push button switch (rated for 110 volts, 10 amps) on a wedge-shaped piece of 2 x 4. This holds the switch steady and raises it high enough to permit easy operation with the toe of one foot. The switch is wired in series with an outlet which is attached to the side of the block, and both are connected in series with an extension cord which plugs into a source of power. The tool is then plugged into the outlet at the side of the block. Rubber Hammer An ordinary hammer can be used instead of a rubber or plastic mallet when it is necessary to do light pounding on furniture or soft metals without damaging the finished surfaces. To convert a metal hammer for this purpose, slip a large rubber crutch tip over the head. These tips come in several sizes and are available at many drugstores or surgical supply stores. Driver for Large Screws To ease the job of driving long, heavy screws into hard woods—or for other heavy screwdriving jobs—home handymen should remember that special bits are available which can be fitted into an ordinary auger bit brace. Available in all sizes and equipped with square shanks so that they can be firmly gripped in the chuck, these screwdriver bits can be used in a brace when extra leverage is needed, or when speed is desirable because a large number of screws must be driven.
  • 15. Eliminate Workshop Dust To remove dust around the home workshop when doing a great deal of power sanding or sawing, put your wife's vacuum cleaner to work. Clamp or tie the nozzle of the cleaner beneath the power tool table. Have it running at the time sawing or sanding is going on. Sawdust will be sucked up promptly before it can spread to other parts of the house. Fine Sawing For a really smooth, fine cut when sawing small moldings and thin veneers use a regular metal- cutting hacksaw if you do not have a cabinetmaker's hacksaw. Select a fine-toothed blade and mount it so that the teeth cut on the forward stroke. A hacksaw also works well for cutting wood in a miter box when thin strips must be cut at precise angles and no standard fine-toothed saw is available. Handle Comfort Wire handles on heavy cans or pails can be uncomfortable to hold on to when they are fully loaded. To alleviate this problem slit a piece of garden hose and slip it over the wire handle. The result will be a broader, more comfortably cushioned grip that will eliminate sore hands. Improvised Punch Small punches for making holes in leather, rubber, cork, or cardboard are simple to make. Use metal pipe or tubing of the desired diameter. Cut off a three or four-inch length and place in a vise- File a one-half-inch-wide bevel around one end of the pipe until a sharp edge is created. Use the punch by hammering through the material which has been laid over a block of hard wood. This will make the punch easier to pull out, will give a clean cut, and will preserve its sharpened edge. Using Ladders Protect Ladders Wooden ladders will last longer if they are protected with occasional applications of clear varnish or penetrating sealer. Do not use an opaque paint. This might hide cracks or other defects so that it will be difficult to tell when the ladder becomes unsafe. Non-Skid Steps For a gritty, non-skid surface on ladder rungs, the homeowner can sprinkle fine sand over each one immediately after it is varnished. A less gritty surface will result if the sand is mixed right in with the varnish before it is applied.
  • 16. Save Steps Three or four half-inch holes drilled in the top platform of a stepladder will save much climbing to reclaim dropped tools while working on jobs requiring use of a ladder. The holes are used as a temporary rack to hold screwdrivers, pliers and the like. It keeps them handy in an upright position without the danger of their rolling off. Protect Siding When using an extension ladder on the outside of the house, the top of the ladder will sometimes mar siding or trip where it leans against the house. To prevent this, wrap the upper ends of the ladder with several thicknesses of heavy cloth. Or, you can also use a pair of old work gloves, slipping one over the top of each rail. Carrying Stepladder A heavy-duty drawer handle or screen door handle can simplify the job of carrying a stepladder from job to job around the house. Screw the handle to one of the vertical side rails (Fig. 9) to permit easier carrying of the ladder while it is laying down in the horizontal position. Take time to locate the handle at the center of balance so that the ladder will not tip when it is carried. Fig. 9 Prevent Slipping To keep a stepladder from slipping dangerously on smooth polished interior floors, nail a pair of rubber heels to the bottom of each of the front legs. On metal ladders that do not have rubber feet the heels can be pasted in place with contact cement, used according to the directions on the bottle.
  • 17. Support for Ladder When a tall extension ladder must be used outdoors on soft ground, provide a firm rest for the legs by laying a short length of wide planking under the ladder ends. To keep the legs from slipping off the plank, nail a strip of scrap molding lengthwise along the plank's surface where it will act as a wedge under the ladder legs. Ladder Tray You can convert the top platform of any stepladder into a handy tray which will hold nails, screws, or tools without having to worry about their falling off. To do this, nail strips of quarter- round molding around the outside edge on top of the platform so as to provide a rim or low wall on all sides. Ladder Safety When using an extension ladder to reach high places remember to always set it up so that the base of the ladder is away from the base of the building by a distance equal to approximately twenty-five per cent the total height of the ladder. This makes for the safest angle and will prevent falling or slipping. In addition, never go higher than the fourth rung from the top when climbing. Ladder Rest Fig. 10 To permit leaning extension ladders against the outside of the house where windows occur, a wide board of softwood can be nailed across the ladder at its top end to provide a "bridge" or brace. This will contact the window frame on both sides and will keep the ladder ends from touching the glass or screens. This board should be at least as long as the widest window frame likely to be encountered and about six inches wide. (See Fig. 10.)
  • 18. Storing Ladders Long extension ladders are usually stored by hanging on garage walls. This not only takes up a good deal of valuable wall space, it also requires a great deal of maneuvering each time the ladder is used. To simplify this problem and to save on space, the ladder can be easily stored on the garage floor by laying it down the middle directly under the car. The car can be driven right over it without interference, and a sheet of tarpaper will protect the ladder against oil drippings. Caring for your tools is important for the success of any construction or DIY project. It is also important in ensuring your safety while at work. Want to know other tools you will need for a safe and successful construction project? Visit this page today.